






The Social Feed widget in The Plus Addons for Elementor shows live Facebook posts on an Elementor page, and to reach them it needs a Facebook access token.
This page walks through generating one on Facebook for Developers — once for a Facebook page, and once for an individual account.
Requirement – This widget is a part of The Plus Addons for Elementor Pro, make sure it’s installed & activated to enjoy all its powers.
Before You Start
- Edition: Pro — Social Feed ships only in The Plus Addons for Elementor Pro. With Pro deactivated the widget does not render at all, and there is no free version of it.
- Prerequisite: Elementor (free) installed and active.
- Widget to enable: go to The Plus Addons > Widgets, search for Social Feed and turn its toggle on.
- Prerequisite: a Facebook account, and a Facebook developer account (you can create one during the steps below).
- Prerequisite for a page token: admin access to the Facebook page whose posts you want to show.
- Where the token ends up: in the Social Feed widget, open the item under Social Feeds, set Source to Facebook, and paste it into Access Token.
These steps happen on Facebook’s own developer site, not in WordPress. Facebook redesigns those screens regularly, so treat the sequence below as the shape of the job rather than a pixel-perfect script — see Not verified at the bottom of this page.
Generate Access Token for Page
To generate an access token for a Facebook page, follow the process:
- Log in to your Facebook account and go to Facebook for Developers.
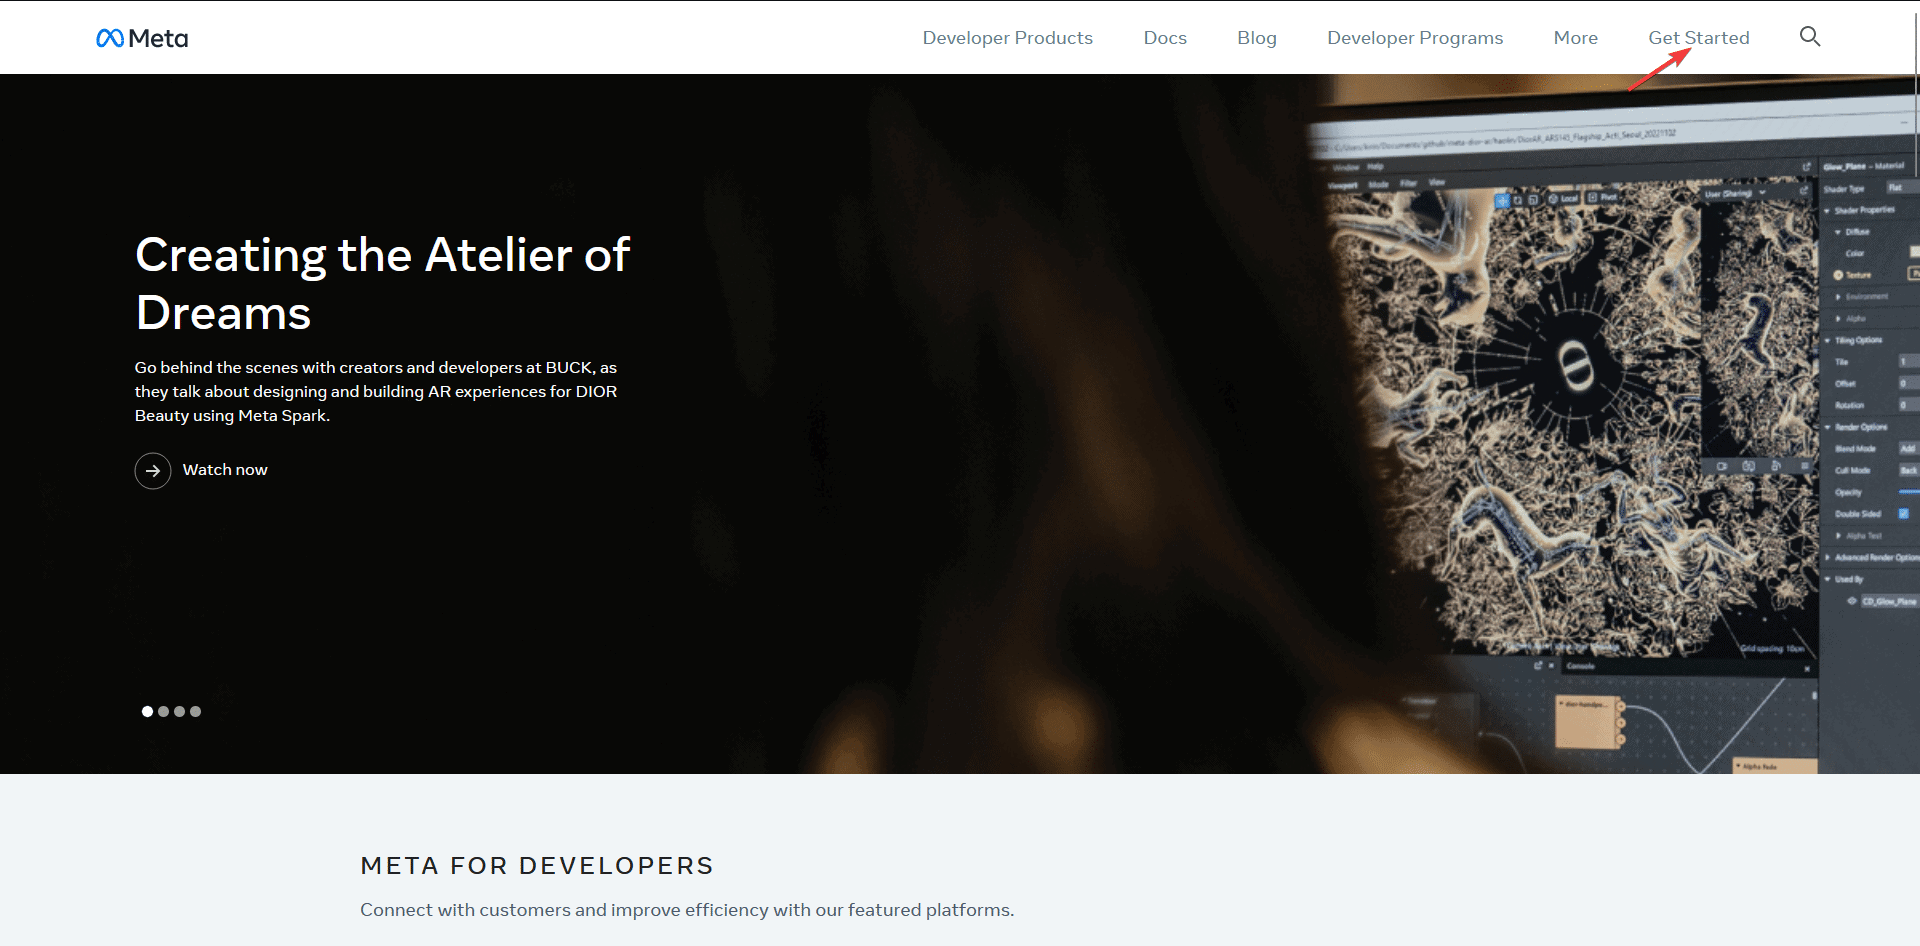
- If you do not have a developer account, click the Get Started button at the top. Skip to step 4 if you already have one.
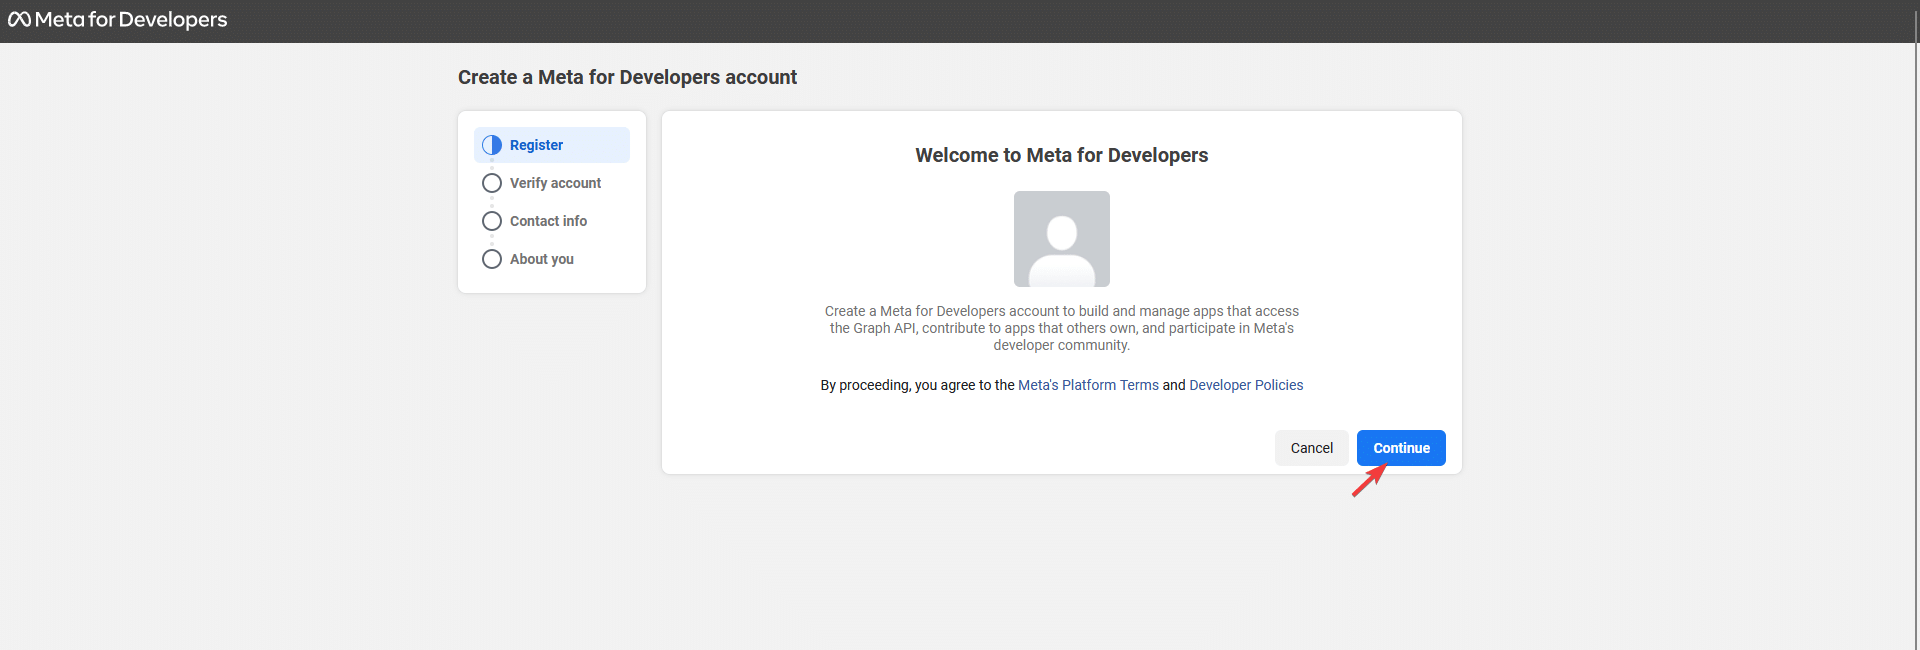
- Register for a developer account and follow the steps to create it.
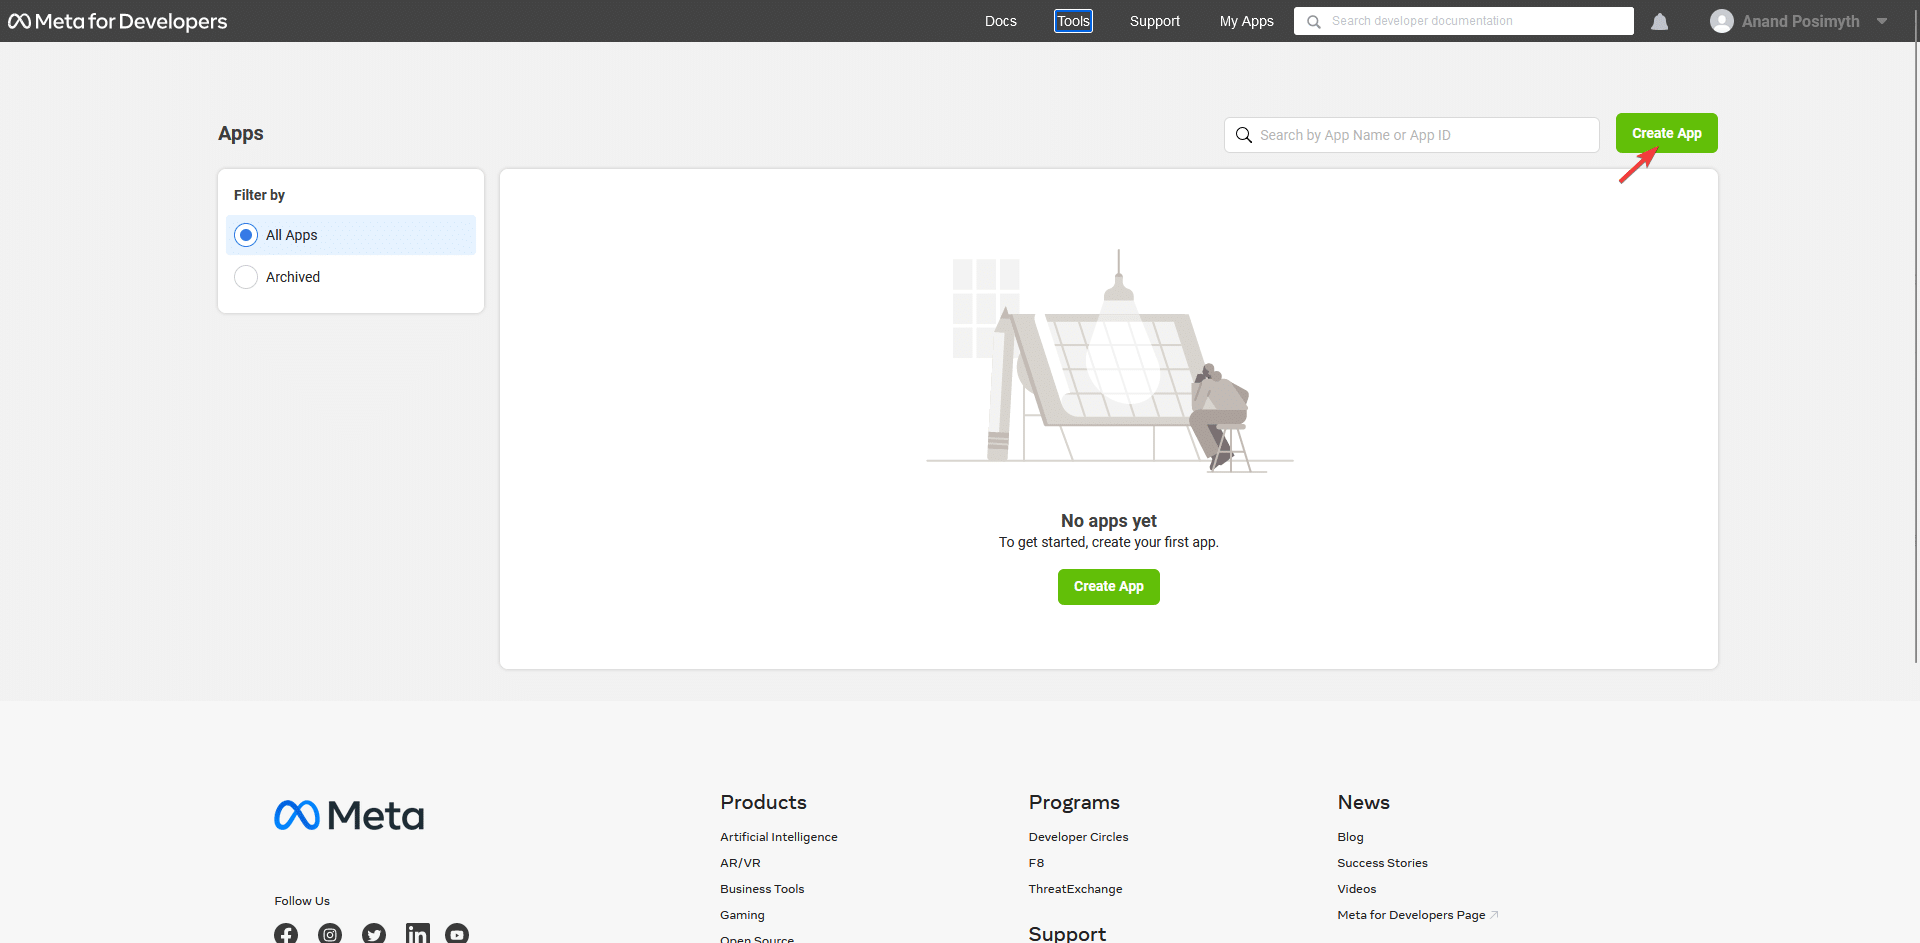
- Once done, you will get to the Apps page. Click the Create App button.
- On the next page, select the business profile you want to link with the app and click Next.
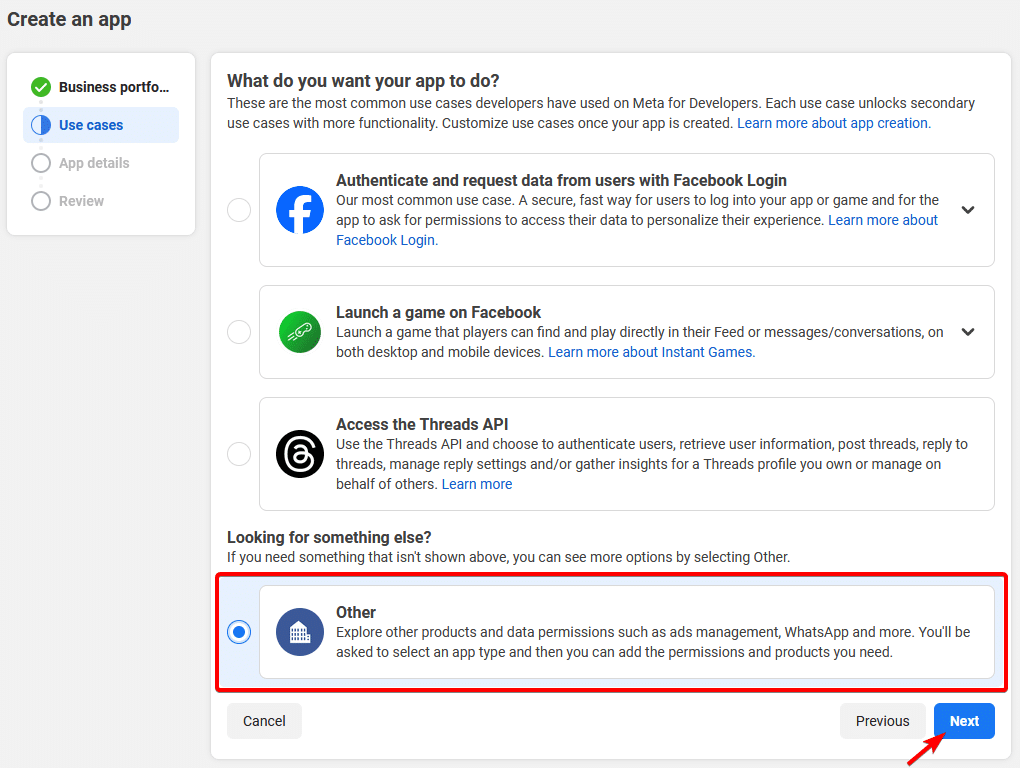
- On the next page, select Other and click Next.
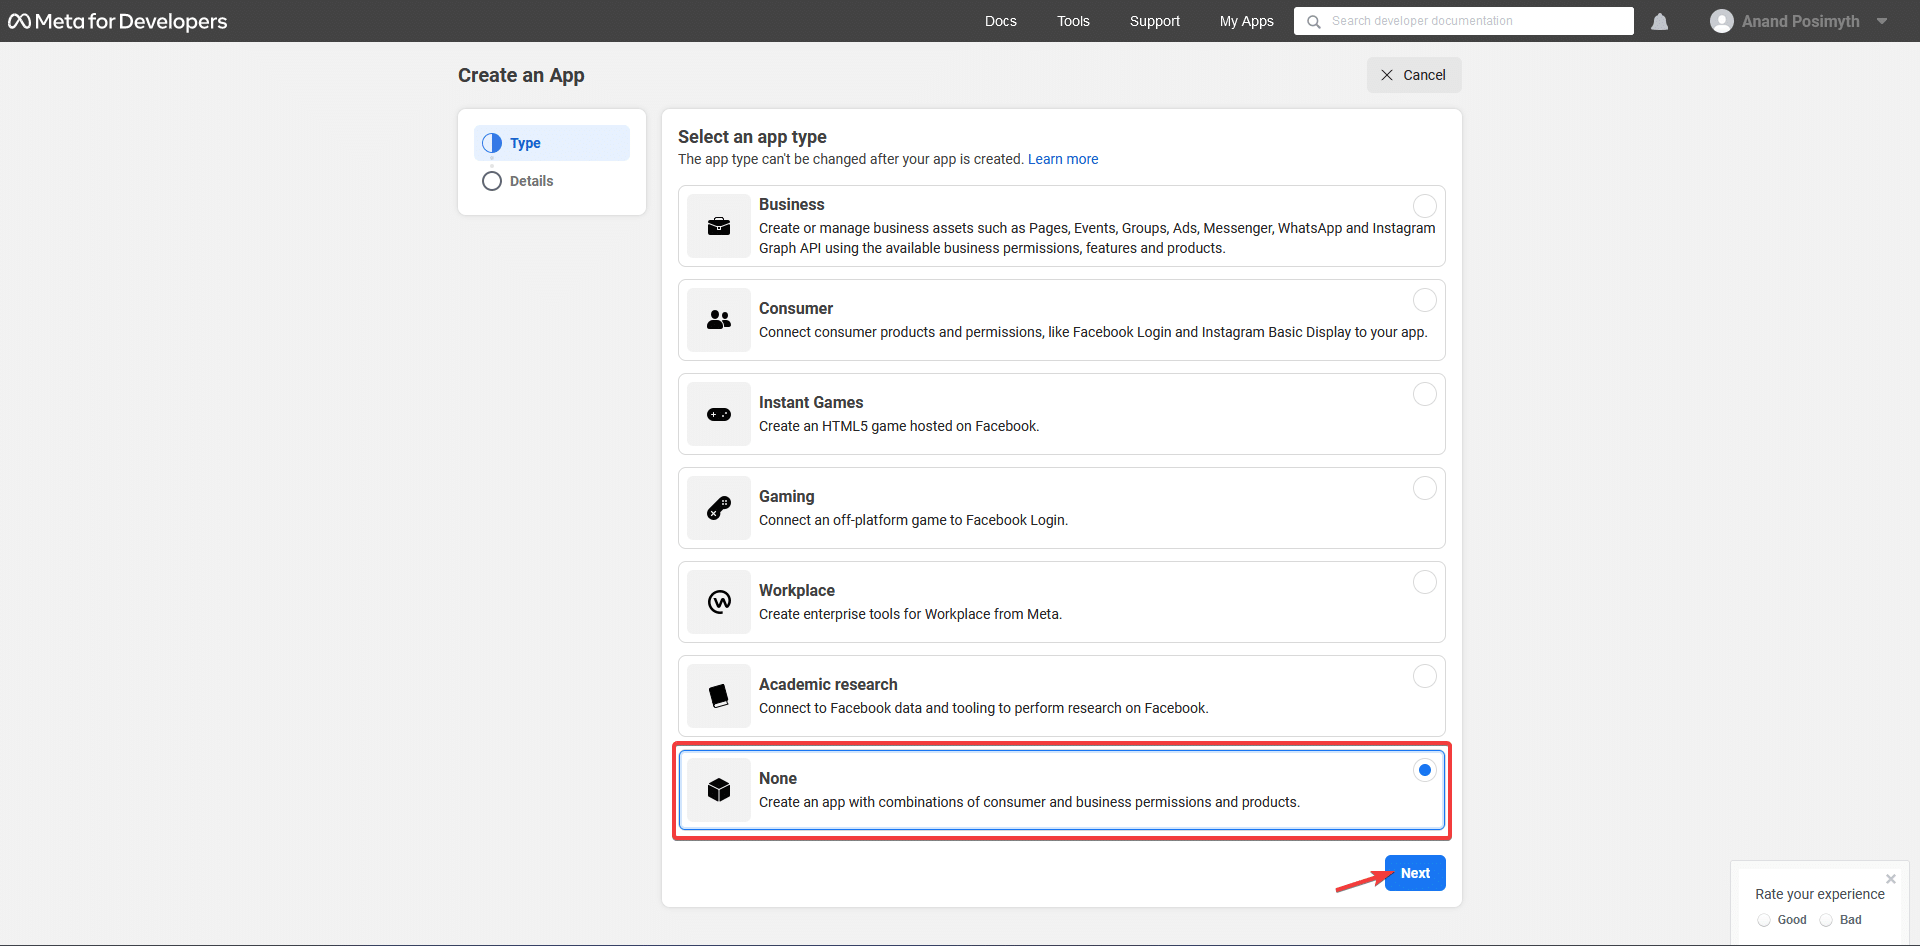
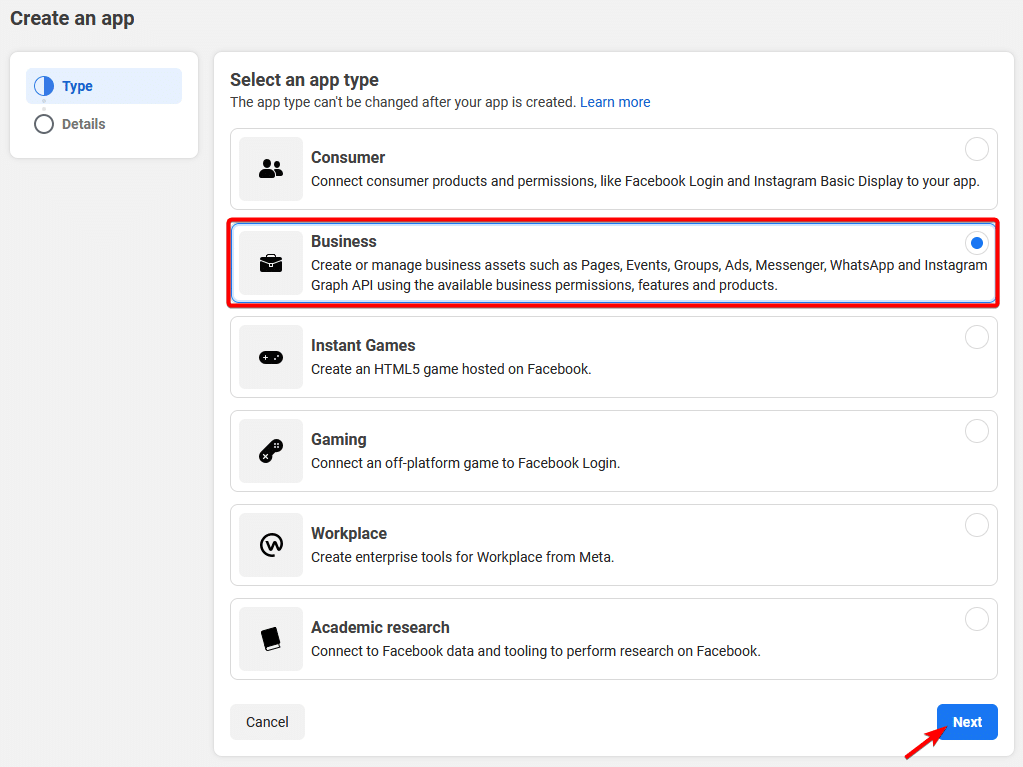
- On the next screen, select your app type. Select Business and click Next.
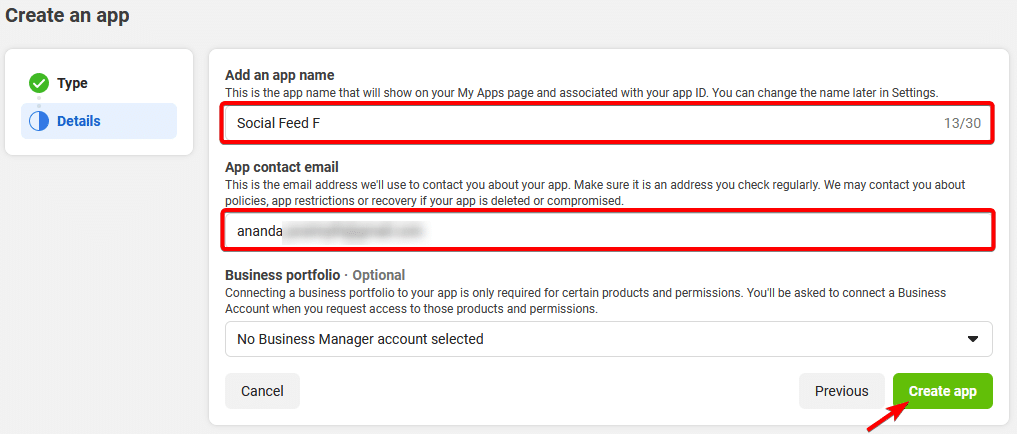
- Add an app name and email address. Optionally connect your business account. Click Create App when done. Facebook will ask for your password to authenticate.
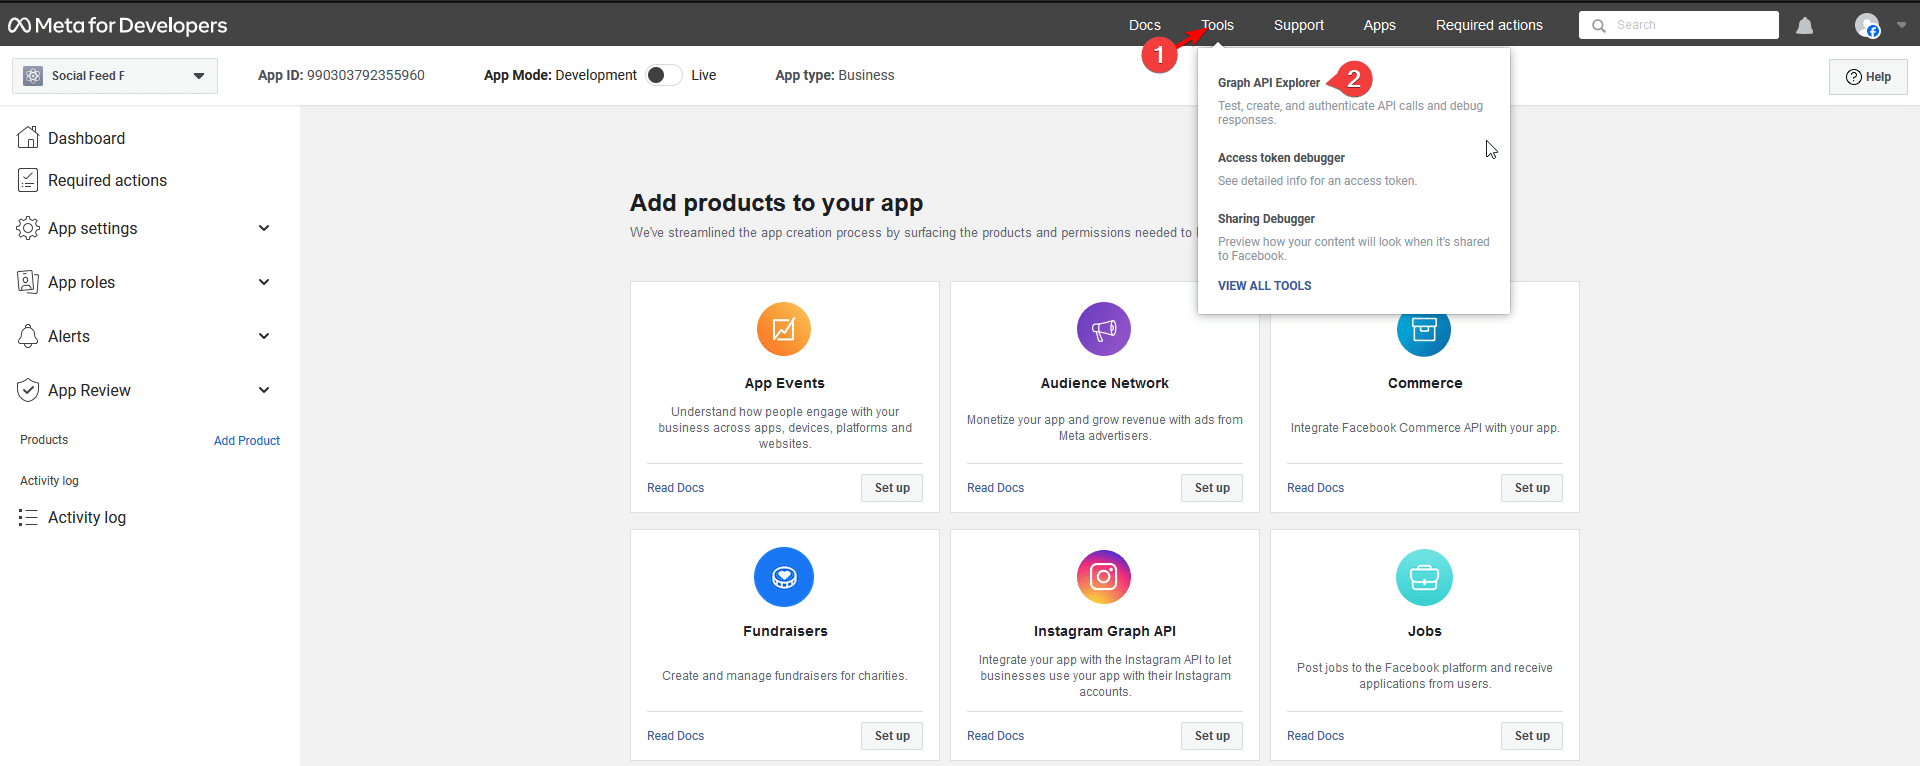
- On the next page, go to Tools > Graph API Explorer from the top menu.
- On the next page, select your app from the Meta App dropdown.
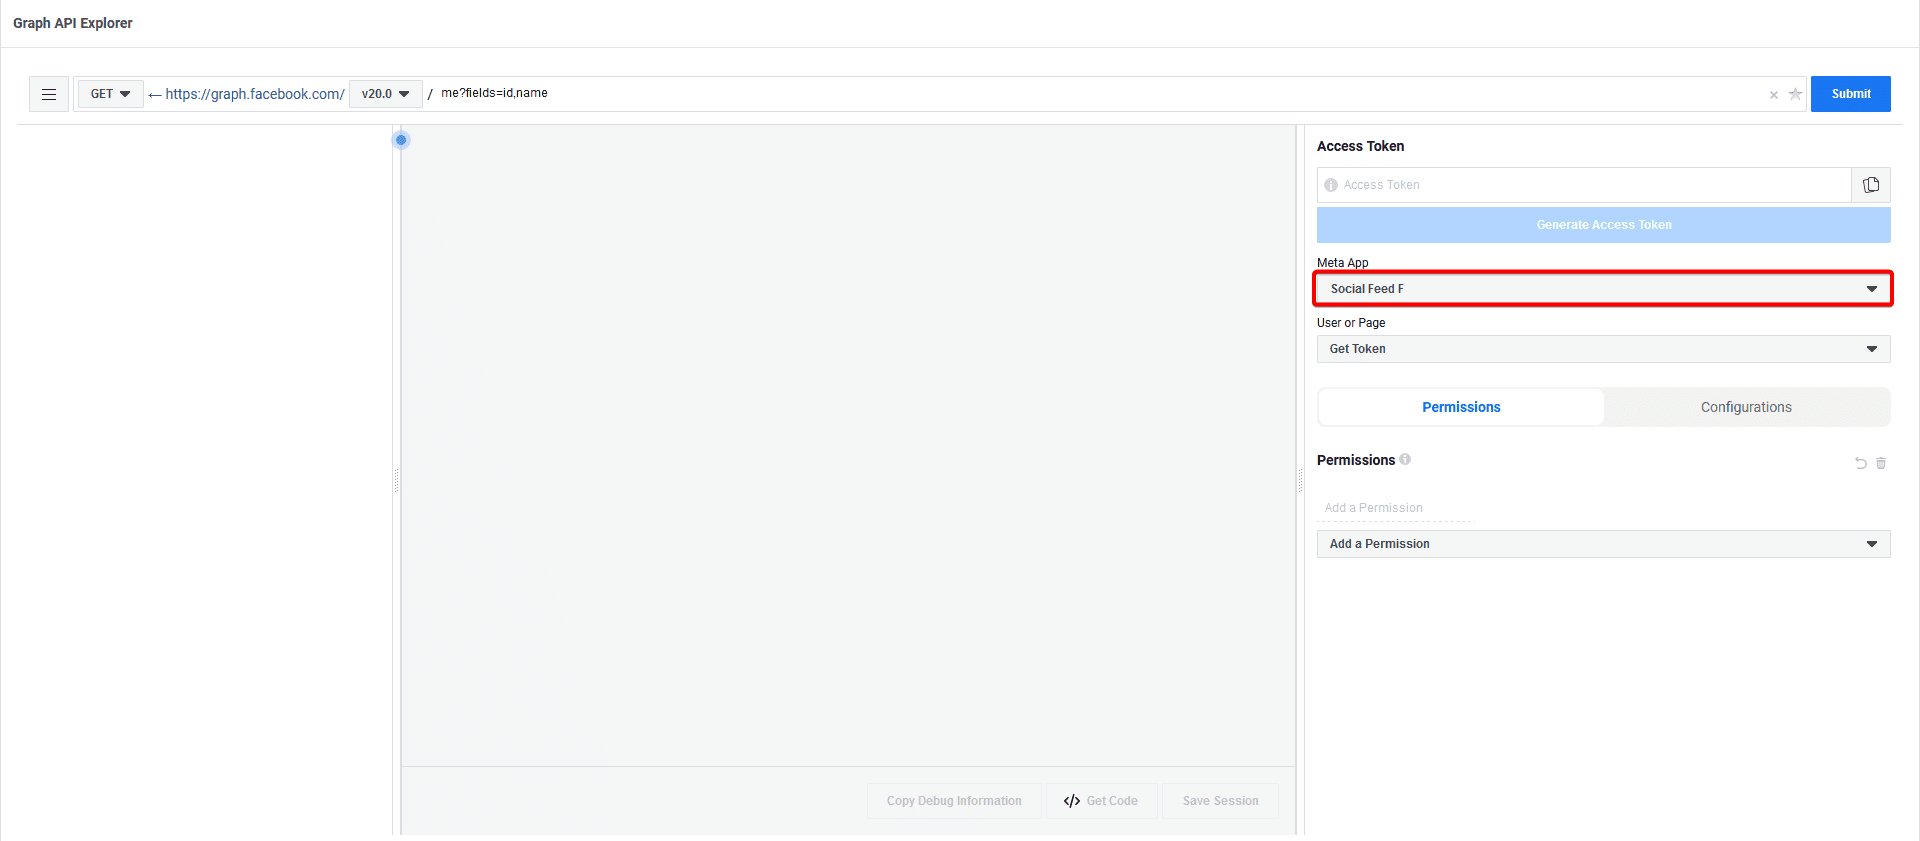
- From the User or Page dropdown, select Get Page Access Token. A popup will open. Continue with your Facebook account, then select your Facebook page and follow the steps. You will now see two permissions in the Permissions tab.
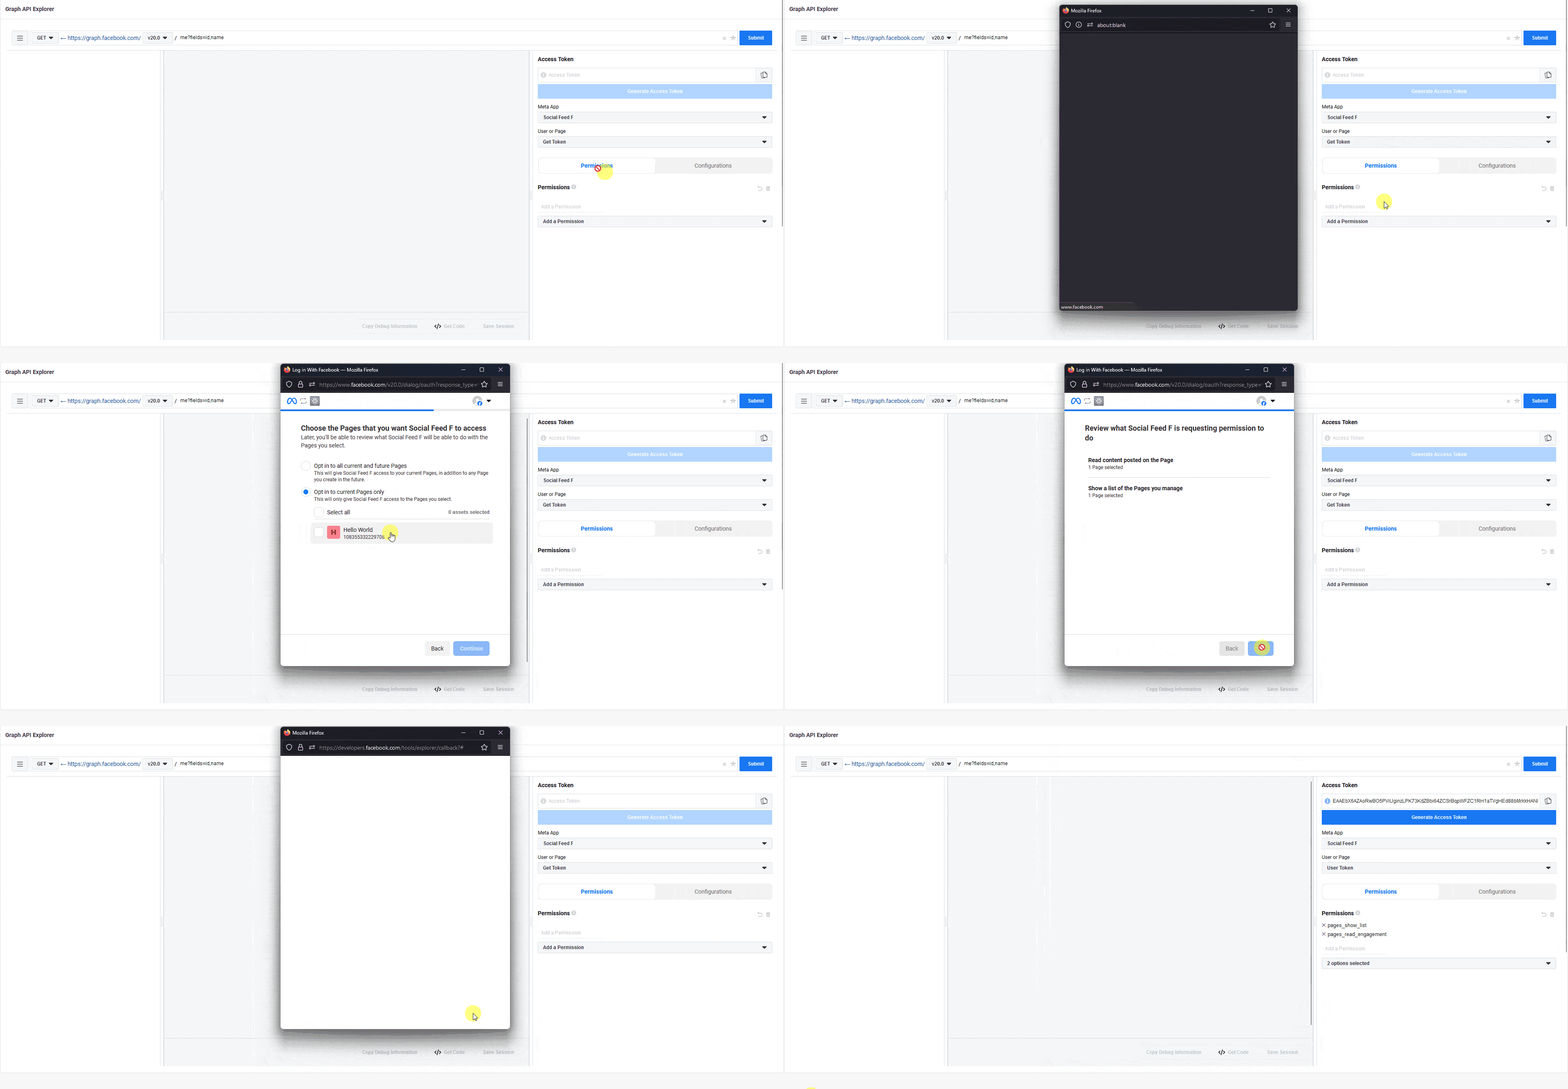
- Add the pages_read_user_content permission in the Add a Permission field.
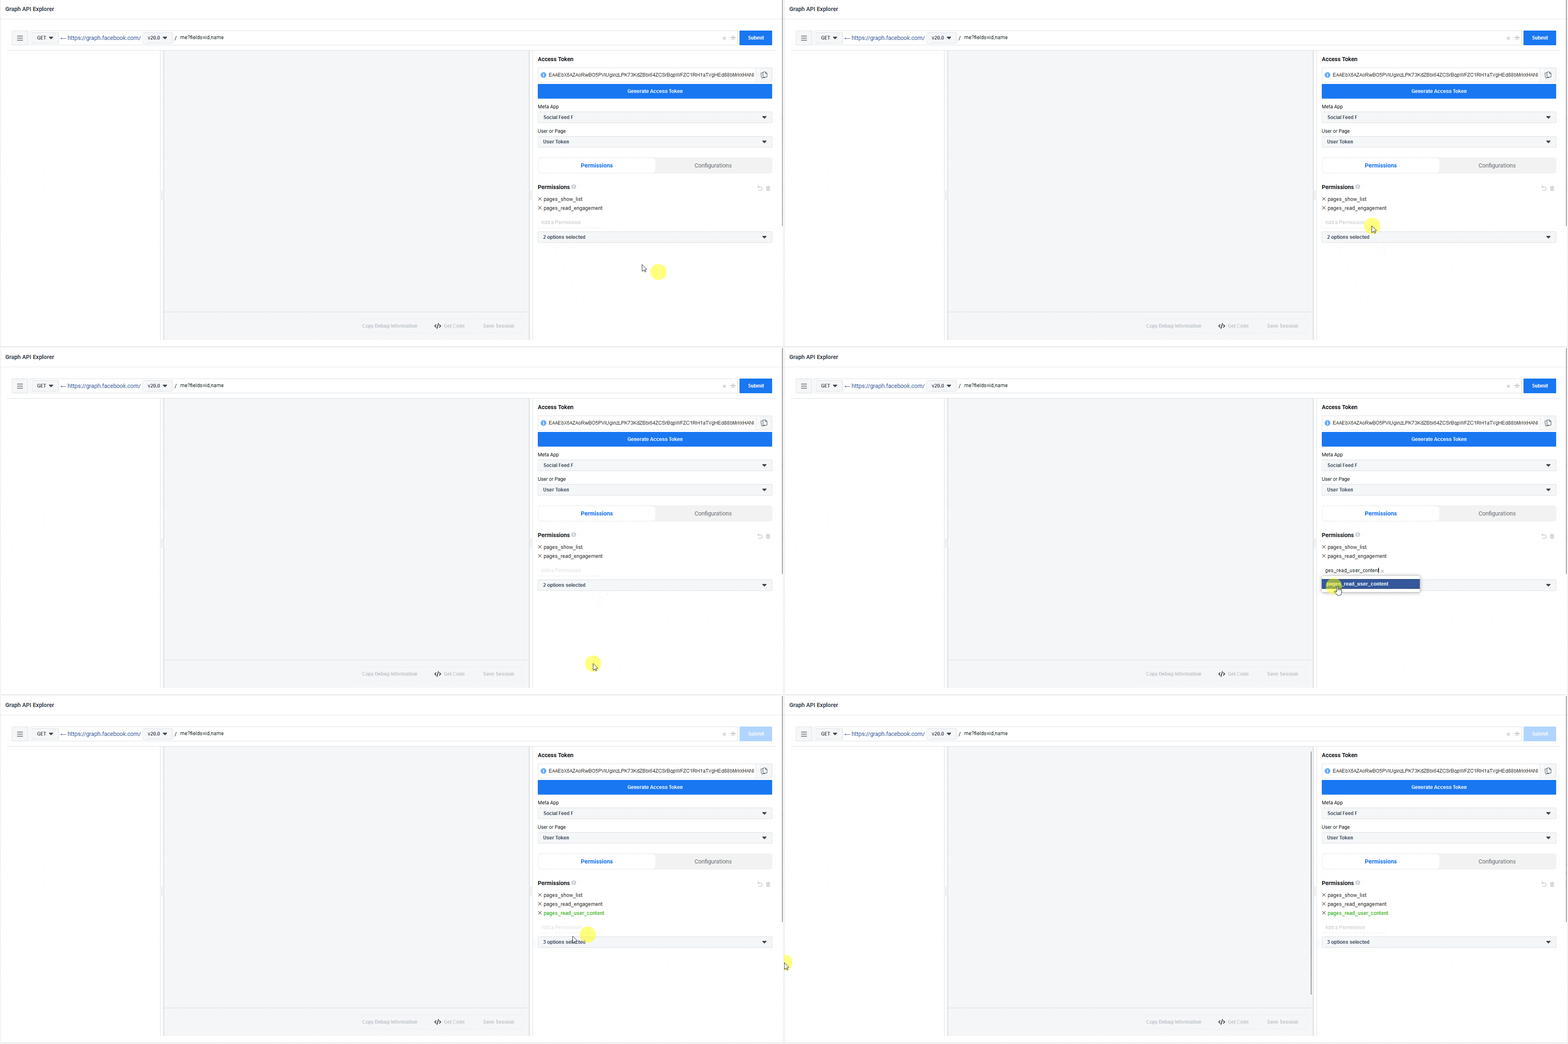
- Add these two in the same way:
- pages_manage_metadata
- business_management
You should now have five permissions in the Permissions tab. Permissions shown in green are not included yet.
- To include them, click the Generate Access Token button. A popup will open. Continue with your Facebook account, then select your business profile and Facebook page and follow the steps. All permissions will now appear in black.
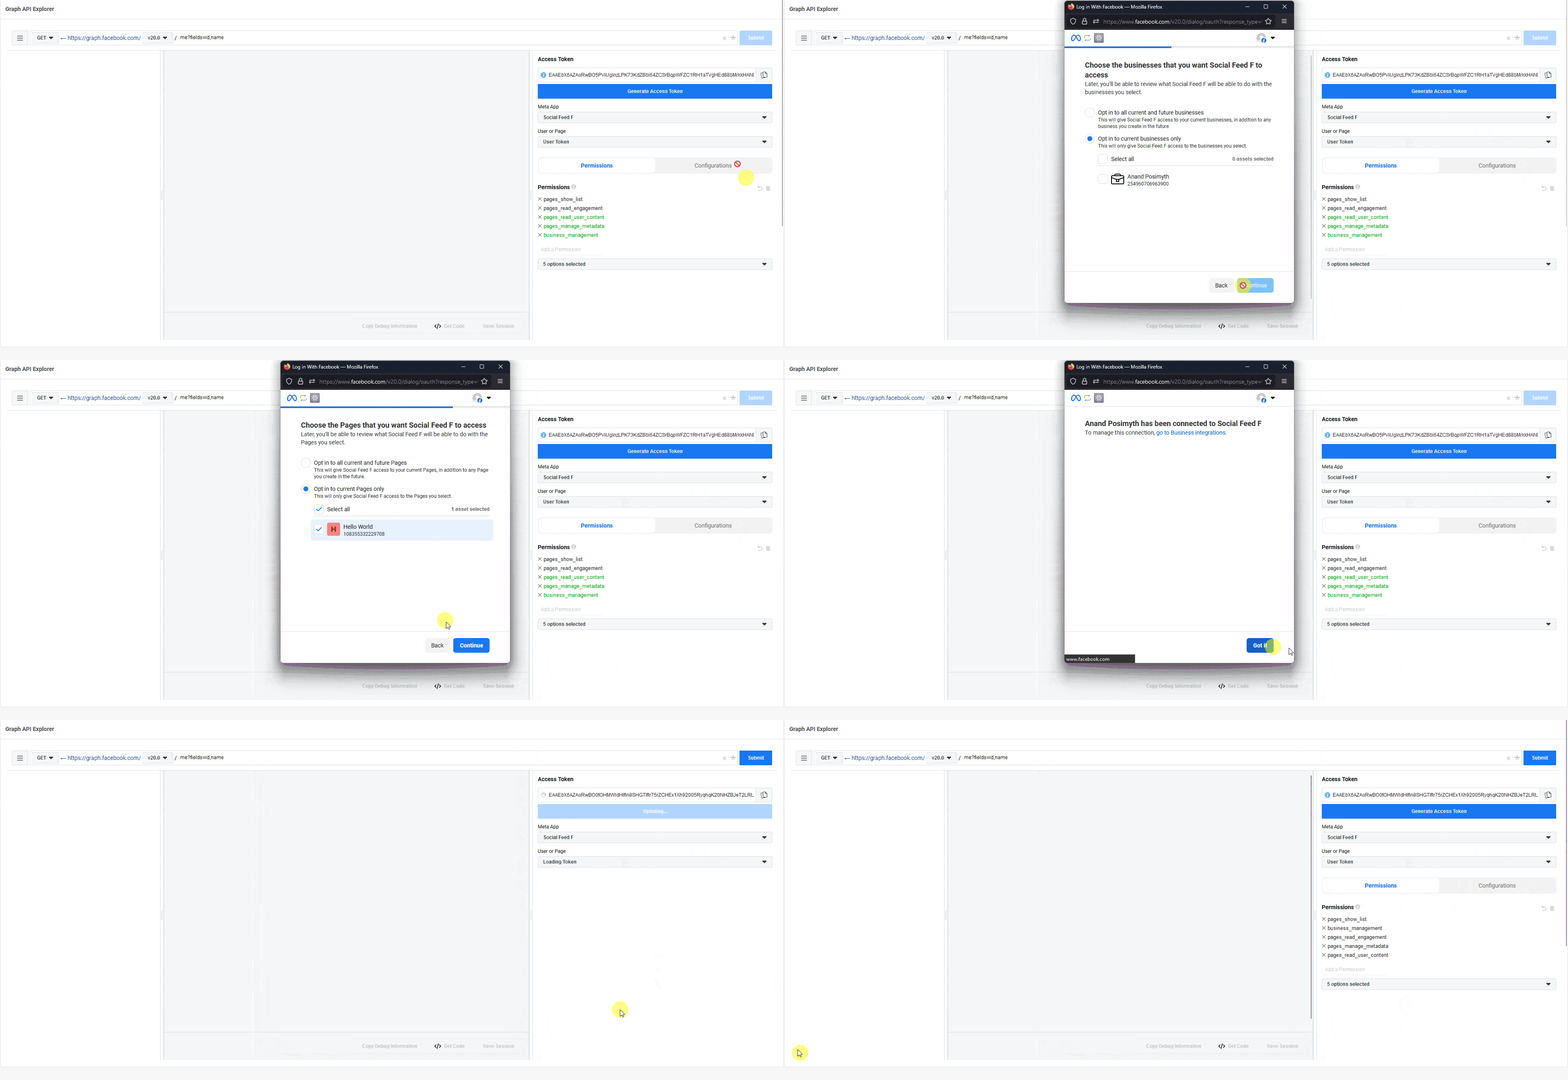
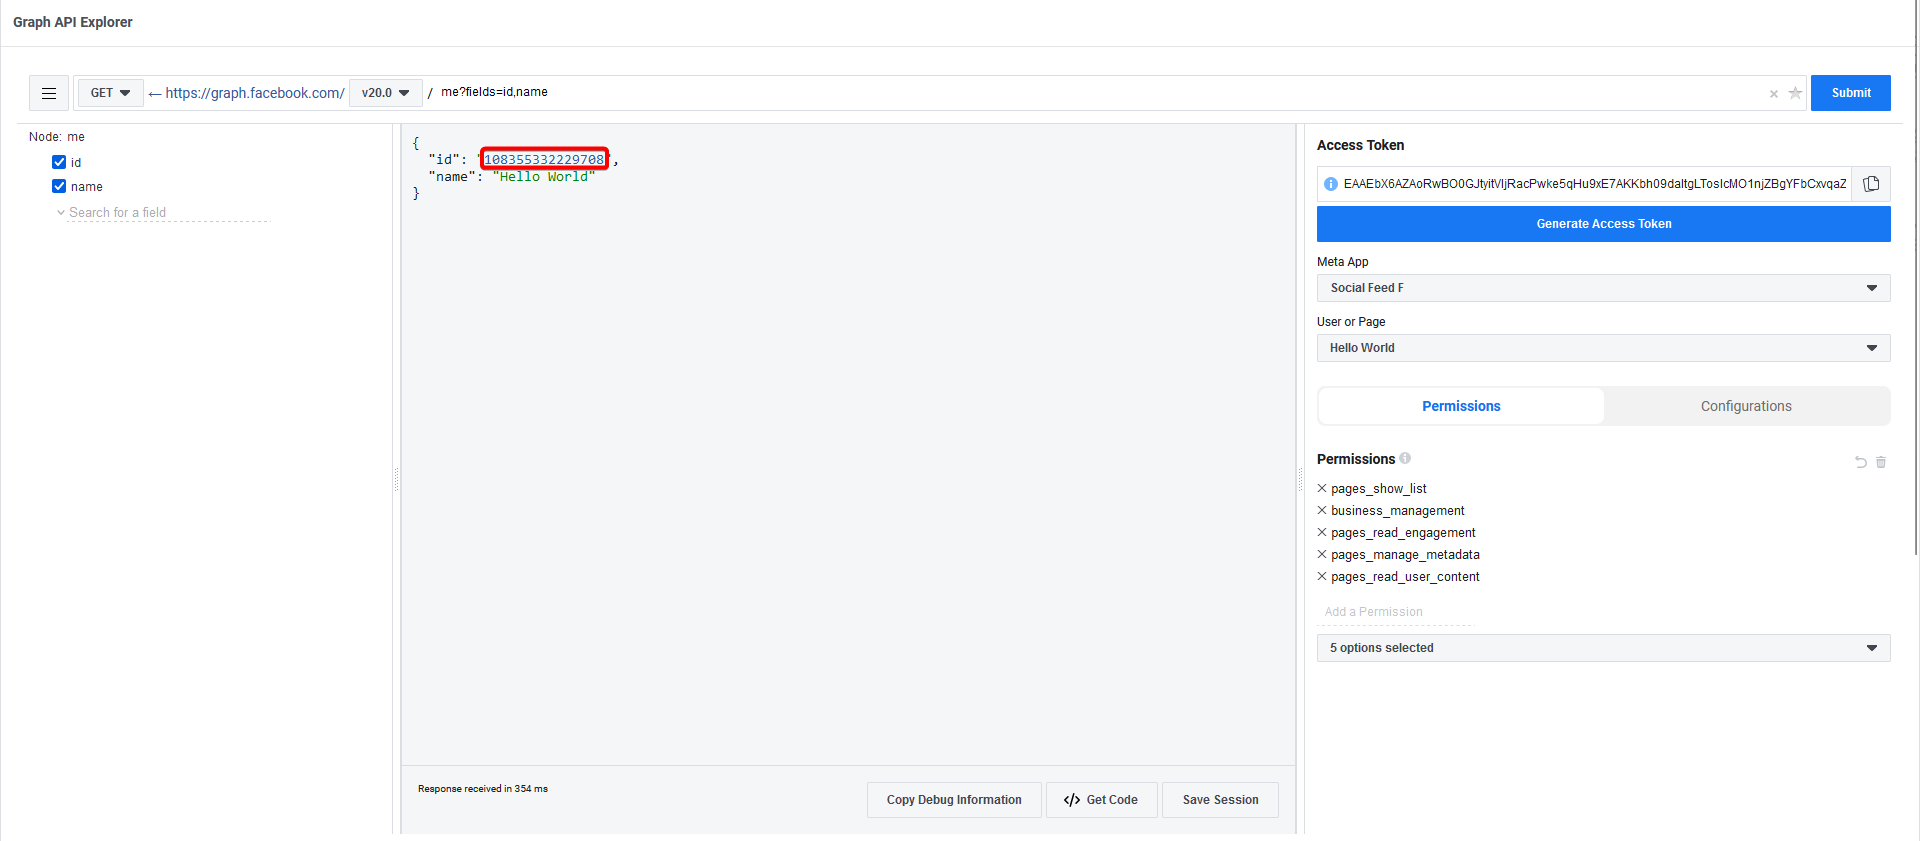
- From the User or Page dropdown, select your Facebook page and click Submit. Your page name and id will appear.
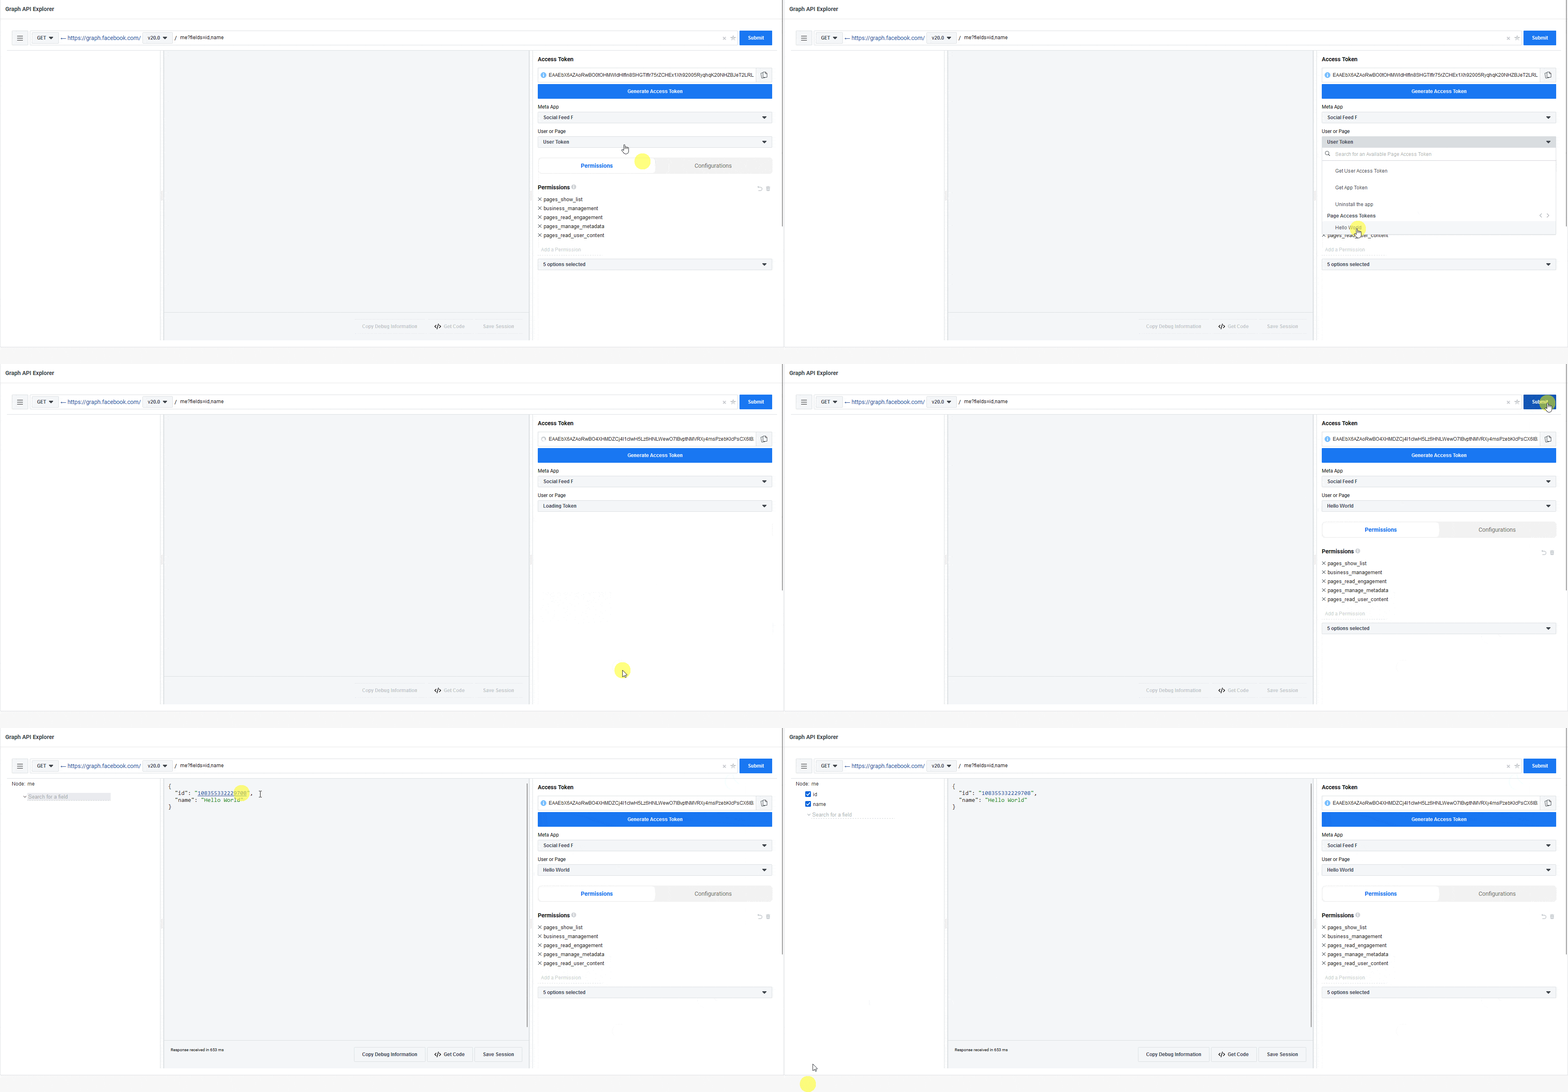
- Copy the page id and save it — it goes in the widget’s Page ID field.
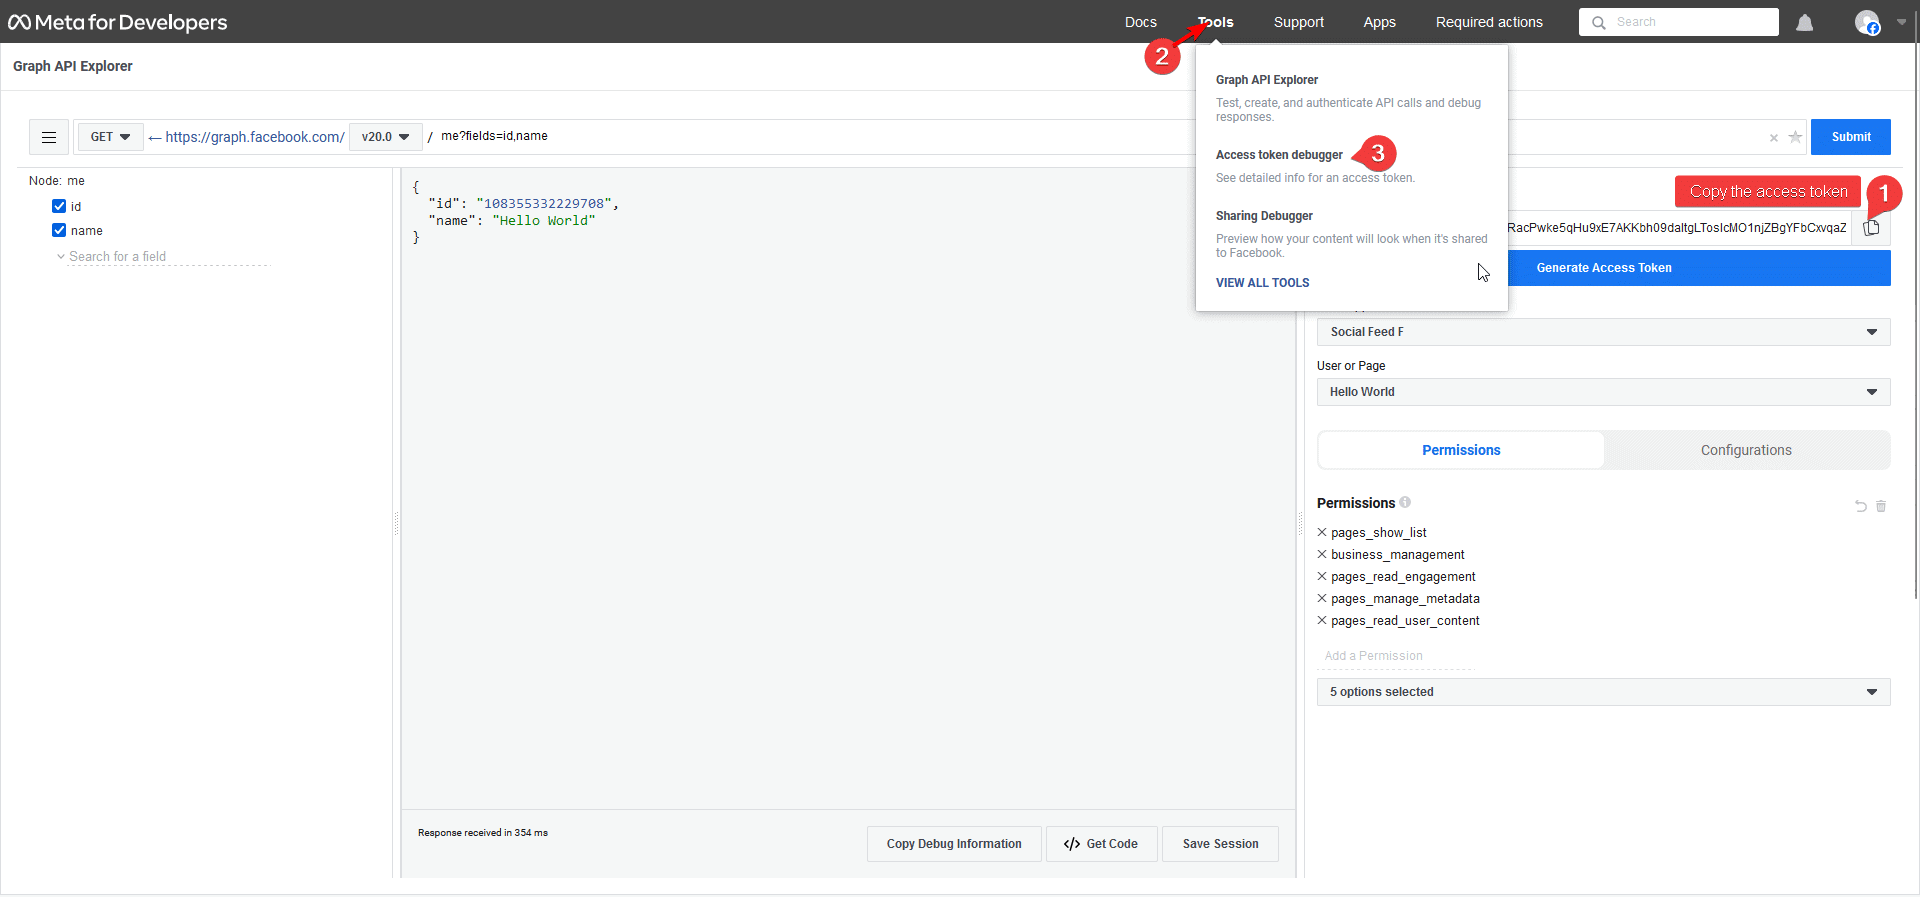
- The token you have at this point is temporary and expires in about 2 hours. To extend it to about 2 months, copy it and go to Tools > Access Token Debugger from the top menu.
- Paste it in the field under the Access Token tab and click Debug.

- You will see the token’s details. Scroll down and click Extend Access Token.
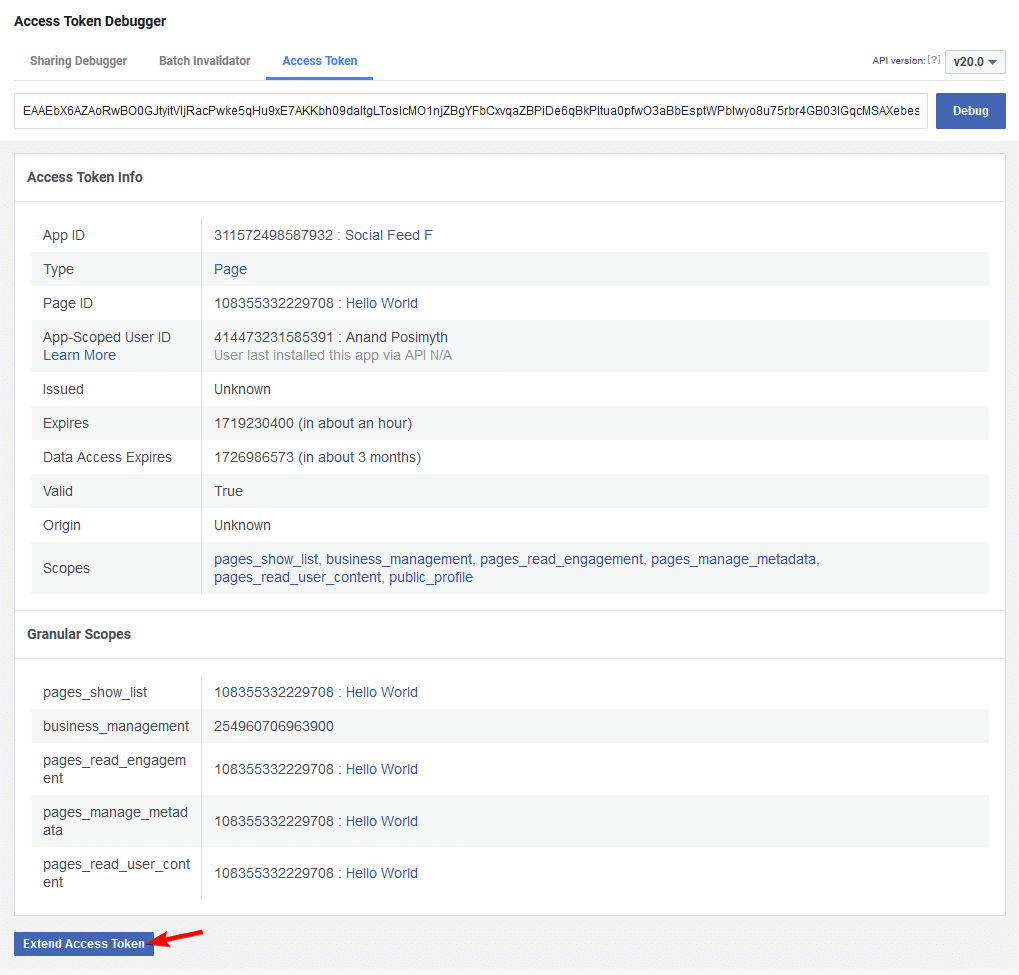
- Facebook will ask for your password. The extended token, valid for about 2 months, appears. Copy and save it. To put it to work, see How to Add Live Facebook Feed in Elementor?.
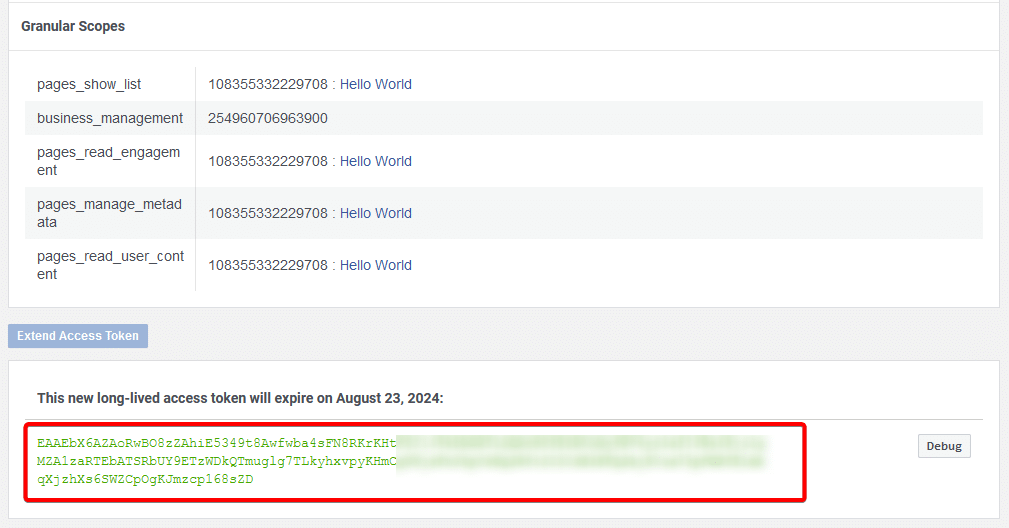
Once the access token expires you have to generate a new one, or the Social Feed widget stops showing posts.
Generate Access Token for Individual Account
To generate an access token for an individual account, follow the process:
- Log in to your Facebook account and go to Facebook for Developers.
- If you do not have a developer account, click the Get Started button at the top. Skip to step 4 if you already have one.
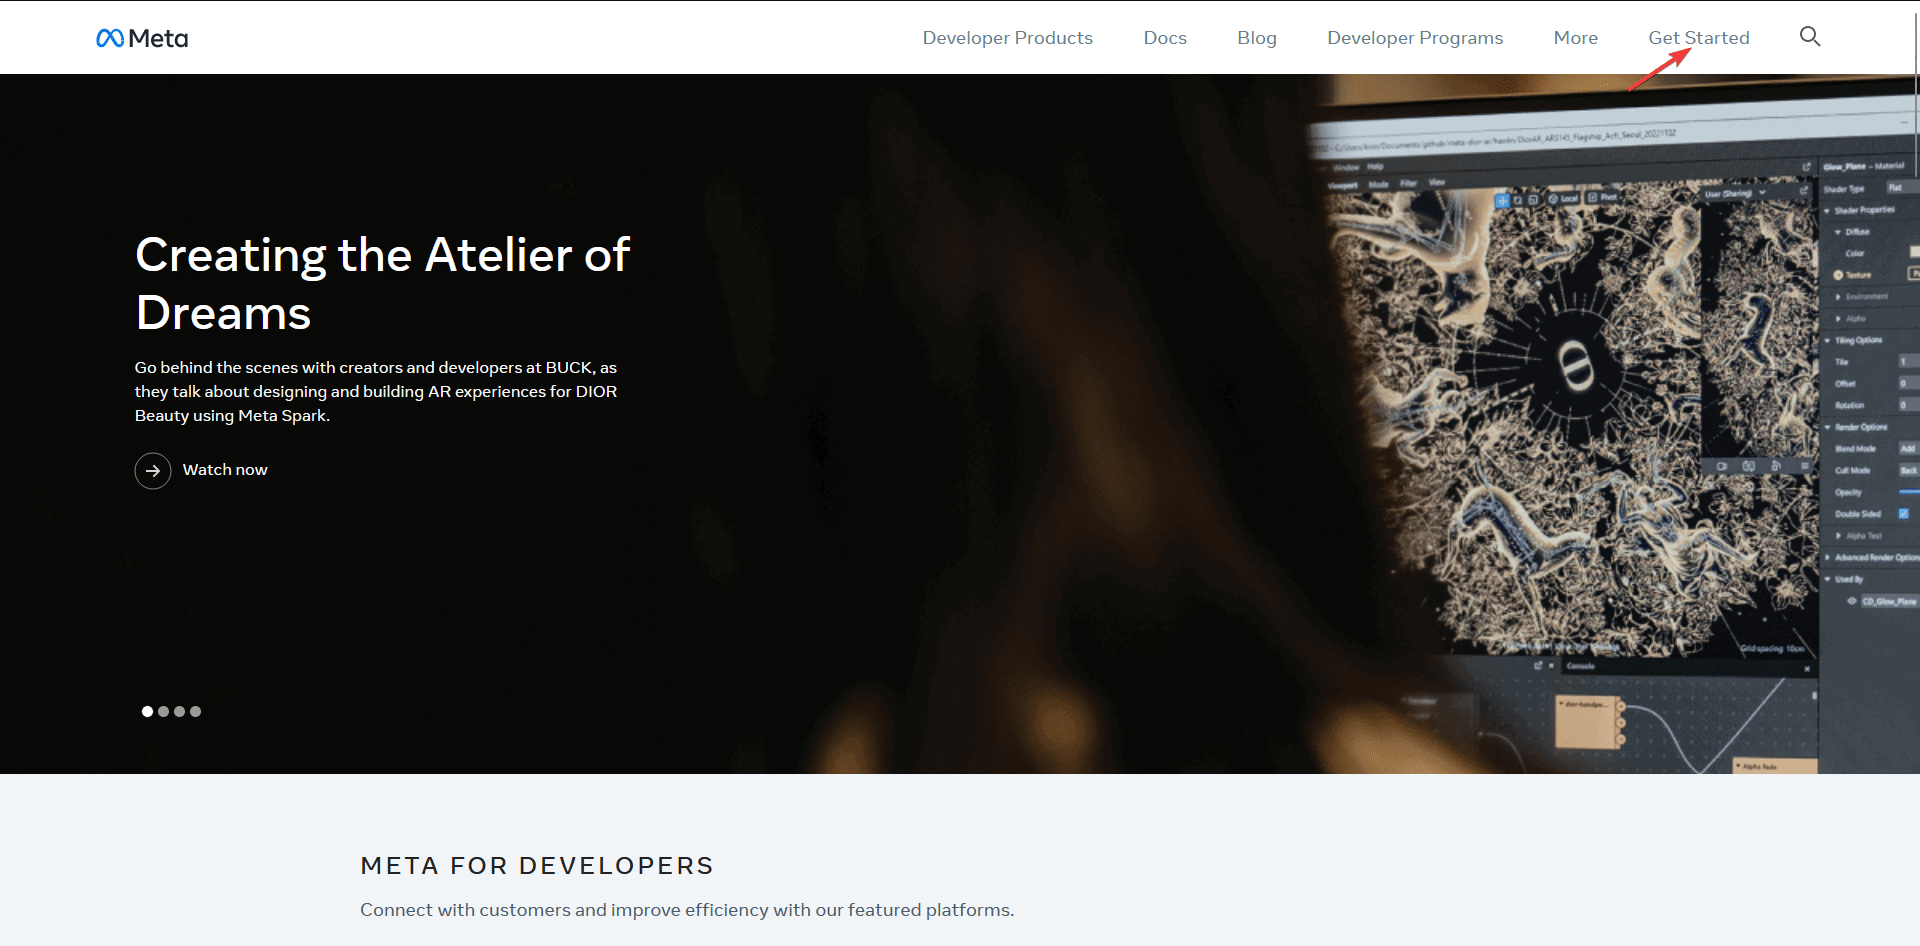
- Register for a developer account and follow the steps to create it.
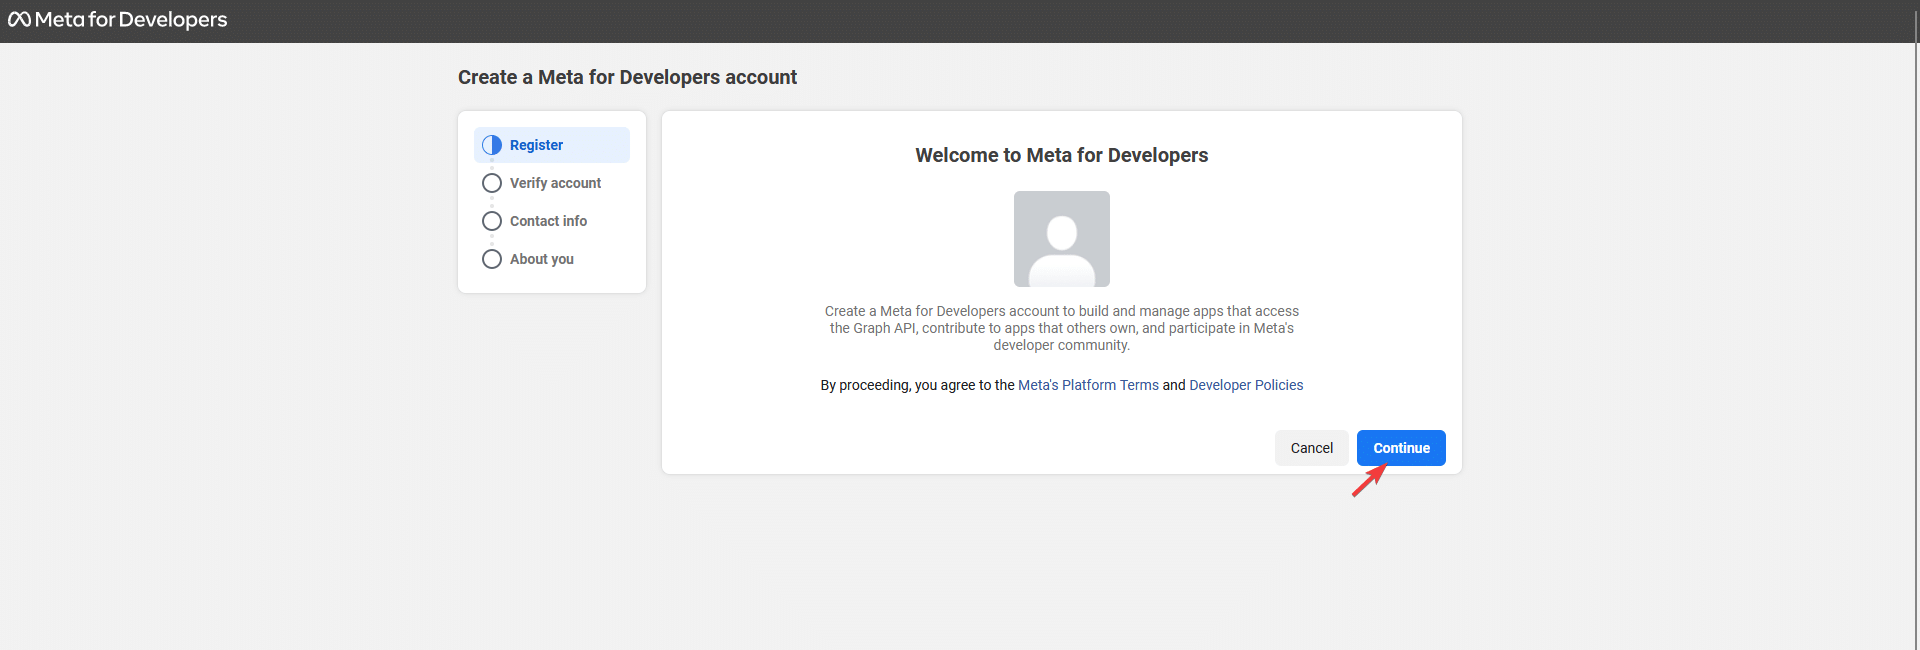
- Once done, you will get to the Apps page. Click Create App.
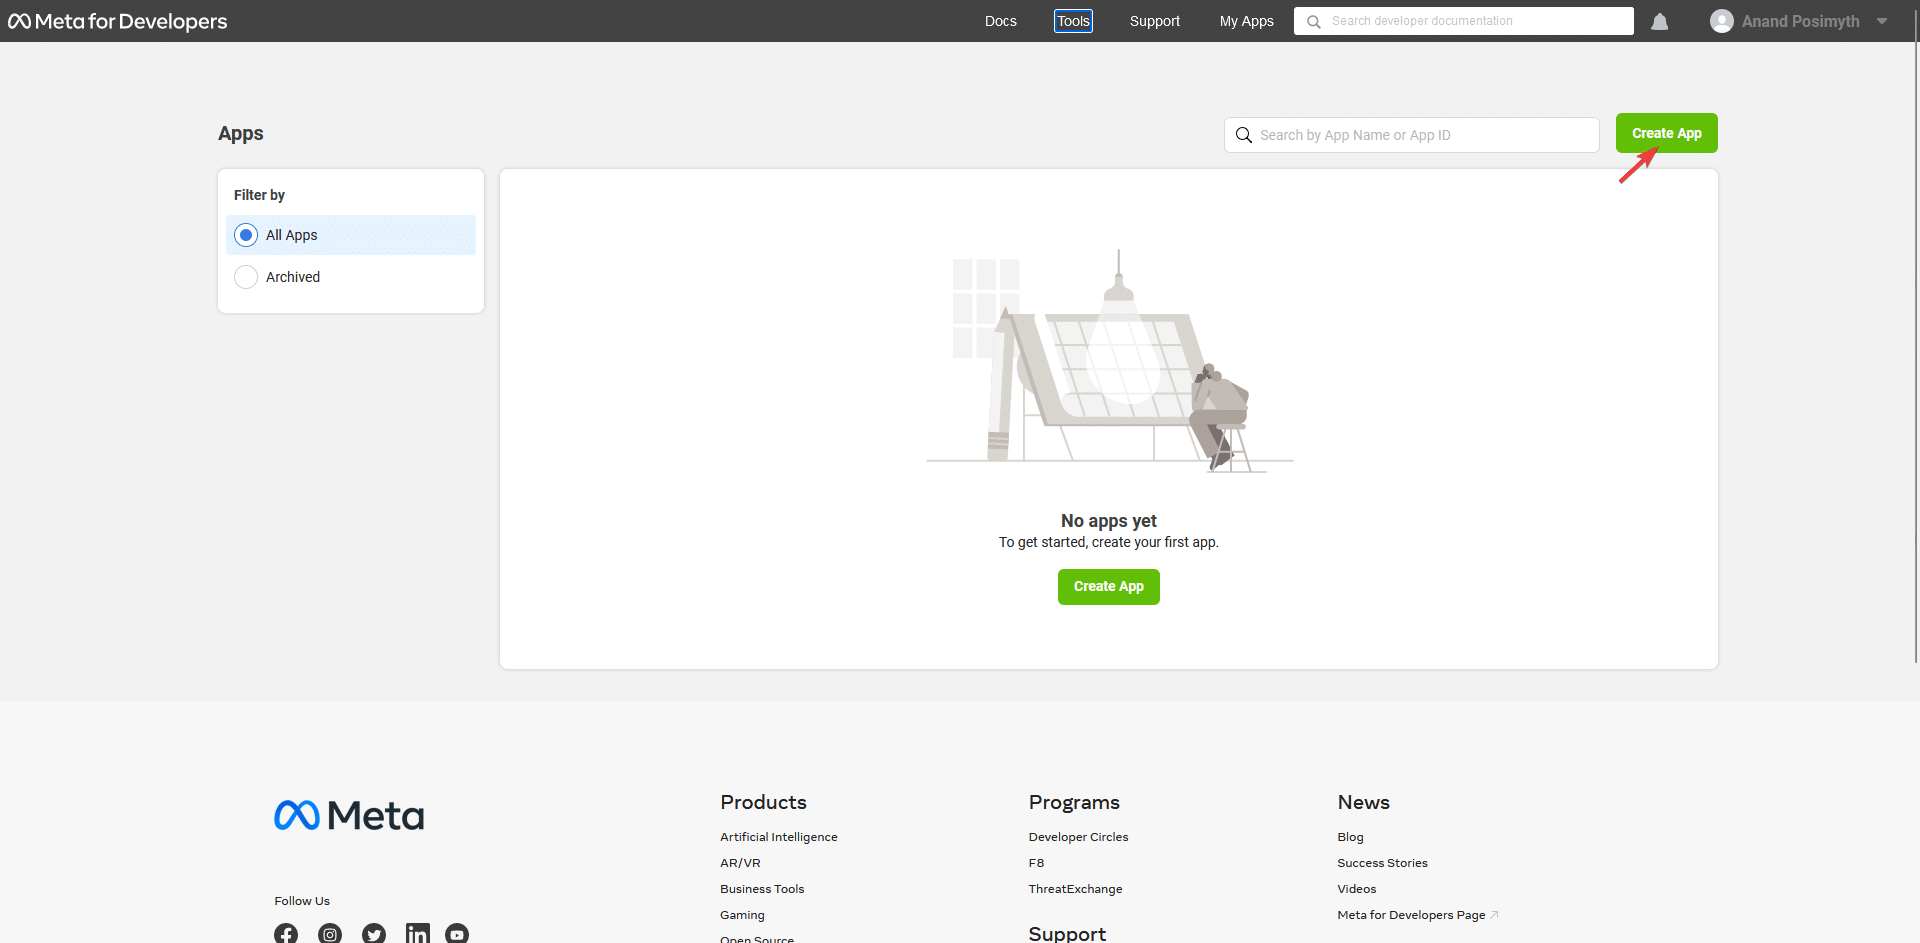
- On the next page, select the business profile you want to link with the app and click Next.
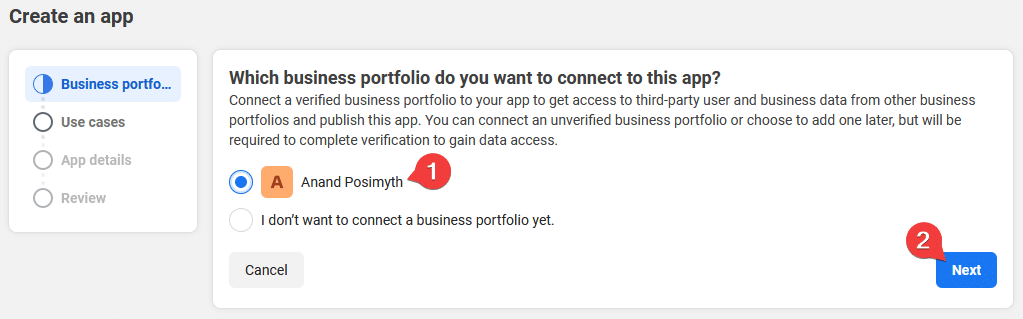
- On the next page, select Other and click Next.
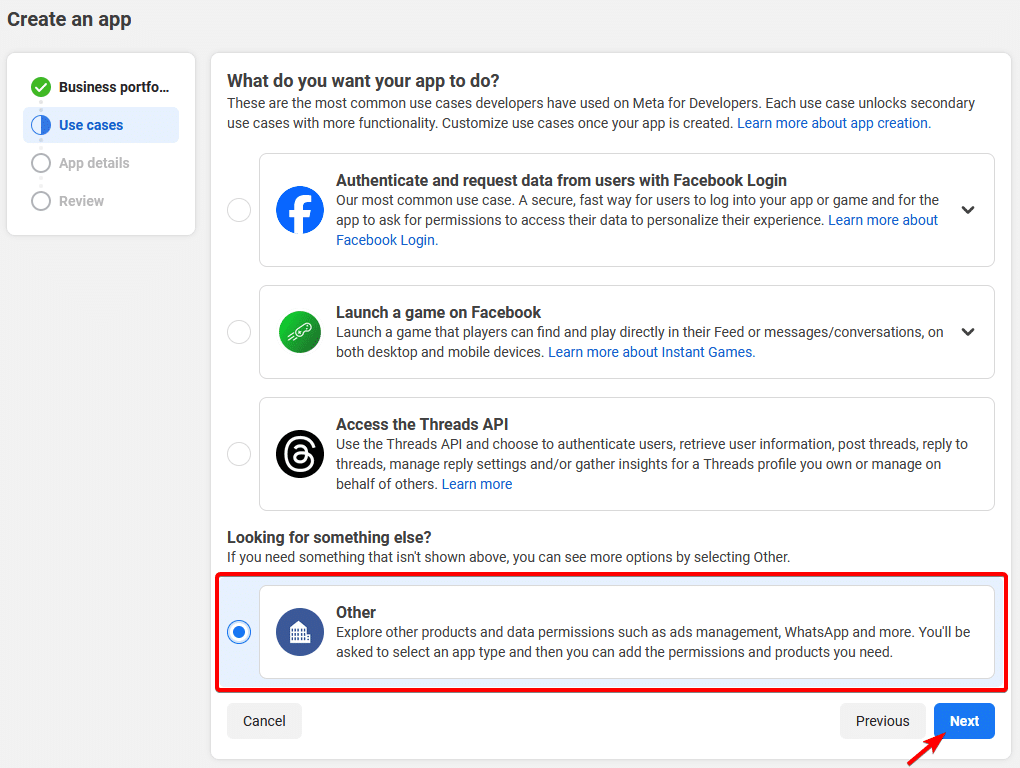
- On the next screen, select your app type. Select Consumer and click Next.
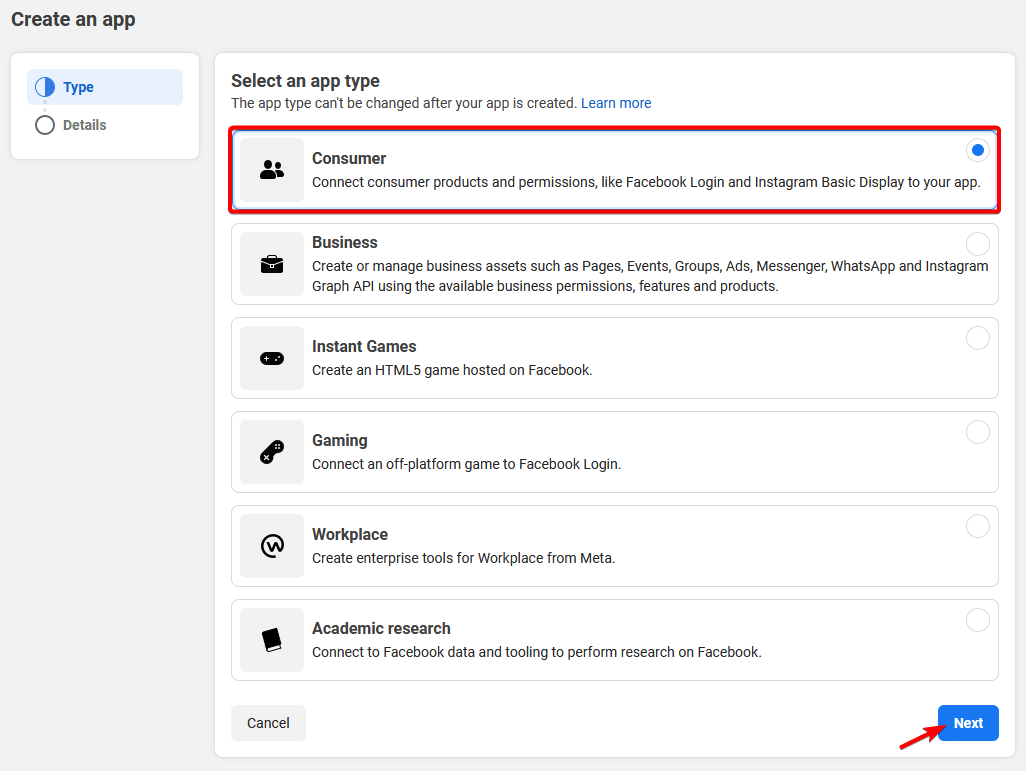
- Add an app name and email address. Optionally connect your business account. Click Create App. Facebook will ask for your password.
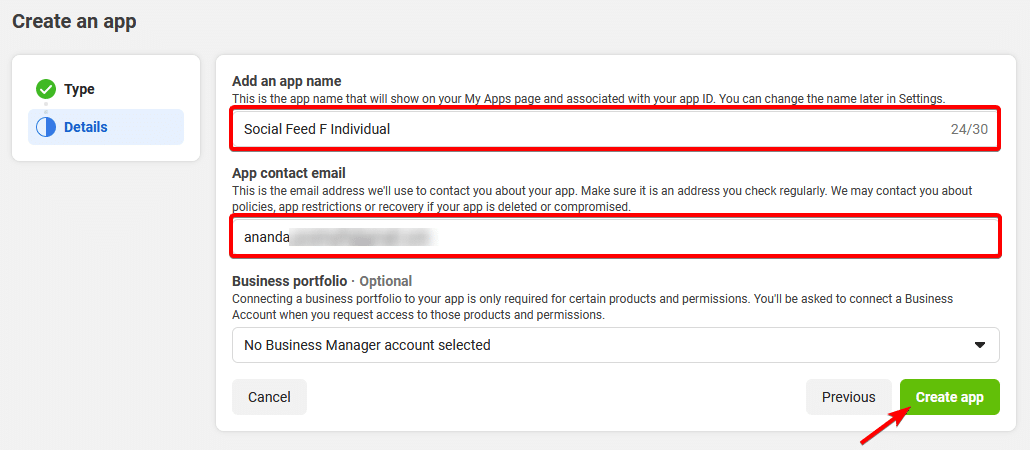
- On the next page, go to Tools > Graph API Explorer from the top menu.
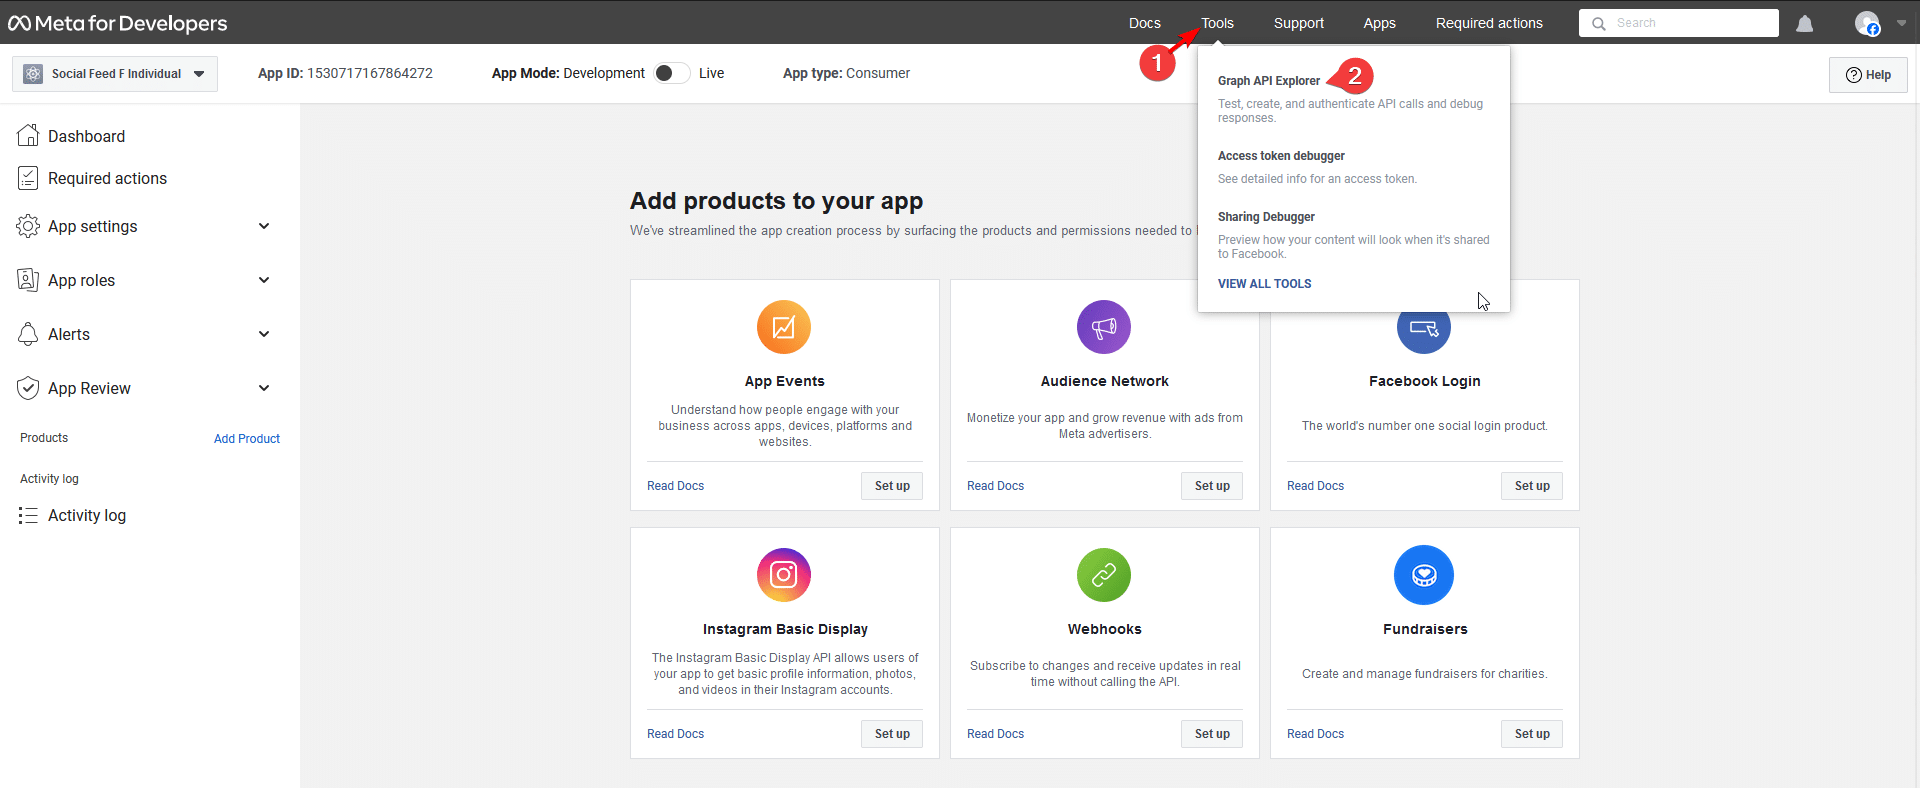
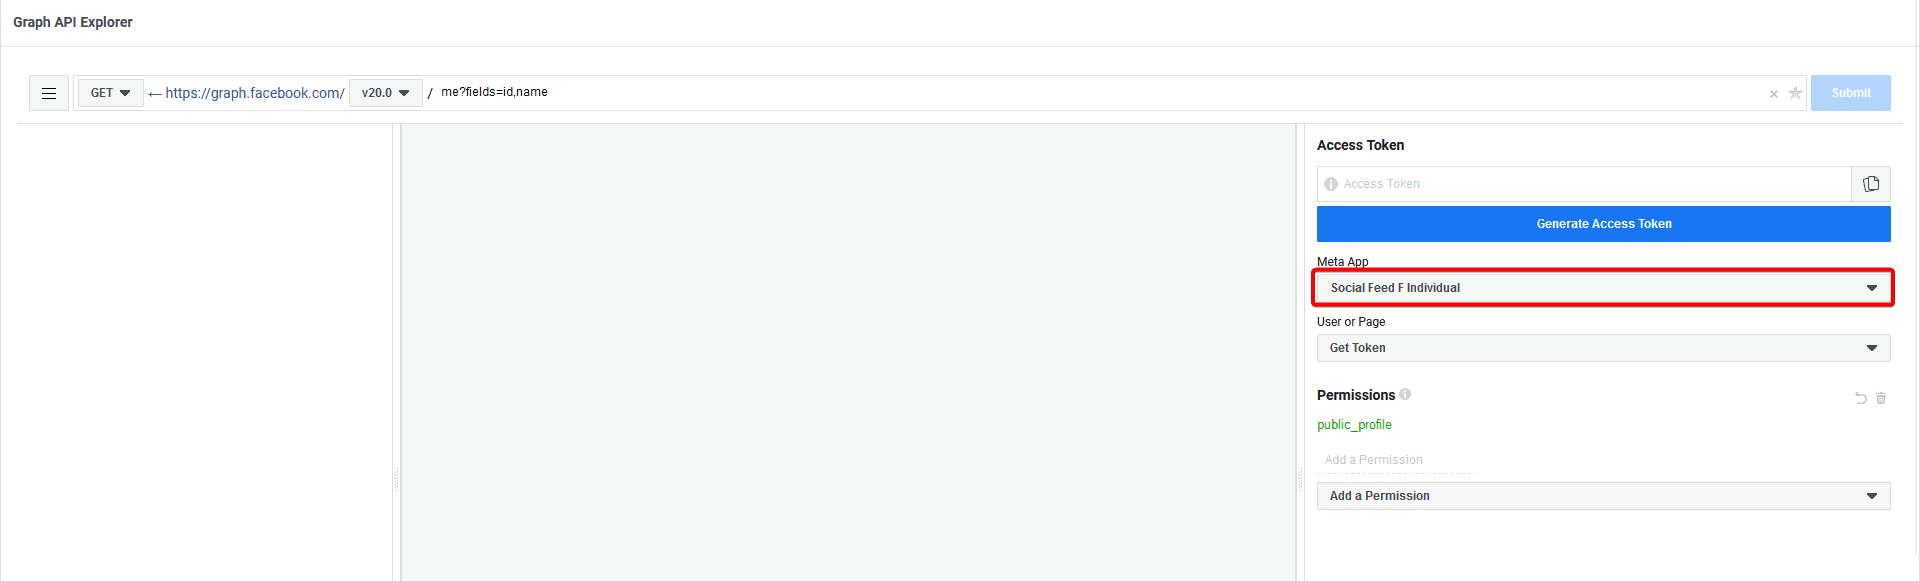
- Select your app from the Meta App dropdown.
- In the Permissions tab, add user_likes in the Add a Permission field.
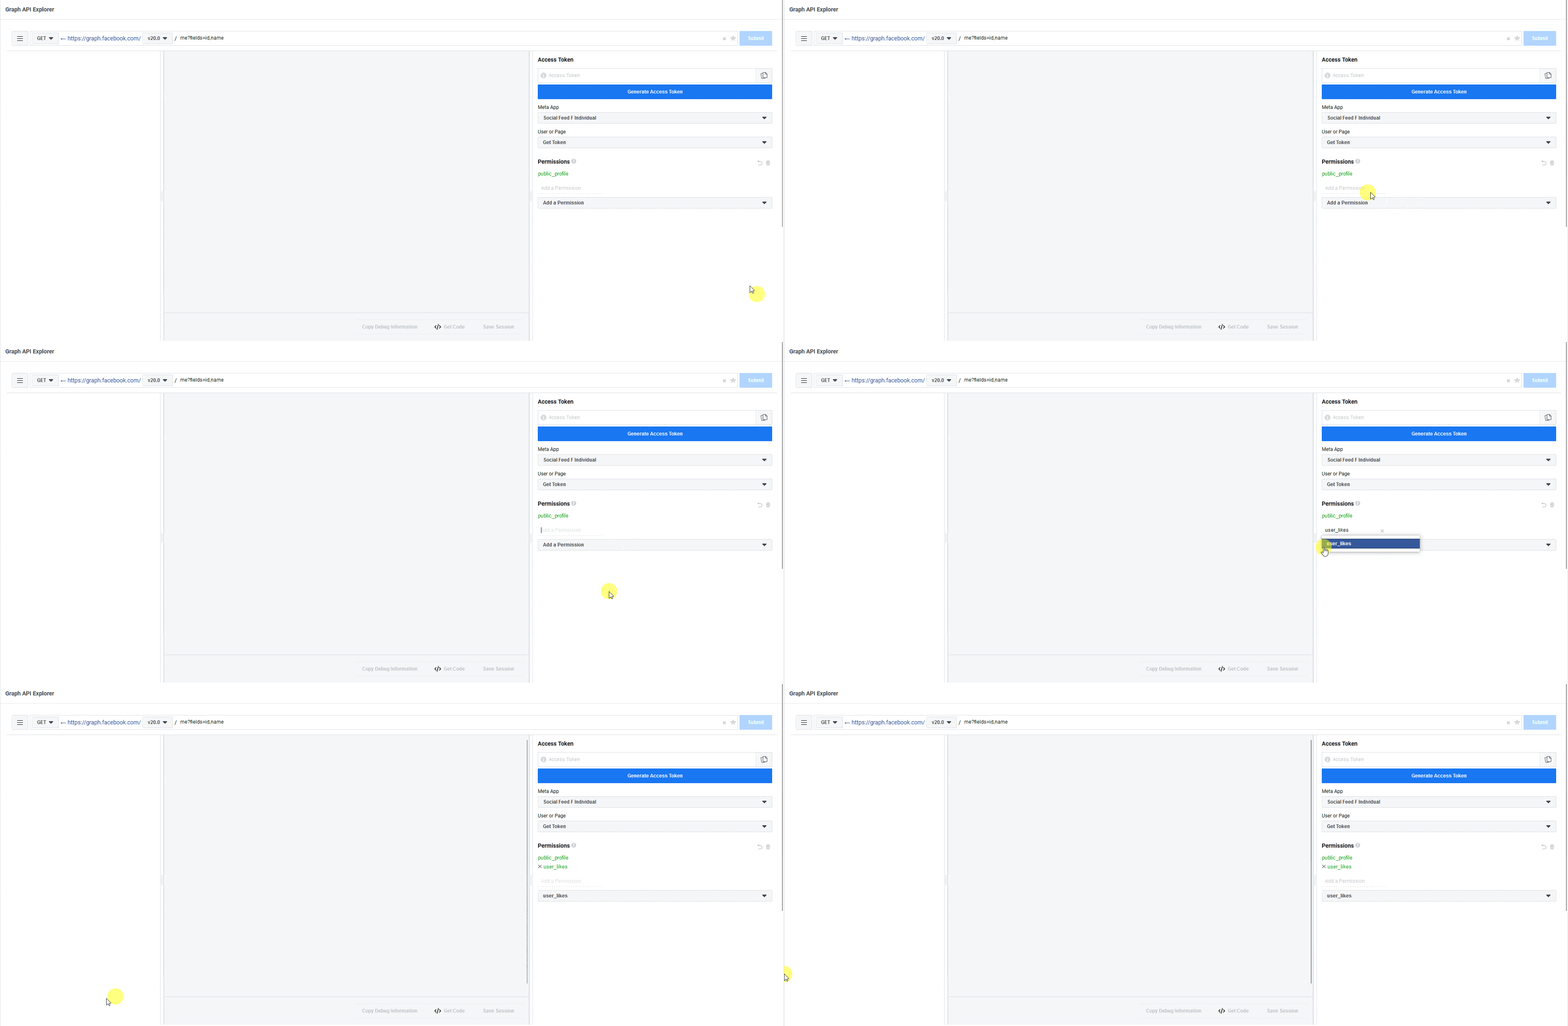
- Add these in the same way:
- user_videos
- user_posts
- user_link
You should now have five permissions, including the default public_profile. Permissions shown in green are not included yet.
- To include them, click Generate Access Token and continue with your Facebook account. All permissions turn black and the token is ready.
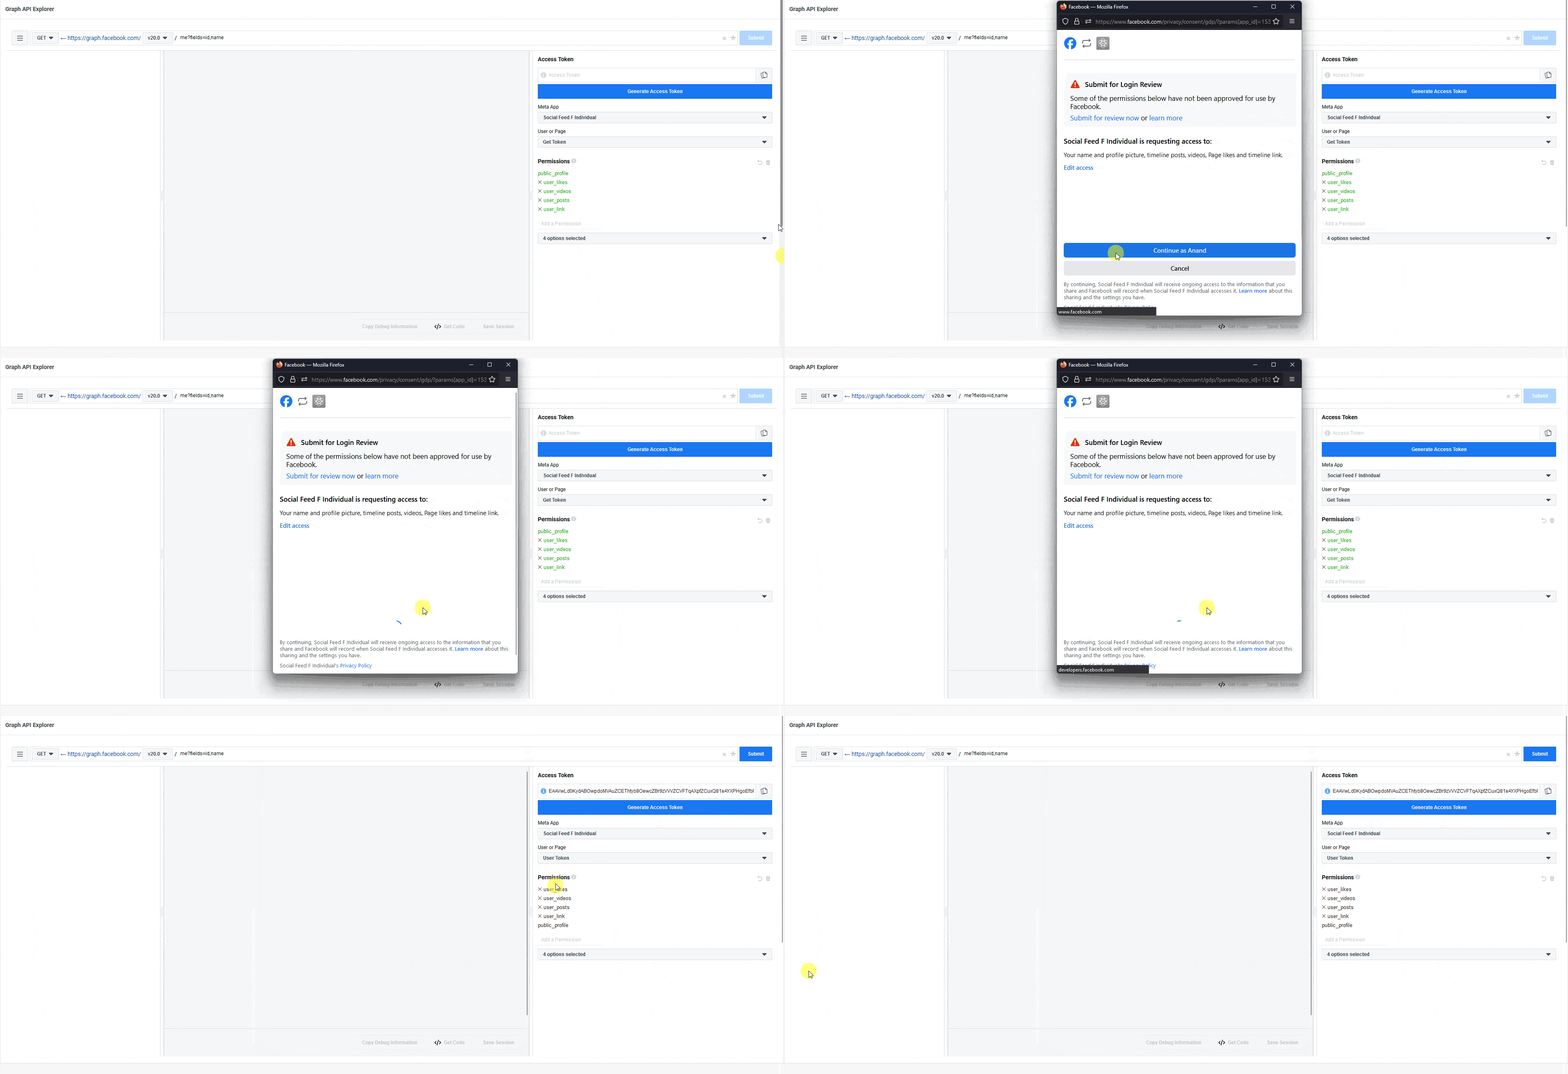
This token is temporary too — about 2 hours. Extend it with steps 17 to 20 of Generate Access Token for Page above.
Which token for which setting
- A token is tied to one Facebook Type. A page token only works with Facebook Type = Page, and an individual token only with Individual. They are not interchangeable.
- Page ID is only needed for a page. It is the numeric id from step 16, not the page’s name or its vanity URL.
- The widget’s field is called Access Token whichever kind you generated.
Limitations
- Tokens expire. Two hours unextended, about two months extended. There is no renewal inside WordPress — when it lapses the feed shows an error card and you come back here.
- Facebook changes these screens. Button names and the order of the app creation wizard move around. The permissions you need do not.
- An app in development mode only sees its own admins’ content. If your feed is empty but the token is accepted, check the app’s mode on the developer site.
Not verified
So you know exactly what has and has not been checked:
- The developer-console steps themselves. Facebook’s developer screens change often and were not walked through for this revision; the sequence and the screenshots below are the ones this page already carried.
- A feed of real posts from a connected Facebook account. This page was checked without ever entering a real access token, API key or password, so what the finished Facebook feed looks like once connected was not observed for this revision.
- Whether the permission list is still exactly these five. Facebook adds and retires permissions; the list here is the one this page has carried.
Troubleshooting
The feed shows "Somthing Wrong" and 400
Facebook refused the request — that spelling is the plugin’s, not a typo here. Most often the token has expired, or it was generated for the other Facebook Type.
Some permissions stay green
They are requested but not granted. Click Generate Access Token again and complete the popup; granted permissions turn black.
I cannot find Get Page Access Token
It is in the User or Page dropdown inside the Graph API Explorer, not in the app settings.
The token works but no posts appear
Check Page ID is the numeric id, and that the page actually has public posts of the Content Type the widget is asking for.
