The Thank You page is the final page a customer sees after completing a purchase, and it plays a crucial role in reinforcing a positive shopping experience. However, the default Thank You page in WooCommerce may not always align with your brand’s aesthetic or provide the necessary information for your customers.
With the Woo Thank You widget from The Plus Addons for Elementor you can easily customize the WooCommerce thank you page as required.
To check the complete feature overview documentation of The Plus Addons for Elementor Woo Builder, click here.
Required Setup
- Elementor FREE Plugin installed & activated.
- You need to have The Plus Addons for Elementor plugin installed and activated.
- This is a Premium widget, and you need the PRO version of The Plus Addons for Elementor.
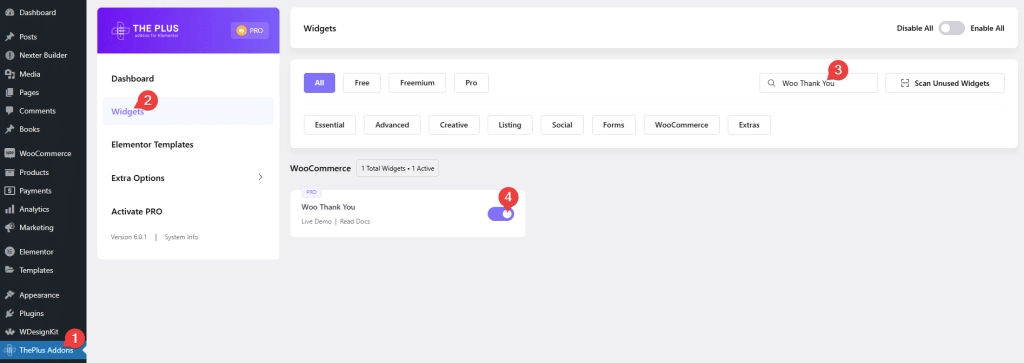
- Make sure the Woo Thank You widget is activated, to verify this visit The Plus Addons → Widgets → and Search for Woo Thank You and activate.
How to Activate the Woo Thank You Widget?
Go to
- The Plus Addons → Widgets
- Search the widget name and turn on the toggle.
Assign Thank You Page
By default, WooCommerce doesn’t have separate thank you page, so you have to create a thank you page.
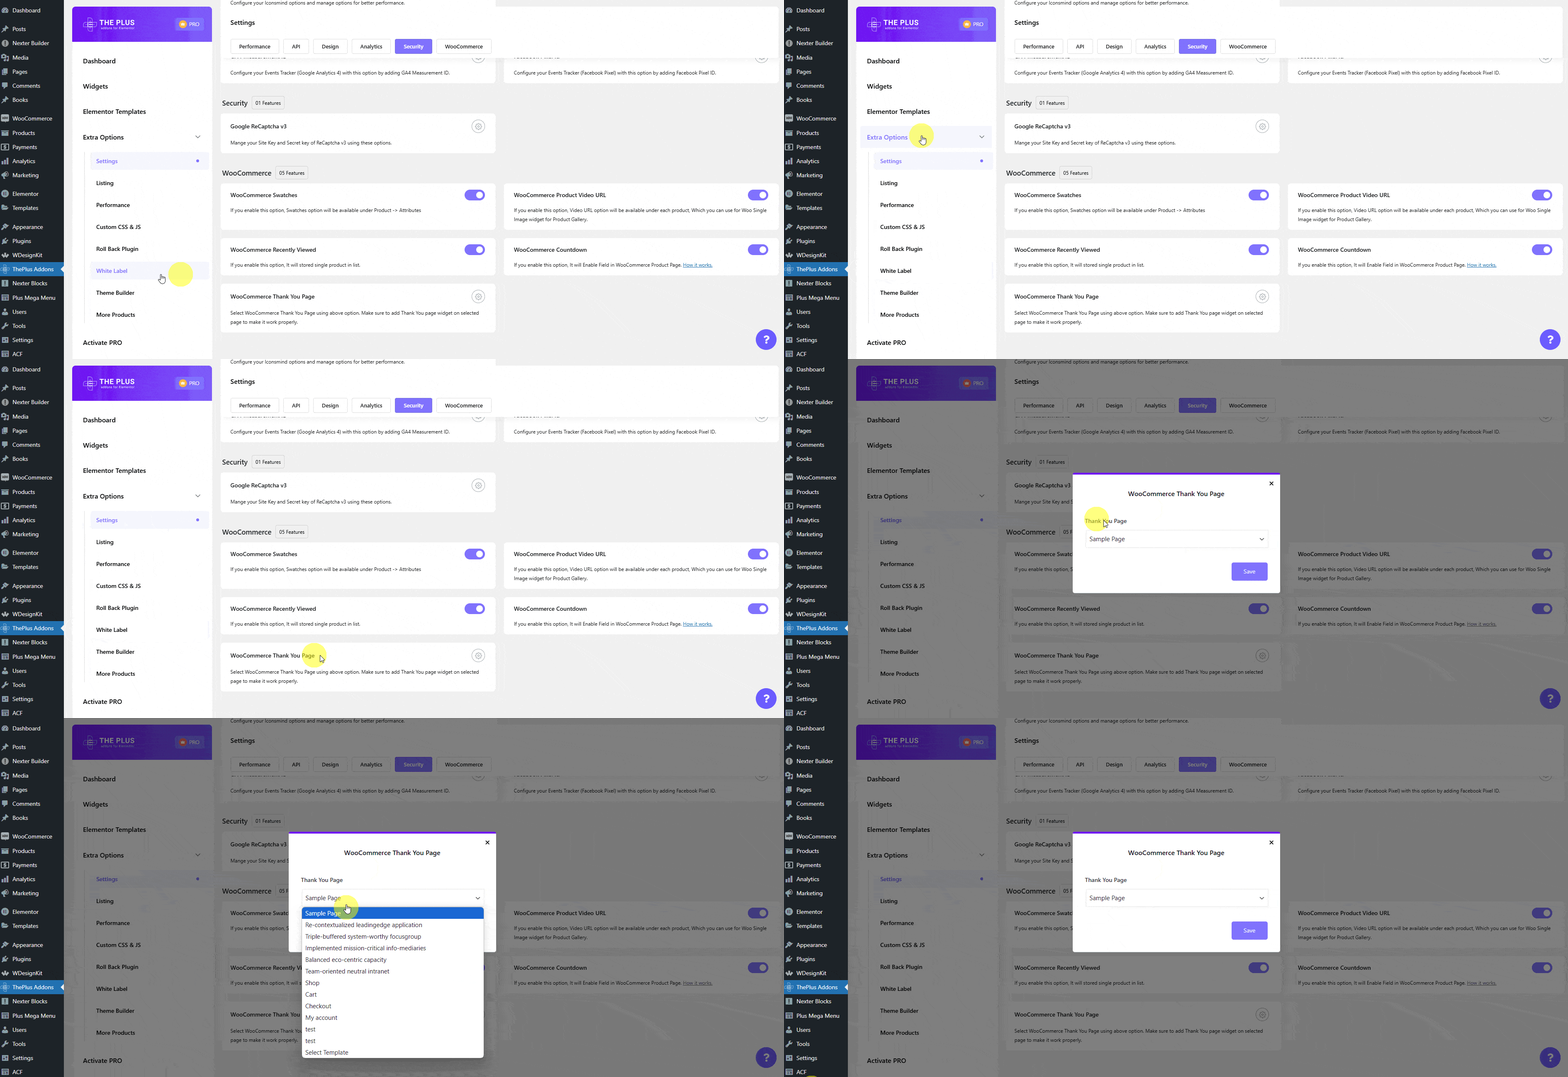
Then from the Dashboard go to The Plus Addons > Extra Options > Settings scroll down to the Woocommerce Thank You Page: section and click on settings icon then select your page from the dropdown, and then click Save.
Add Woo Thank You
Edit your thank you page with Elementor and add the Woo Thank You widget.
Woo Thank You
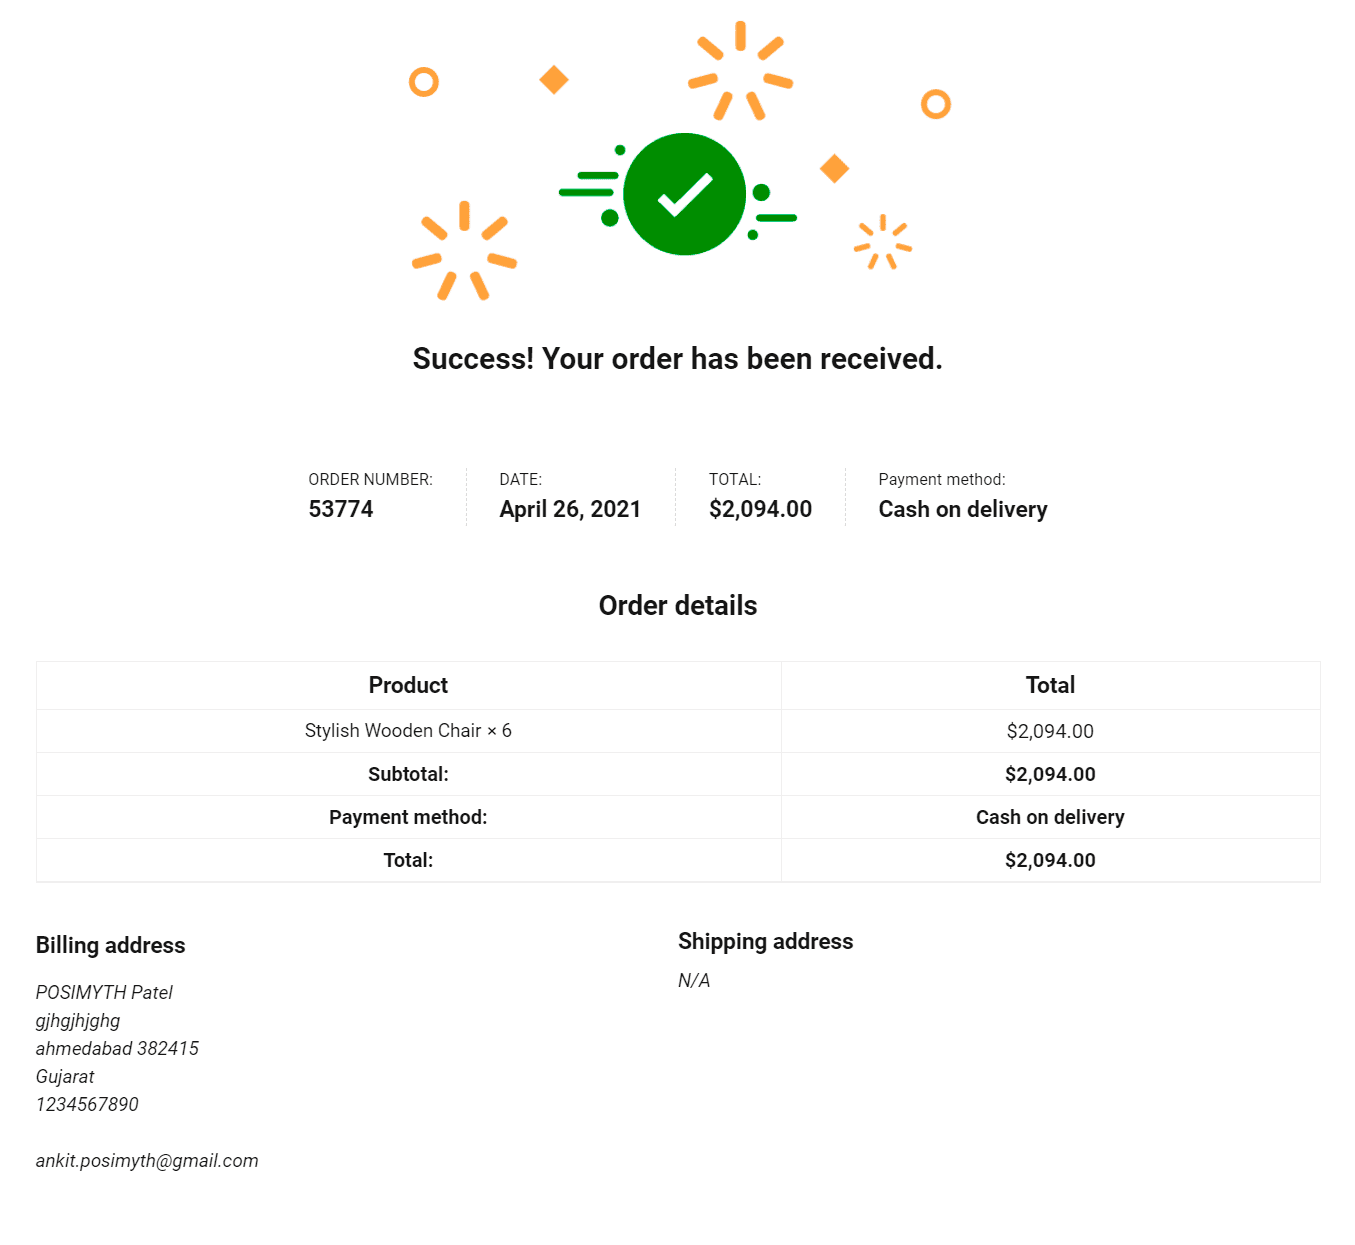
From the Order Status Message toggle, you can show or hide the order status message and meta details.
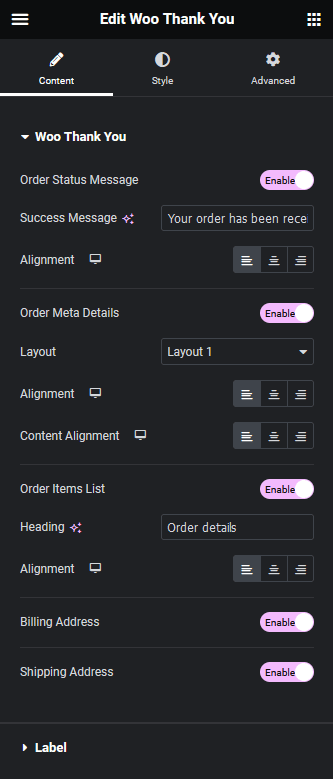
When enabled, you can customize the order success message from the Success Message field and you can align it from the Alignment section.
Once the Order Status Message is enabled, you’ll see the Order Meta Details toggle. With this, you can show or hide the order meta details only.
You can select a layout from the Layout dropdown for the meta details.
From the Alignment section, you can align the meta details.
Then, you can align the container from the Content Alignment section.
You can show or hide the order details from the Order Items List toggle.
You can edit the section heading from the Heading field.
From the Alignment section, you can align the order details.
You can show or hide the billing address from the Billing Address toggle.
Then from the Shipping Address toggle, you can show or hide the shipping address.
Label
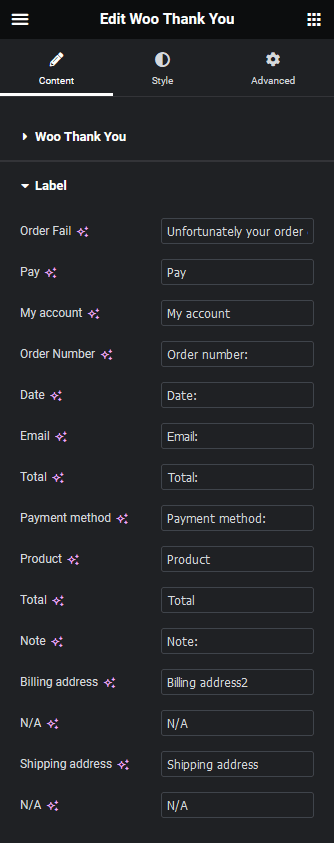
From the Label tab, you can edit different labels and headings of the page.
Suggested reading, 5 best WooCommerce product search plugins
Order Fail – To set the message for failed orders.
Pay – To edit the Pay button text when an order is failed.
My account – To edit the My Account button text when an order is failed.
Order Number – To edit the order number label of a successful order.
Date – To edit the date label of a successful order.
Email – To edit the email label of a successful order.
Total – To edit the total label of a successful order.
Payment method – To edit the payment method label of a successful order.
Product – To edit the product label of the order details section.
Total – To edit the total label of the order details section.
Note – To edit the note label of the order details section.
Billing address – To edit the billing address heading.
N/A – To edit the N/A label of the billing address section.
Shipping address – To edit the shipping address heading.
N/A – To edit the N/A label of the shipping address section.
From the Style tab, you can customize the page further.
Now, you’ll see a beautiful thank you page.
Also, read how to create a WooCommerce order tracking page in Elementor.
