Do you want to edit the WooCommerce cart page in Elementor? Similar to the other pages of WooCommerce, you’ll get very limited options to edit the cart page. So to edit the cart page you need coding knowledge.
With the Woo Cart widget from The Plus Addons for Elementor you can easily customize the WooCommerce cart page as per your style and brand without any coding.
To check the complete feature overview documentation of The Plus Addons for Elementor Woo Builder, click here.
Required Setup
- Elementor FREE Plugin installed & activated.
- You need to have The Plus Addons for Elementor plugin installed and activated.
- This is a Premium widget, and you need the PRO version of The Plus Addons for Elementor.
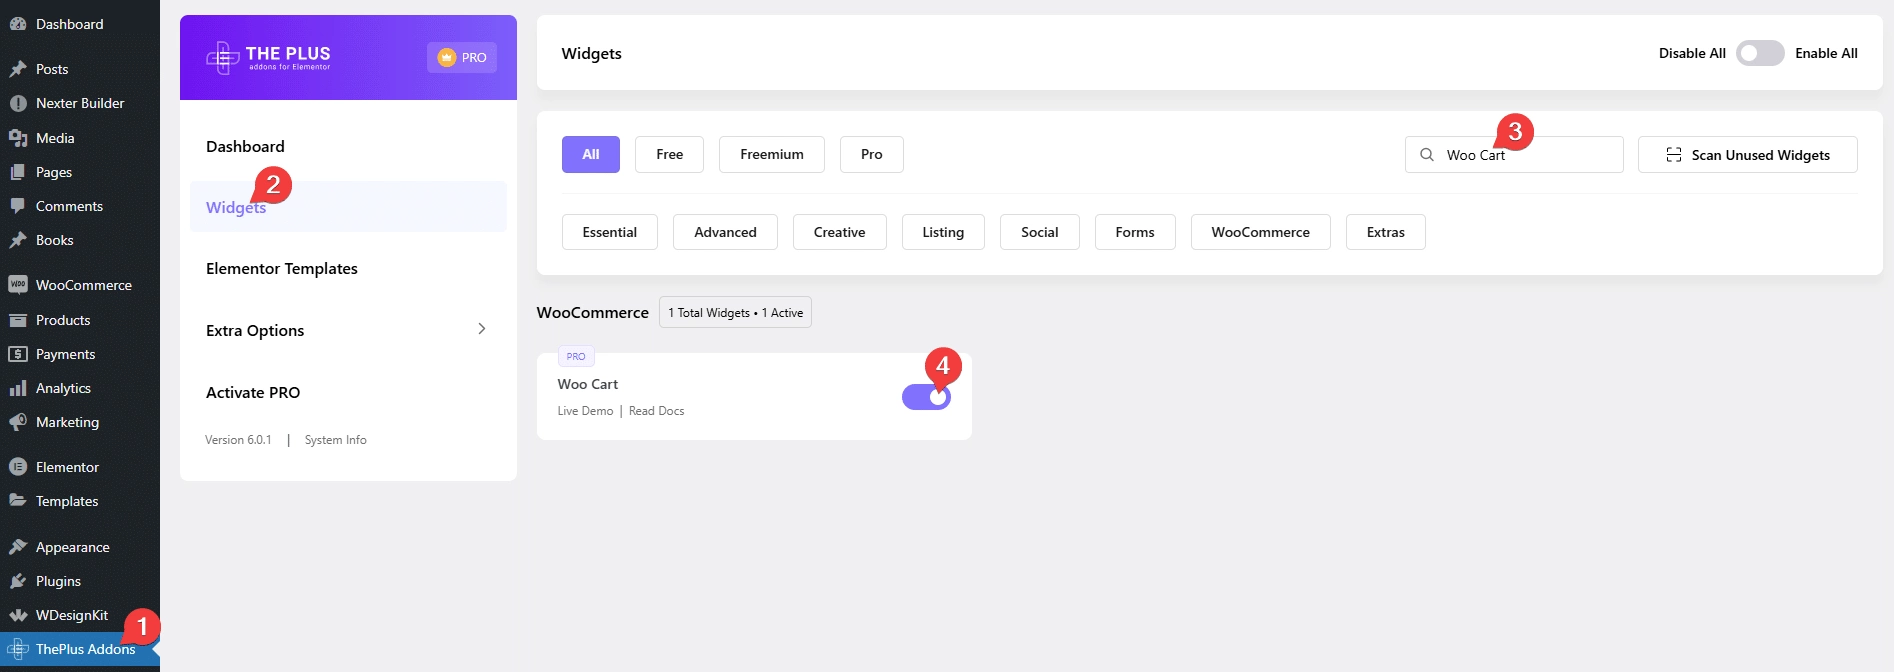
- Make sure the Woo Cart widget is activated, to verify this visit The Plus Addons → Widgets → and Search for Woo Cart and activate.
How to Activate the Woo Cart Widget?
Go to
- The Plus Addons → Widgets
- Search the widget name and turn on the toggle.
Add Woo Cart
To edit the cart page, open the cart page with Elementor and add the Woo Cart widget.
Note: Make sure all the default WooCommerce pages are created.
From the Layout dropdown, under the Layout tab, you have to select a layout. Here you’ll find two options –
Default – To show all the default sections of the cart page.
Custom – With this option, you can customize which sections to show.
Default
When you select the Default option from the Layout dropdown, you’ll get some customization options under the Cart with Items tab.
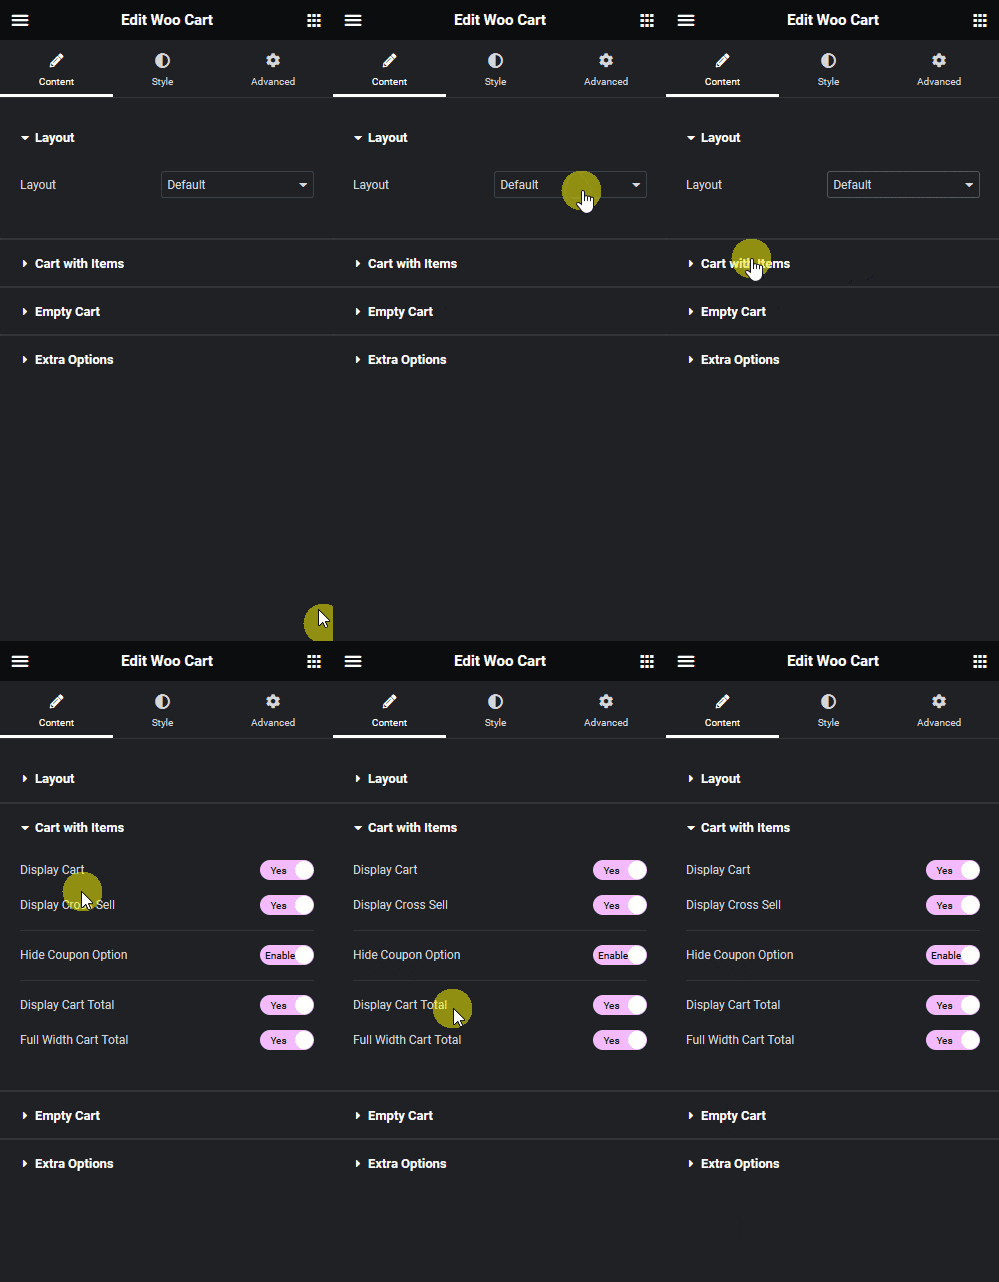
Display Cart – To show or hide the cart section with items.
Display Cross Sell – To show or hide the cross sell products.
Hide Coupon Option – To show or hide the coupon section.
Display Cart Total – To show or hide the cart total section.
Full Width Cart Total – To make the cart total section full width.
Custom
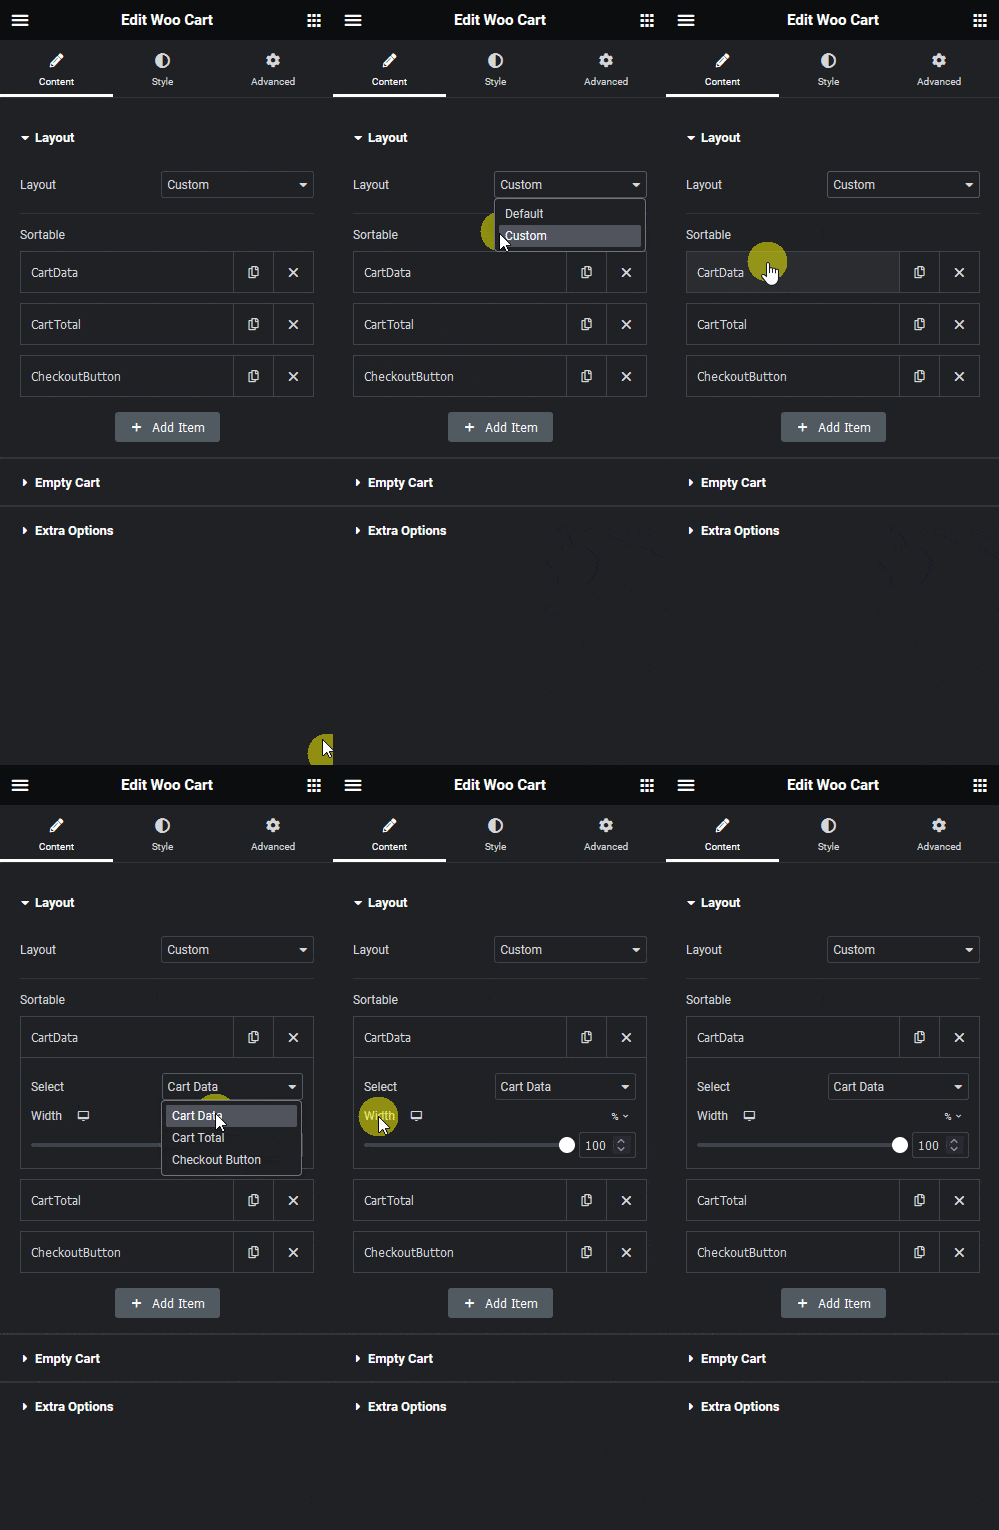
When you select Custom from the Layout dropdown, you’ll see three items, open one item.
Learn, how to edit WooCommerce thank you page in Elementor.
From the Select dropdown, you have to select the section you want to show. Here, you’ll find three options –
Cart Data – To show the cart section with items. You can manage the section width for different devices.
Cart Total – To show the cart total section. You can manage the section width for different devices.
Checkout Button – To show the checkout button. You can manage the section width and the button text as well.
Similarly, you can edit the other items, and you can also drag and drop to rearrange the items or you can delete an item as well.
You can click on the + Add Item to add more items.
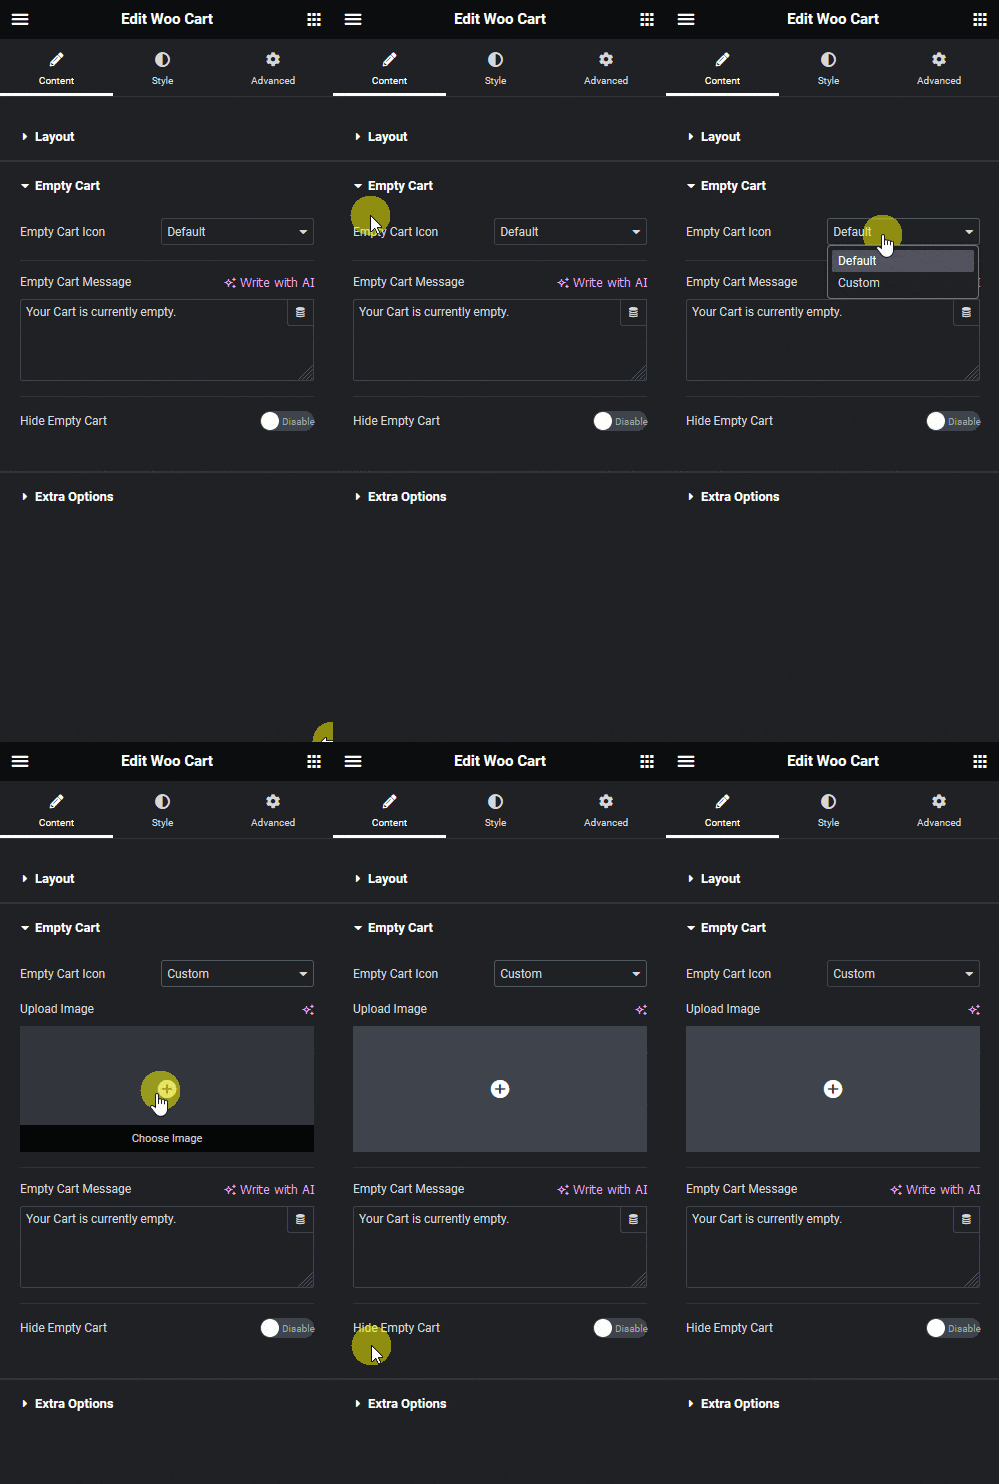
From the Empty Cart tab, you can set a custom image/icon and message for the empty cart.
Suggested reading, Ultimate guide to protect WooCommerce store from fraud & fake orders [Tips+Tools]
You can also hide the empty cart by enabling the Hide Empty Cart toggle.
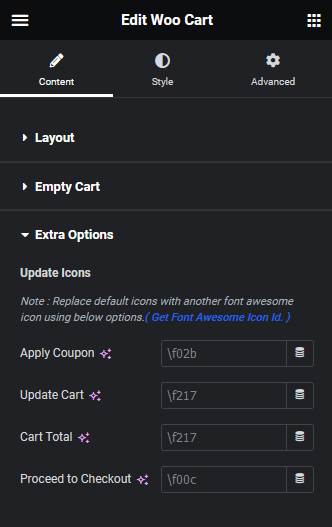
Then, from the Extra Options tab, you can add icons to each button of the cart page by adding the Font Awesome icon Unicode.
From the Style tab, you can customize the page style further.
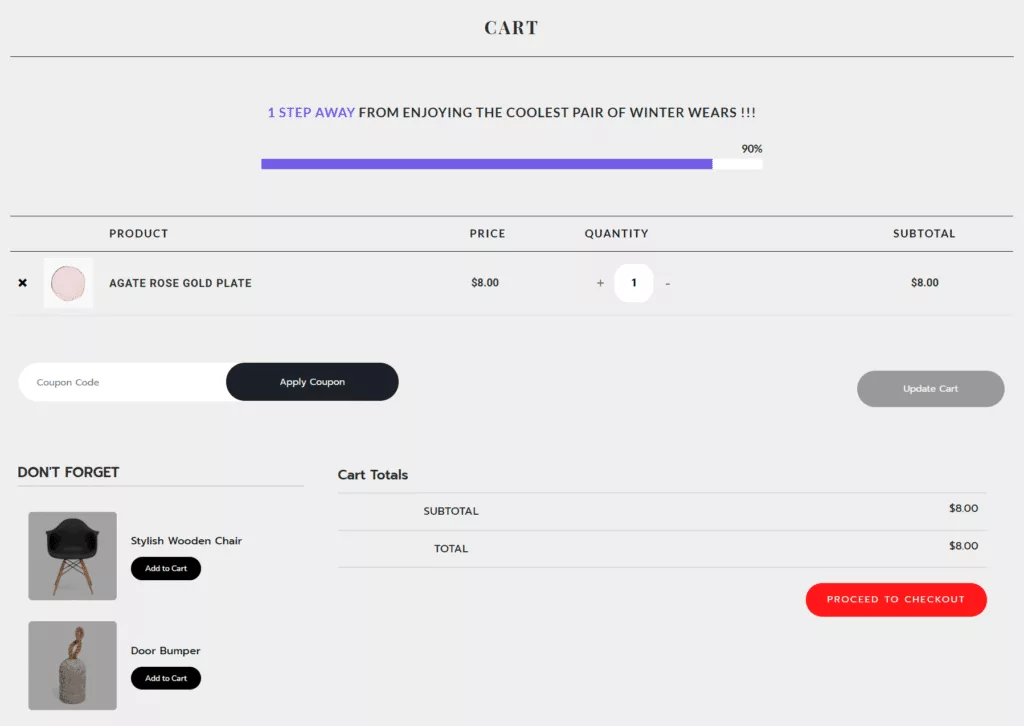
Now, you’ll see a beautiful cart page.
Also, check how to edit WooCommerce checkout page in elementor.


