






Want an email in your inbox every time someone fills in your Elementor form?
The Email action of the Form widget from The Plus Addons for Elementor sends you each submission, with the subject, message and sender you choose.
To check the complete feature overview documentation of The Plus Addons for Elementor Form widget, click here.
Requirement – This widget is a part of The Plus Addons for Elementor, make sure it’s installed & activated to enjoy all its powers.
Before You Start
- Edition: Free — works in the free plugin and in Pro.
- Widget to enable: Form, switched on under The Plus Addons > Widgets.
- Working email sending on your site. We recommend SMTP: see How to set up SMTP.
Steps
- Add the Form widget to your page and set up your fields.
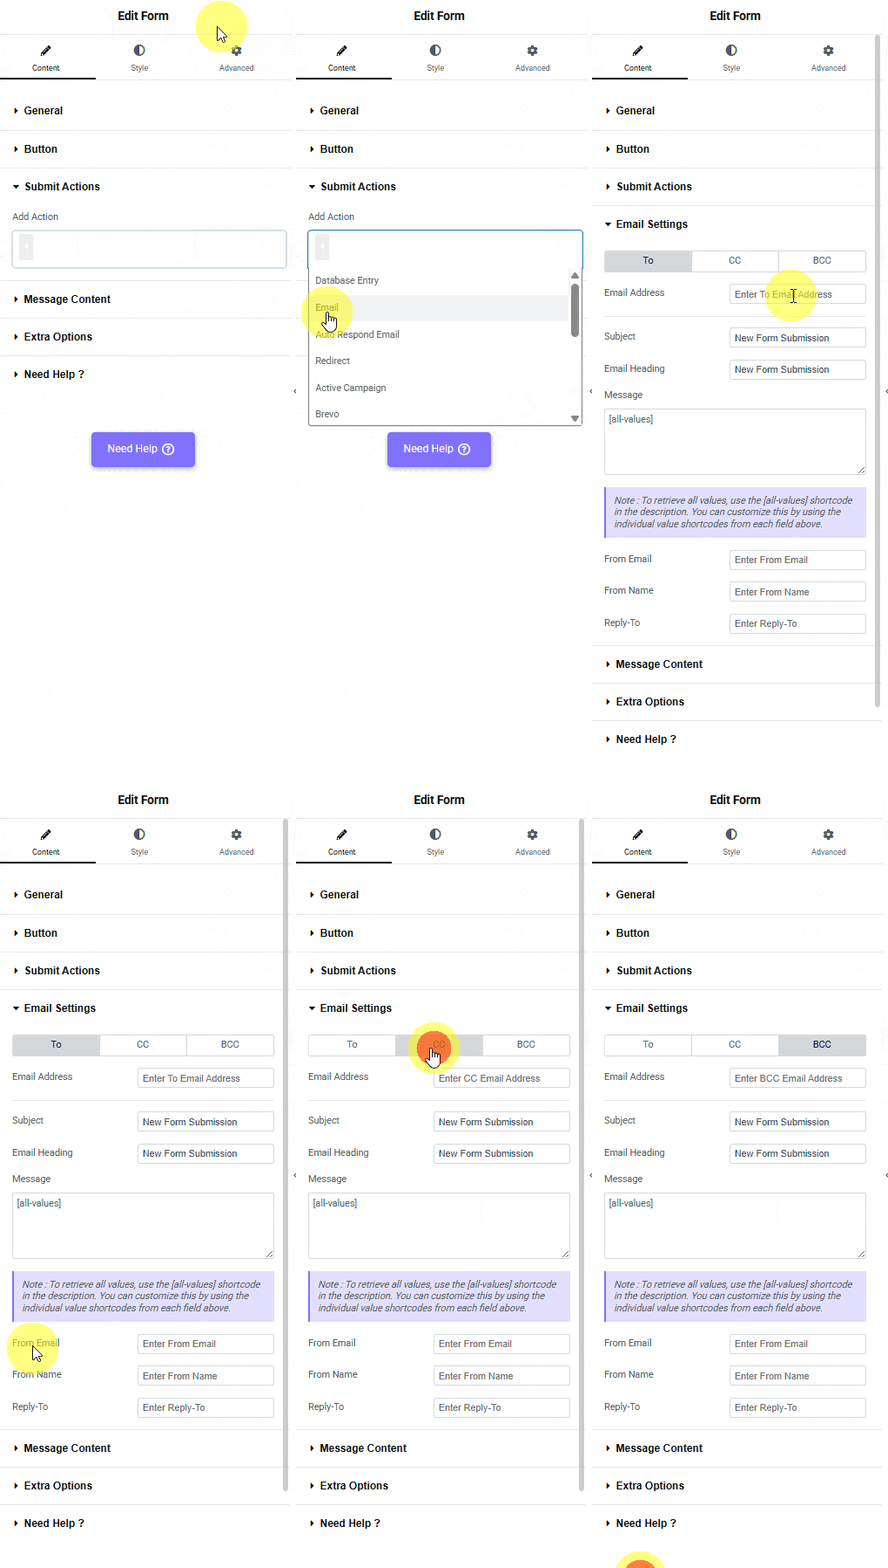
- In Content > Submit Actions, make sure Email is in Add Action. It is there by default.
- Open Email Settings. On the To tab, enter the address that should receive the submissions. Use the CC and BCC tabs for a copy.
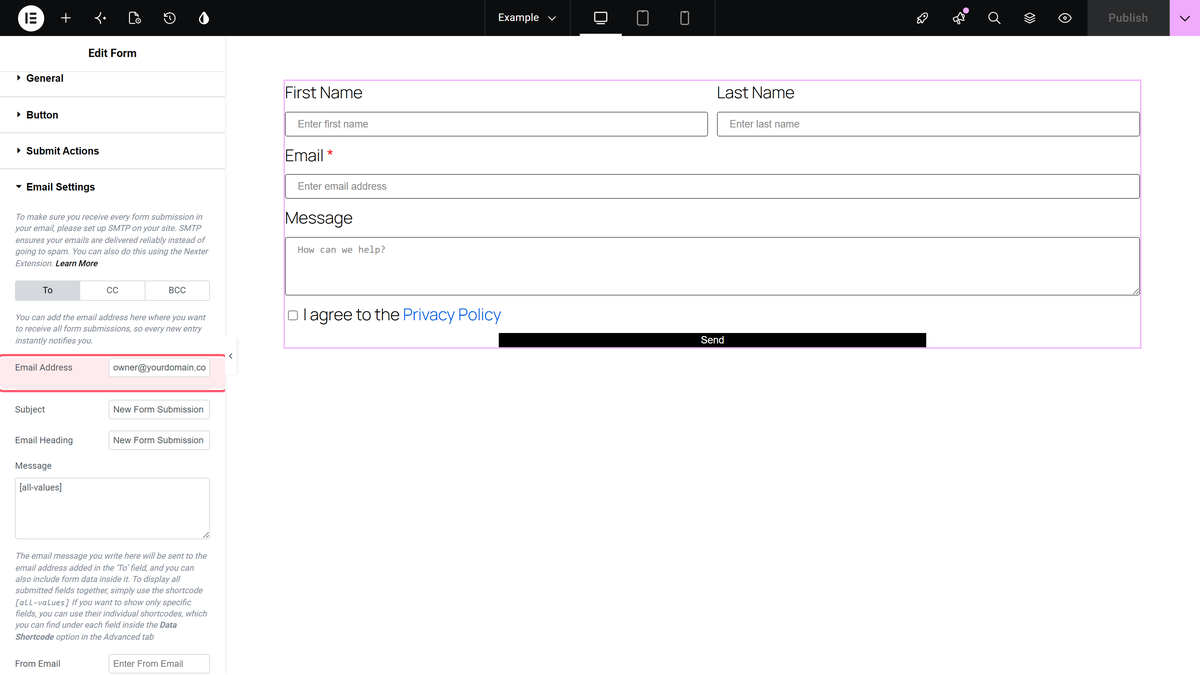
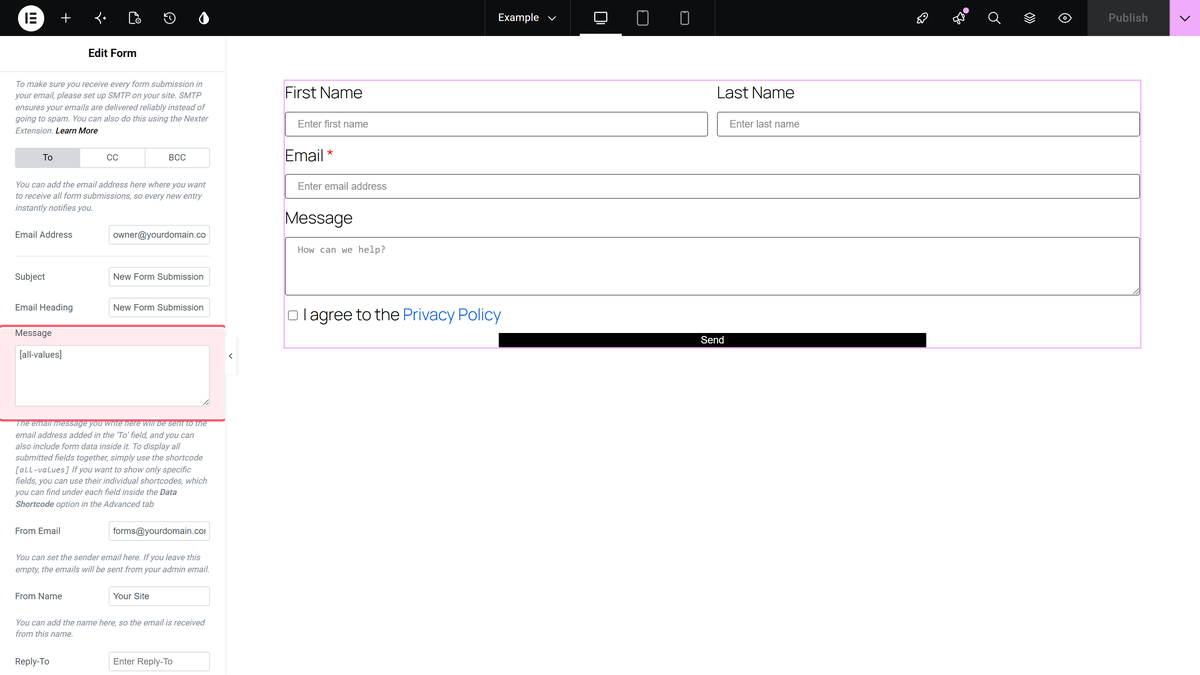
- Set the subject, message and sender (see the table below), then publish.
| Setting | What it does | Default |
|---|---|---|
| To / CC / BCC > Email Address | Who receives the email. One address per box | Site admin email when To is empty |
| Subject | The email subject line | New Form Submission |
| Message | [all-values] lists every field. Or write your own text with field shortcodes such as [value_id="email"] | [all-values] |
| From Email | The sender address. Use an address on your own domain | [email protected] when empty |
| From Name | The sender name | Empty |
| Reply-To | Where your replies go | Empty |
How It Behaves
| Free plugin | Pro | |
|---|---|---|
[all-values] | The Email Heading as a title, then each typed value (without field names) | Each field as field ID: value, then the date, time, page URL, browser and IP address |
| Email Heading | Shown as the title of the email | Currently not added to the email |
- A field’s shortcode is
[value_id="+ its Unique ID +"]. In Pro, typing a Unique ID fills the field’s Data Shortcode box (field Advance tab) for you. Only these form shortcodes work in the message. - The email is sent as HTML.
Limitations
- One address per box. A comma-separated list in To is not accepted: the email goes to your site admin email instead. Use CC and BCC for extra recipients.
- In the free plugin, your own Message text is changed to lowercase (the typed values keep their case). For example, Name: arrives as name:.
- In the free plugin, keep Email selected. Without it, visitors see “Emails could not be sent. Please try again.” and a Redirect action does not run.
Troubleshooting
Emails don’t arrive or land in spam
Set From Email to an address on your domain and set up SMTP. Many hosts don’t deliver mail sent with the default PHP mailer.
