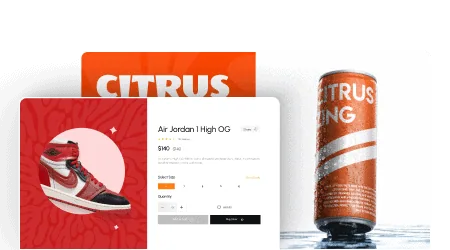
Do you want to edit the WooCommerce product page as per your requirement? WooCommerce offers a variety of customization options, but it can be challenging to make significant changes to the product pages without extensive coding knowledge.
But The Plus Addons for Elementor offers a range of widgets to customize the WooCommerce product page in Elementor easily.
To check the complete feature overview documentation of The Plus Addons for Elementor Woo Builder, click here.
Required Setup
- Elementor FREE Plugin installed & activated.
- You need to have The Plus Addons for Elementor plugin installed and activated.
- This is a Premium widget, and you need the PRO version of The Plus Addons for Elementor.
- Make sure the Woo Single Basic, Woo Product Images, Woo Single Pricing and Woo Single Tabs widgets are activated, to verify this visit The Plus Addons → Widgets → and Search for Woo and activate them.
How to Activate the Woo Single Product Widgets?
Go to
- The Plus Addons → Widgets
- Search “woo” and turn on the toggle.
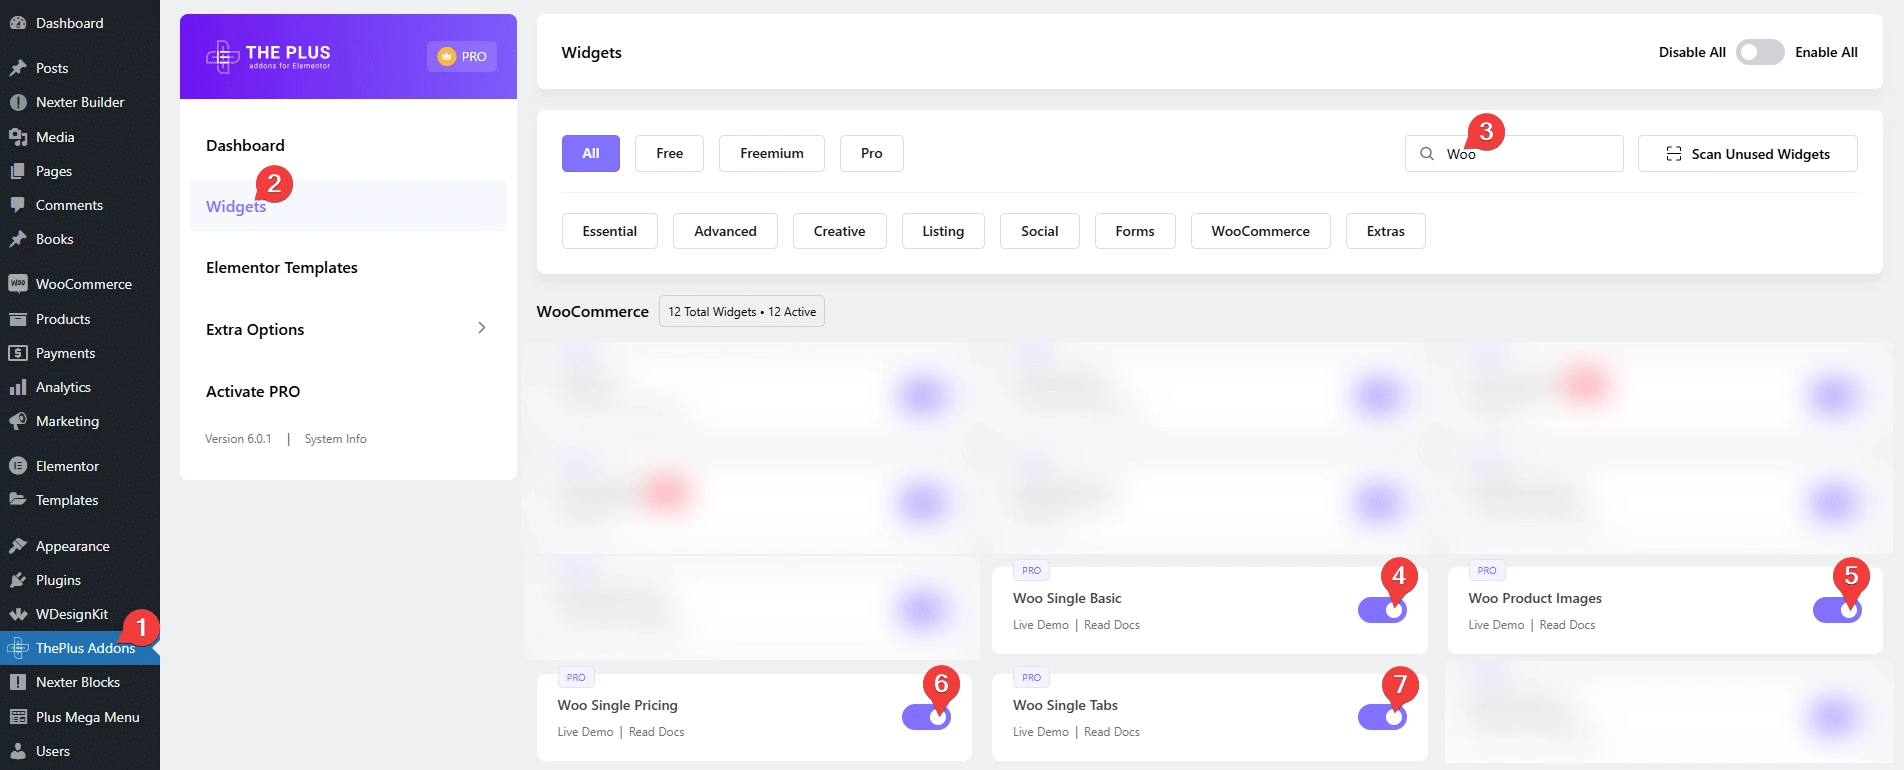
Note: Make sure you’ve added some products to your WooCommerce store.
You have to use these widgets on a single product template.
You can use the free Nexter Builder or you can use Elementor Pro if you are already using it to create the single product template.
Add Woo Single Basic
To show product details such as product title, short description, badge, rating and product next previous button on a single product page, add the Woo Single Basic widget to the appropriate location on the single product template.
In the Woo Single Basic section, you’ll see five items, open one item.
From the Select dropdown, you have to select the data you want to show. Here, you’ll find five options –
Title – To show the product title.
Short Description – To show a short description of the product.
Badge – To show a discount or stock related badge on the product.
Rating – To show product rating.
Next/Previous Product – To show a next previous button for easy navigation.
Based on your selection, you’ll see relevant options.
Similarly, you can edit the other items, and you can also drag and drop to rearrange the items or you can delete an item as well.
You can click on the + Add Item to add more items.
From the Alignment section, you can align the content.
Show Product Title
To show the product title on a single product page, open an item from the Woo Single Basic section.
From the Select dropdown, select Title.
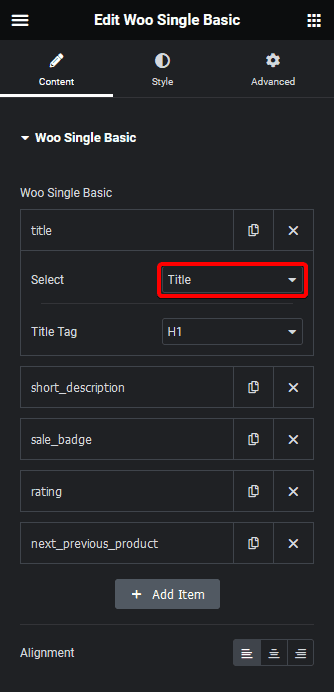
You can change the HTML tag of the title from the Title Tag dropdown.
Now you’ll see the product title.
Show Product Short Description
To show the product short description on a single product page, open an item from the Woo Single Basic section.
From the Select dropdown, select Short Description.
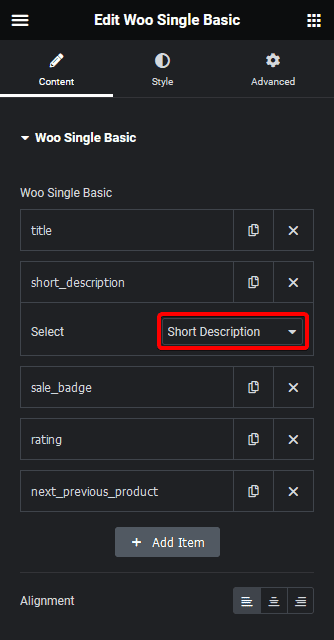
Now, you’ll see the product description added in the short description section of the product edit page.
Show Product Badge
To show a badge on a single product page, open an item from the Woo Single Basic section.
From the Select dropdown, select Badge.
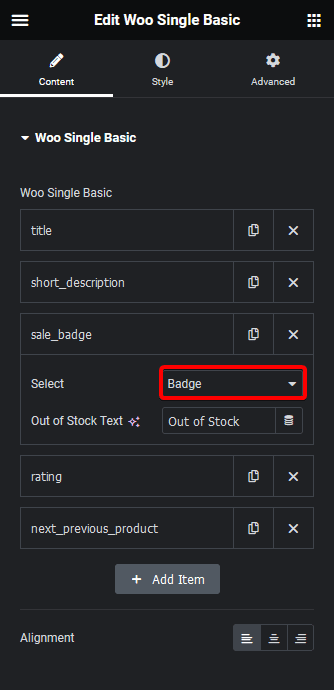
Now, if a product is out of stock or selling at a discounted price, you’ll see the relevant badge.
For the out of stock status, you can change the text from the Out of Stock Text field.
Show Product Rating
To show a rating on a single product page, open an item from the Woo Single Basic section.
From the Select dropdown, select Rating.
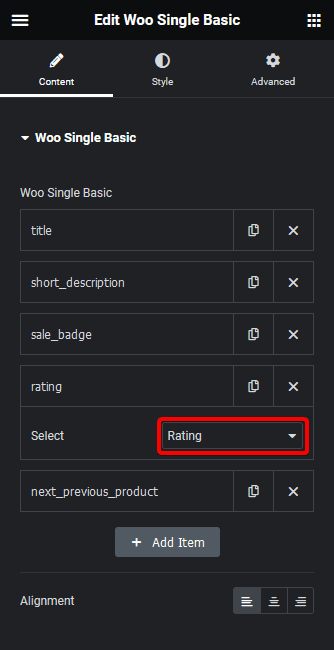
Now, if a product has received reviews, you’ll see the rating on that product page.
Show Next Previous Product Button
To show a next previous product button on a single product page, open an item from the Woo Single Basic section.
From the Select dropdown, select Next/Previous Product.

You can edit the next previous text and add icons to them as well.
By turning on the Current Category toggle, you can make the next previous button specific to the current category of the product. This will only show the next previous products from the same category as the current product.
Now you’ll see the next previous button on the product page to easily navigate to other products.
Based on your selection, you’ll see relevant product details on the product page
From the Style tab, you can customize the style further.
Add Woo Product Image
To show the product image on a single product page, add the Woo Product Image widget to the appropriate location on the single product template.
From the Layout dropdown, you have to select the image layout type. Here, you’ll find two options –
Image Gallery – To show multiple product images.
Single Image – To show a single product image.
Based on your selection, you’ll see relevant options.
Show Image Gallery
To show multiple product images on a single product page, select Image Gallery from the Layout dropdown.
Note: To show the image gallery, make sure images are added to the product gallery section of the product edit page.
Then, from the Style section, you can select from two predefined styles.
If you select Style 1, you can hide small image thumbnails by enabling the Hide Thumbnail toggle.
You can also set the image position from the Thumbnail Position dropdown.
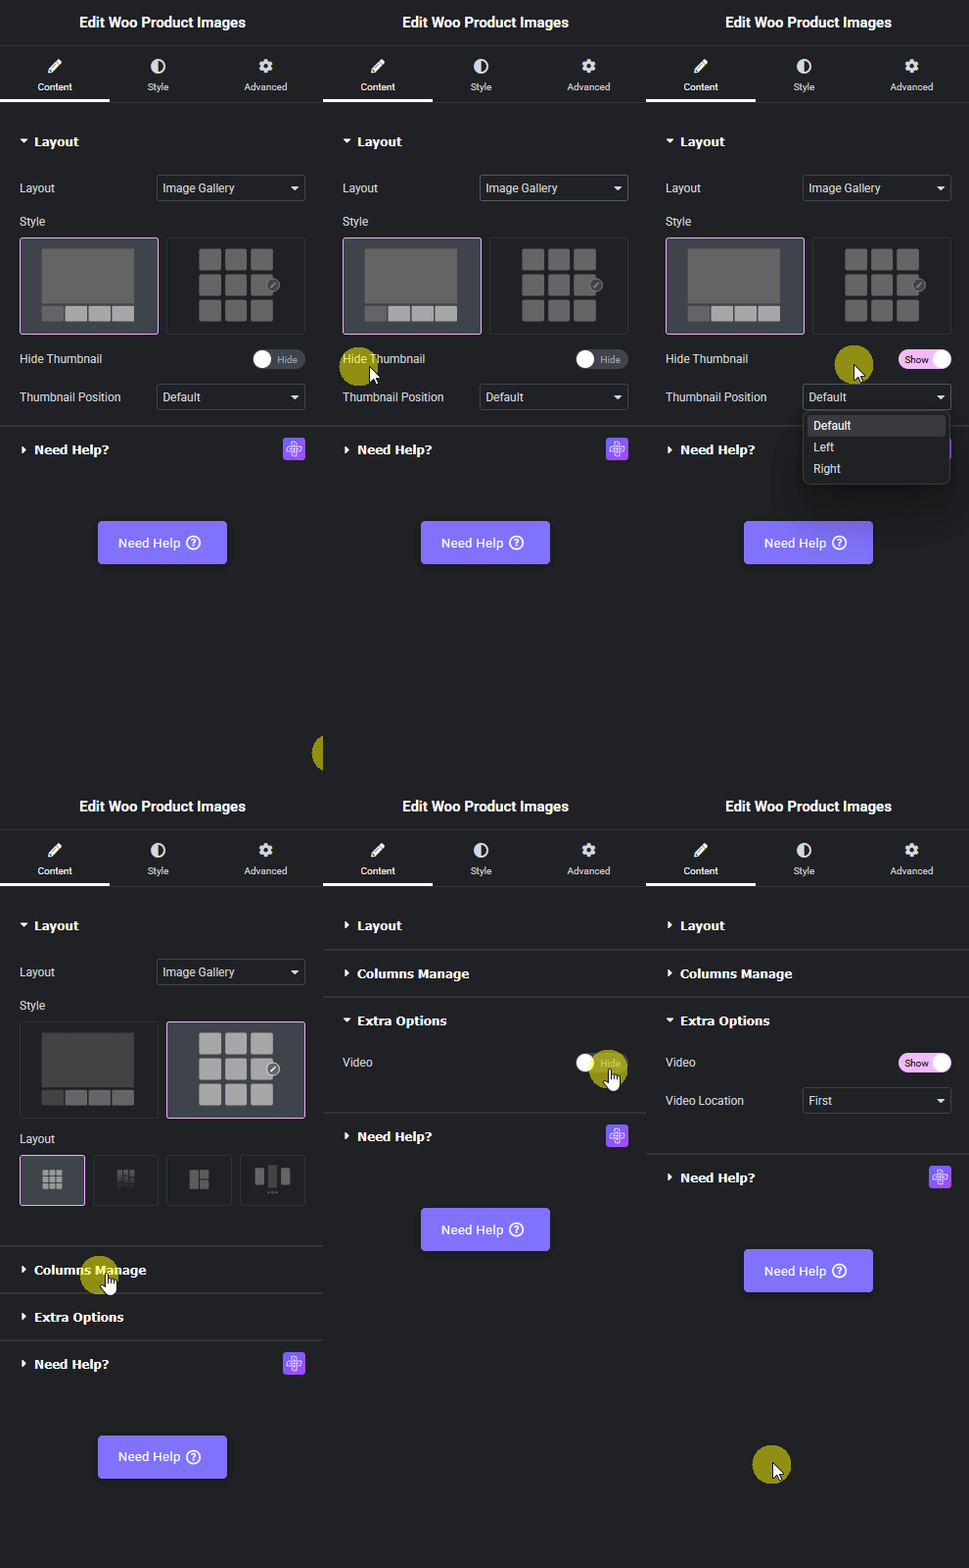
But if you select Style 2, you’ll get to select different layouts from the Layout section. Here, you’ll find four options –
Grid – To show the product images in a grid layout.
Masonry – To show the product images in a masonry grid layout.
Metro – To show the product images in a metro layout.
Carousel – To show the product images in a carousel. You can set the image size for the carousel from the Image Type dropdown.
For the carousel layout, you can connect and control the carousel with the Carousel Remote widget using the Unique Carousel ID from the Carousel tab under the Style tab.
From the Columns Manage tab, you can manage the image column for different devices for the grid, masonry and metro layouts.
From the Extra Options tab, you can show a video in the image gallery by turning on the Video toggle.
Then, from the Video Location dropdown, you can place the video at the beginning or at the end of the gallery.
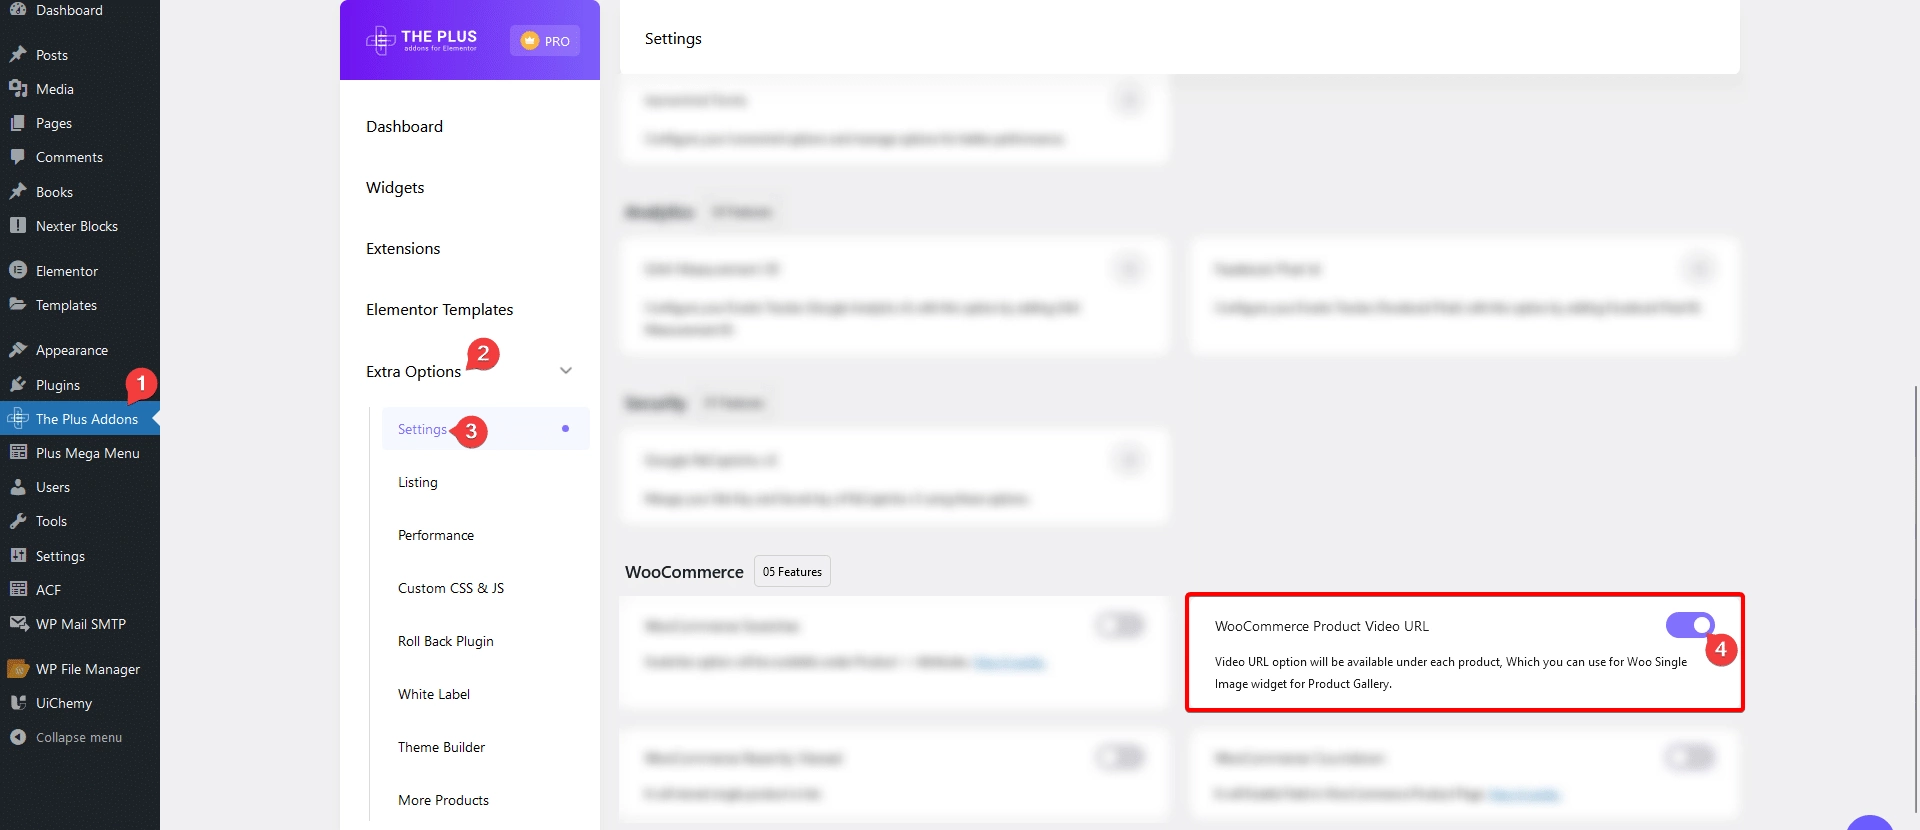
Note: Make sure to enable the WooCommerce Product Video URL toggle from The Plus Addons > Extra Options > Settings. Only then you’ll get an option to add a video on the product edit page.
Show Single Image
To show a single product image on a single product page, select Single Image from the Layout dropdown.
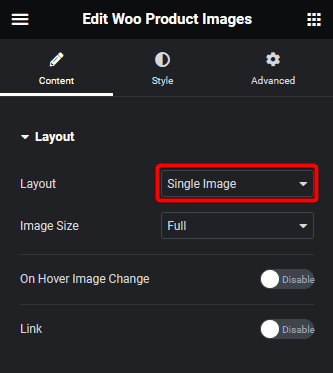
From the Image Size dropdown, you can select the image size.
Then you can turn on the On Hover Image Change toggle to show a different image on hover. For this make sure you’ve added images in the product gallery section of the product edit page.
You can make the image linkable by enabling the Link toggle.
From the Style tab, you can customize the style further.
Add Woo Single Price
To show product pricing related details such as add to cart button, product price, stock, items sold, and other attributes on a single product page, add the Woo Single Price widget to the appropriate location on the single product template.
In the Woo Single Pricing section, you’ll see five items, open one item.
From the Select dropdown, you have to select the data you want to show. Here, you’ll find five options –
Add to Cart – To show the add to cart button.
Price – To show the product price.
Stock – To show the stock status of the product.
Sold – To show how many products have been sold.
Attributes – To show different product attributes like category, tag and SKU.
Based on your selection, you’ll see relevant options.
Similarly, you can edit the other items, and you can also drag and drop to rearrange the items or you can delete an item as well.
You can click on the + Add Item to add more items.
From the Extra Options tab, you can show the in stock status by enabling the Add to Cart : Instock Status toggle.
Show Add to Cart Button
To show the add to cart button on a single product page, open an item from the Woo Single Price section.
From the Select dropdown, select Add to Cart.
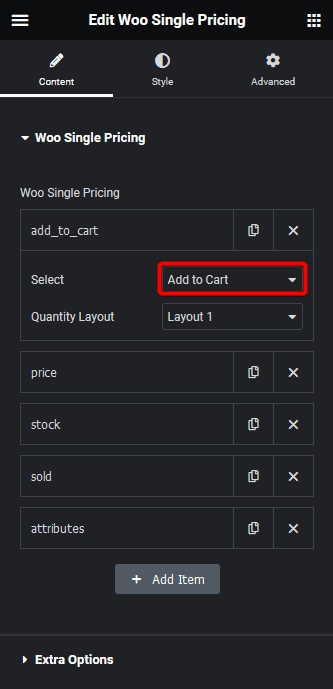
Then, from the Quantity Layout dropdown, you can select a layout style.
Now you’ll see the add to cart button with a quantity input field.
Show Product Price
To show the product price on a single product page, open an item from the Woo Single Price section.
From the Select dropdown, select Price.
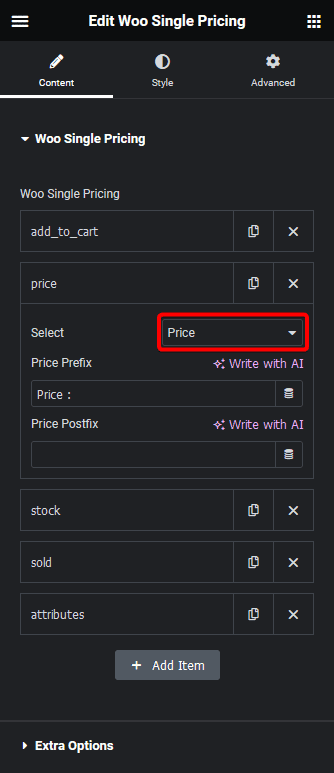
You can add a prefix and postfix text as well.
Now you’ll see the product price.
Show the Product Stock Status
To show the product stock status on a single product page, open an item from the Woo Single Price section.
From the Select dropdown, select Stock.
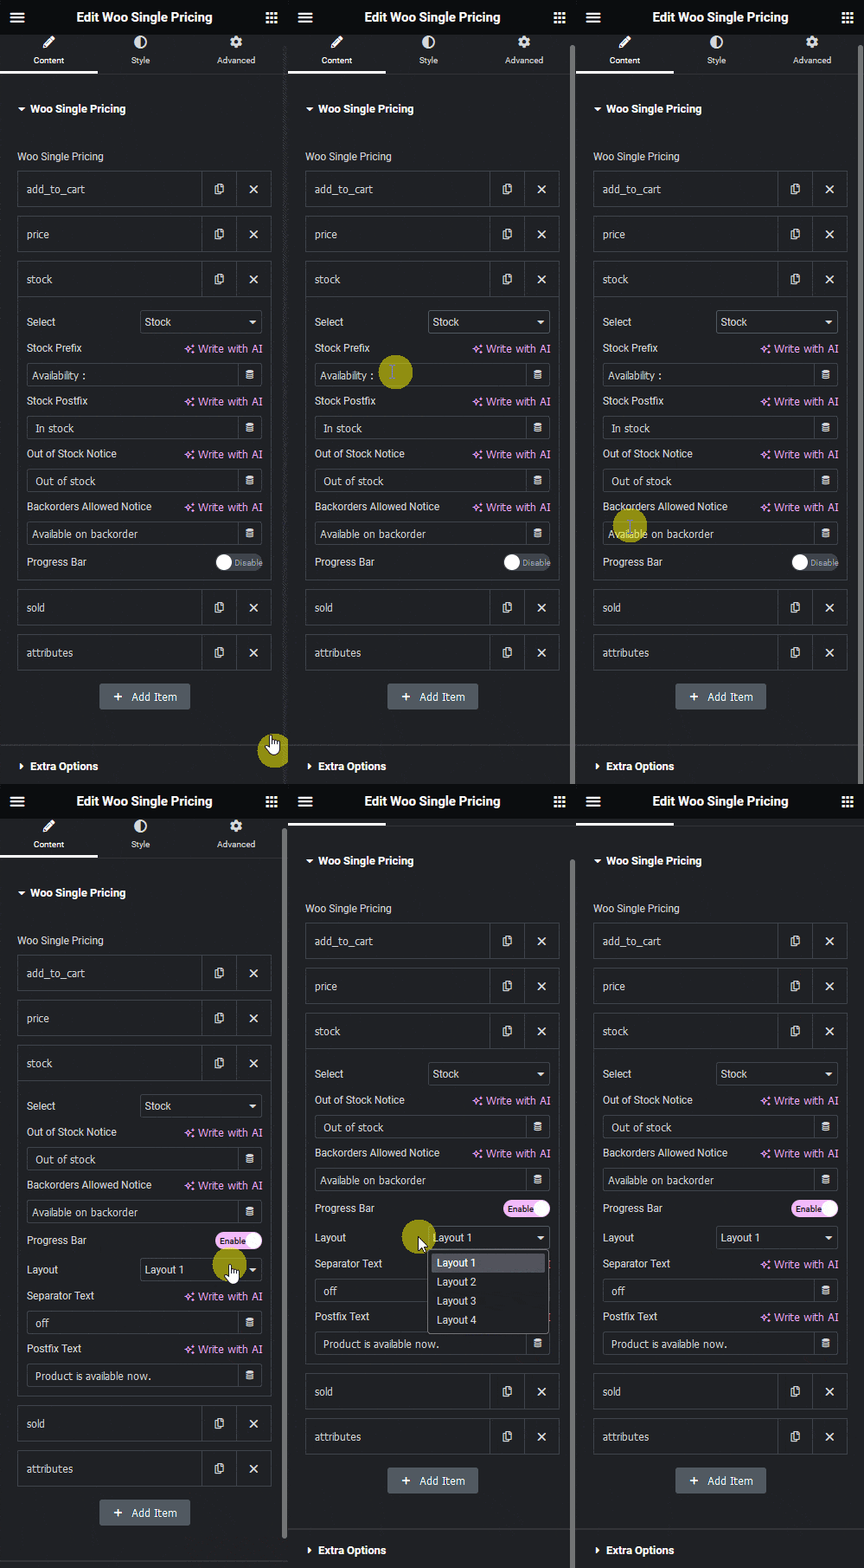
You can add a prefix and postfix text to the stock.
In the Out of Stock Notice field, you can add the text for out of stock status.
If you have enabled backorders for your products, you can manage the text from the Backorders Allowed Notice field.
By enabling the Progress Bar toggle, you can add a progress bar showing the product stock.
From the Layout dropdown, you can choose different styles for the progress bar.
Then in the Separator Text field, you can add a text between total and available stock.
You can add a text after the stock in the Postfix Text field.
To show the progress bar on a product page make sure the specific product is sold at least once and Stock management is checked under the Inventory tab on the product edit page.

Now, you’ll see the product stock status.
Show Number of Items Sold
To show the number of times the product is sold on a single product page, open an item from the Woo Single Price section.
From the Select dropdown, select Sold.
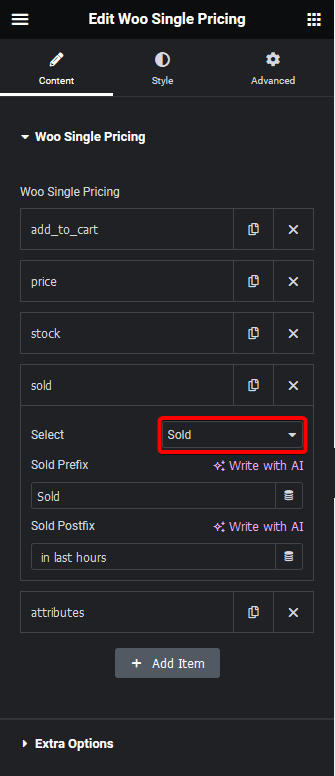
You can add a prefix and postfix text as well.
Now you’ll see how many times the product is sold.
Show Product Attributes
To show some product attributes on a single product page, open an item from the Woo Single Price section.
From the Select dropdown, select Attributes.
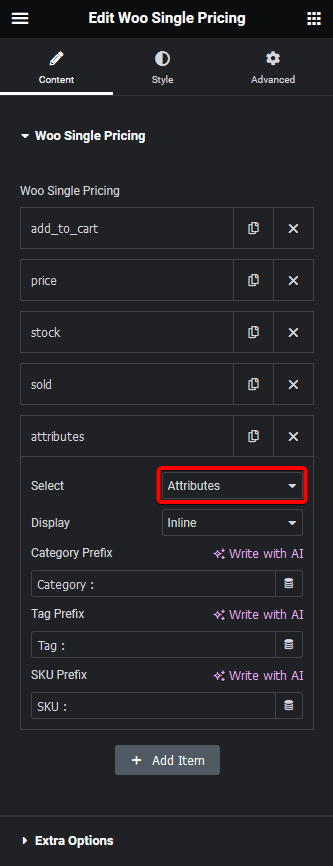
This will show the product category, tag and SKU.
From the Display dropdown, you can select the layout.
You can add a prefix text to all the attributes from their respective fields.
From the Style tab, you can customize the style further. From here, you can also style the product variation swatches.
Note: To show variation swatch options, make sure you’ve enabled WooCommerce Swatches and then created attributes and added them to the product.
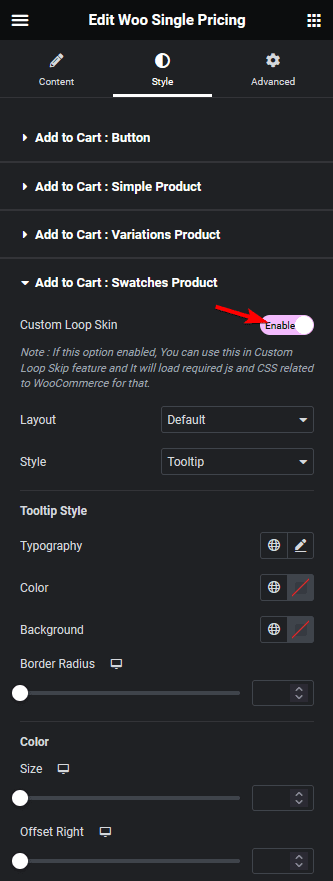
If you’ve created a custom product loop with the Product Listing widget and have used the Woo Single Pricing widget on the custom loop skin. In that case, you can show variation swatches on product loop items by enabling the Custom Loop Skin toggle from the Add to Cart : Swatches Product tab under the Style tab.
Suggested reading, 5 best WooCommerce product search plugins.
Add Woo Single Tabs
To add a tabbed section for showing product description, additional information or reviews on a single product page, add the Woo Single Tabs widget to the appropriate location on the single product template.
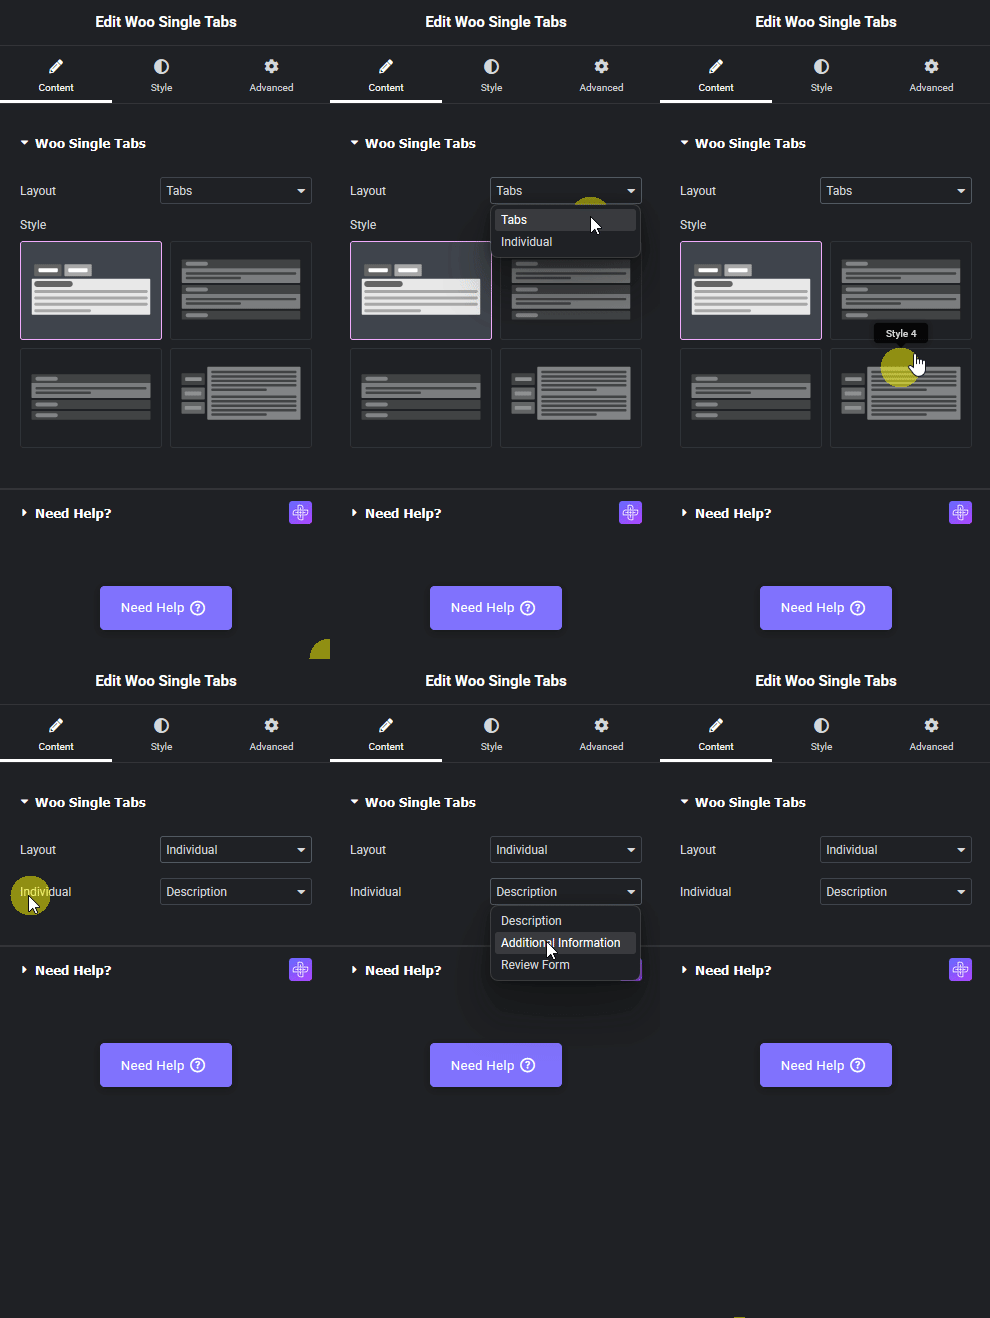
From the Layout dropdown, you can select the layout. Here, you’ll find two options –
Tabs – To show the description, additional information and reviews tabs.
Individual – To show any one tab.
Learn, how to edit WooCommerce thank you page in Elementor.
For the Tabs option, you can select a predefined style from the Style section.
But when you select the Individual option, you can show any one specific tab from the Individual dropdown.
From the Style tab, you can customize the style further.
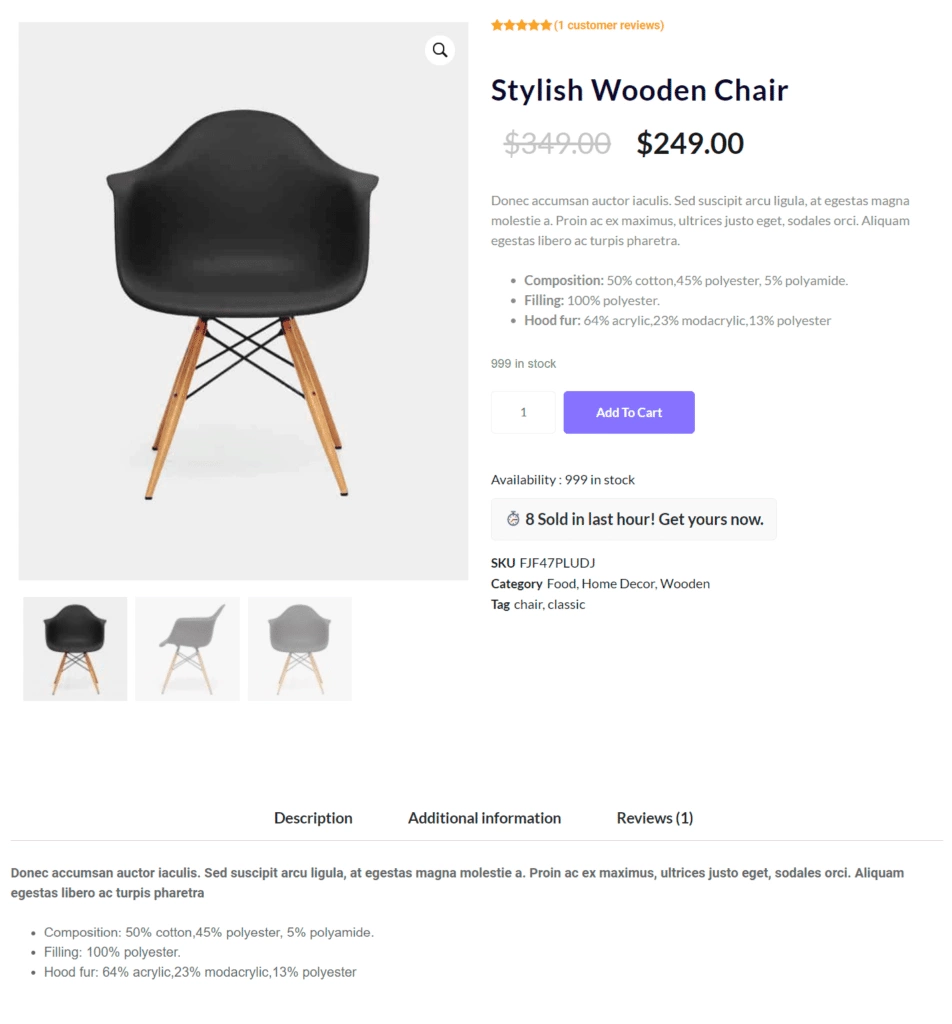
After using the above widgets you should have a beautiful single product page. You can use the Product Listing widget to show related products on the product page.
Also, read how to edit WooCommerce my account page in Elementor.
