






Dots tell a visitor how many slides a horizontal scroll section has and where they are in it, and let them jump straight to one.
You get them by connecting the Carousel Remote widget to the Horizontal Scroll widget, both from The Plus Addons for Elementor.
To check the complete feature overview documentation of The Plus Addons for Elementor Horizontal Scroll widget, click here.
Requirement – This widget is a part of The Plus Addons for Elementor Pro, make sure it’s installed & activated to enjoy all its powers.
Before You Start
- Edition: Pro — Horizontal Scroll is only in The Plus Addons for Elementor Pro. With the Pro plugin switched off the widget is not in the editor at all, and a page that already uses it shows nothing where the widget was.
- Widget to enable: Horizontal Scroll, switched on under The Plus Addons > Widgets.
- Second widget to enable: Carousel Remote, also under The Plus Addons > Widgets. It is a Pro widget too.
- You need a template: an Elementor Library template whose top-level sections are the slides. The widget turns each top-level section of that template into one horizontal slide.
Step 1: Give the Slides IDs and a Connection ID
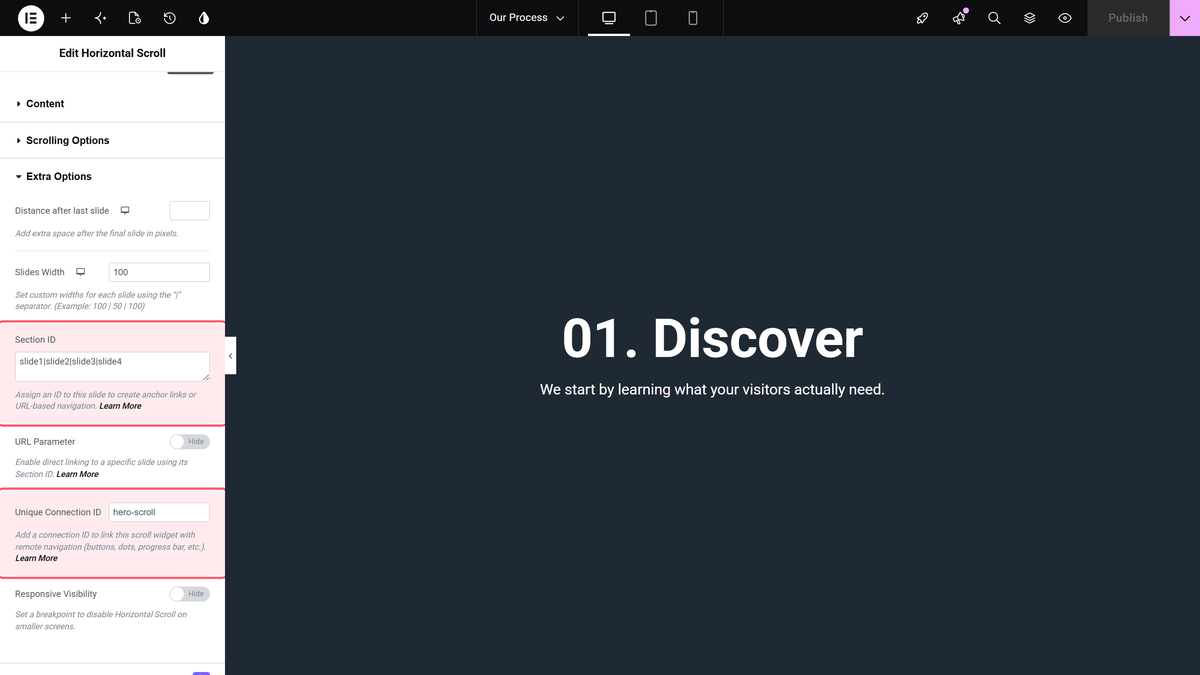
Select the Horizontal Scroll widget and open Extra Options.
- In Section ID, type one id per slide separated by | with no spaces, for example
slide1|slide2|slide3|slide4. The dots use these to know where to jump. - In Unique Connection ID, type a name of your own. This is what pairs the two widgets, so it has to be unique on the page.
Step 2: Point Carousel Remote at It
Add the Carousel Remote widget to the same page and open its Content section.
- Type the same value in Unique Connection ID.
- Set Remote Type to Horizontal Scroll. It starts on Carousel.

Step 3: Switch the Dots On
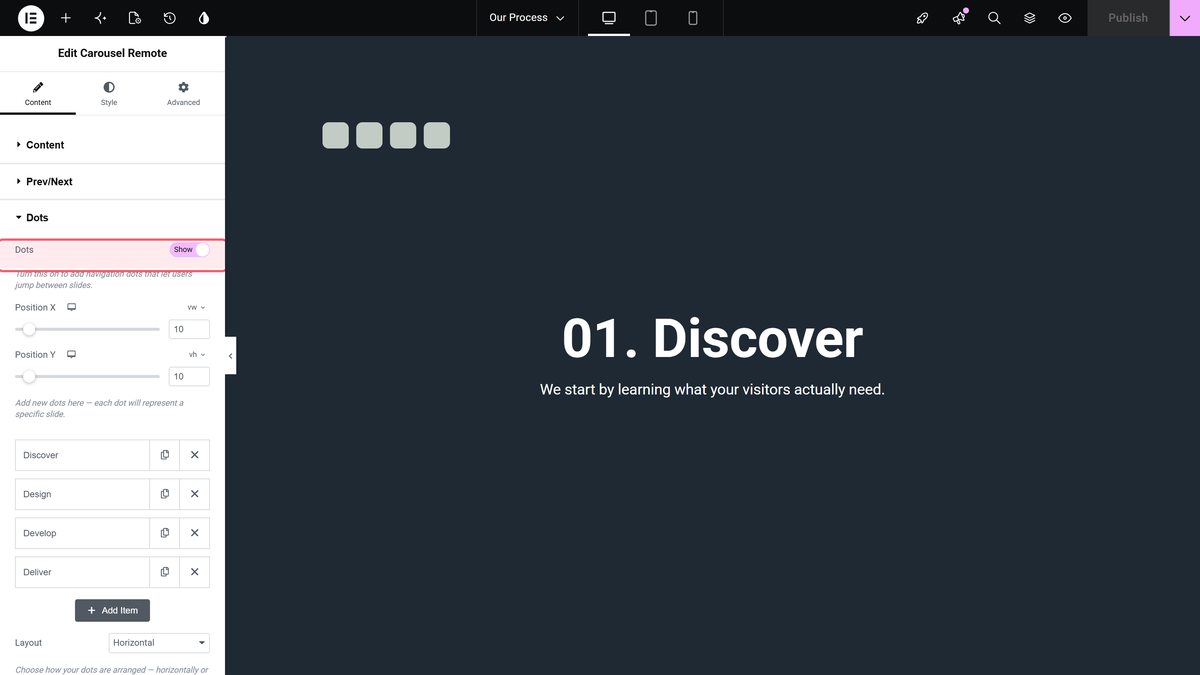
- Open the Dots section and switch Dots on.
- Use Position X and Position Y to place the row of dots over the slides.
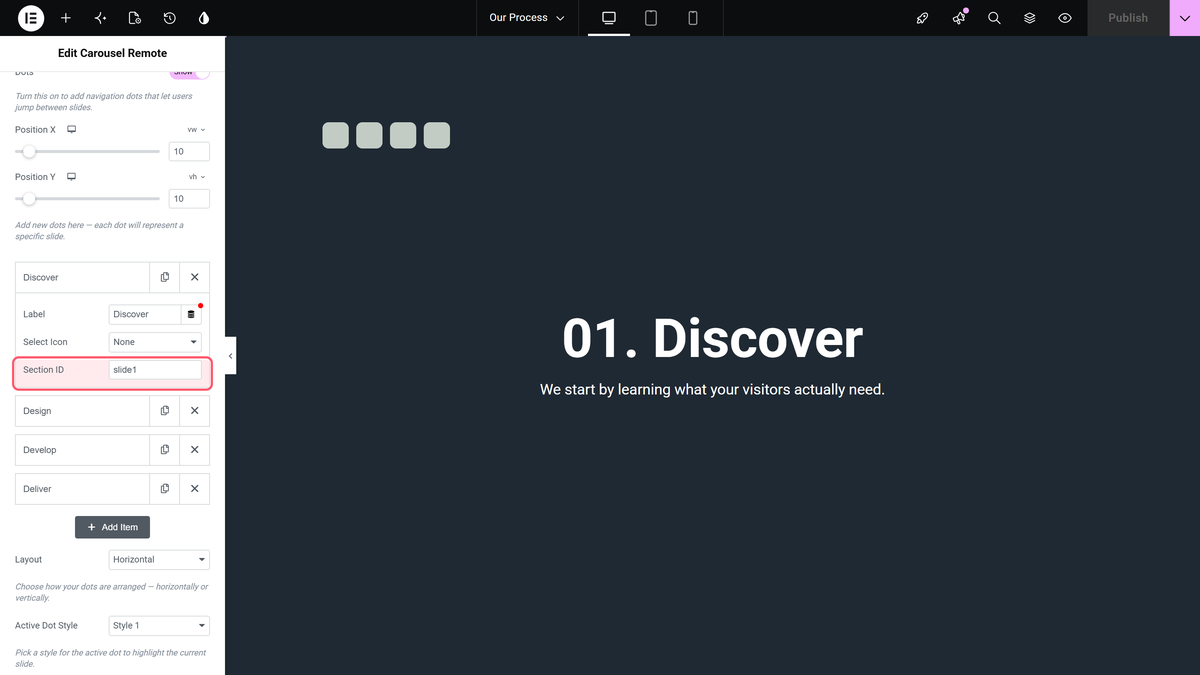
- Open Dot 1 and put the first slide’s id in its Section ID field. Add a Label if you want a tooltip, and choose an icon or image in Select Icon.
- Do the same for the other rows, changing the Section ID each time. Use + ADD ITEM so the number of dots matches the number of slides.
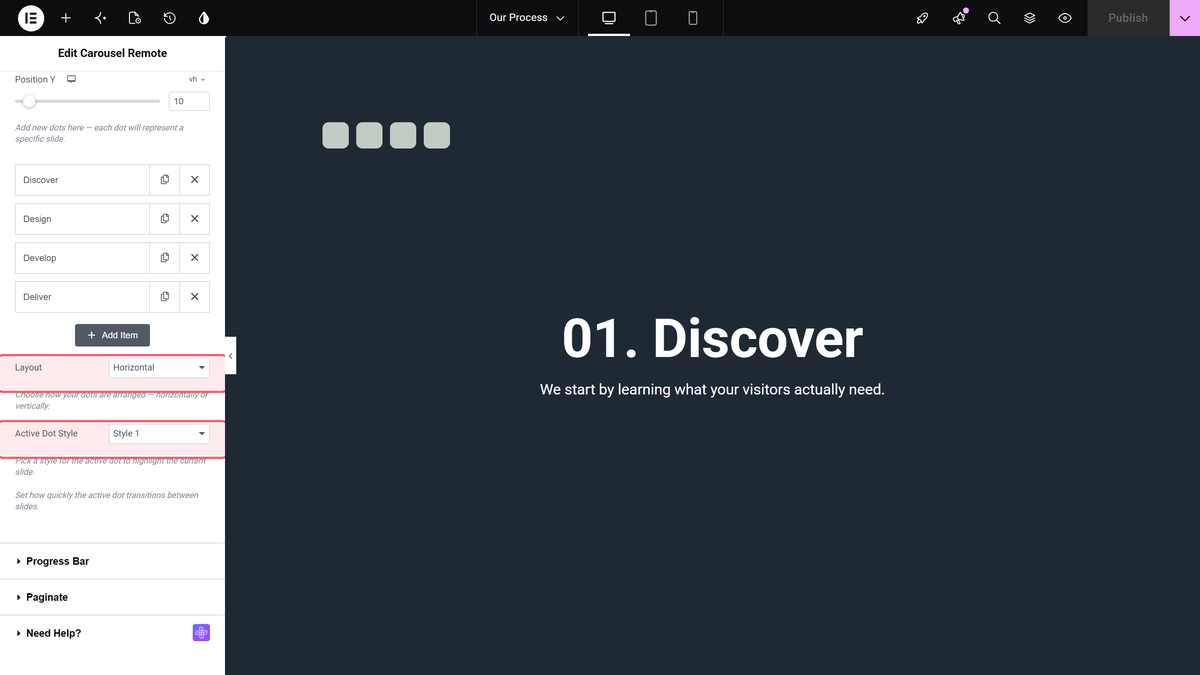
- Below the rows, Layout switches the dots between Horizontal and Vertical, and Active Dot Style chooses between Style 1 and Style 2 for the dot in view.
The Result
The dots sit over the horizontal scroll section and stay there while the slides move:

How It Behaves
- At runtime the Carousel Remote markup is moved inside the horizontal scroll section, so the dots stay on screen for the whole sideways run rather than scrolling past.
- The dot whose Section ID matches the slide in view is the active one, and it updates as you scroll.
- Clicking a dot scrolls the page so that its slide sits at the left edge.
- With URL Parameter switched on in the scroll widget, clicking a dot also puts that slide’s id in the address bar.
- A slide hidden on the current device is removed from the strip, and its dot is removed with it.
Limitations
- The number of dot rows has to match the number of slides. With three dots and four slides, the last slide highlights no dot at all.
- Each dot needs its Section ID filled in by hand. Nothing is filled in for you.
- Both widgets are Pro only. With the Pro plugin off, neither the slides nor the dots render.
- If the slides have different widths through Slides Width, a dot click lands off-centre, because the jump is worked out from the first slide’s width.
- Active Dot Style offers two styles only.
Troubleshooting
The dots do nothing
The two Unique Connection ID values have to match exactly, and Remote Type on the remote must be Horizontal Scroll.
Clicking a dot goes nowhere
That dot’s Section ID does not match any id in the scroll widget’s Section ID list. Check for typos and for spaces around the |.
The last slide does not highlight a dot
Add another dot row with + ADD ITEM so the count matches the number of slides.
The dots scroll away with the page
Put the Carousel Remote widget on the same page as the scroll widget and connect them. Unconnected, it renders where you dropped it.
