






Are you looking to add images creatively in Elementor? With the Cascading Image widget from The Plus Addons for Elementor, you can add images in a cascading layout.
This allows users to add a unique and eye-catching element to their websites, making them stand out from the competition.
Check the Live Widget Demo
Required Setup
- Elementor FREE Plugin installed & activated.
- You need to have The Plus Addons for Elementor plugin installed and activated.
- This is a Premium widget, and you need the PRO version of The Plus Addons for Elementor.
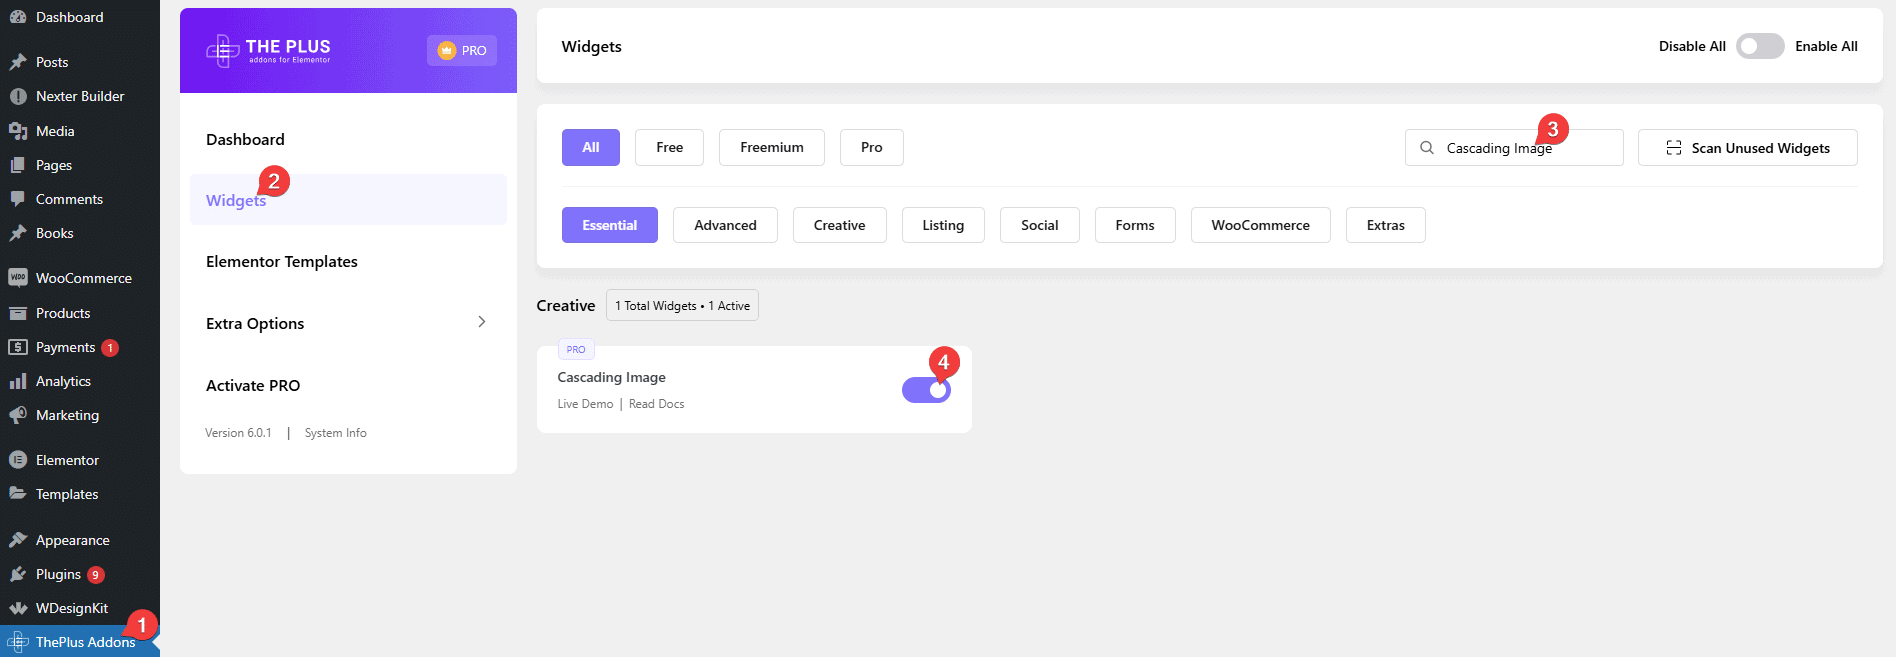
- Make sure the Cascading Image widget is activated, to verify this visit The Plus Addons → Widgets → and Search for Cascading Image and activate.
Learn via Video Tutorial:

How to Activate the Cascading Image Widget?
Go to
- The Plus Addons → Widgets
- Search the widget name and turn on the toggle.
Key Features
- Multiple Content Type – You can add cascading effects on image, text content and Lottie files.
- Slide Show – You can easily create an image cascading slide show.
- Image Mask – You can easily add a mask on images of the image cascade.
- Popup – You can add a popup on images of the image cascade.
- Multiple Effects – You can add multiple effects like scrolling effect, parallax effect and more on images of the image cascade.
- Image Animation – You can easily add animation to the image.
How to Use the Cascading Image Widget?
Add the Cascading Image widget to the page.
Image Cascading
Note: By clicking on the Import Presets button, you can import a ready-made design and customize it as per your requirements.
In the Add Multiple Cascading Sections you have to add content. Here you’ll find one repeater item; by default, open it.
From the Layer Position section, you can position and set the width of the content for desktop, tablet and mobile separately.
Left (Auto / %) – From here, you can position the content from left.
Right (Auto / %) – From here, you can position the content from right.
Top (Auto / %) – From here, you can position the content from the top.
Bottom (Auto / %) – From here, you can position the content from the bottom.
Width – From here, you can set the width of the element.
Set the width and position of the content as per your requirements.
To set different positions for tablet and mobile, enable the Responsive Values toggle from the Tablet and Mobile tabs, respectively.
Then, from the Layer Type dropdown, you have to select the content type. Here you’ll find three options –
- Image – From here, you can add an image to create an image cascading effect.
- Text Content – From here, you can add text content.
- Lottie – From here, you can add Lottie Files.
You’ll see different settings for each option, select the option as per your requirement. Let’s select Image here.
In the Image Select section, you have to add your image.
Then from the Image Resolution dropdown, you can set the image size.
From the Extra Options section, you can add different effects.
Note: Most of these options work similarly to the global options available for the other widgets of The Plus Addons for Elementor.
Continues Effect – From here, you can add different continuous animation effects like pulse, floating, tossing, rotating and more to the content (image and text content).
Mask Image Shape – From here, you can add an image mask to the content (image and text content).
Magic Scroll – From here, you can add a scrolling effect to the content (image and text content).
Tooltip – From here, you can add a tooltip to the content (image, text content and Lottie).
Special Effect – From here, you can add special overlay effects to the content (image and text content).
Parallax Move – From here, you can add a mouse move parallax effect to the content (image and text content).
On Hover Tilt – From here, you can add a hover tilt effect to the content (image and text content).
Link /Popup – From here, you can add or link to additional content from the content (image and text content). Here you’ll find two options –
- Link – With this option, you can add an external link to the content.
- Popup – With this option, you can add a popup to the content.
From the Normal/Hover tab you can add different CSS effects to the Image content type for normal and hover states.
In the Normal tab, you’ll find the following options –
Overlay Background – From here, you can add a background overlay color to the image.
Box Shadow – From here, you add a box shadow to the image.
Opacity – From here, you add an opacity to the image.
Transform CSS – From here, you add a custom CSS transform property to the image.
Border Radius – From here, you add a border radius to the image.
Then in the Hover tab, you’ll find the same options for the hover state.
From the Responsive Visibility toggle, you can select to show or hide the image for responsive devices separately.
You can click on the + Add Item button to add more items.
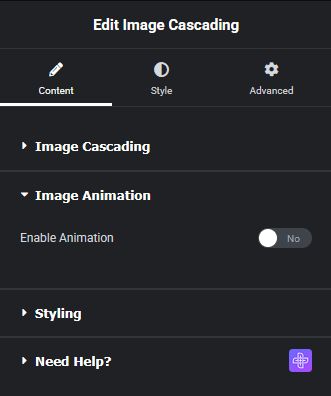
Image Animation
By enabling the Enable Animation toggle, you can add animation to the image.
Styling
From the Minimum Height section, you have to set a minimum height for the widget.
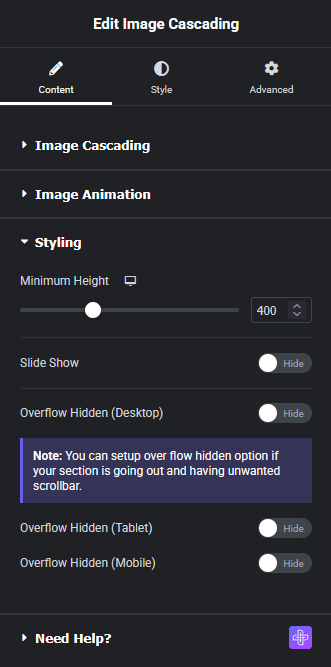
Note: The scrolling effect and elements position will be based on this minimum height.
From the Slide Show toggle, you can add a slide show to the image cascade.
You can hide the overflow of the content for responsive devices separately from Overflow Hidden (Desktop), Overflow Hidden (Tablet) and Overflow Hidden (Mobile) toggles.
How to Style the Cascading Image Widget?
If you are using the Lottie as the content then you’ll find the styling options under the Style tab.
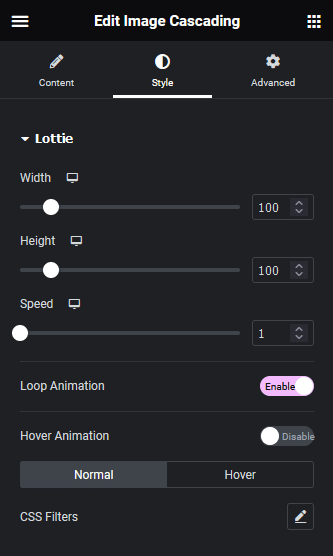
Lottie – From here, you can style the Lottie Files.
- Width – From here, you can set the width of the LottieFiles.
- Height – From here, you can set the height of the LottieFiles.
- Speed – From here, you can control the LottieFiles animation speed.
- Loop Animation – From here, you can play the LottieFiles animation in a loop.
- Hover Animation – From here, you can play the LottieFiles animation on mouse hover.
- CSS Filters – From here, you can add different CSS filters to the LottieFiles for normal and hover states.
Advanced options remain common for all our widgets, you can explore all its options from here.
