Do you want to customize the look and feel of your Elementor website beyond the options provided by the widgets? This is where custom CSS comes into play, which can help you customize and make specific design changes to your Elementor website.
With the Section Custom CSS extension from The Plus Addons for Elementor, you can easily add custom CSS to target specific sections, inner sections, containers, inner containers and elements within those in Elementor.
Required Setup
- Elementor FREE Plugin installed & activated.
- You need to have The Plus Addons for Elementor plugin installed and activated.
- This is a Premium feature, and you need the PRO version of The Plus Addons for Elementor.
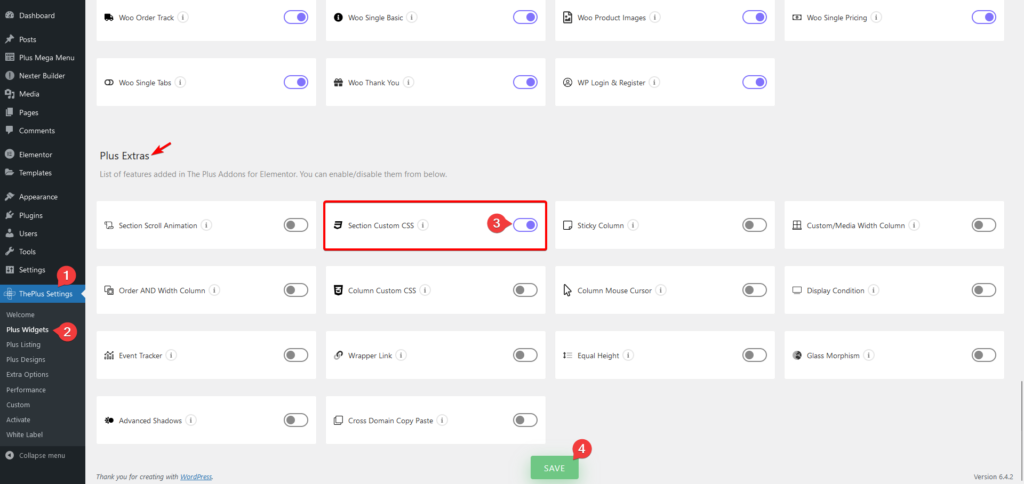
- Make sure the Section Custom CSS extension is activated, to verify this, visit Plus Settings → and Scroll down to Plus Extras and look for Section Custom CSS and activate.
How to Activate the Section Custom CSS Extension?
Go to
- The Plus Settings → Plus widgets
- Scroll down to Plus Extras and look for the extension turn on the toggle then click Save.

Note: If you want to add custom CSS to columns of the old Elementor Sections you need to activate the Column Custom CSS extension.
Key Features
- Target specific section – You can easily target a specific section or content within it.
How to Add Custom CSS in Elementor?
Select a section, inner section, container or inner container and follow the steps –
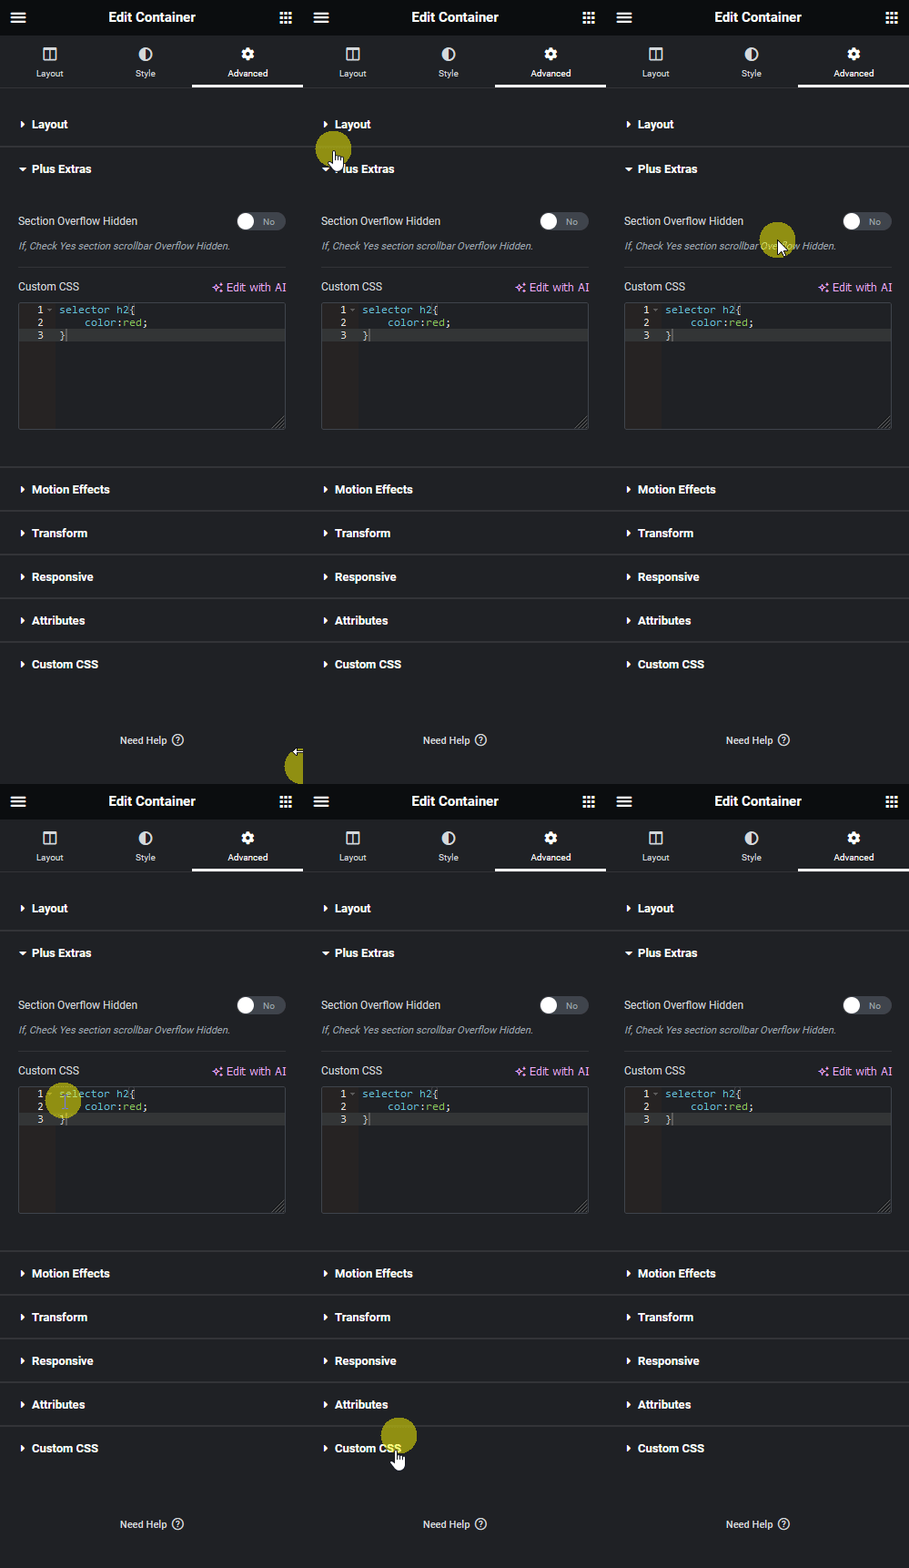
1. Go to Advanced > Plus Extras.
By enabling the Section Overflow Hidden toggle, you can hide the scrollbar of the section.
2. Then in the Custom CSS section, you can write your custom CSS.
You can write global CSS rules that can affect the entire site or you can use the “selector” prefix to target the section itself or the content within the section only.

For example, if you only want to change the color of H2 in the section you can write the CSS like this
selector h2{
color:red;
}
This will only change the color of H2 in that section.
Following this process, you can target and customize the style of any widget.
For more in-depth guidance on using CSS in Elementor for free. <- Click here to learn more.


