
Google Analytics 4 is built around events. Out of the box it records page views and a handful of automatic interactions — not the specific clicks that matter on your own pages.
The Event Tracker extension of The Plus Addons for Elementor sends a GA4 event, with your own properties attached, when a visitor clicks any Elementor widget.
To check the complete feature overview documentation of The Plus Addons for Elementor Event Tracker extension, click here.
Requirement – This extension is a part of The Plus Addons for Elementor Pro, make sure it’s installed & activated to enjoy all its powers.
Before You Start
- Edition: Pro — Event Tracker ships only in The Plus Addons for Elementor Pro. With the free plugin alone the Events Tracker section does not appear in the Advanced tab at all.
- Extension to enable: Event Tracker, under The Plus Addons > Extensions in the Plus Visibility group. It is off until you turn it on.
- Prerequisite: a GA4 Measurement ID on the site, saved under The Plus Addons > Settings > Analytics > GA4 Measurement ID. Without it the extension only logs a message in the browser console.
- Prerequisite: something to click. The event fires on a click, so put the tracker on a button, a link, a form submit button or a video play button — not on a block of plain text.
Find Your GA4 Measurement ID
Skip this if you already have it. Meta and Google change their own screens from time to time. If yours does not match the screenshots below, follow their own guide — the steps inside The Plus Addons do not change.
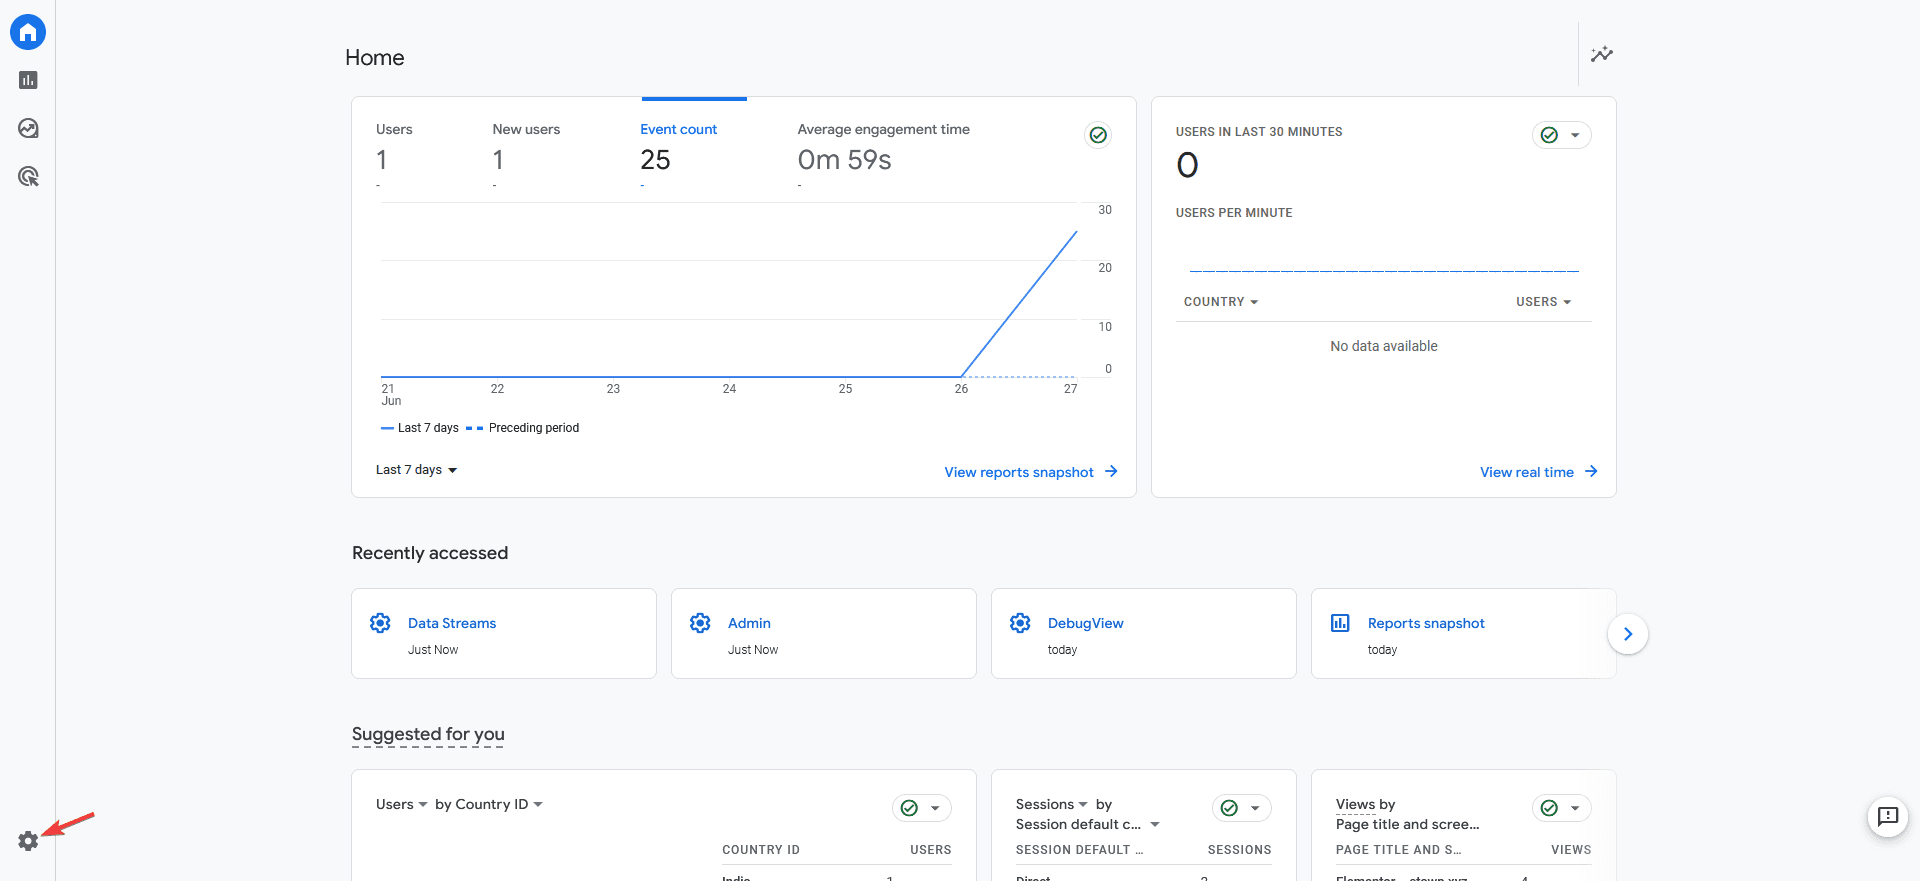
- Open Google Analytics and click Admin.
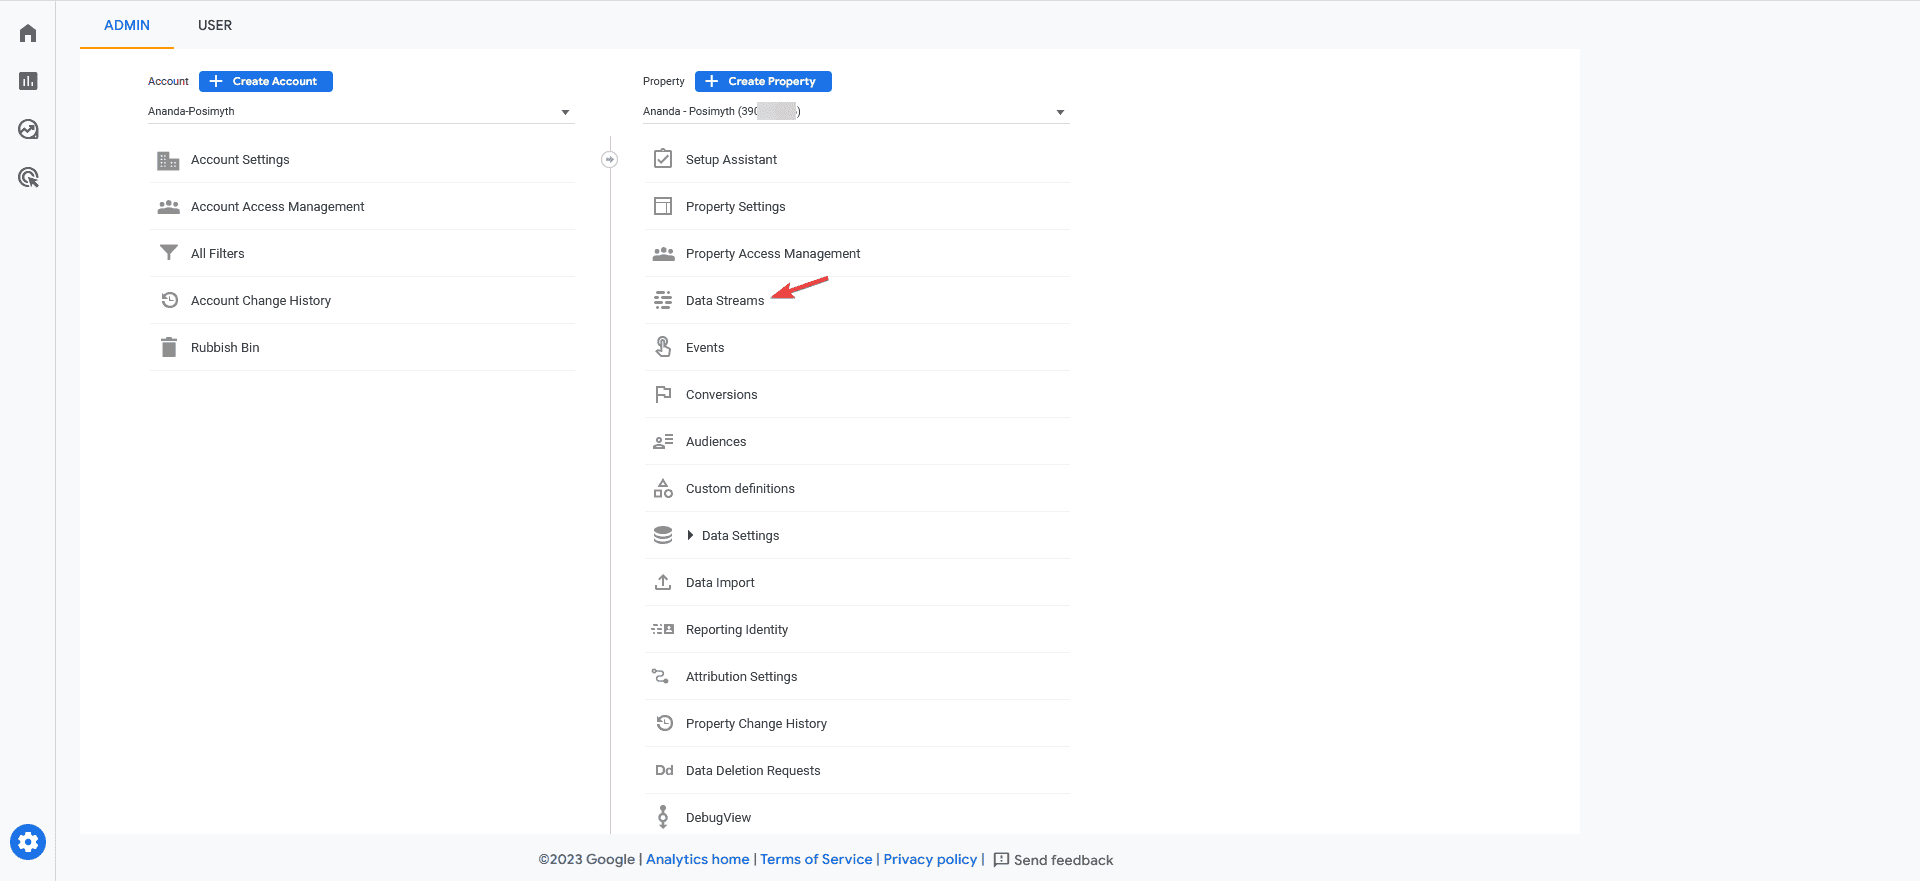
- Open Data Streams.
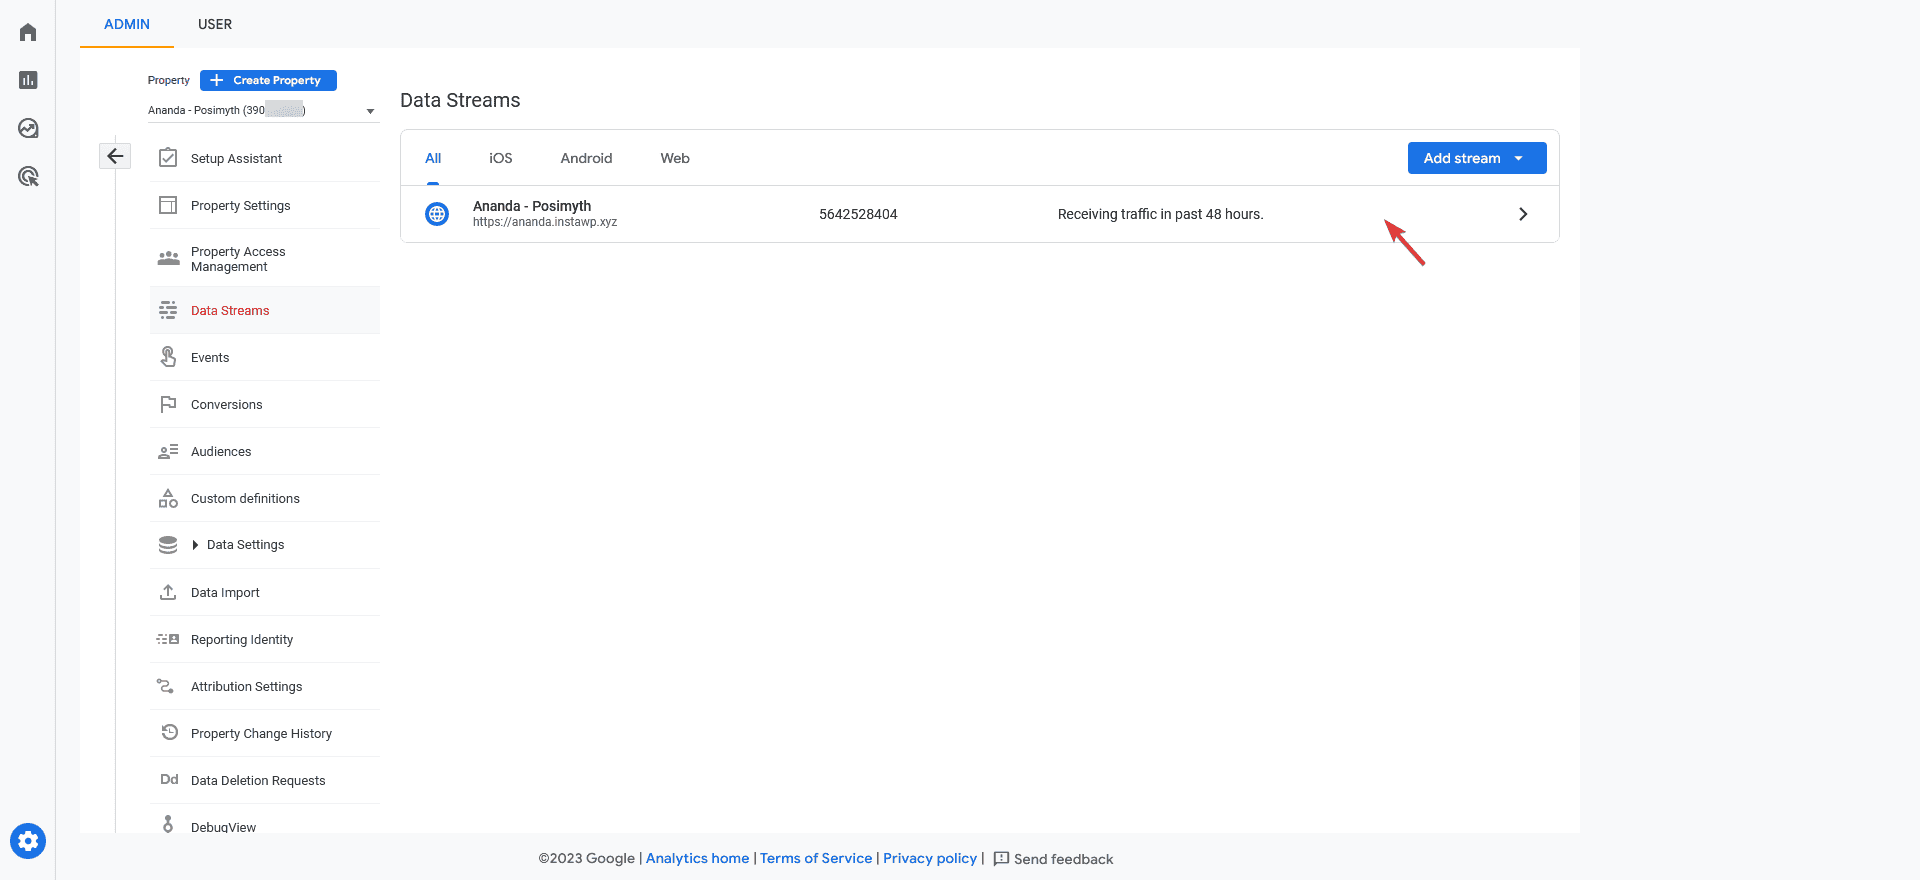
- Click the stream for the property you want.
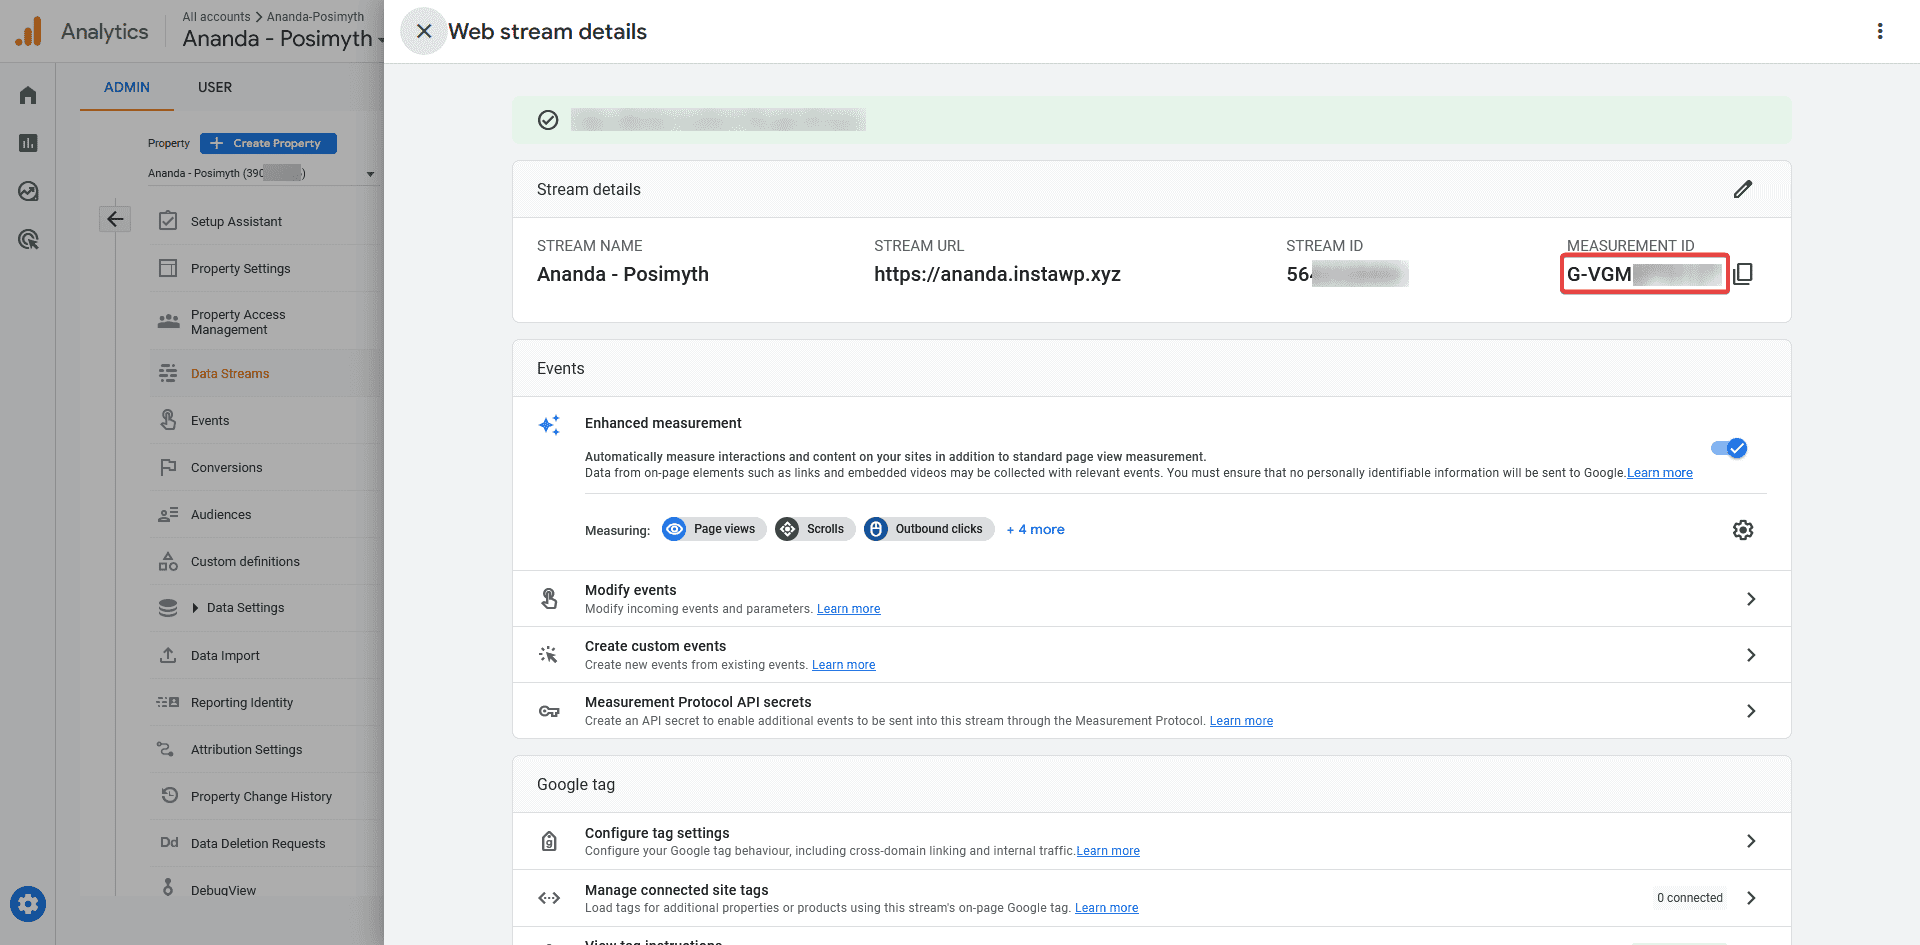
- Copy the Measurement ID. It starts with
G-.
Save the Measurement ID in The Plus Addons
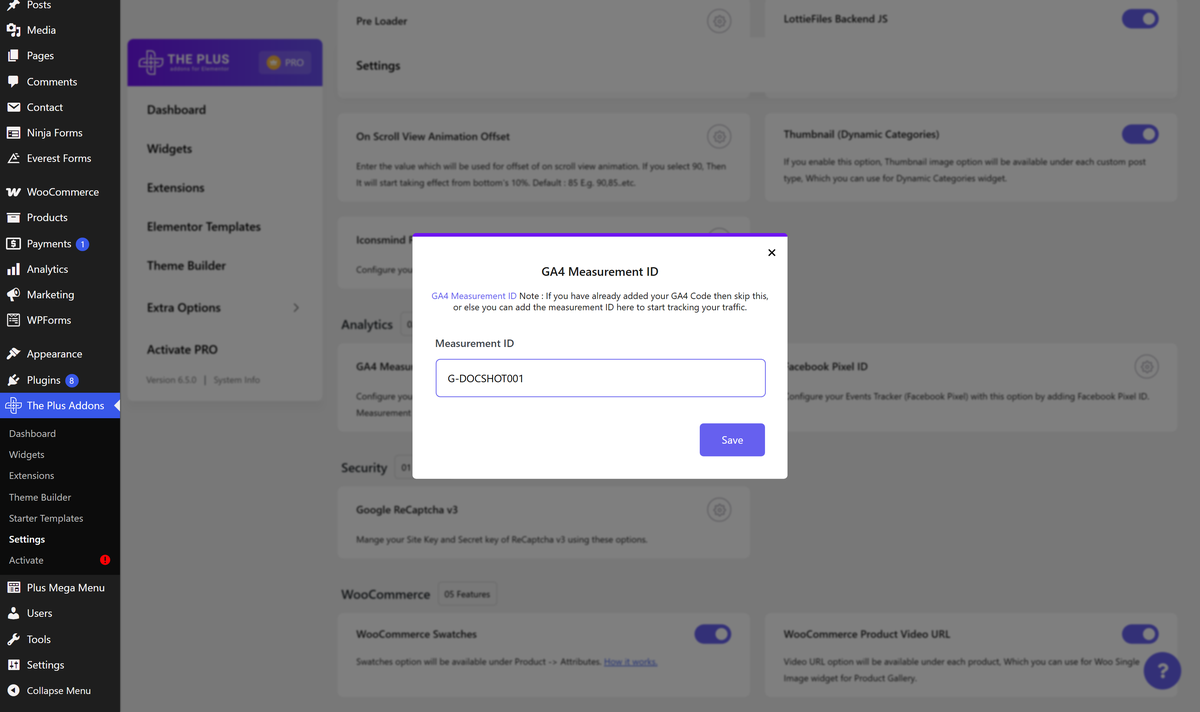
Skip this if GA4 is already on your site through another plugin, Google Tag Manager or a script in your theme. The popup says as much: add the ID here only if you have not added the GA4 code already.
- Go to The Plus Addons > Settings and scroll to the Analytics group.
- Click the gear button on the GA4 Measurement ID card.
- Paste the ID into the Measurement ID field and click Save.
Track a Click as a GA4 Event
- Select the widget in Elementor and open the Advanced tab.
- Scroll to the bottom and open Events Tracker.
- Turn on Google Analytics 4.
- Leave Event Type on Recommended to use Google’s own event list, then pick one from Select Event. There are 31, from Ad Impression to View Promotion; the default is Ad Impression, so change it. For a checkout button, pick Purchase.
- In Event Properties, open the item and fill in Name and Value. Use + Add Item for more rows.
- Update the page.
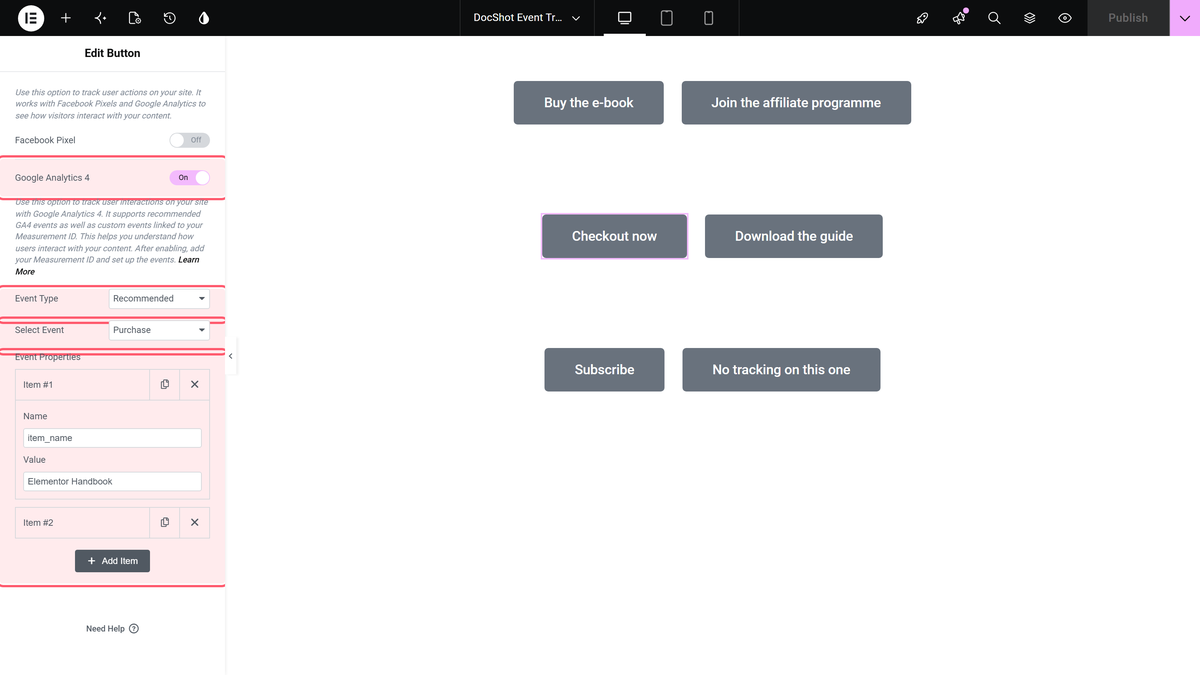
Name is the parameter GA4 will show against the event; Value is what it holds. Selling several e-books, for instance, you might send item_name / Elementor Handbook and value / 29.
Check That the Event Fires
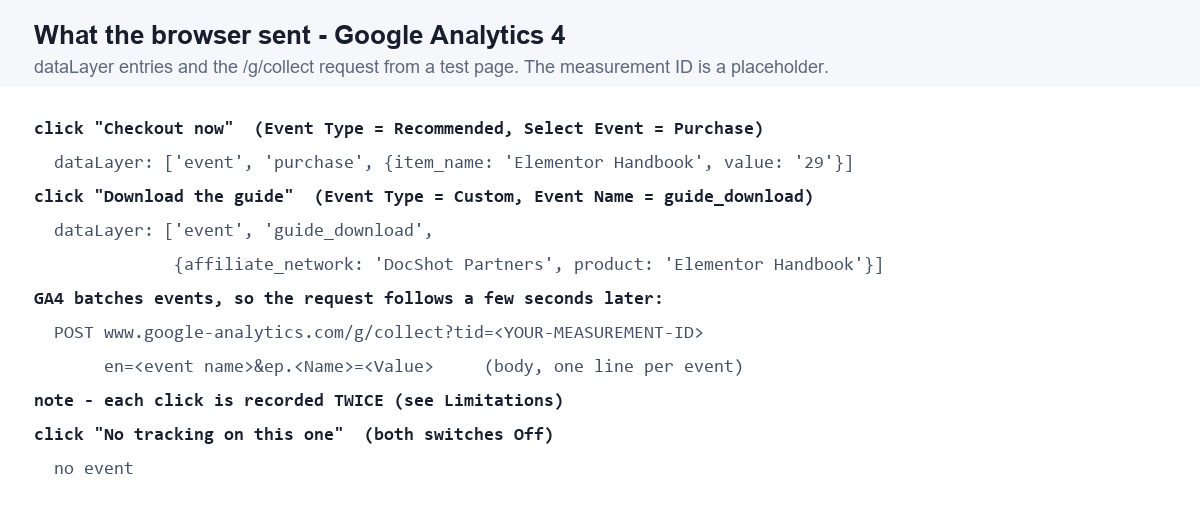
On the published page a click pushes the event, with its properties, and GA4 sends it on a few seconds later. This is what the browser actually did on a test page:
To see it on your own property, GA4 has a live view.
- Install the Google Analytics Debugger Chrome extension and turn it on.
- Reload your page and click the tracked element.
- In Google Analytics, go to Admin > DebugView. The event appears within seconds, and opening it shows your properties.
Turn ad blockers off and do not use a browser that blocks trackers by default, or the request never leaves. If DebugView stays empty, this guide lists the usual causes.
Outside DebugView, GA4 reports can take up to 24 hours to show a new event.
Settings
| Setting | What it does | Default |
|---|---|---|
| Google Analytics 4 | Sends a GA4 event on click, and loads gtag.js with your measurement ID. | Off |
| Event Type | Recommended uses Google’s event list; Custom lets you type your own name. | Recommended |
| Select Event | One of 31 GA4 recommended events. Shown only when Event Type is Recommended. | Ad Impression |
| Event Properties | Repeater of Name / Value pairs sent with the event. | one empty row |
How It Behaves
- The event is sent on a click, not on page load. GA4’s own
page_viewis separate. - The property rows are sent as event parameters, one per row, named exactly as you typed them.
- Turning the switch on anywhere on a page makes that page load Google’s
gtag.js. - GA4 batches requests, so the network request follows the click by a second or two rather than appearing instantly.
Limitations
- Every GA4 event is recorded twice. On a button the same link matches two of the extension’s internal selectors, so one click pushes two identical events and the request carries both. Your GA4 counts for these events will be double. Meta events are not affected.
- On a container, only the first link is tracked. If you put the tracker on a container holding three buttons, only the first one sends the event. Put the tracker on each button instead.
- A missing measurement ID is silent in the editor. With the switch on and no ID saved, the only warning is a line in the browser console, and it points at an old menu path.
- There is no way to send a numeric value typed as a number; every property value is sent as text.
Troubleshooting
DebugView shows nothing
Check the measurement ID is saved under The Plus Addons > Settings > Analytics > GA4 Measurement ID, that the debugger extension is on, and that no ad blocker or tracking protection is running.
The event appears but the properties do not
Open the repeater item and check both Name and Value are filled in. An empty row sends nothing.
Each click shows up twice
That is the known double-fire above. The events are real; the count is doubled.
Only one of several buttons is tracked
The tracker is on the container rather than on the buttons. Turn it on for each button separately.