Google Reviews have become an essential aspect of online business success. Google reviews hold significant weight in influencing consumer decisions. Therefore, it is crucial for businesses to showcase their positive reviews on their websites to build trust and credibility with potential customers.
With the Social Reviews widget from The Plus Addons for Elementor, you can easily show Google reviews on your Elementor website.
To check the complete feature overview documentation of The Plus Addons for Elementor Social Reviews widget, click here.
Requirement – This widget is a part of The Plus Addons for Elementor, make sure it’s installed & activated to enjoy all its powers.
To show Google Reviews with the Social Reviews widget from The Plus Addons for Elementor, you have to create a Google Places API Key and a Place ID.
Create a Google Places API Key
1. Go to Google Cloud console, to create a project, if you don’t have one.
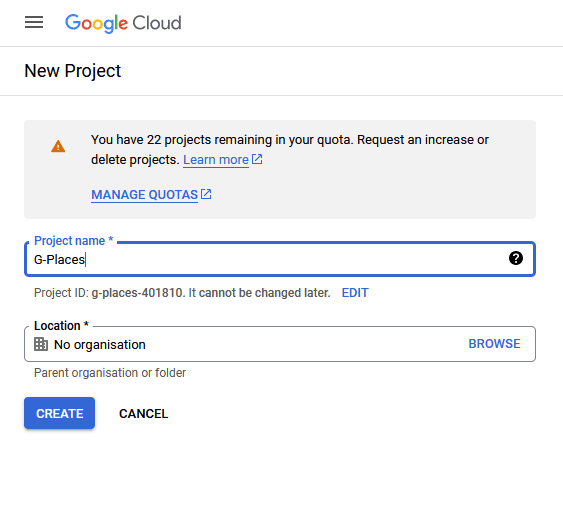
2. Once the project is created, click on the Hamburger icon > APIs and services > Credentials from the dashboard.
Note: If you have an existing project, you can directly go to the Credentials page.
3. Then go to Library.
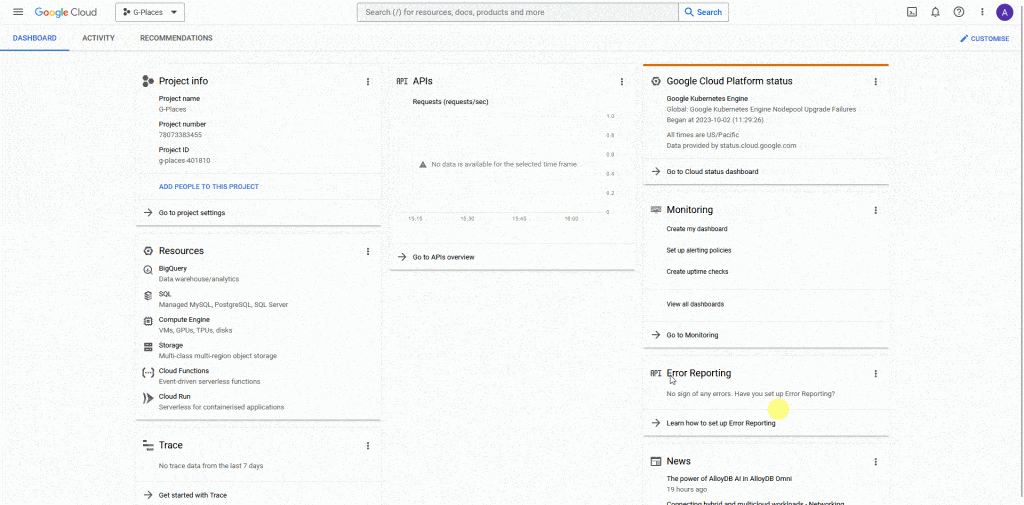
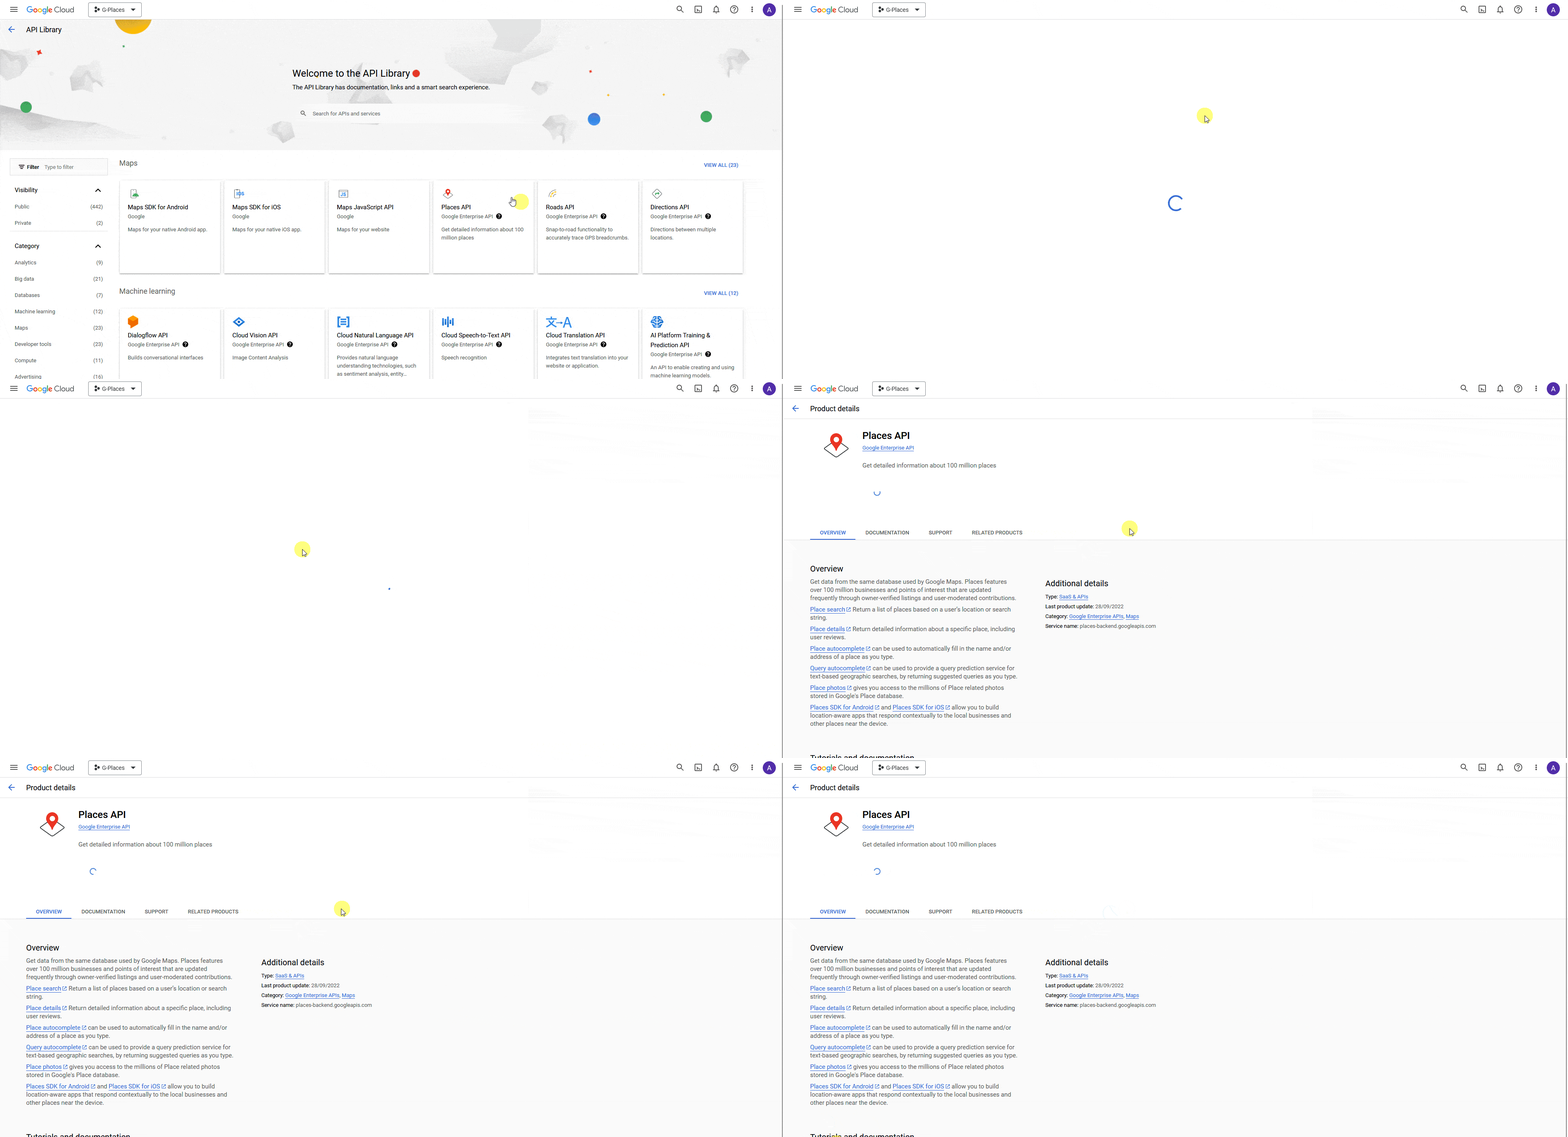
4. In the search bar search for Places API and click on the Places API then click Enable.
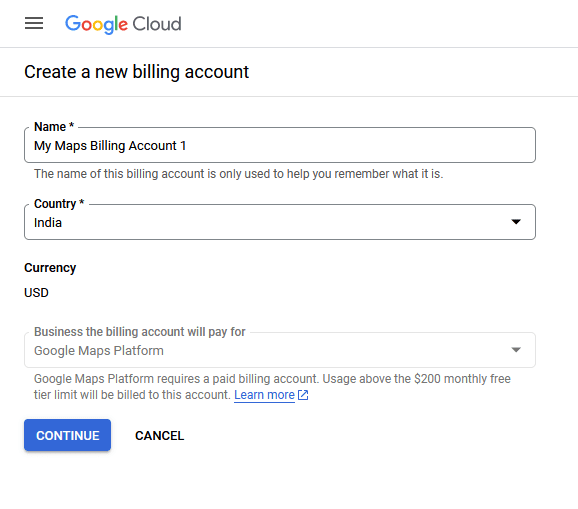
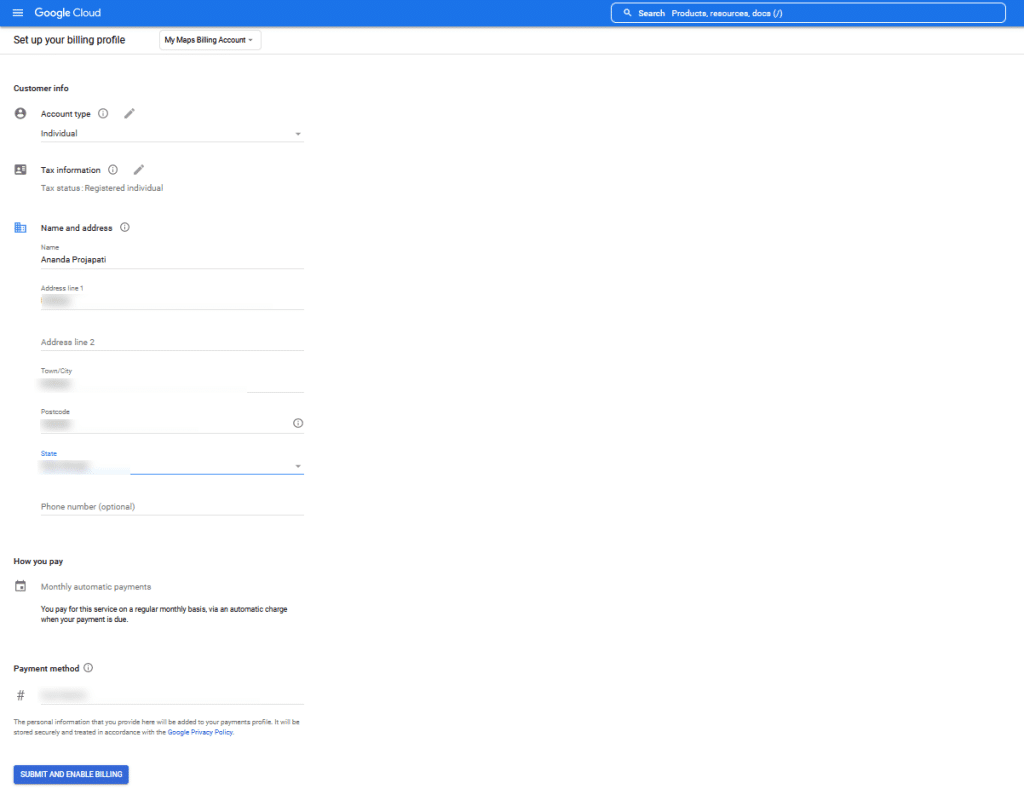
5. On the next screen, you have to add your billing details, if not added already.
Note: If you have an active billing, you can skip to step 7.
Add your billing account name and select your country then click on Continue button.
6. On the next page, add your billing details. Select the account type, add tax details, personal details and add a payment method.
Then click on the Submit and Enable Billing button.
7. Once the billing is setup, go back to the project dashboard, from the listed APIs click on the Maps JavaScript API and enable it.
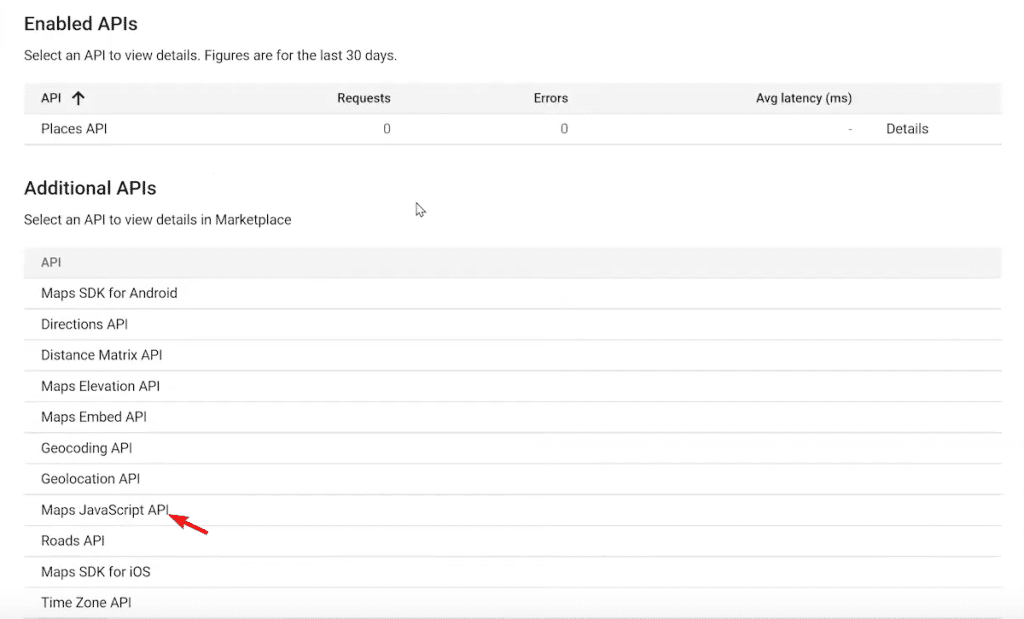
Note: You can also directly search for the Maps JavaScript API in the Library.
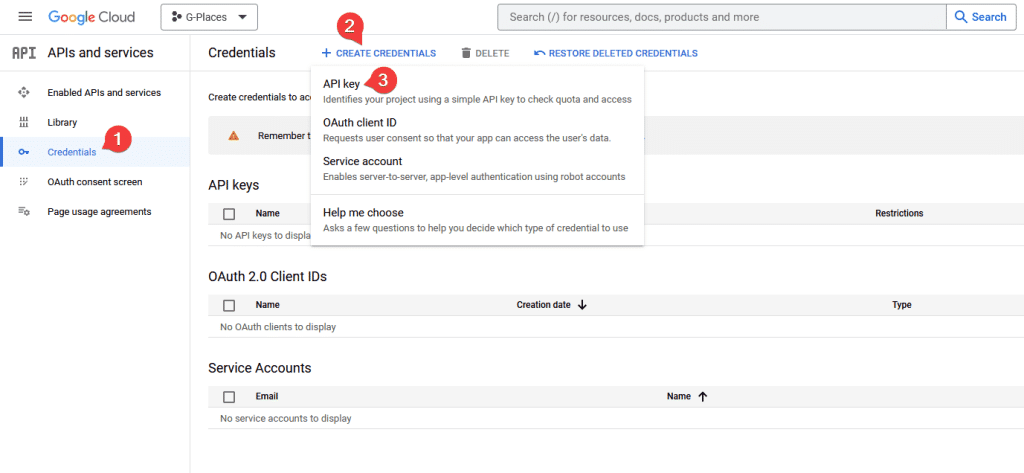
8. Then click on the Credentials on the sidebar.
9. On the next page, click on the + CREATE CREDENTIALS > API Key at the top.
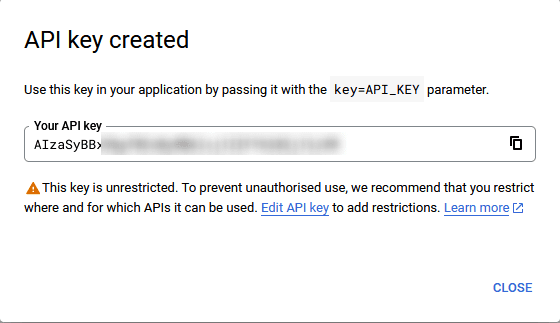
10. Then you’ll see your API key in a popup, copy the key in a notepad.
Find a Place ID
1. Go to Place ID to find a place Id.
2. In the map search field, you have to search for the location you want to show the reviews of.
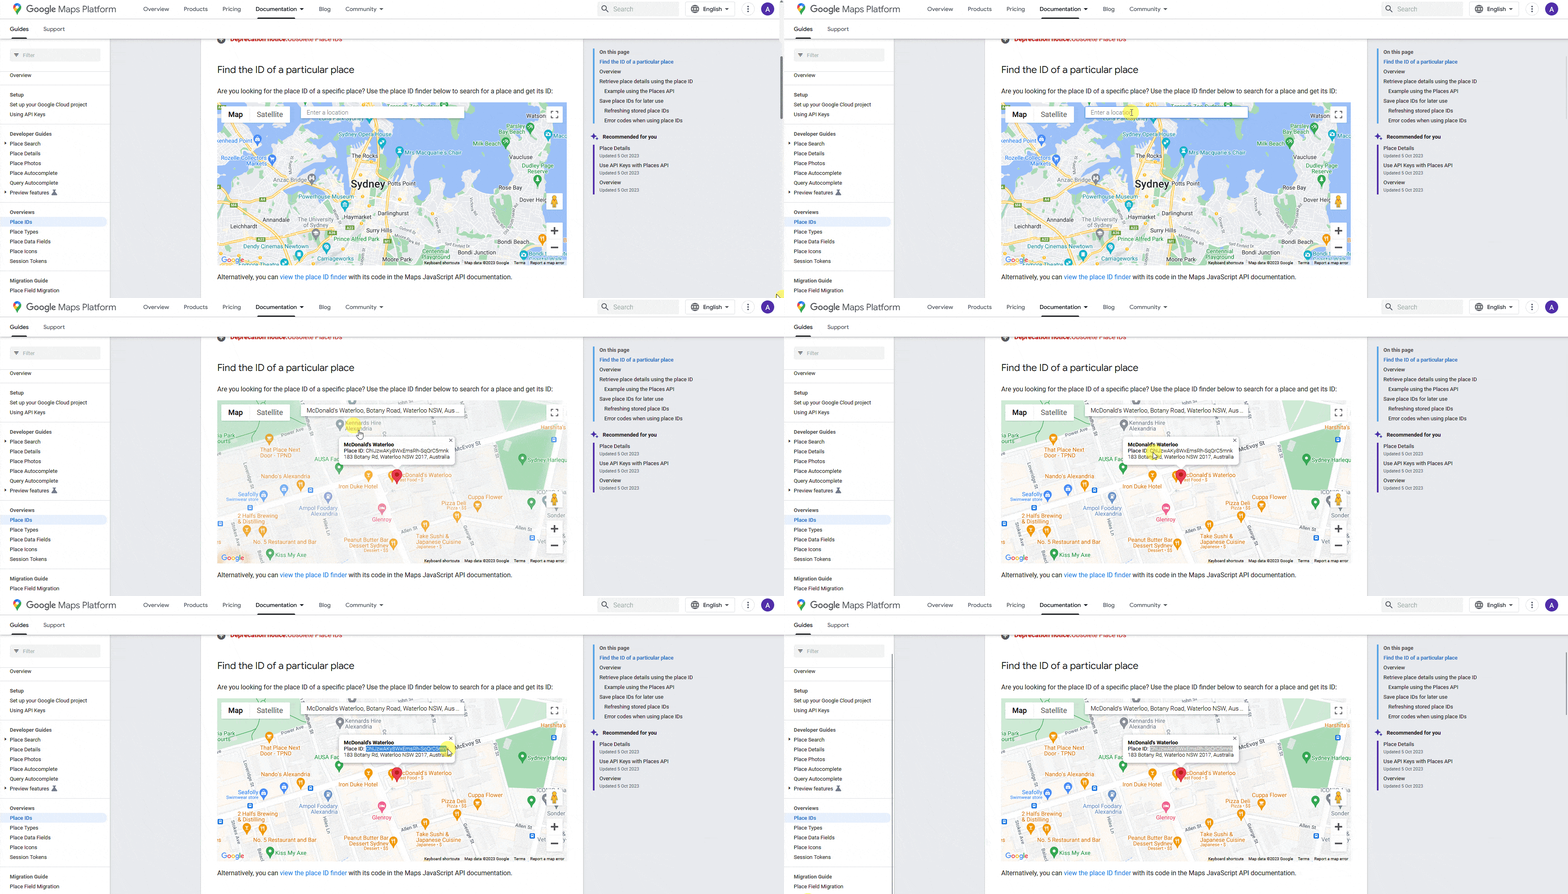
3. You’ll find the place id of that location in a tooltip. Copy the id in a notepad.
Use the Social Review Widget
Now add the Social Reviews widget on the page and follow the steps –
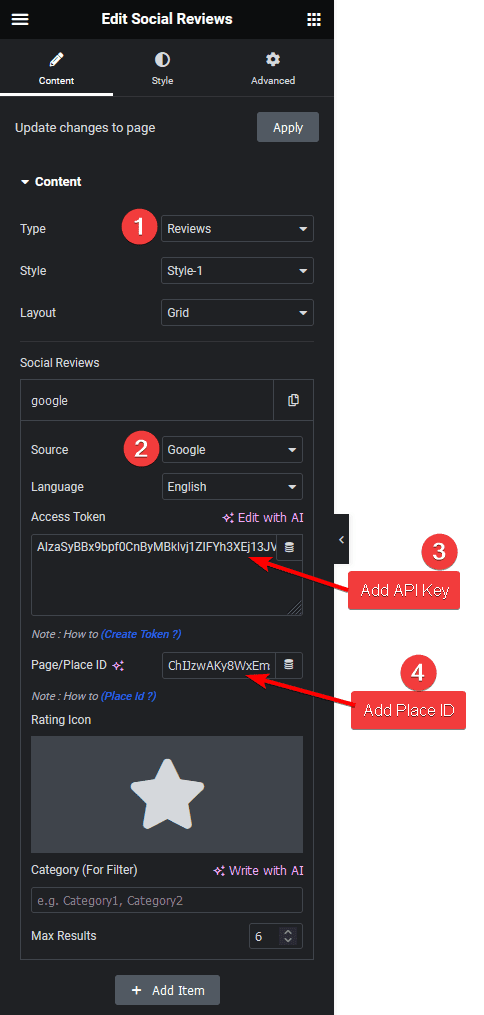
1. From the Type dropdown, select Reviews, then select the appropriate layout and style for the reviews.
2. Go to the Social Reviews section and open the item.
3. Select Google from the Source dropdown.
4. Then add your API Key and Place ID in the Access Token and Page/Place ID fields, respectively.
Also Read, How to Show Social Reviews in Carousel Slider in Elementor
Now, you’ll see Google reviews from that specific location. You can refine the result from the remaining settings.
You can change the review icon from the Rating Icon section.
In the Category (For Filter) field, you can add a category name to filter reviews by category.
Then, in the Max Results field, you can set how many reviews you want to display.
With the Free Google Places API, you can only show a maximum of 5 reviews, irrespective of the number set in the Max Result field.
To counter this limitation, enable the Performance toggle from the Performance tab, this will save all the Google reviews in the database, so as you acquire more reviews overtime, you’ll get to show more reviews.
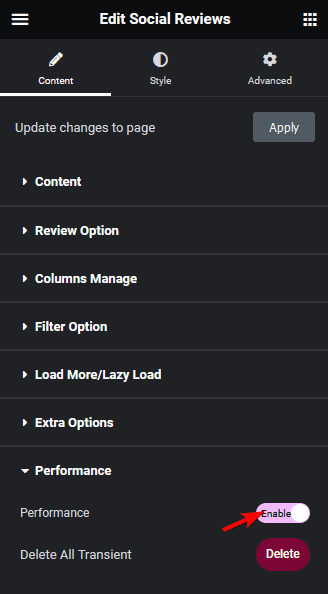
Note: Make sure not to delete the Transient. This will delete all the reviews from the database, and you’ll only see 5 reviews.
From the Extra Options tab, you can set the refresh time to load new reviews as well.

Suggested Read: How to Add Reviews Manually in Elementor.


