






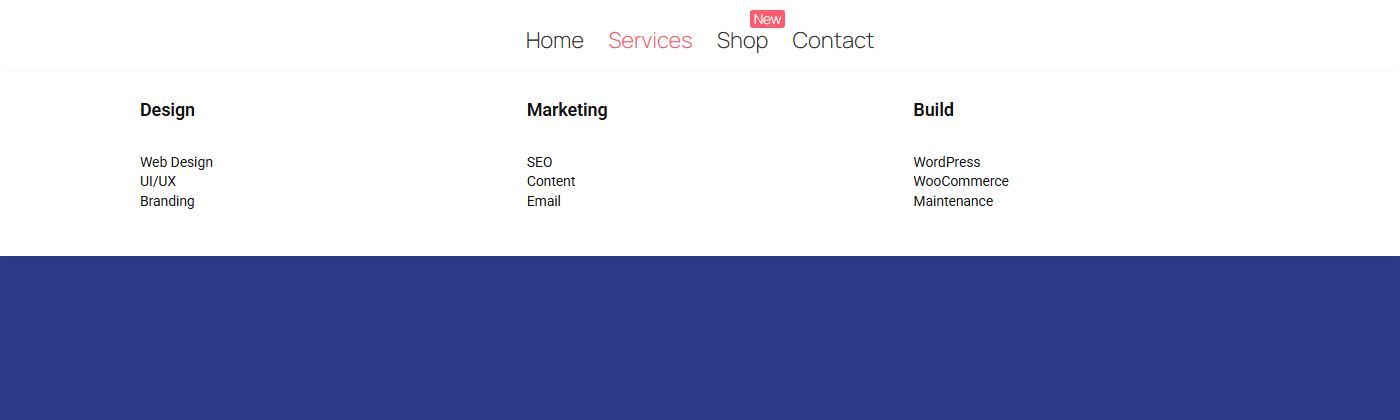
Do you have a big site or a shop with many categories? A mega menu opens a wide panel with several columns of links, images or buttons, so visitors see a whole section at once.
With the Navigation Menu widget from The Plus Addons for Elementor, you design each panel in Elementor and add it to a normal WordPress menu. No separate mega menu plugin is needed.
To check the complete feature overview documentation of The Plus Addons for Elementor Navigation Menu widget, click here.
Requirement – This widget is a part of The Plus Addons for Elementor, make sure it’s installed & activated to enjoy all its powers.
Before You Start
- Edition: Pro — the Navigation Menu widget is part of The Plus Addons for Elementor Pro. The free Navigation Menu Lite widget does not have this option.
- Widget to enable: Navigation Menu, switched on under The Plus Addons > Widgets.
- A header template. Add the widget to your site’s header so the menu shows on every page. Build the header with the free Nexter Builder or with Elementor Pro’s Theme Builder.
- A WordPress menu under Appearance > Menus, if you use the Default menu type.
- A theme that shows Appearance > Menus. Block themes such as Twenty Twenty-Five hide it. On those, build the mega menu with the Repeater menu type instead.
How It Works
- Each panel is a Plus Mega Menu item — a small page you design in Elementor.
- In Appearance > Menus, you put each panel under a normal menu item, such as a Custom Link called “Services”.
- The Navigation Menu widget shows that menu. Hovering (or clicking) “Services” opens the panel.
Step 1: Design the panels
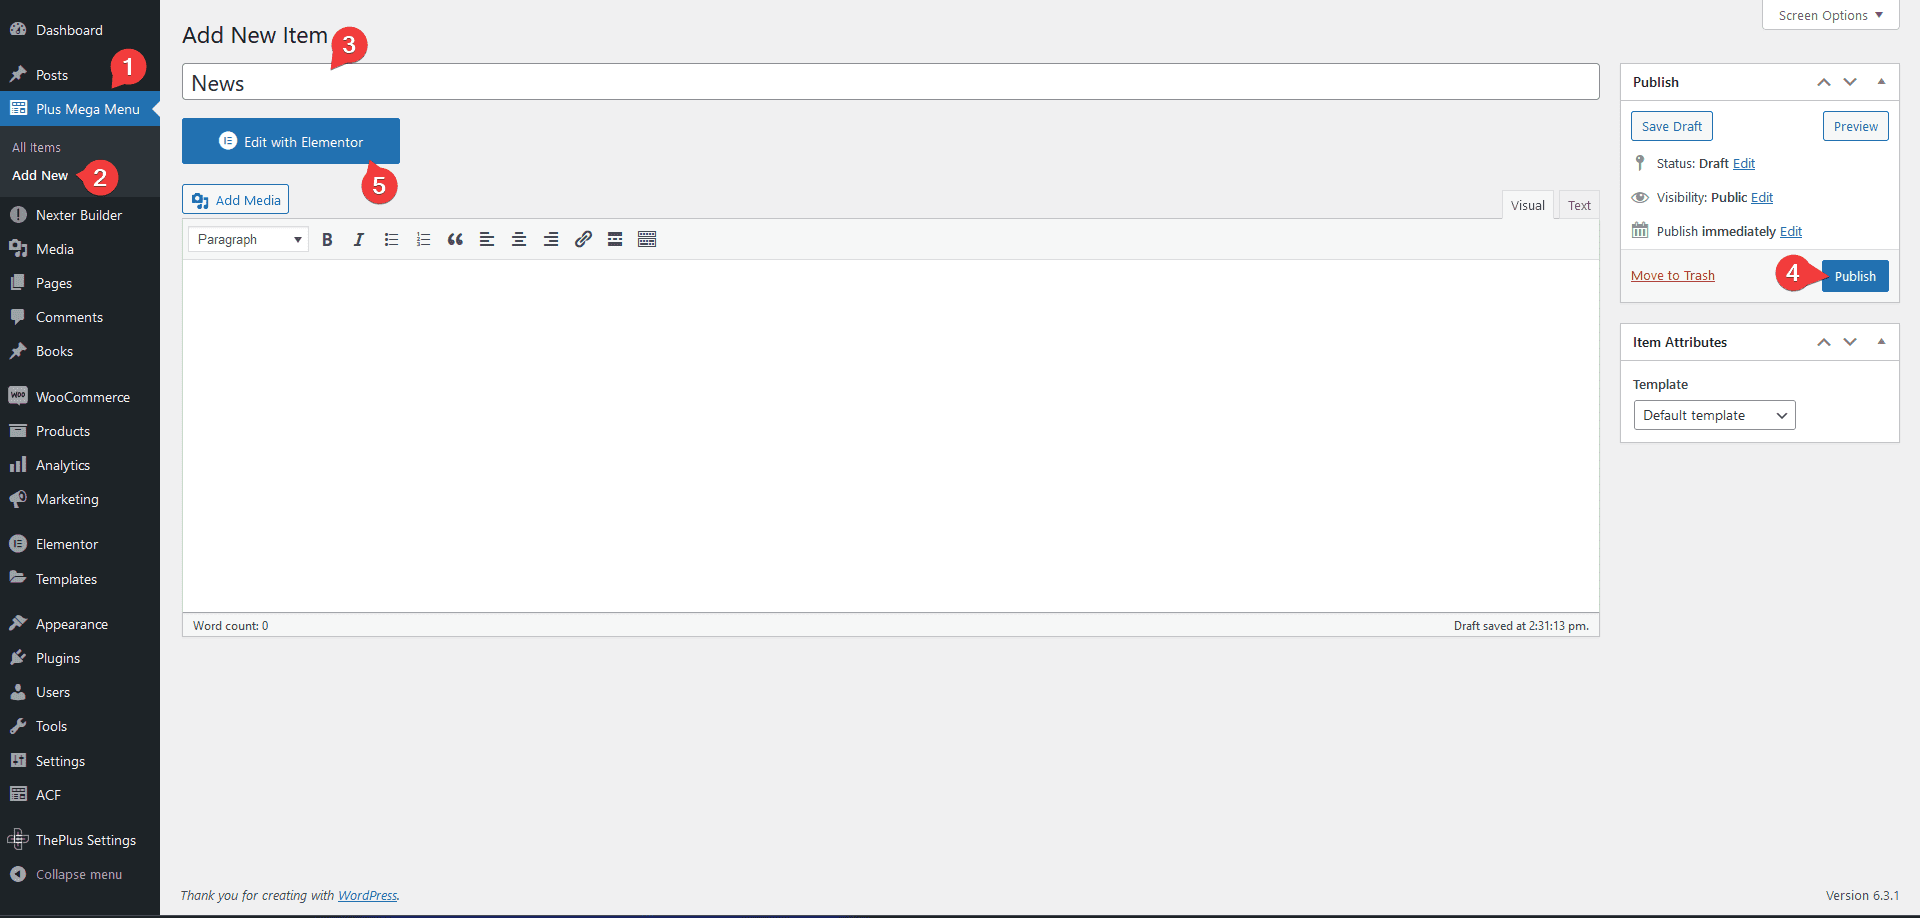
Plus Mega Menu appears in the WordPress dashboard once the Navigation Menu widget is on. For each panel:
- Go to Plus Mega Menu > Add New.
- Give it a name and click Publish.
- Click Edit with Elementor, build the panel, and click Update.
Keep the panel published. A draft or private panel shows nothing in the menu.
If Elementor shows an error
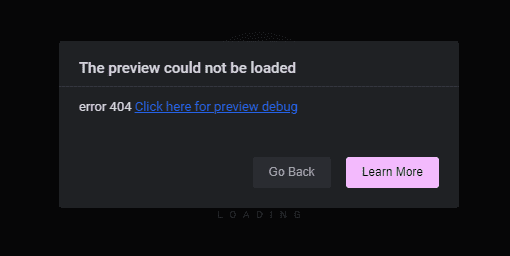
If the editor will not open a new Plus Mega Menu item, go to Settings > Permalinks and click Save Changes without changing anything. That refreshes WordPress’s links. Then open the item again.
Step 2: Build the WordPress menu
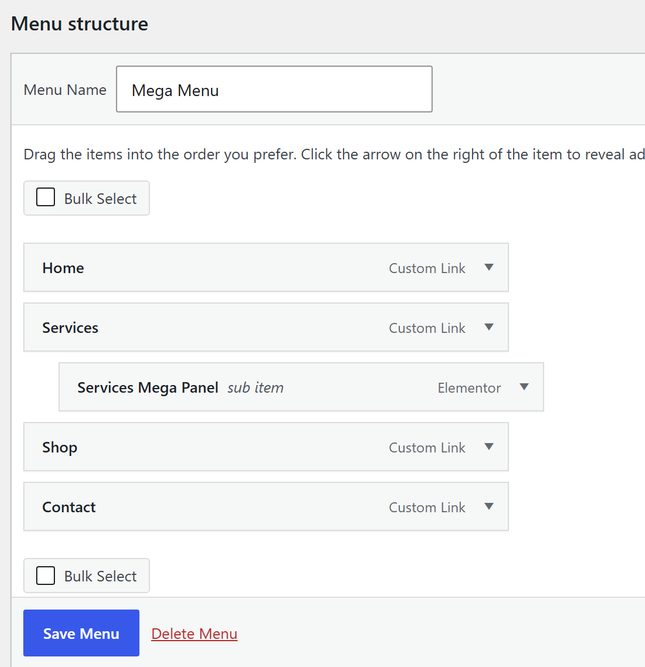
- Go to Appearance > Menus and create a menu (or open an existing one).
- Click Screen Options at the top and tick Plus Mega Menu. Its box is hidden by default.
- Add a Custom Link for each top-level item that should open a panel — for example “Services” with the URL
#. - From the Plus Mega Menu box, add your panel, then drag it under its custom link so it becomes a sub item.
- Click Save Menu.
Step 3: Set the panel width and labels
Open the parent item (“Services”). The Plus Addons adds these fields to every menu item:
| Field | What it does |
|---|---|
| Mega menu Type | Default — a normal-width dropdown. Container — as wide as the page’s content area. Full Width — as wide as the browser window |
| Dropdown Max-Width(px) | A fixed panel width, 100–1920px. Only with Default, and it appears after you save the menu with Default selected |
| Dropdown Menu Alignment | Default or Center under the item. Only with Default |
| Text Label | A small badge next to the item, such as “New” or “Sale” |
| Label Color / Label Bg Color | The badge’s text and background colour. They only show when Text Label has text |
| Icon Type | An icon (by class name) or an image before the item |
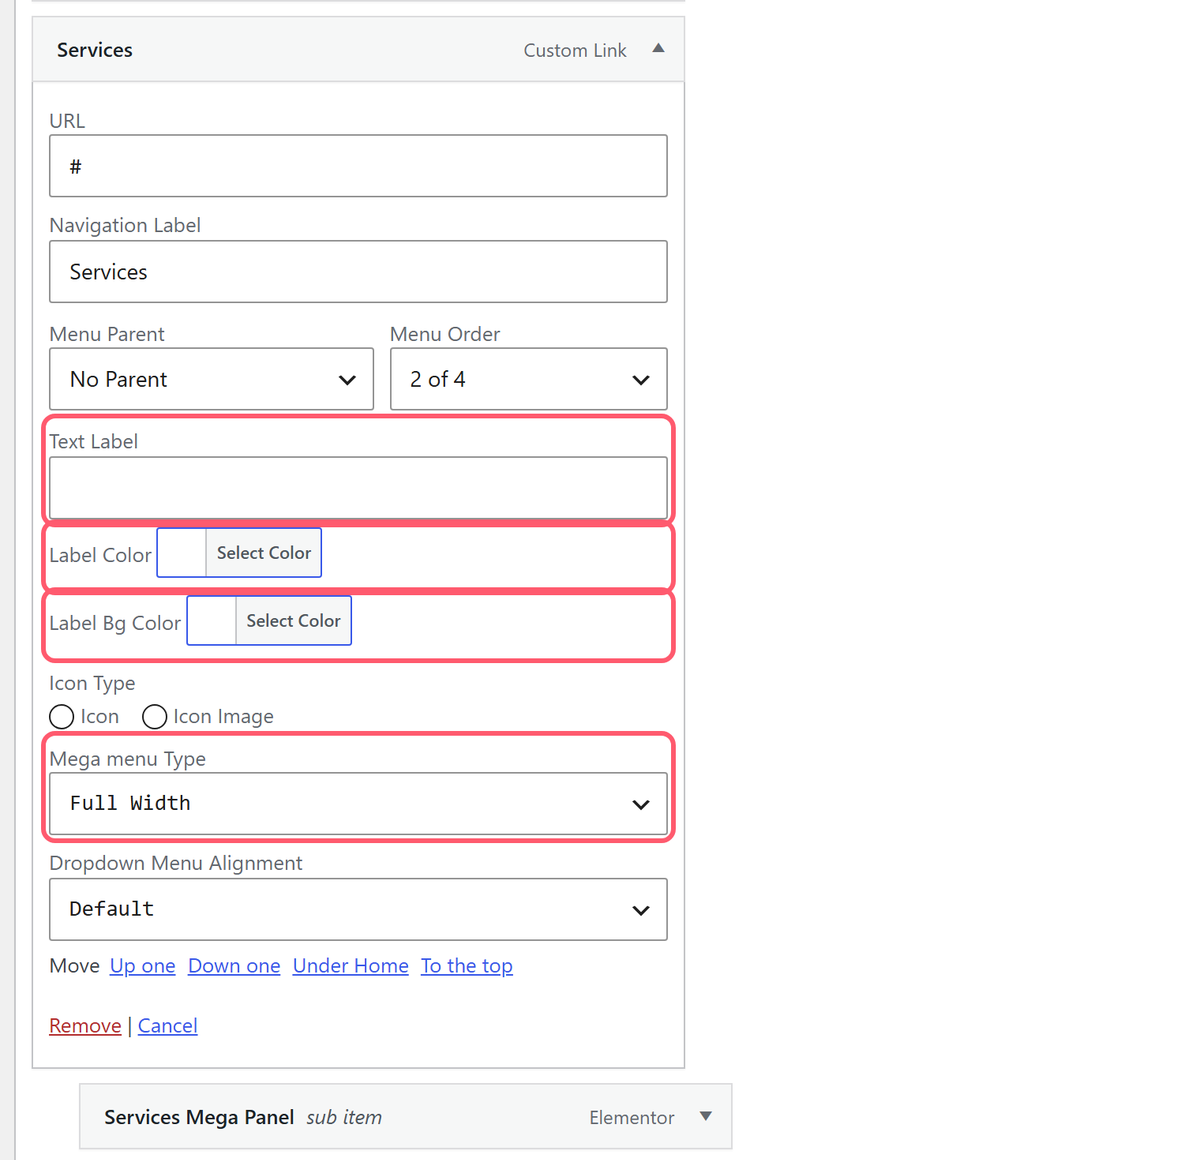
Set these on the parent item, not on the panel. Click Save Menu.
Step 4: Show the menu
Add the Navigation Menu widget to your header. In Layout, keep Menu Type on Default and choose Horizontal Menu (or Vertical Menu) in Menu Direction. In Content > Select Menu, pick your menu, then choose Menu Hover/Click and Menu Effects.
Your mega menu is ready.
Limitations
- Pro only. The Plus Mega Menu post type and the extra menu item fields come with the Pro plugin.
- Widths are worked out when the page loads and resizes. Container follows the boxed width of the section or container the menu sits in; Full Width uses the browser width.
- One level of panels. Don’t put a mega menu inside another mega menu.
- The mobile menu shows the panel’s content too, inside the mobile menu. Design panels that also work on a narrow screen.
Troubleshooting
The panel is empty
The Plus Mega Menu item is not published, or it is not a sub item of the parent. Check both in Appearance > Menus.
Full Width is not full width
Check Mega menu Type is set on the parent item and the menu was saved. Clear the page cache afterwards.
The badge colours don’t show
Fill in Text Label. The colours only style that label.
