Are you looking to create a dynamic and visually appealing logo showcase in Elementor using a custom post type? A custom post type allows you to organize and manage your logos separately from regular posts or pages, giving you more control over their display and functionality.
With The Plus Addons for Elementor, managing client logos on your website becomes easier. It offers a dedicated custom post type specifically designed for client logos, which seamlessly integrates with the Clients Listing widget. This built-in functionality allows you to effortlessly organize and showcase your client logos without the need for additional customization.
Moreover, if you already have a custom post type for client logo, you can seamlessly integrate it with the Clients Listing widget.
To check the complete feature overview documentation of The Plus Addons for Elementor Clients Listing widget, click here.
Requirement – This widget is a part of The Plus Addons for Elementor, make sure its installed & activated to enjoy all its powers.
Use Default Custom Post Type from The Plus Addons for Elementor
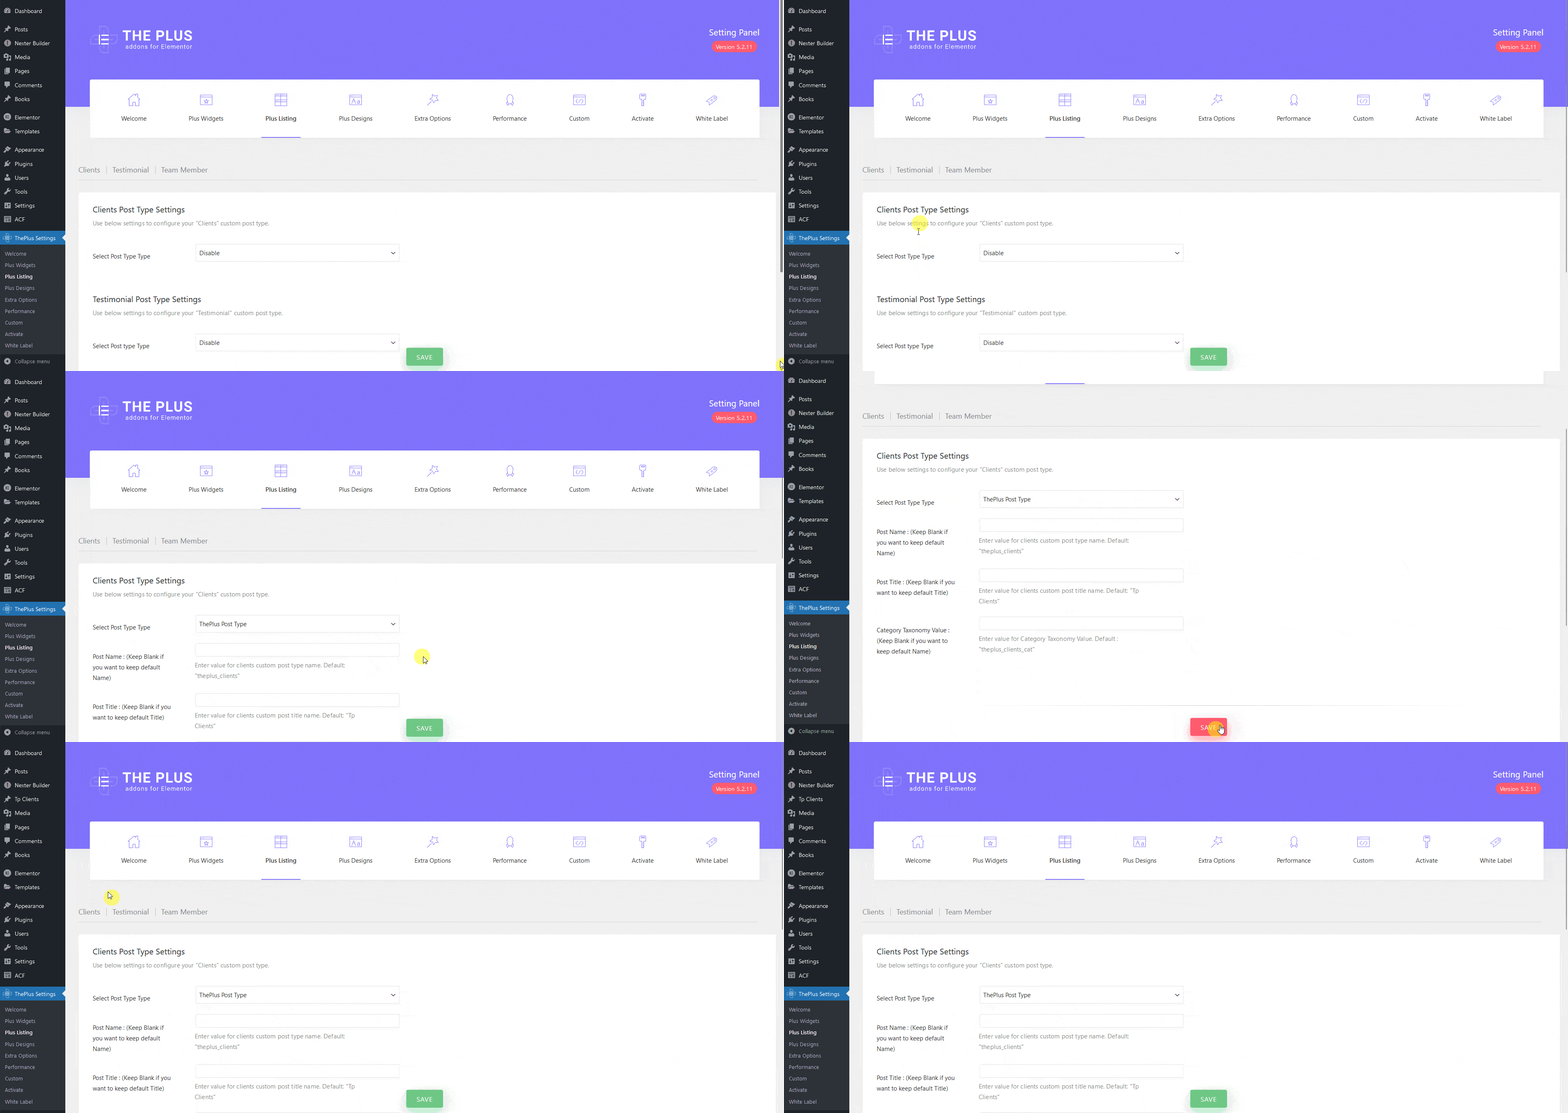
To do this, first, you have to activate the clients custom post type. From the Dashboard, go to ThePlus Settings > Post Listing.
Under the Clients Post Type Settings section, select ThePlus Post Type from the Select Post Type Type dropdown.
Then you can keep all the fields such as Post Name, Post Title and Category Taxonomy Value blank to use the default post type names but if you want, you can add your own names that will affect the post type slug and post type names.
Once done, click on the Save button.
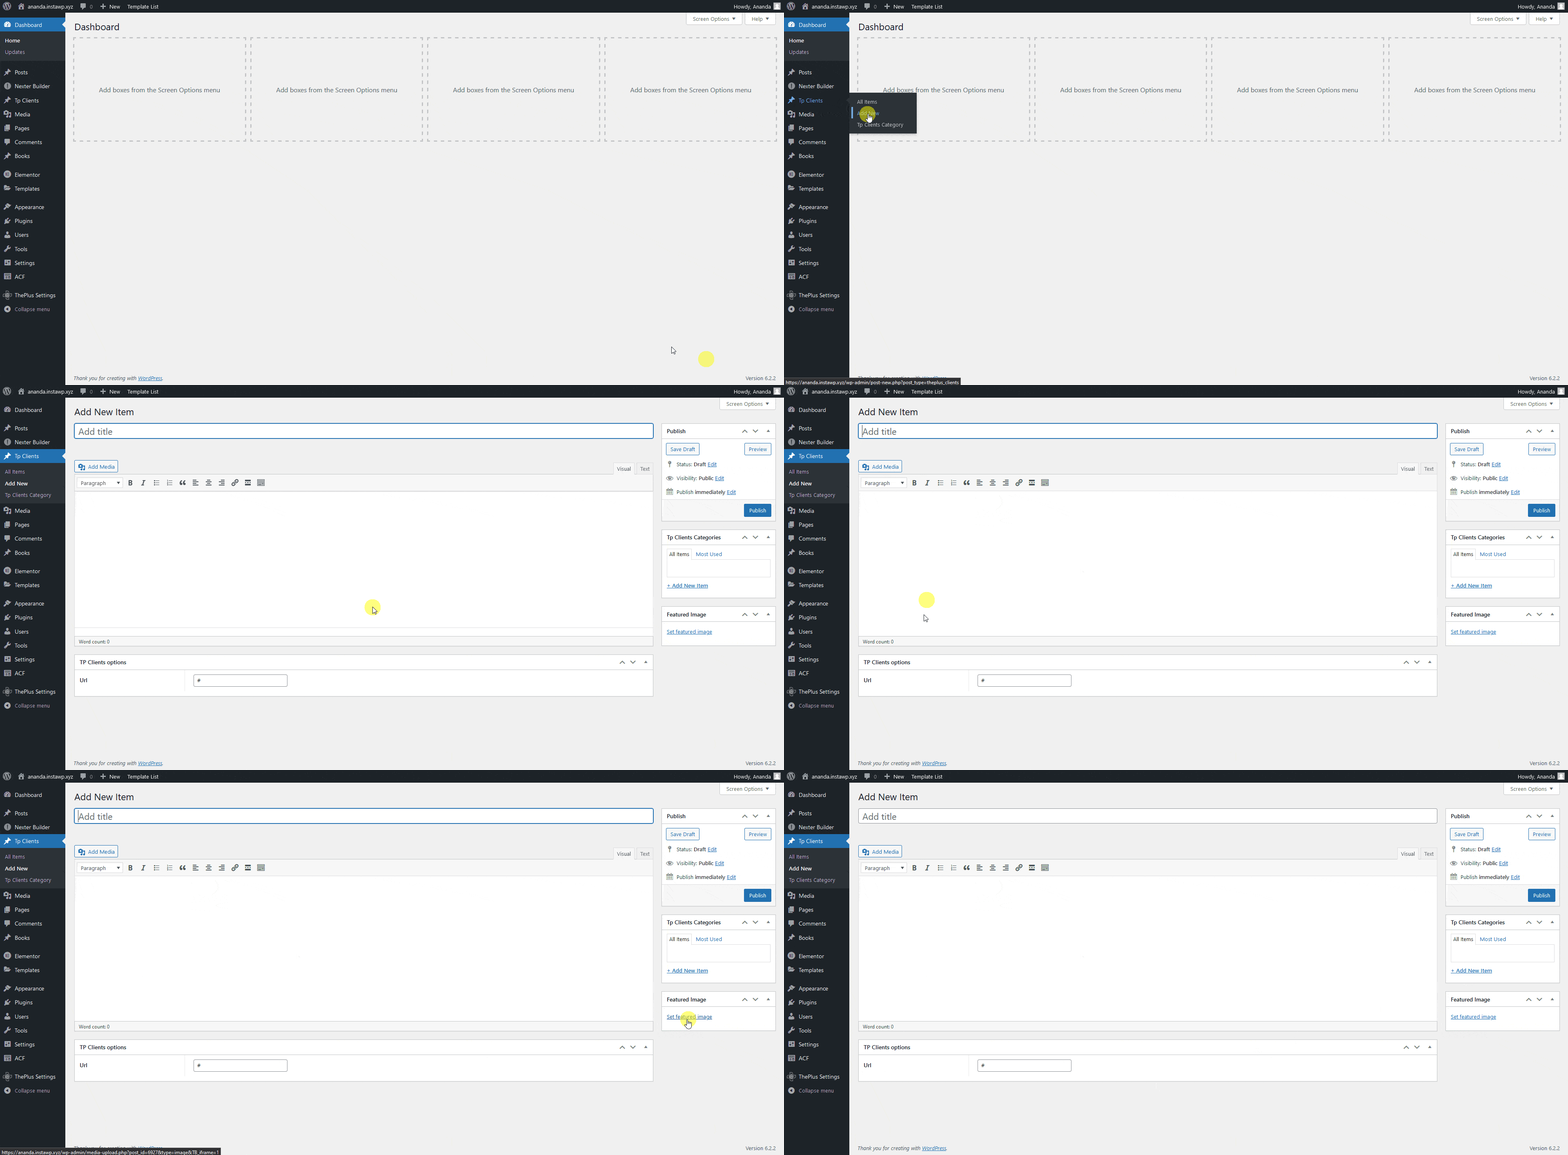
Reload the page then you’ll see Tp Clients or the custom name you’ve set for the post type in the admin menu.
There you have to add some posts with client details.
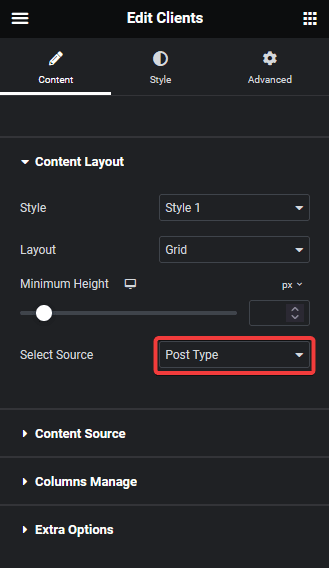
Once you’ve added some clients, open a page with Elementor and add the Clients Listing widget on the page. Select the appropriate layout from the Layout dropdown then select Post Type from the Select Source dropdown under the Content Layout tab.
You’ll be able to see the client logos on the page.
From the Select Category under the Content Source tab, you can select specific categories as the source of your logo showcase.
In the Maximum Posts Display field, you can set a maximum number of items to be displayed on a page.
From the Offset Posts field, you can hide posts from the beginning of the list.
Then from the Order By dropdown, you can order the logo showcase with different parameters.
From the Order dropdown, you can arrange the logo showcase in ascending or descending order based on the option selected in the Order By dropdown.
Use Your Own Custom Post Type
If you already have or want to use your own custom post type for client logos, you can easily use it with the Clients Listing widget.
You can use the free Advanced Custom Fields (ACF) plugin to create custom post type and custom taxonomy.
For example, we have a custom post type called Client for clients and Client Categories as a custom taxonomy.
Now to use this post type with the Clients Listing widget, from the Dashboard, go to ThePlus Settings > Post Listing.
Under the Clients Post Type Settings section, select Prebuilt Theme Based from the Select Post Type Type dropdown.
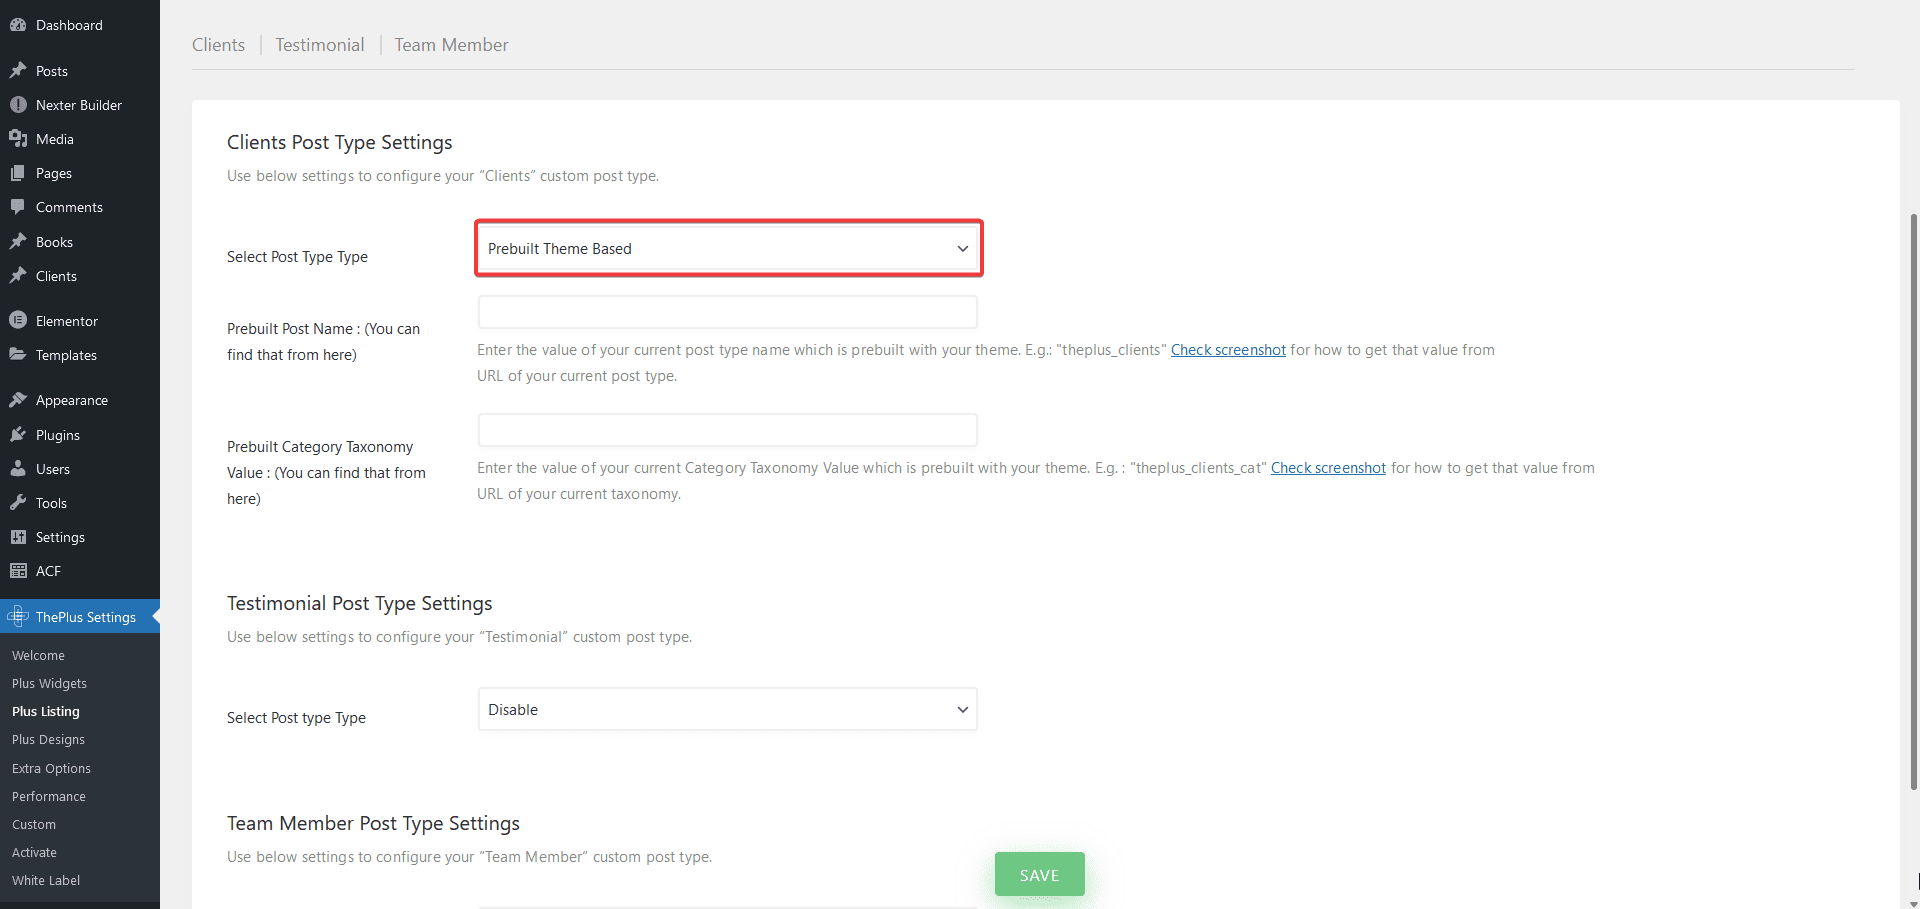
In the Prebuilt Post Name field, add your custom post type name.
To find it click on the post type, in the URL the name after ‘post_type=’ is the post type name.
For example, we have ‘post_type=client’, so ‘client’ will be the post type name.
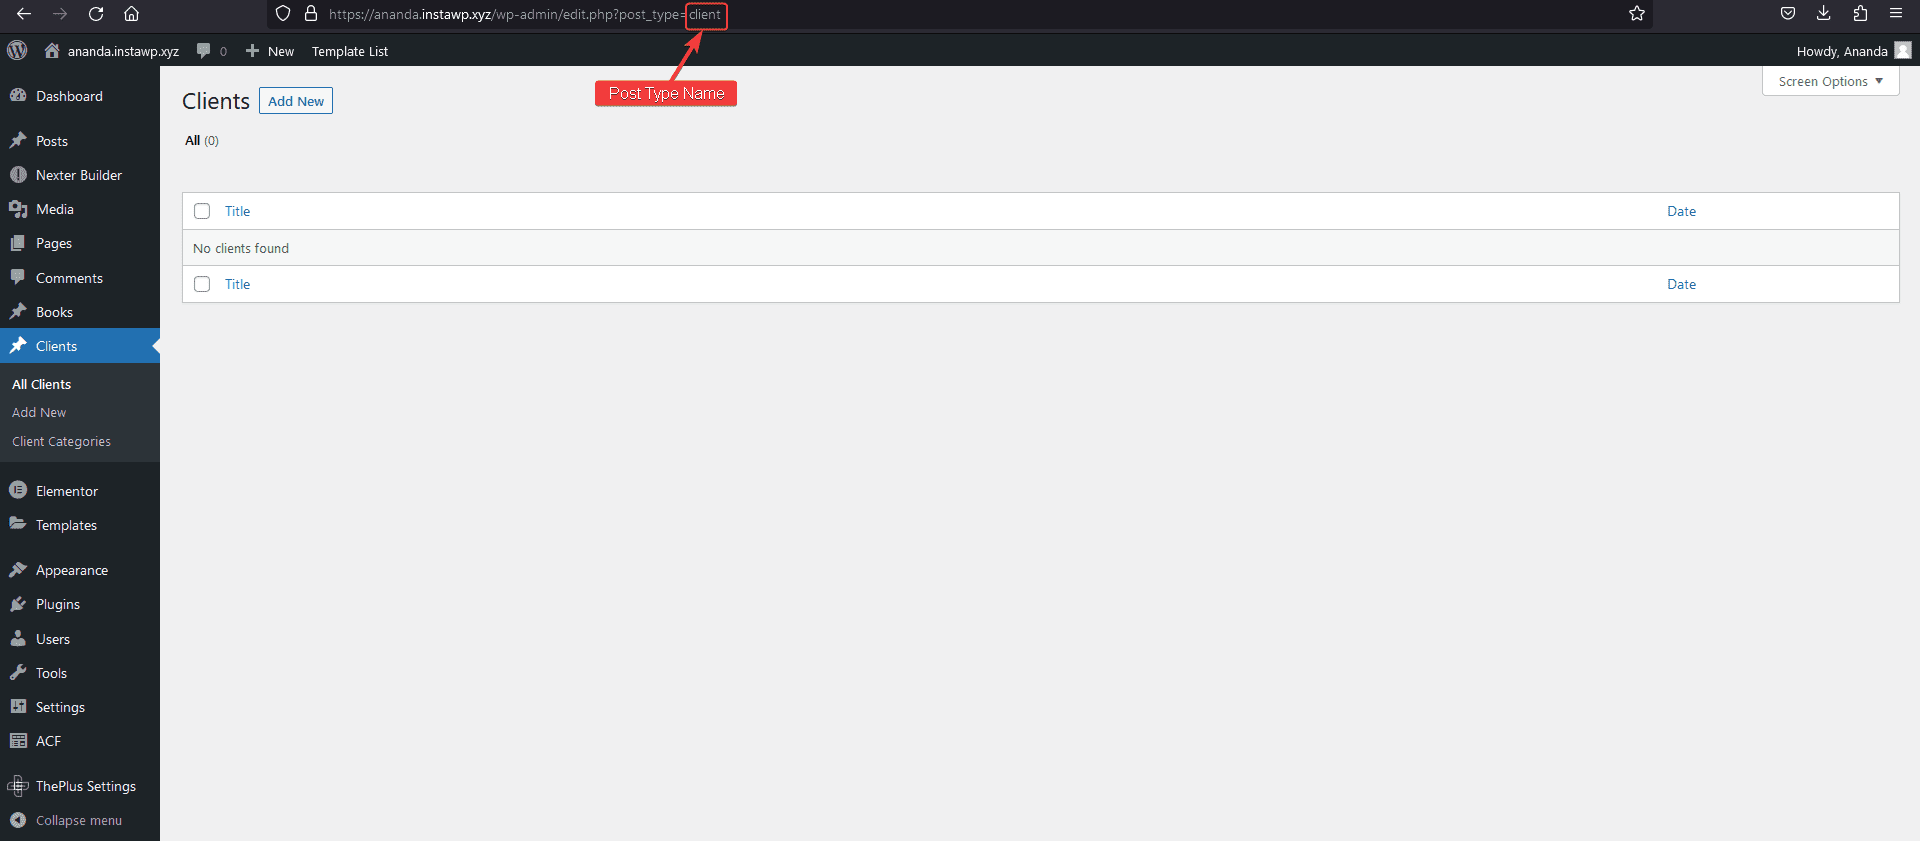
If you have created a custom taxonomy for your custom post type, in the Prebuilt Category Taxonomy Value, you can add the taxonomy name.
To find it click on the taxonomy link under your custom post type, in the URL the name after ‘taxonomy=’ is the taxonomy name.
For example, we have ‘taxonomy=client-category’, so ‘client-category’ will be the taxonomy name.
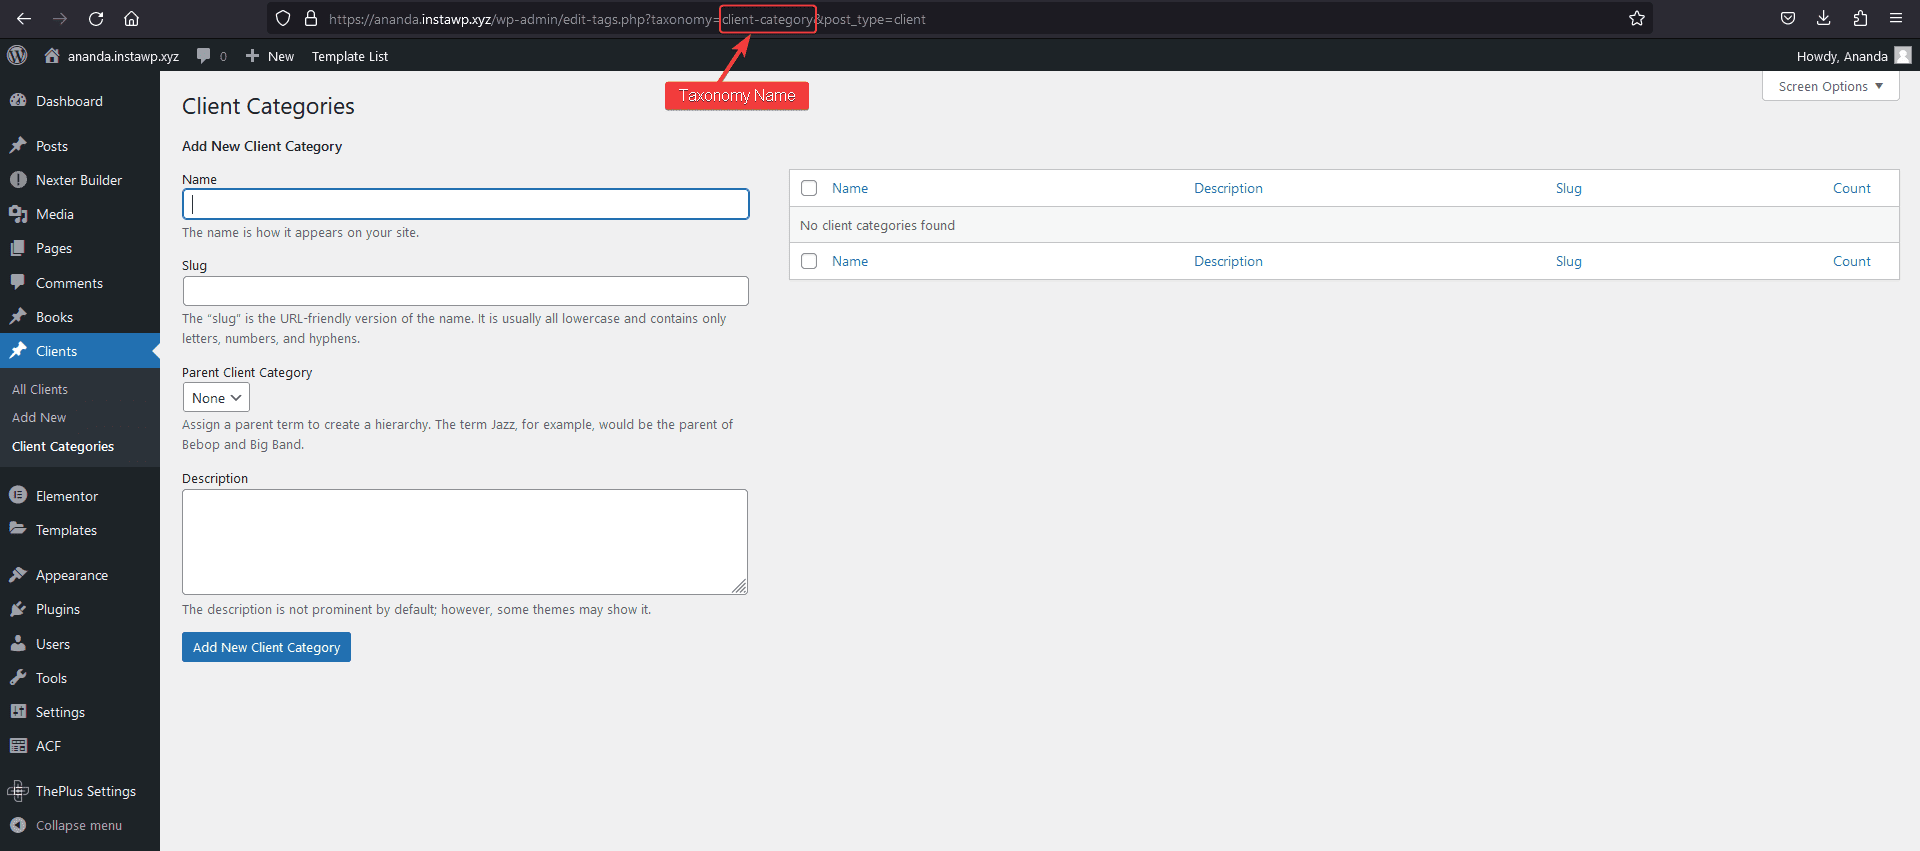
Add both names in the Prebuilt Post Name and Prebuilt Category Taxonomy Value field.
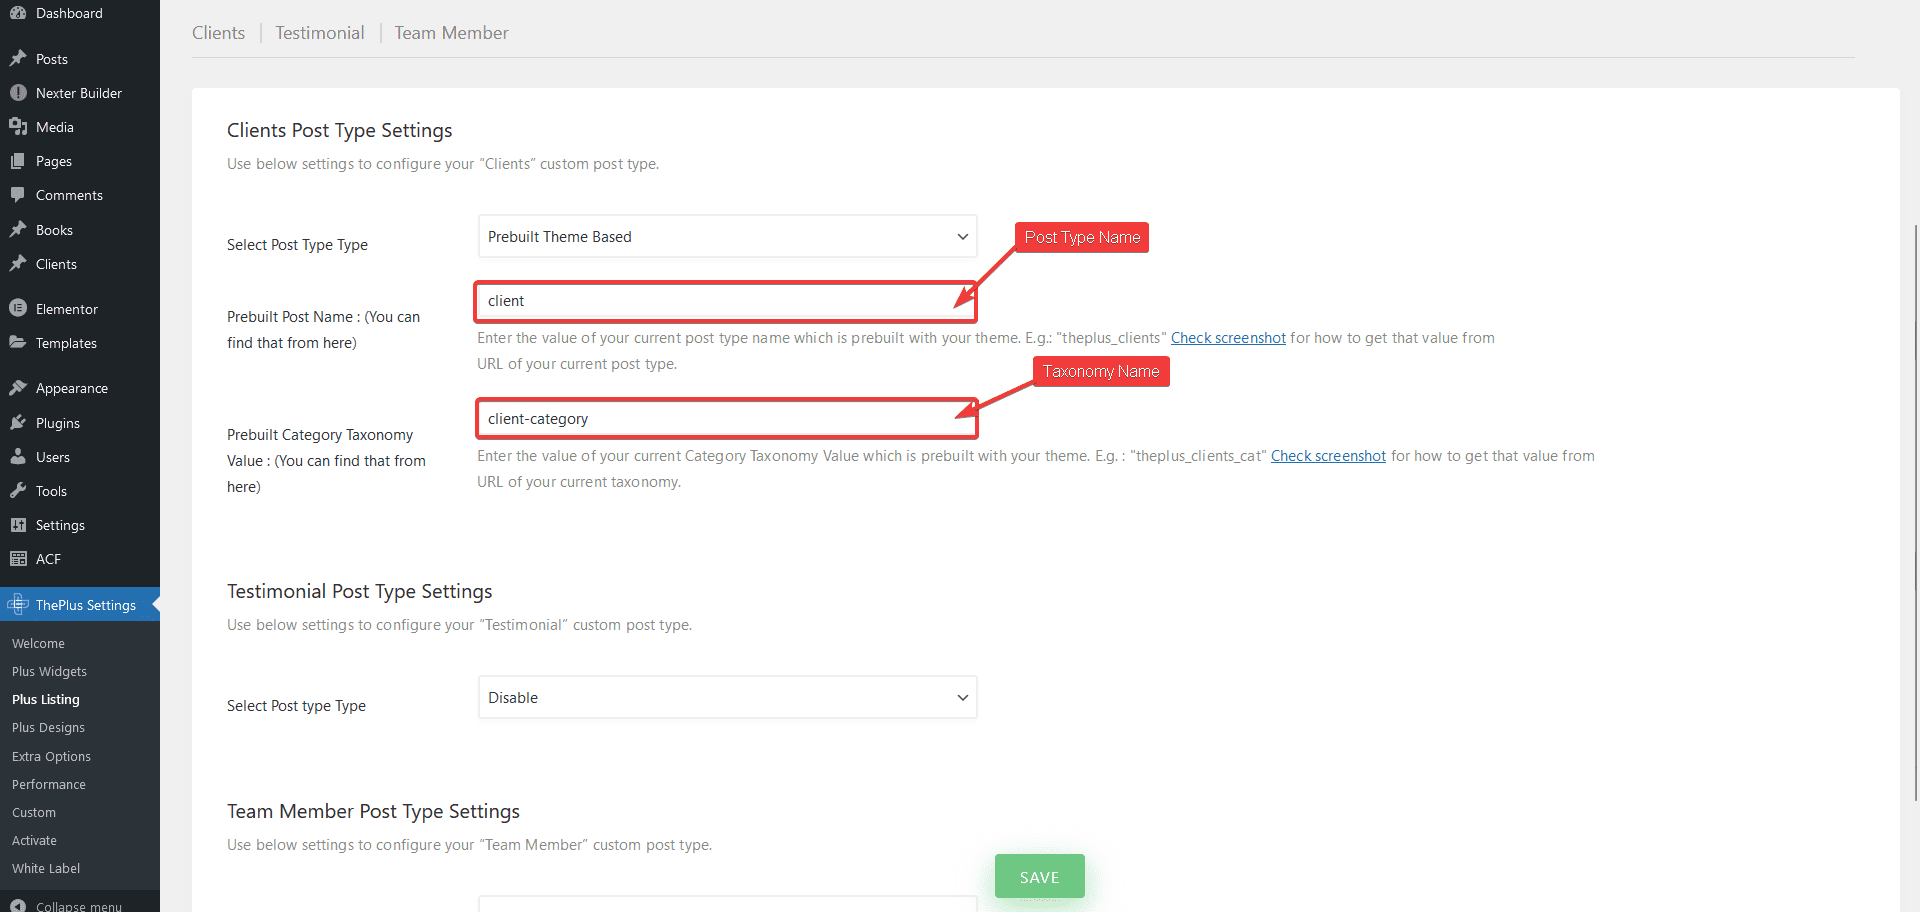
Once done, click on the Save button.
Now all the predefined Tp Clients fields will be added to your custom post type, you can also add your own custom fields to it, to show more information on the client’s single page.
Note: Your custom field value will not show in the listing of the Clients Listing widget.
Add some posts with client details in your custom post type.
Once done, then follow the same steps mentioned for the default custom post type to show the client logos using the Clients Listing widget.
Also, read How to Add a Category Wise Filter in Logo Showcase in Elementor.


