






A custom-built card design still benefits from a front-end filter bar – the two features are independent controls that work together.
Dynamic Listing’s Category Wise Filter section works the same way regardless of whether Style is set to a built-in design or to Custom.
For the full settings tour of the Dynamic Listing widget, see Dynamic Listing Widget Settings Overview.
Requirement – This widget is a part of The Plus Addons for Elementor Pro, make sure it’s installed & activated to enjoy all its powers.
Before You Start
- Prerequisite: Elementor (free) installed and active.
- Edition: Dynamic Listing is a Pro widget – it needs The Plus Addons for Elementor Pro installed and its license activated. It will not appear in the free plugin.
- Widget to enable: go to The Plus Addons > Widgets, search for Dynamic Listing and turn its toggle on.
Steps
- Build (or open) a Dynamic Listing widget already using a Custom loop skin, as covered in the Custom Loop Skin doc.
- Under Category Wise Filter, turn on Category Wise Filter and set Filter by and Filter Type as needed.
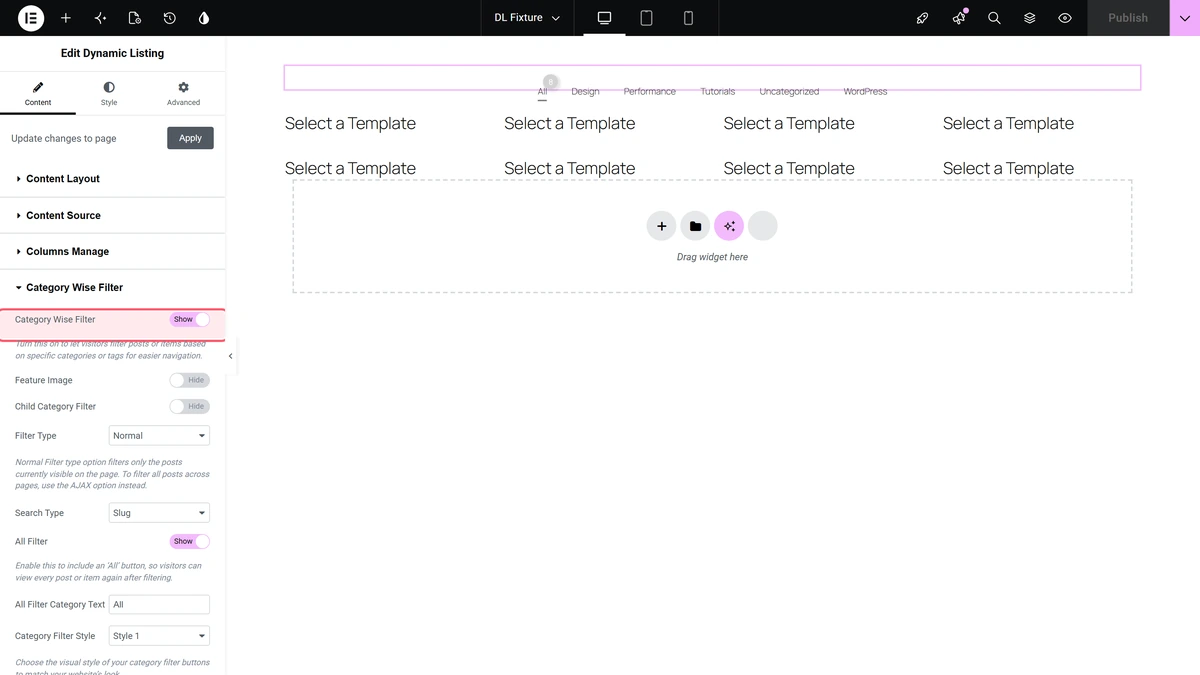
The filter bar renders above the grid exactly as it would with any built-in style – it filters whichever posts the Custom loop-skin template is looping over, without needing any changes to the template itself.
Settings Overview
| Setting | What it does | Default |
|---|---|---|
| Style | Custom loop skin is independent of this section. | style-1 |
| Category Wise Filter | Adds the filter bar above the grid. | Off |
Related Docs
- How to Create Elementor Custom Post Type Loop Skin?
- How to Filter Custom Post Types by Taxonomy in Elementor?
Not verified
So you know exactly what has and has not been checked:
- Whether a custom template that references an unusual dynamic tag breaks silently or errors when combined with AJAX-mode filtering was not specifically tested.
