Importing data from Google Sheets into an Elementor table offers a seamless way to display and manage dynamic content on your website. By integrating Google Sheets with Elementor, you can effortlessly update and synchronise your data in real-time, ensuring that your table is always up to date.
With the help of the Table widget from The Plus Addons for Elementor, you can import data from your Google Sheets directly into an Elementor table, eliminating the need for manual data entry and streamlining your workflow.
To check the complete feature overview documentation of The Plus Addons for Elementor Table widget, click here.
Requirement – This widget is a part of The Plus Addons for Elementor, make sure it’s installed & activated to enjoy all its powers.
To do this, first, you have to generate Google API Key.
Generate Google API Key
1. Login to your Google account and go to the Google Developers Console.
2. If you don’t have any project created, then click on CREATE PROJECT link.
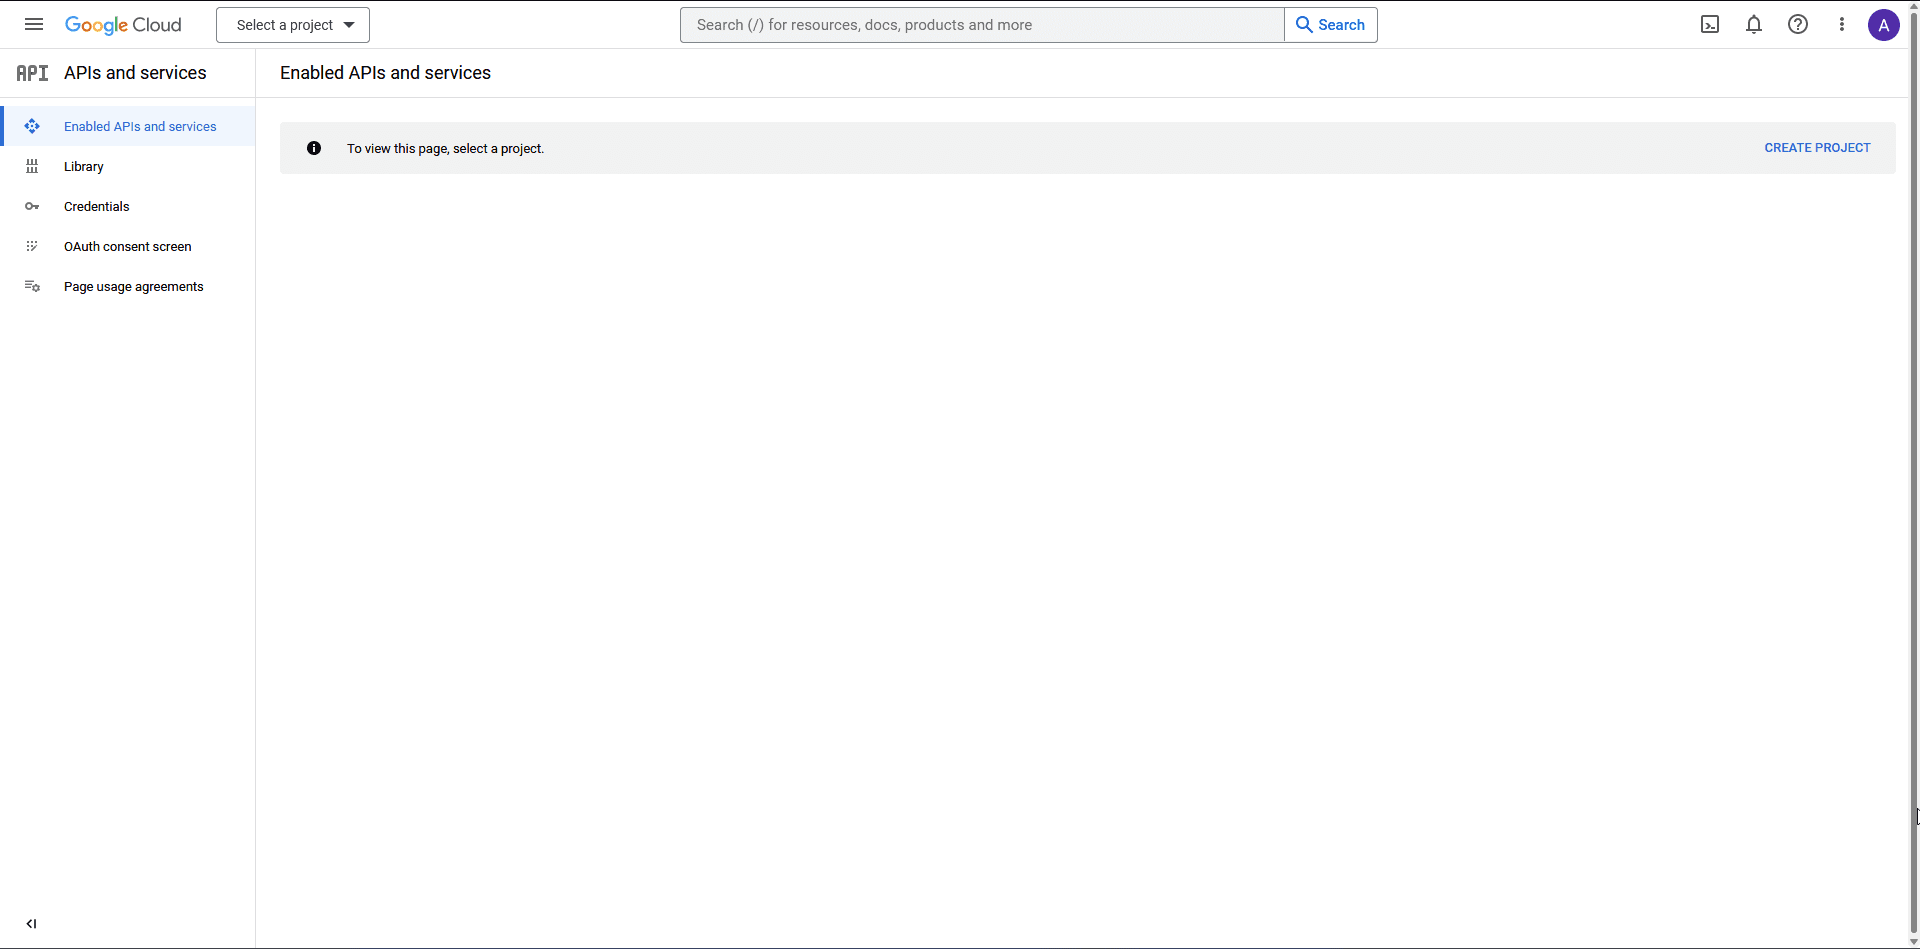
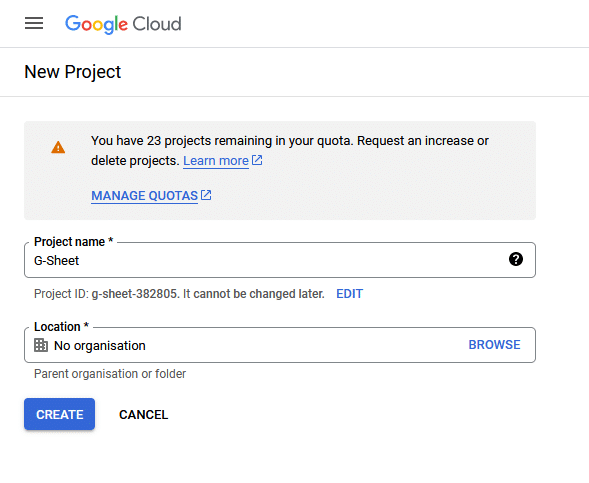
3. On the next screen, add your Project name and click the CREATE button.
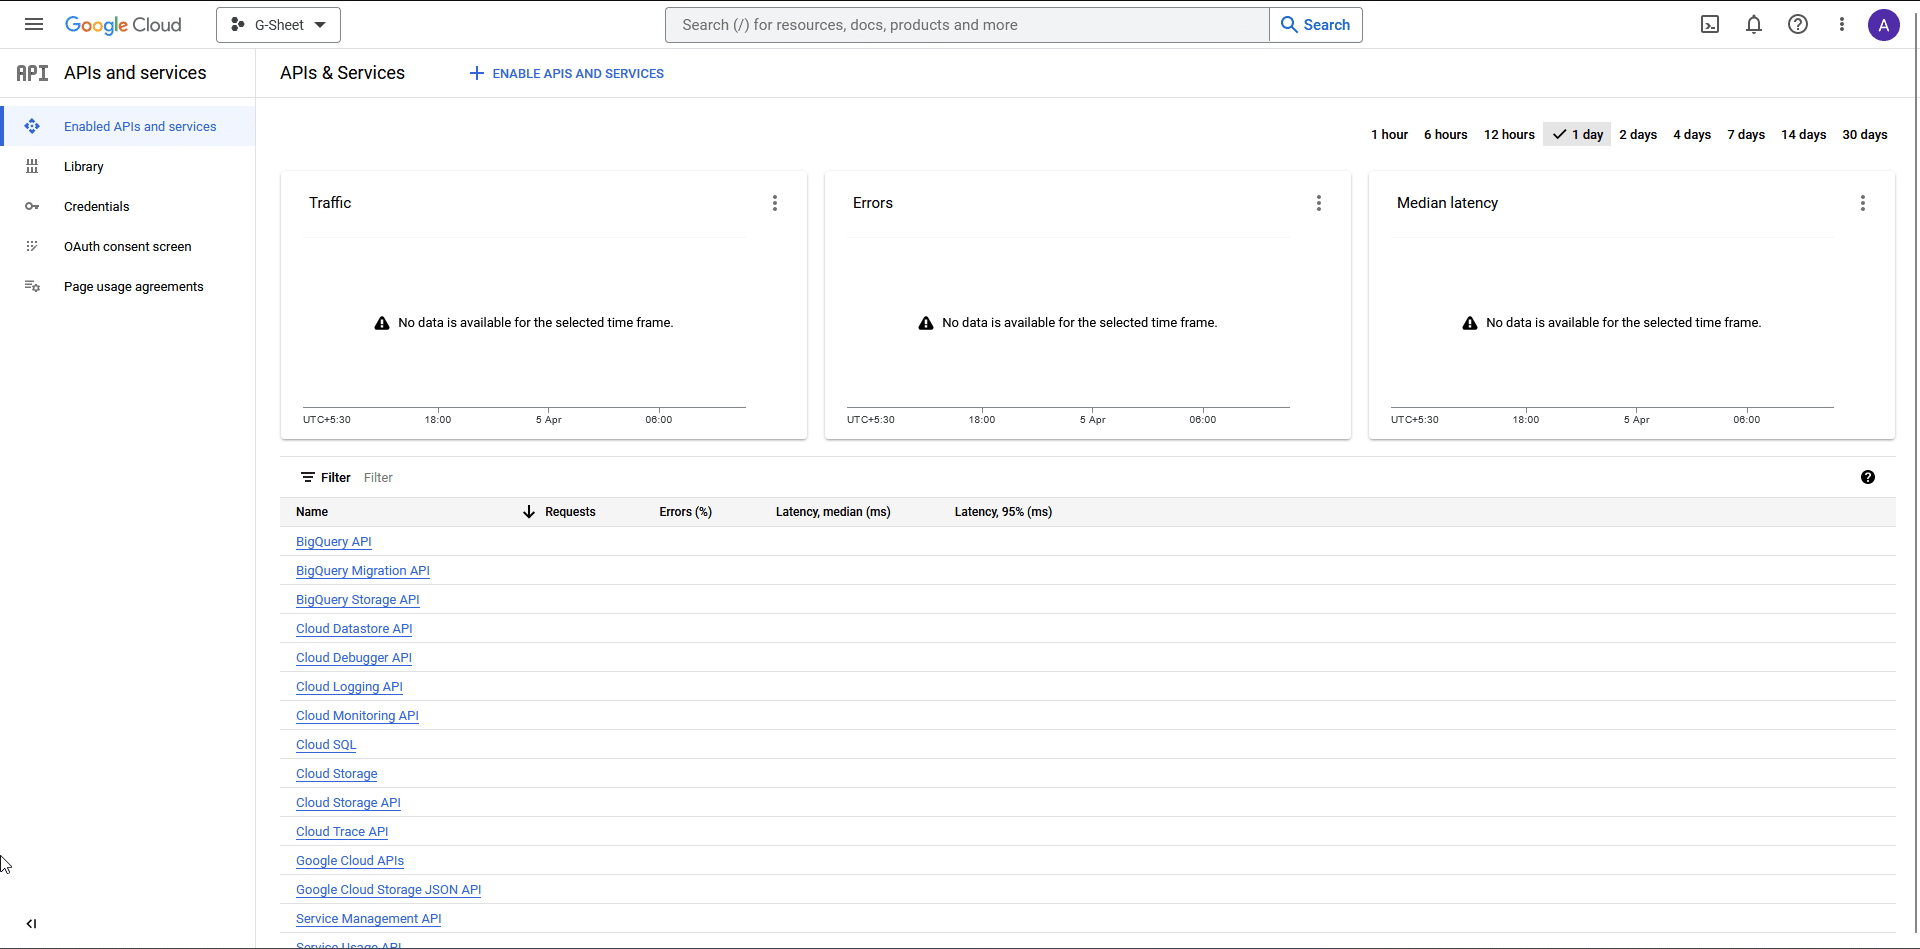
4. Then click on +ENABLE APIS AND SERVICES at the top.
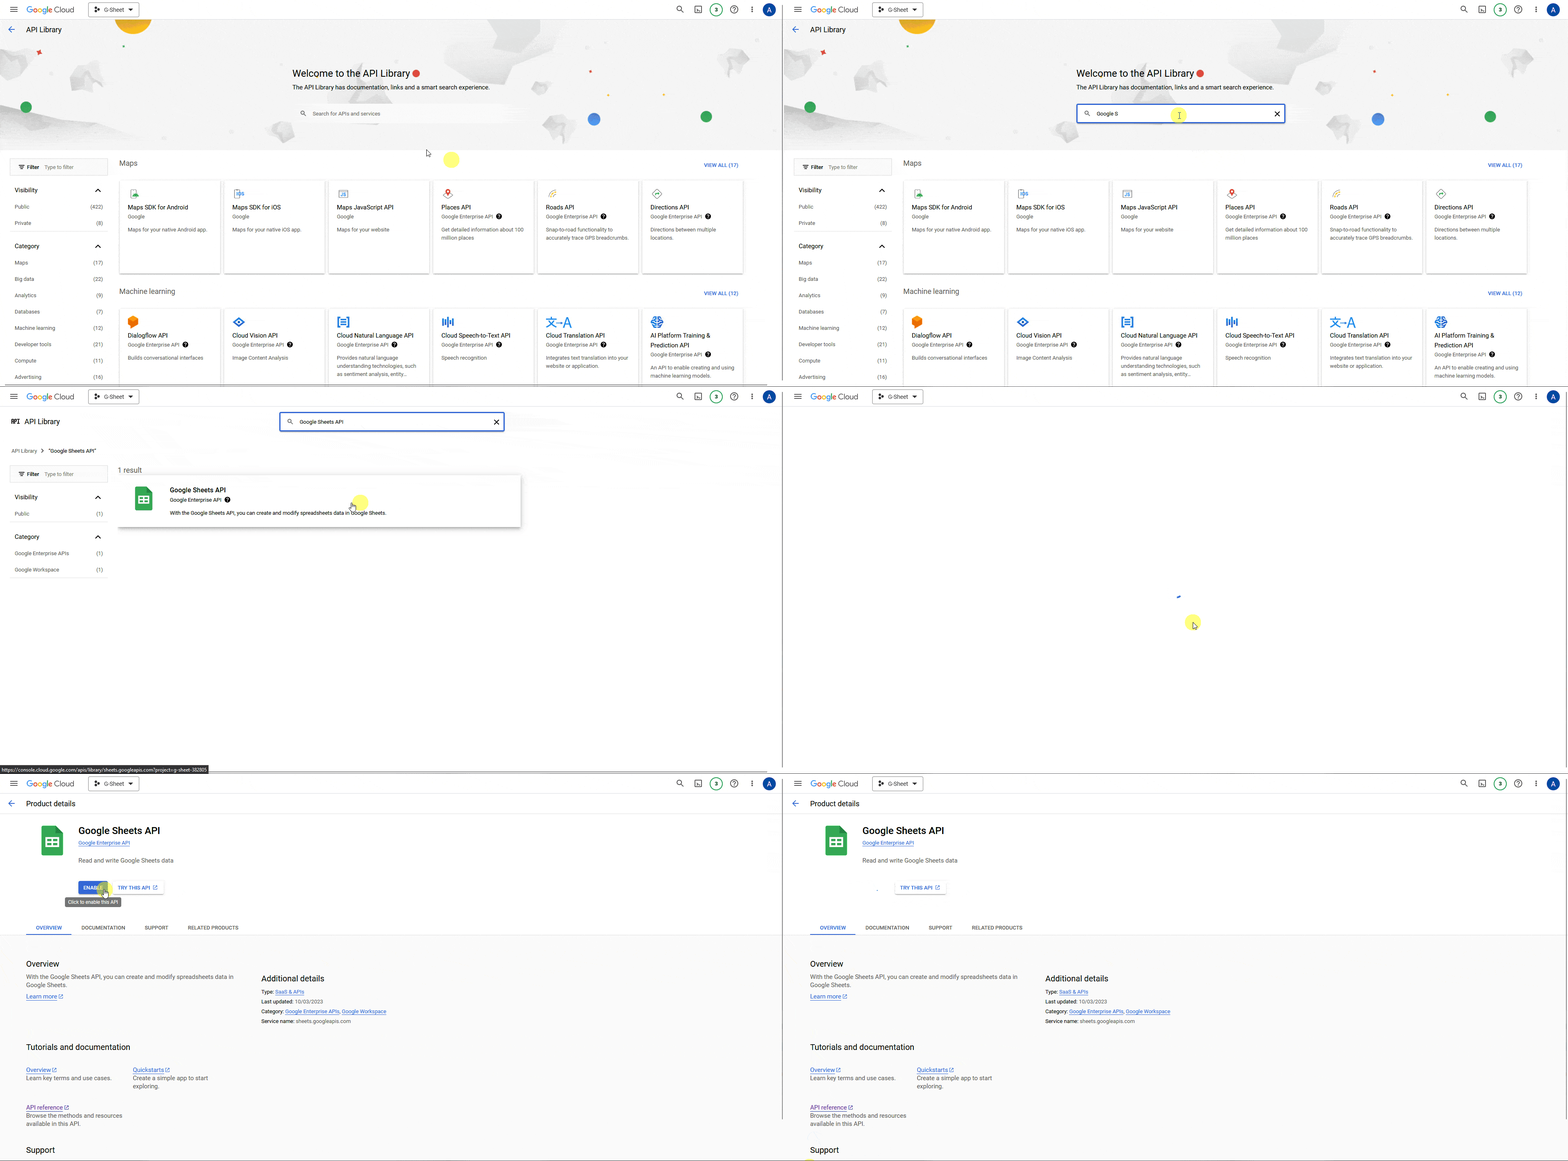
5. On the next page, search for Google Sheets API in the search bar. Click on Google Sheets API then click on the Enable button.
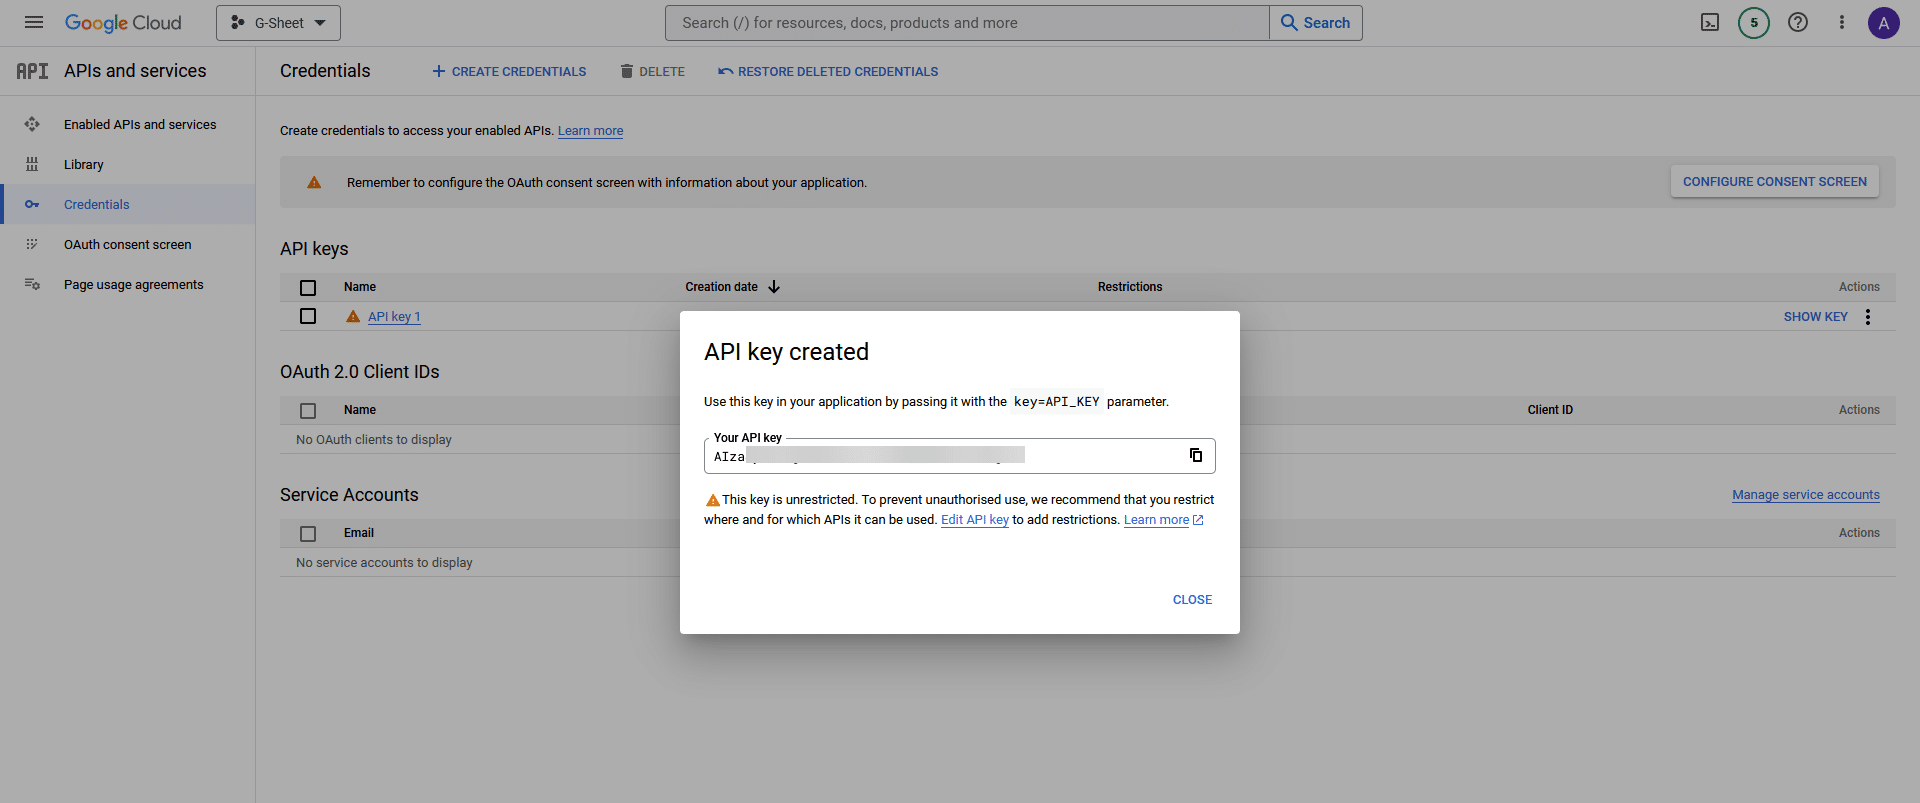
6. Then click on Credentials in the left sidebar.
7. On the Credentials page, from the top, click on + CREATE CREDENTIALS > API Key.

8. It will generate the API Key, copy and paste the key into a notepad.
In the same Google account that you generated the API key with, you should have a Google Spreadsheet with some data.
Now to import Google Sheet data into the Elementor table with the Table widget follow the steps –
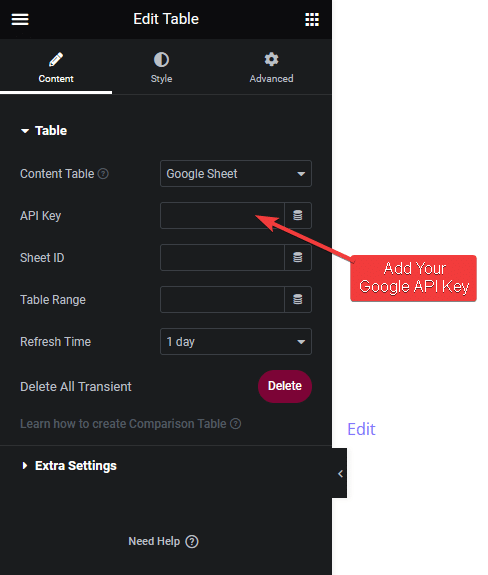
1. Add the Table widget on the page, then select Google Sheet from the Content Table dropdown.
2. In the API Key field, paste your API Key.
3. Go to your Google Spreadsheet, and click on the Share button. In the popup, set the General Access to Anyone with the link and click on Done.
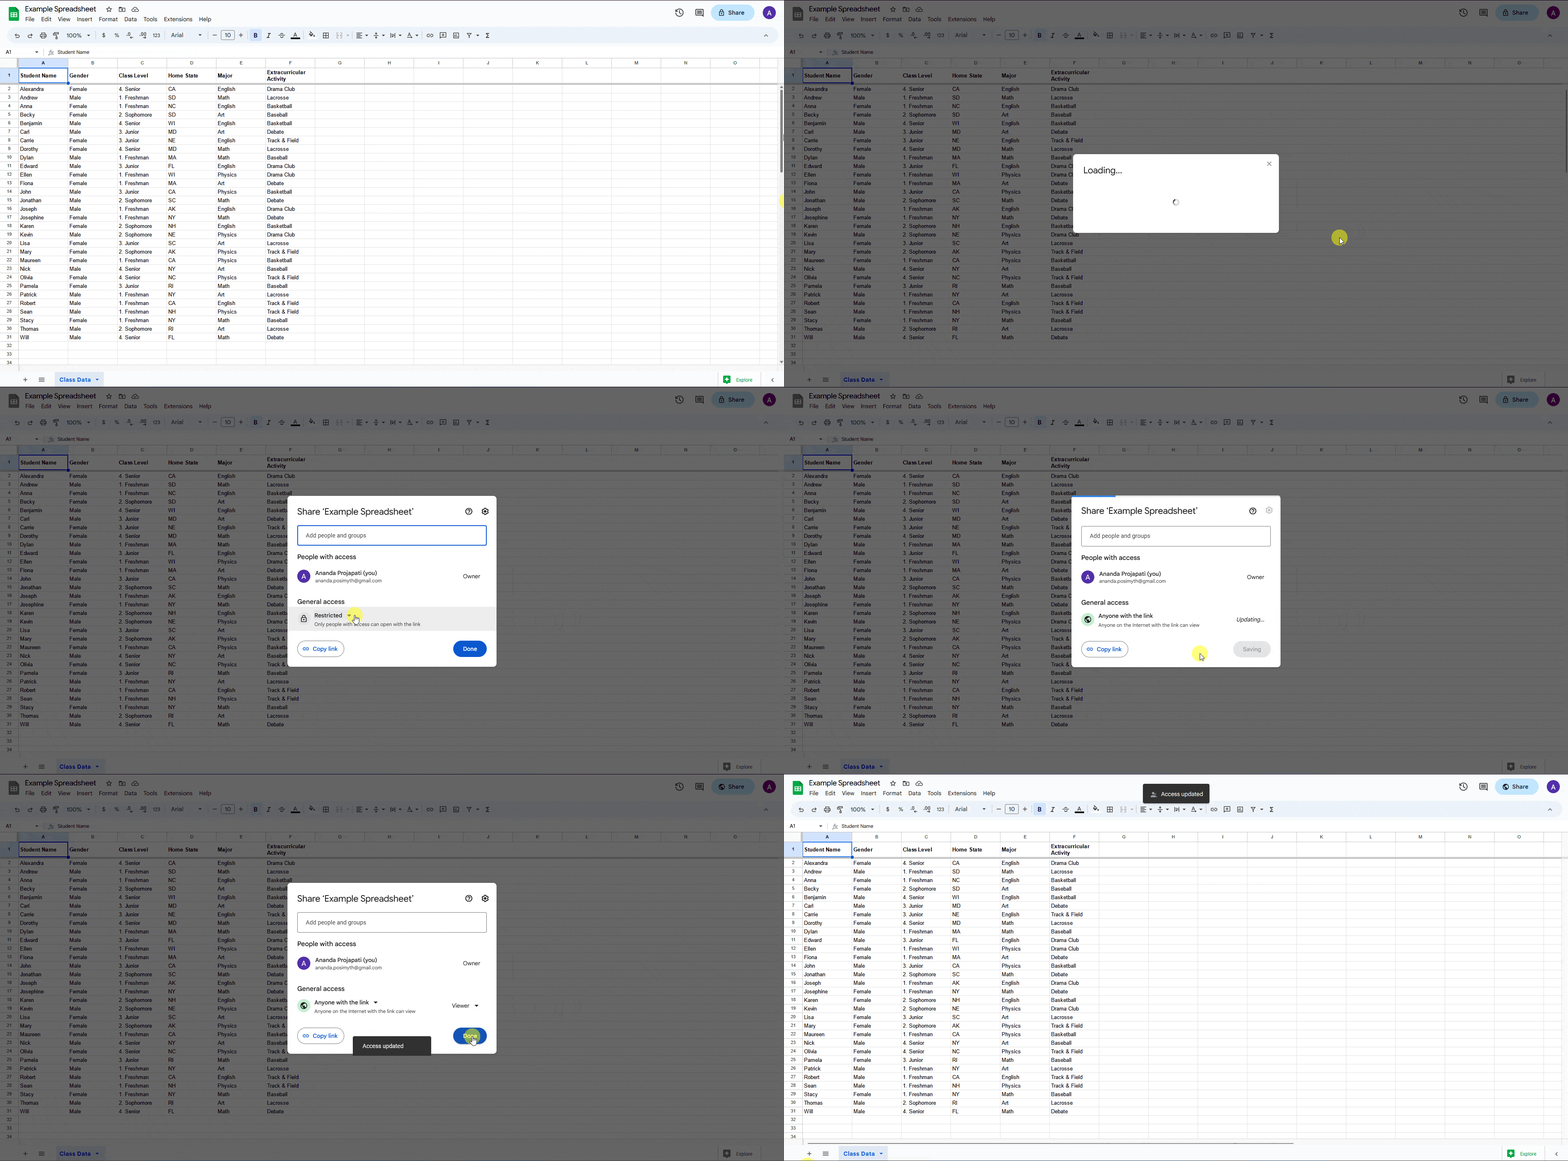
This will allow the Table widget to access your Spreadsheet.
4. Now, you have to find your Google Sheet ID. You can find the spreadsheet id in the spreadsheet URL.
Example URL: https://docs.google.com/spreadsheets/d/12XzuHrBwRQ_peHokt7xSczlZfRqVXCdWRDxLm-3dPjU/edit#gid=0
Then your id should be “12XzuHrBwRQ_peHokt7xSczlZfRqVXCdWRDxLm-3dPjU”
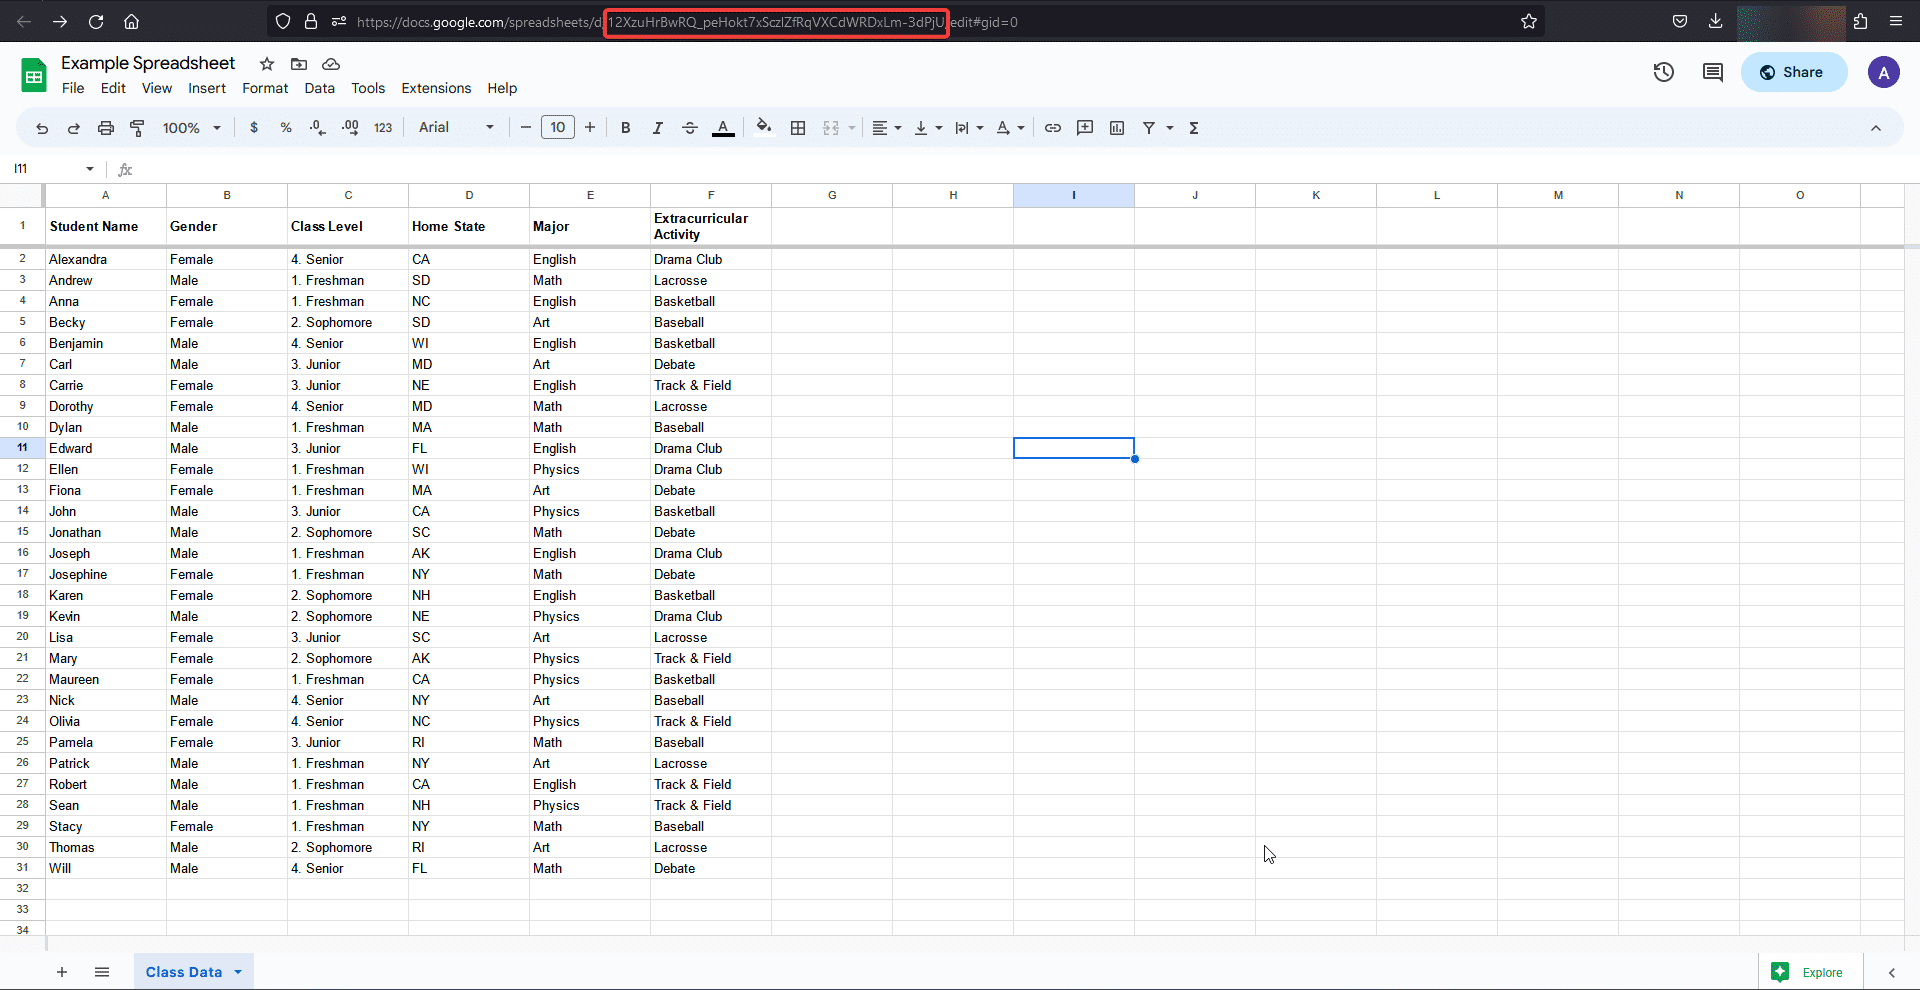
Copy and paste your spreadsheet id in the Sheet ID field of the Table widget.
5. In the Table Range field, you have to add the cell range of your Google Spreadsheet, which you want to show in your Elementor table.
Go to your Spreadsheet, select the range, and then click on Data > Named ranges.
It will show the cell range copy and paste it into the Table Range field of the Table widget.
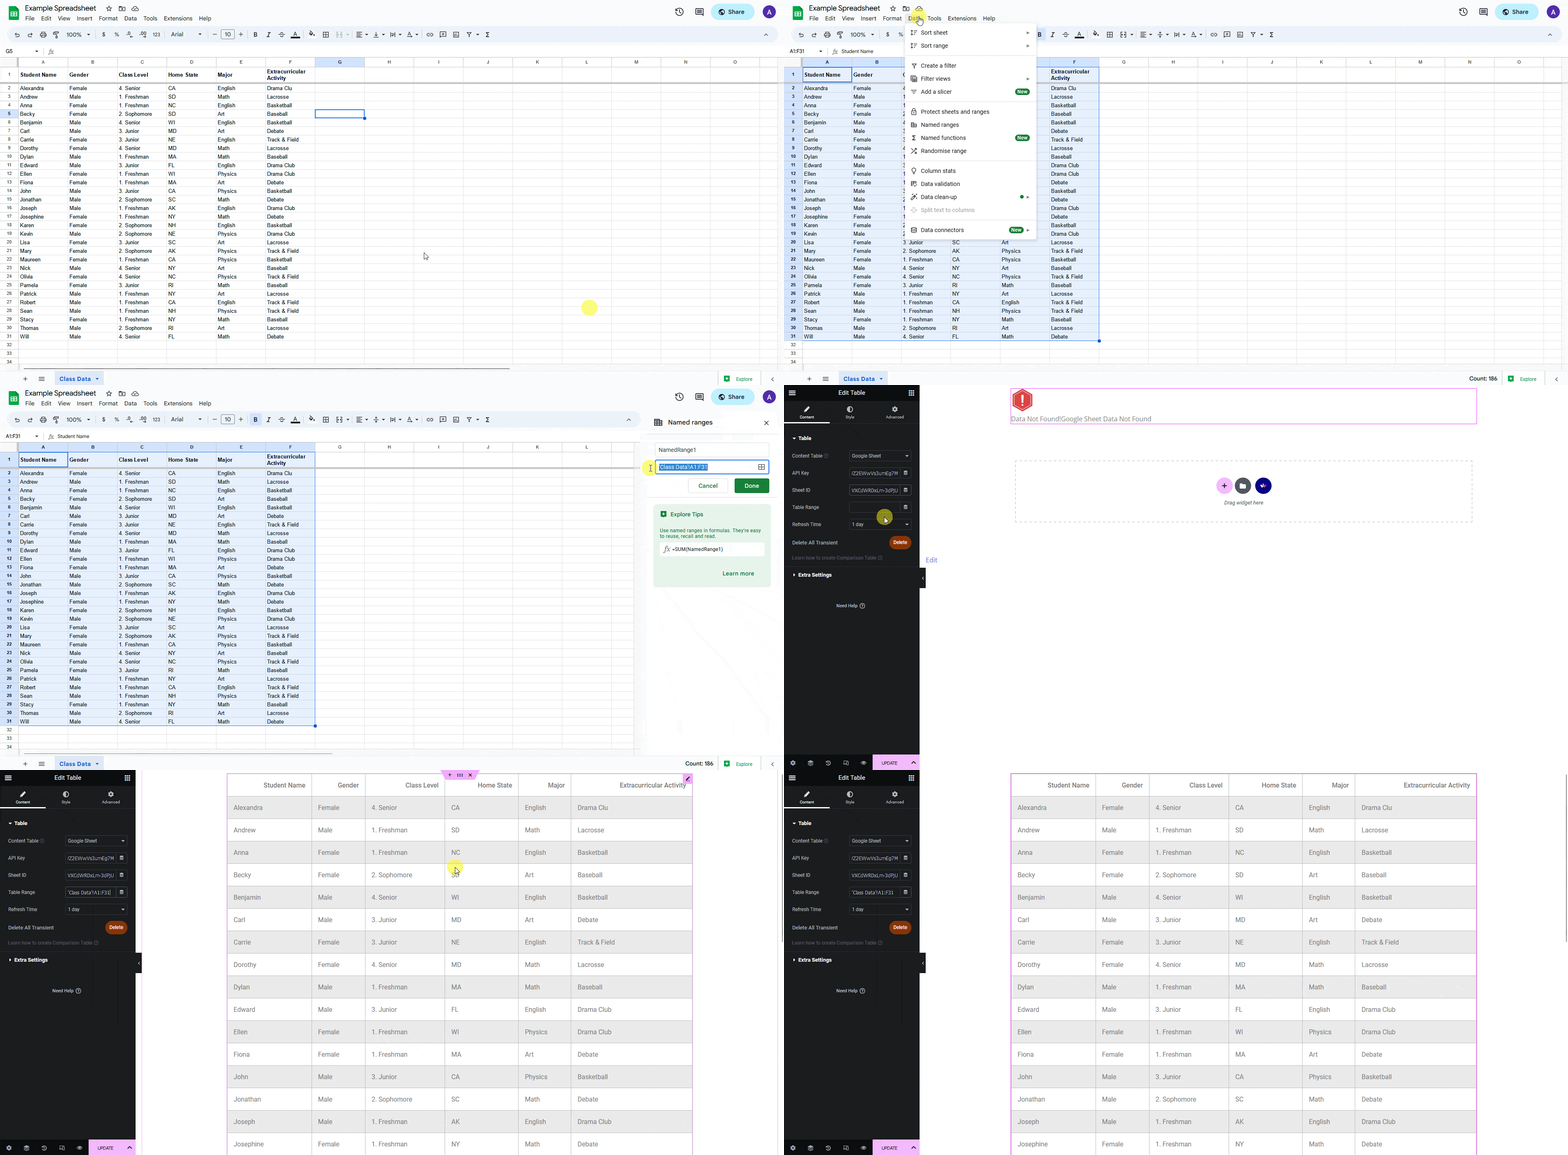
That’s it. Now data from your Google Spreadsheet will show in your Elementor table.
From the Refresh Time dropdown, you can select how often new data will be pulled from the Google Sheet.
But if you want to pull fresh data from the Google Sheet before that specific time, you can click the Delete button in the Delete All Transient section. This will delete the existing data and add new data from the Google Sheet.
Also, check How to Import Data From CSV in Elementor Table.


