





Ninja Forms builds forms quickly, but its own styling options are thin and the finished form usually inherits whatever your theme does with inputs.
The Ninja Form widget in The Plus Addons for Elementor restyles an existing Ninja form from the Elementor panel — labels, single-line fields, text areas, checkboxes and radio buttons — without touching CSS. It also needs one cache setting changed so the form keeps showing after the first visit, covered below.
Requirement – This widget is a part of The Plus Addons for Elementor, make sure it’s installed & activated to enjoy all its powers.
Before You Start
- Edition: Free — the Ninja Form widget ships in the free The Plus Addons for Elementor plugin, and every styling control described here is available without Pro.
- Widget to enable: Ninja Form, switched on under The Plus Addons > Widgets. It only appears there while the Ninja Forms plugin is active.
- You need the form plugin: Ninja Forms installed and activated, with at least one form already created. The widget styles a form that plugin renders; it does not build one.
- Elementor: the free Elementor plugin is enough. None of these controls needs Elementor Pro.
- You need a form: build one in Ninja Forms > Add New first. The Select Form dropdown only lists forms that already exist.
Turn the Widget On
- Go to The Plus Addons > Widgets in the WordPress dashboard.
- Search for Ninja Form.
- Switch its toggle on.

Add the Widget and Pick a Form
- Edit a page with Elementor.
- Drag the Ninja Form widget on to the canvas.
- In Content > Select Form, choose your form.
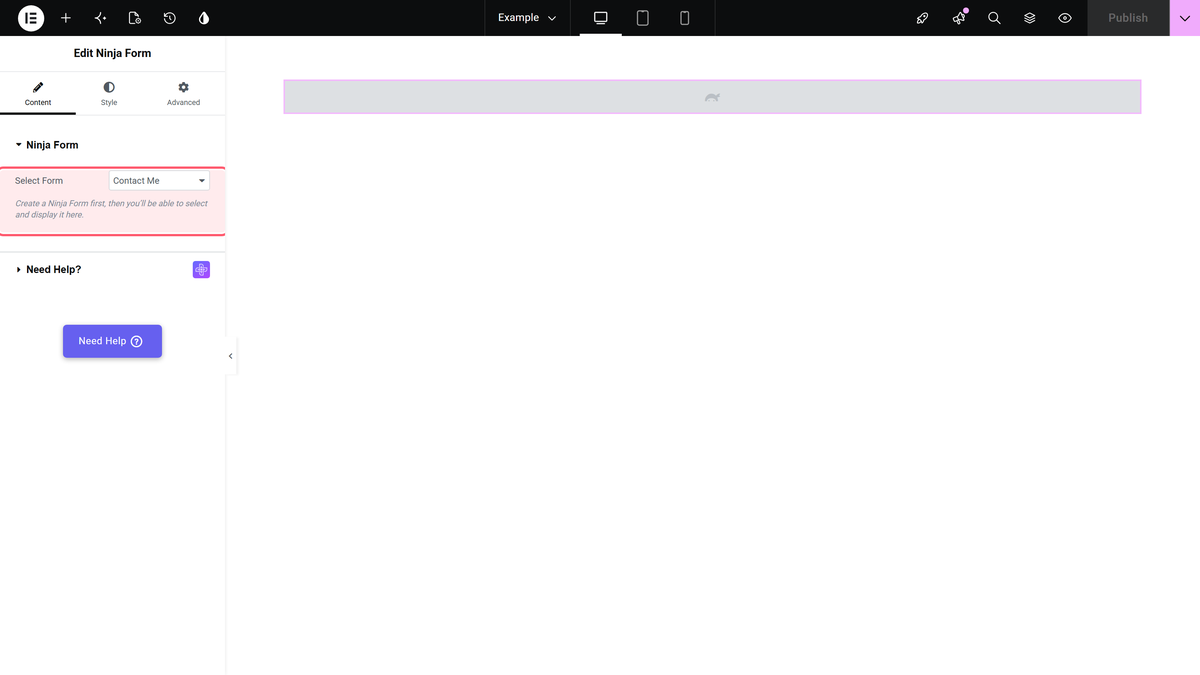
The Elementor canvas stays empty after you pick a form. Preview or publish the page to see the form.
Stop the Form Disappearing After the First Visit
Elementor caches widget output by default. When this widget is served from that cache, Ninja Forms’ own scripts are not loaded and the page shows no form at all. Only the first visit after the cache is cleared shows it. Turn caching off for this widget:
- Select the Ninja Form widget.
- Open Advanced > Layout.
- Set Cache Settings to Inactive.
- Click Update.
You can instead turn the cache off for the whole site under Elementor > Settings > Performance by setting Element Cache to Disable. That affects every widget on the site, so the per-widget setting is usually the better choice.
Style the Labels
Style > Label Styling sets the typography, Label Color and margin of the label above each single field, such as Name, Email or Message. The group title above a set of radio buttons or checkboxes keeps its own style.
Style the Input Fields and Text Areas
Style > Input Fields Styling covers the single-line fields — text, email, number, phone and select. Style > Textarea Fields Styling covers the multi-line boxes. The two sections carry the same controls:
- Padding and Margin, per device.
- Typography, Text Color and Placeholder Color.
- Background Type — colour, gradient or image.
- Border Options: switch Box Border on before Border Style, Border Width and Border Color take effect. Border Radius works either way.
- A Normal / Focus tab.
Style Checkboxes and Radio Buttons
- In the WordPress dashboard, go to Ninja Forms > Settings.
- Under Advanced Settings, set Opinionated Styles to Light or Dark, then save.
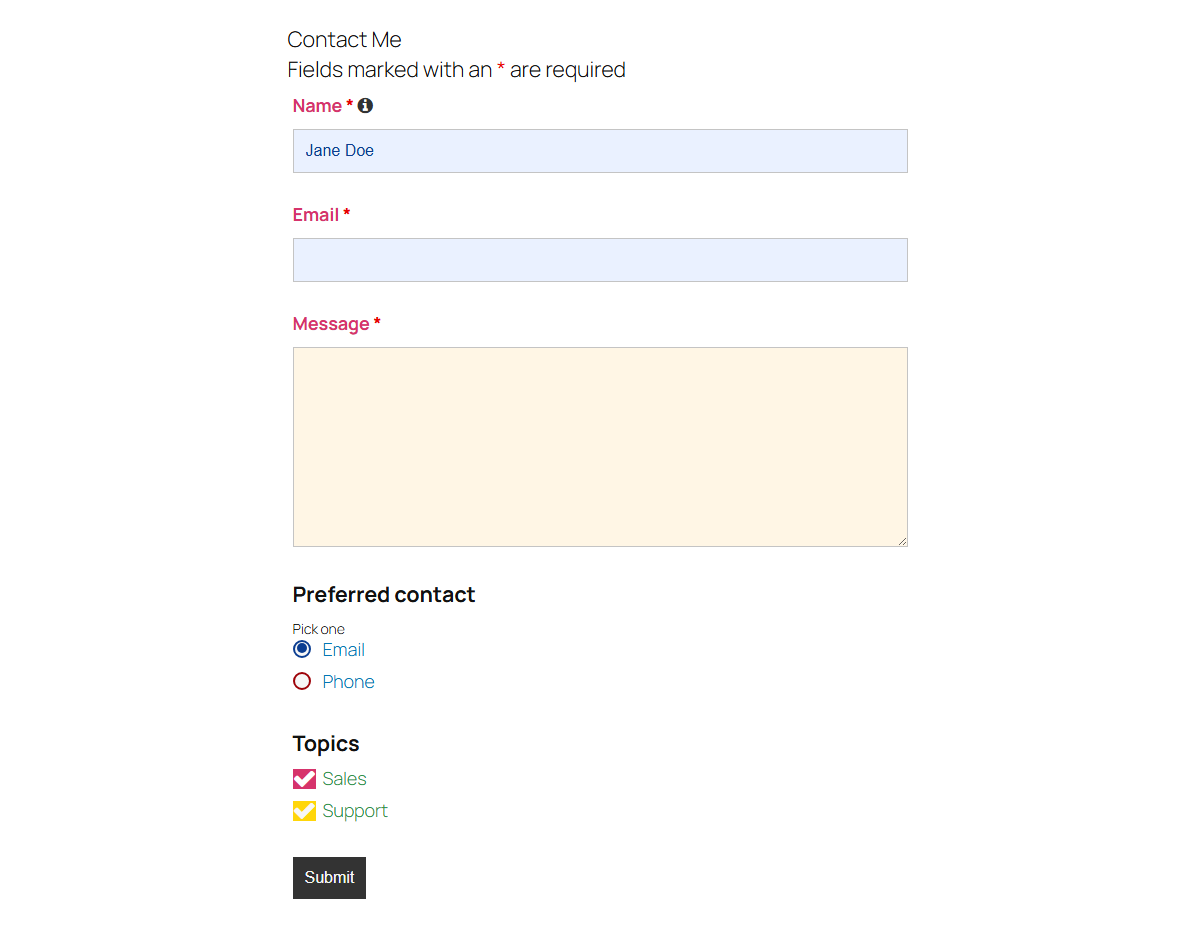
- Back in Elementor, open Style > CheckBox/Radio Field. The Check Box and Radio Button tabs set the option text colour and the checked and unchecked colours of the boxes and circles.
The boxes and circles are drawn by Ninja Forms’ own styles. With Opinionated Styles on None, the browser’s plain checkboxes show and only the option text colour changes.

The Result
Sections That Have No Effect in Version 6.5.0
These sections are in the panel, but in The Plus Addons 6.5.0 they change nothing on the front end:
| Section | What happens |
|---|---|
| Submit/Send Button | The button keeps Ninja Forms’ own look. Use Opinionated Styles in Ninja Forms to change it. |
| Form Heading | The form title keeps its default style. |
| Field Hint | Hint and description text keep their default style. |
| Outer Field | The rows around each field stay unstyled. |
| Form Container | The box around the form stays unstyled. |
How It Behaves
- Fields, actions and email settings stay in Ninja Forms. The widget never edits the form.
- Padding, margin, typography and border widths are all per-device.
- Nothing renders in the Elementor canvas — check your work with Preview Changes or on the published page.
Limitations
- With Elementor’s element cache on, the form disappears after the first visit. Set Advanced > Layout > Cache Settings to Inactive on the widget.
- The form does not render inside the Elementor editor. The canvas is empty until the page is previewed or published.
- Submit/Send Button, Form Heading, Field Hint, Outer Field and Form Container have no effect in version 6.5.0.
- Checkbox and radio styling needs Ninja Forms’ Opinionated Styles set to Light or Dark.
- There is no File/Upload Field section in this widget, so a Ninja Forms file upload field keeps the browser’s own control.
- Border Style, Border Width and Border Color do nothing until Box Border is on.
Troubleshooting
The widget is not in the Elementor panel
Check that Ninja Forms is active, then that the Ninja Form toggle is on under The Plus Addons > Widgets.
The canvas is empty after I pick a form
The form does not render in the Elementor canvas. Preview or publish the page to see it.
The form shows once, then the page is blank
Elementor is serving the widget from its cache. Set Advanced > Layout > Cache Settings to Inactive on the widget and update the page.
The Submit button does not change
Submit/Send Button has no effect in version 6.5.0. Change the button with Ninja Forms’ Opinionated Styles setting instead.
Checkbox colours do nothing
Set Ninja Forms > Settings > Opinionated Styles to Light or Dark.
My border colour does nothing
Switch Box Border on in that section first.
