Do you want to add different post meta in the Elementor blog post? Showing different post meta, such as date, author name, taxonomies etc. can add context to blog posts by providing additional details.
With the Post Meta widget from The Plus Addons for Elementor, you can easily add different post meta on the Elementor blog post page.
To check the complete feature overview documentation of The Plus Addons for Elementor Blog Builder, click here.
Required Setup
- Elementor FREE Plugin installed & activated.
- You need to have The Plus Addons for Elementor plugin installed and activated.
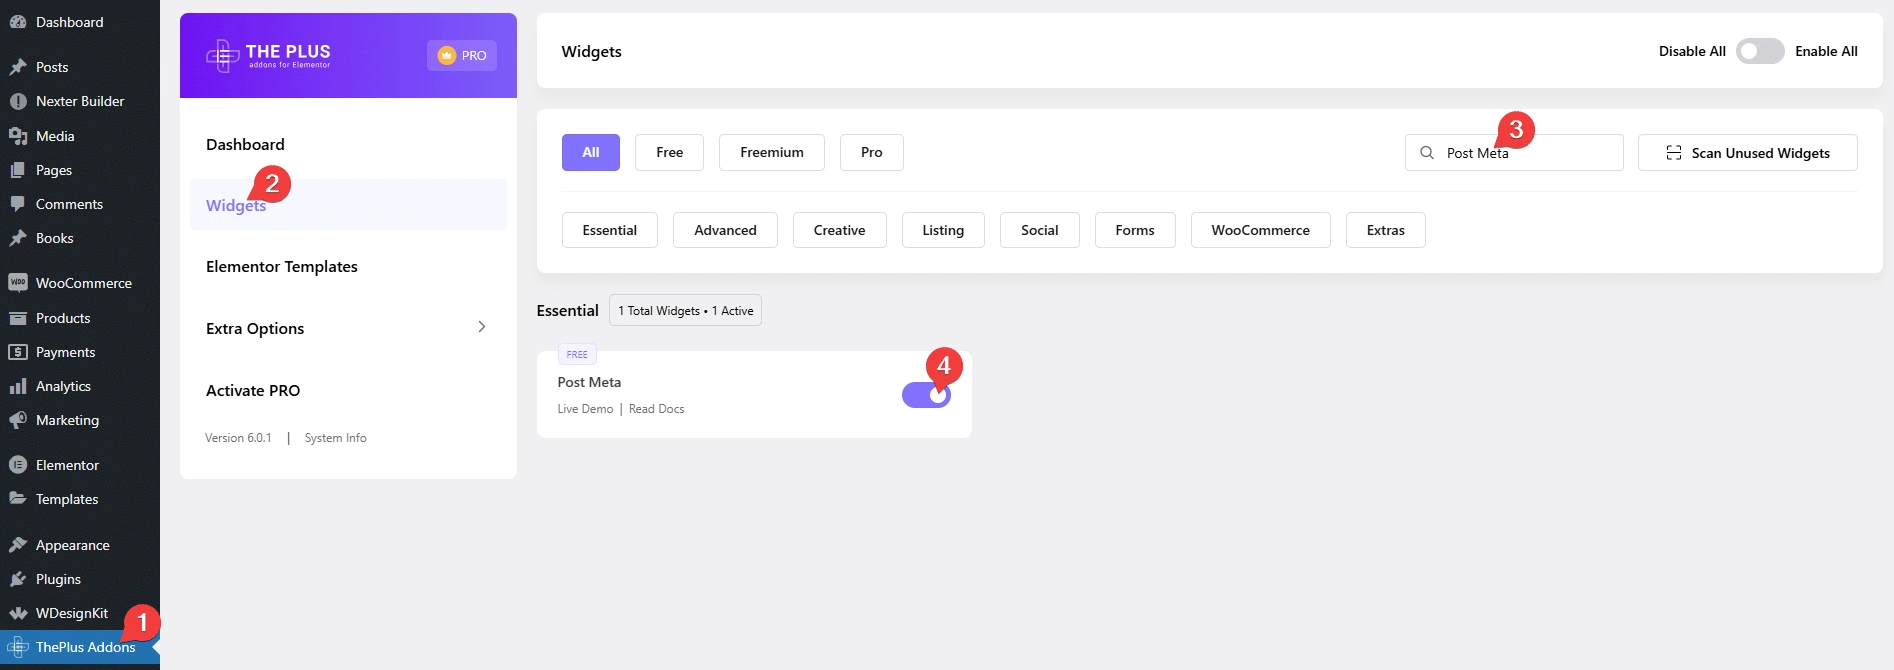
- Make sure the Post Meta widget is activated, to verify this visit The Plus Addons → Widgets → and Search for Post Meta and activate.
How to Activate the Post Meta Widget?
Go to
- The Plus Addons → Widgets
- Search the widget name and turn on the toggle.
Add Post Meta
Add the Post Meta widget to the appropriate location on the blog post template.
To create the blog post template, you can use the free Nexter Builder or you can use Elementor Pro if you are already using it.
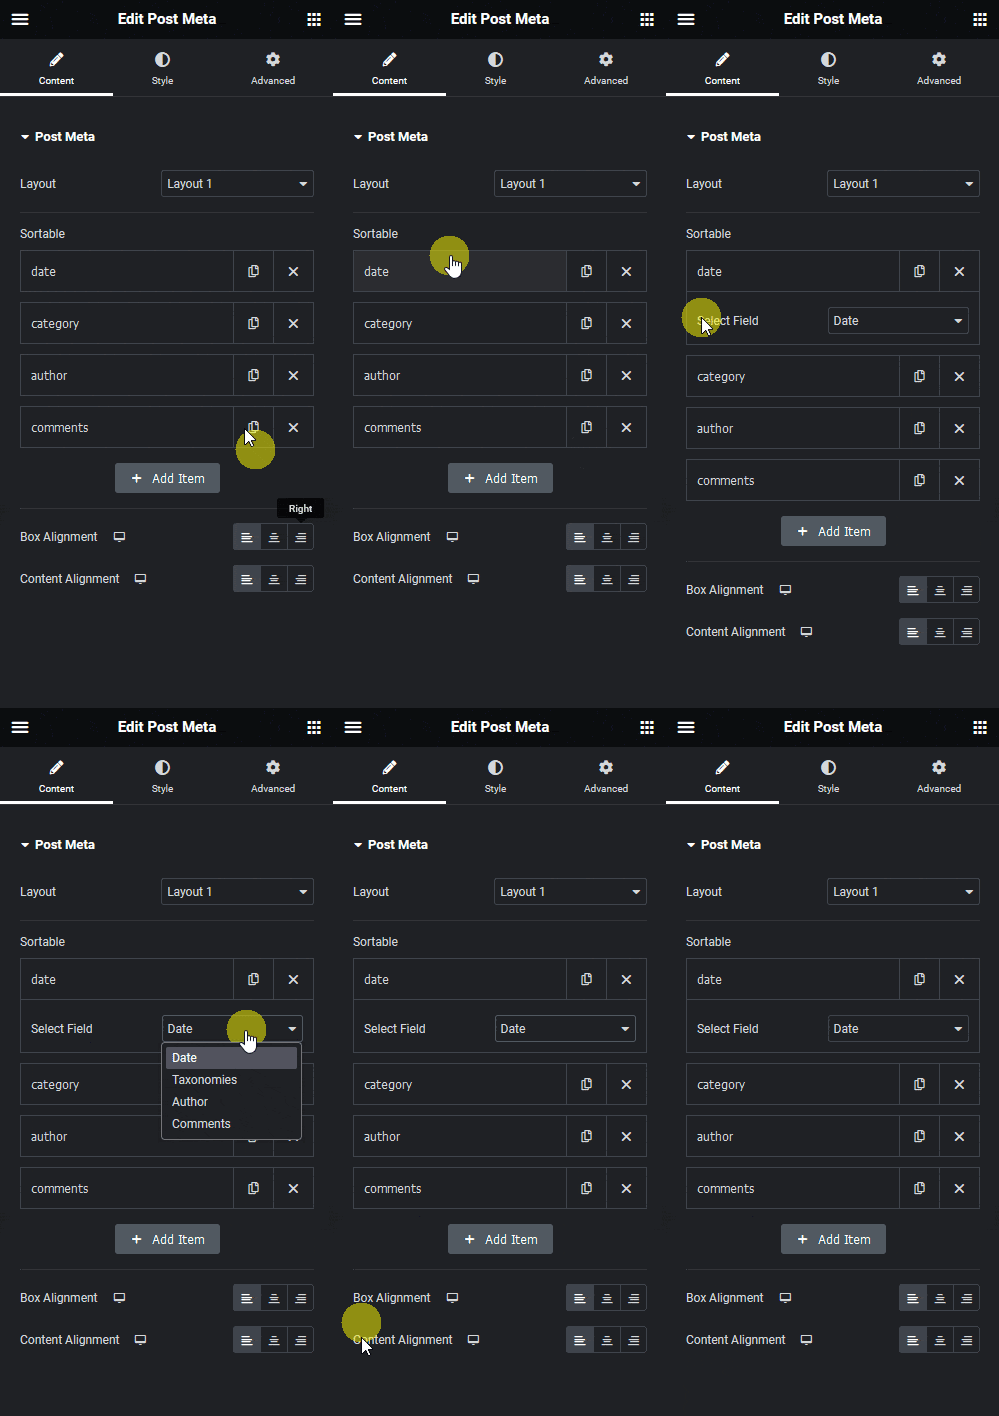
From the Layout dropdown, you can select from two predefined styles.
In the Sortable section, you’ll find four items. Open one item.
From the Select Field dropdown, you have to select the meta type. Here, you’ll find four options –
Date – To show the post date.
Taxonomies – To show different taxonomies such as category, tag etc.
Author – To show the post author name.
Comments – To show the number of comments on the post.
Select the option as per your requirement.
In a similar way, you can edit the other items.
You can click on the + Add Item button to add more items.
From the Box Alignment section, you can align the content within the container.
You can align the content from the Content Alignment section.
Show the Post Date
To show the post date on a blog post, open an item from the Sortable section.
From the Select Field dropdown, select Date.
Also read, 10+ best blogs & YouTube channels to learn Elementor
Now, the post date will show on the post.
Show the Post Taxonomies
To add the post taxonomies to a blog post, open an item from the Sortable section.
From the Select Field dropdown, select Taxonomies.
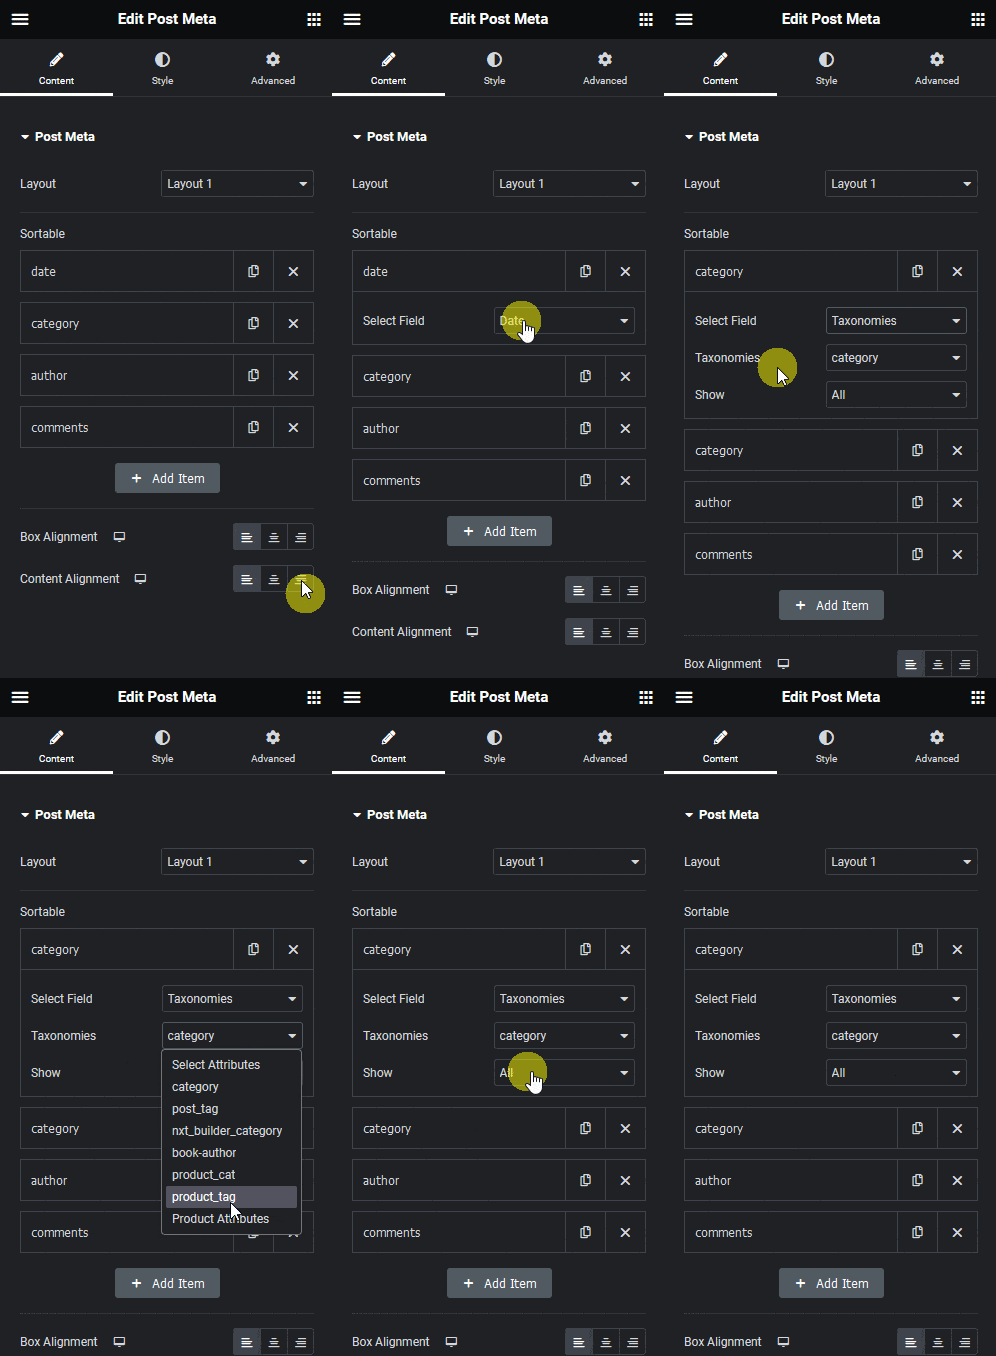
Then, from the Taxonomies dropdown, you have to select the taxonomy.
category – To show post category.
post_tag – To show post tags.
Note: If you have custom taxonomies or different plugins that create custom taxonomies, such as the WooCommerce plugin, you’ll see more relevant options.
From the Show dropdown, you can show all the items or items related to the current post only.
Show the Post Author
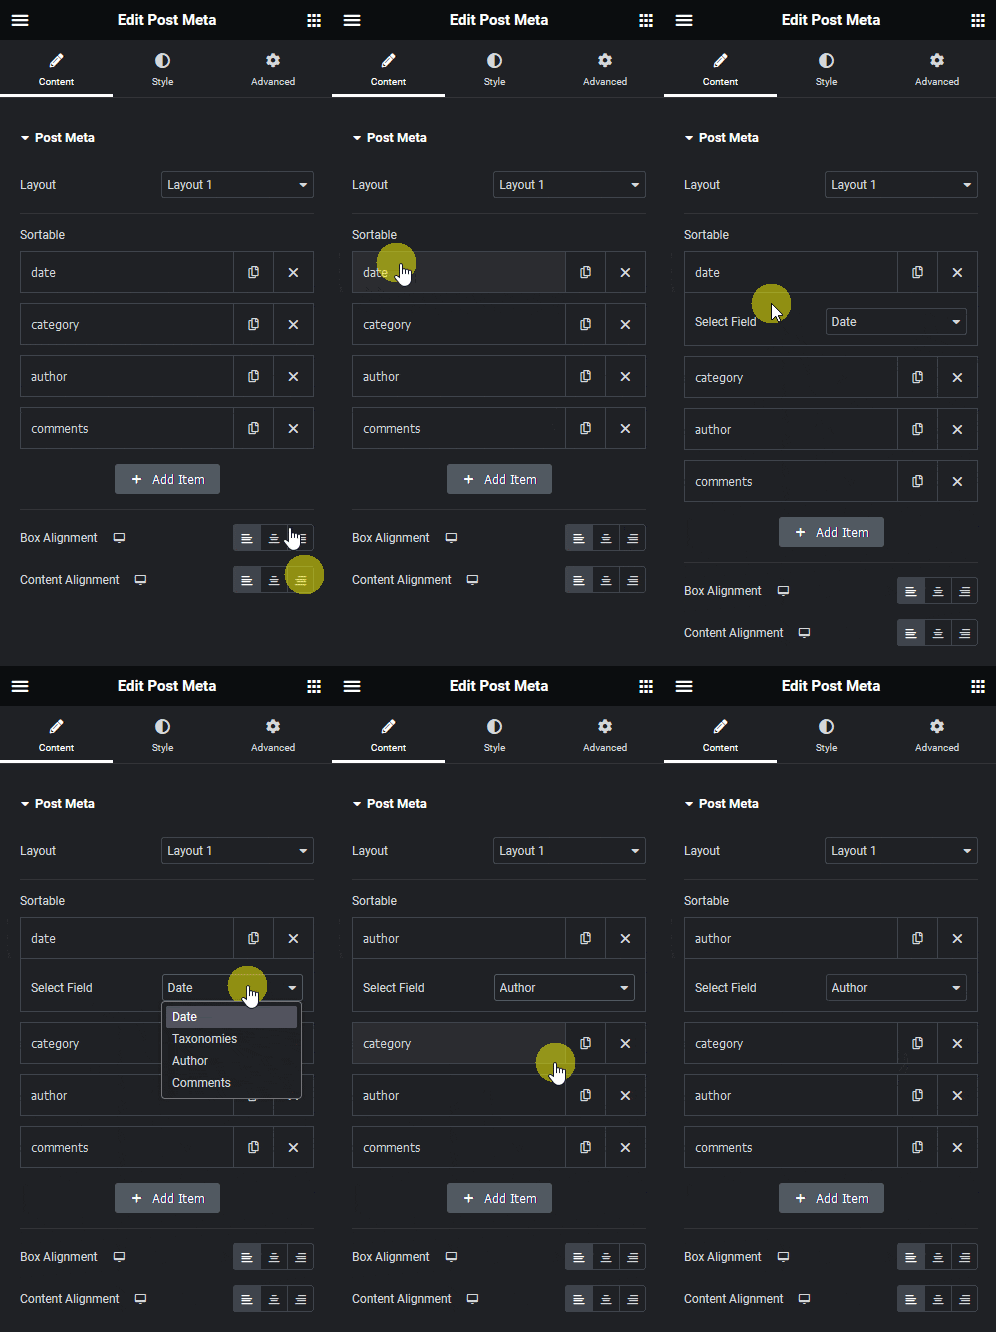
To show the post author’s name on a blog post, open an item from the Sortable section.
From the Select Field dropdown, select Author.
Suggested reading, how to add post author box in Elementor blog post.
Now, the post author’s name will show on the post.
Show Number of Comments
To show the number of comments on a blog post, open an item from the Sortable section.
From the Select Field dropdown, select Comments.
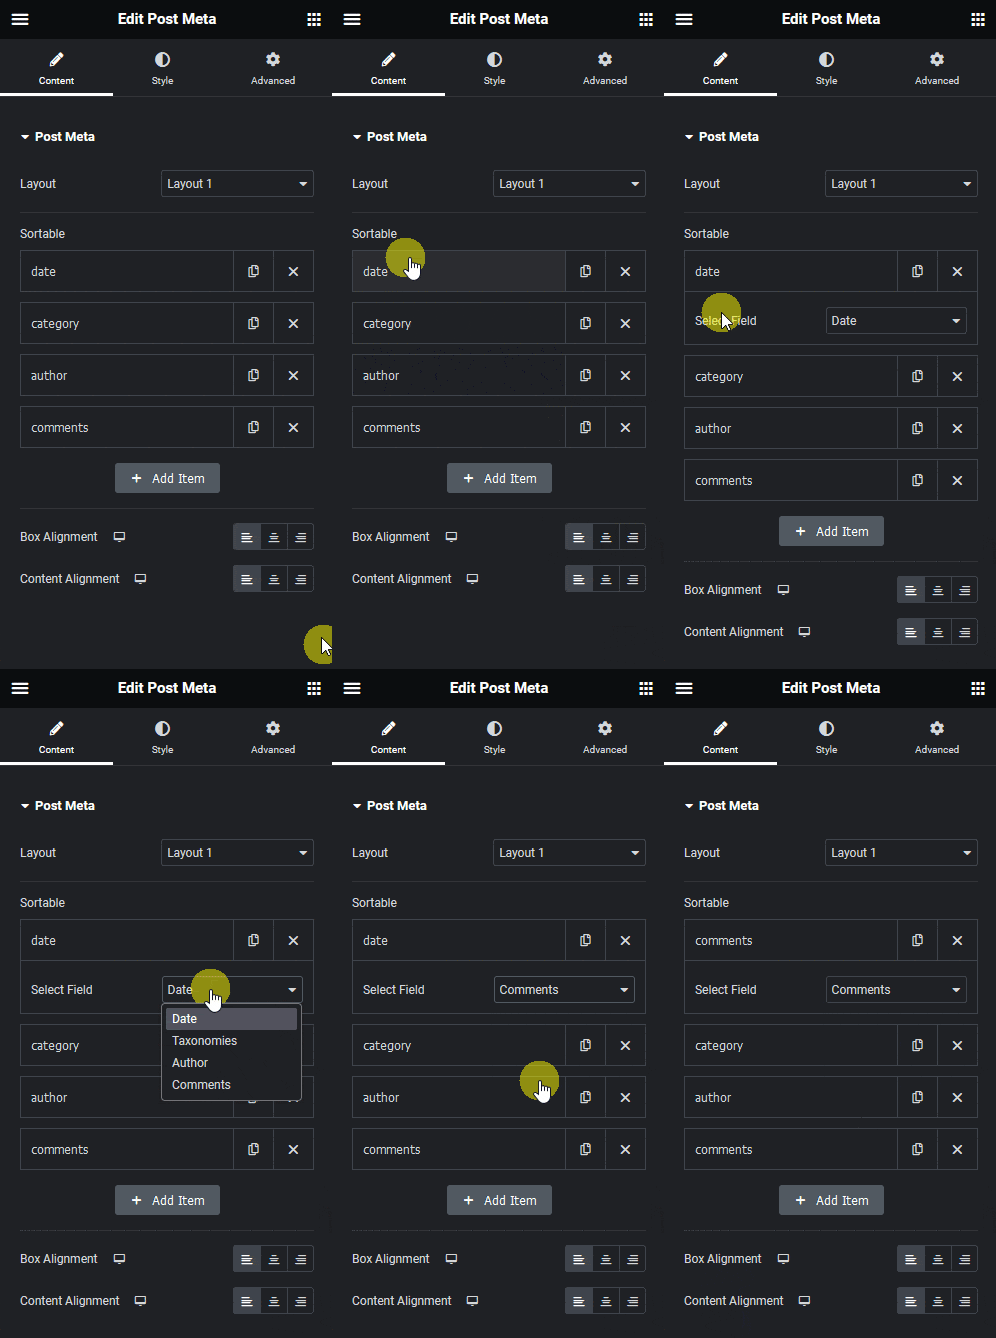
Now, the number of comments will show on the post.
Now based on your selection, you’ll see relevant post meta on your bog post.
From the Style tab, you can customize the style further.

Also, read how to add post next & previous button in Elementor blog post.


