Using the timeline style allows you to display a chronological sequence of events in a visually appealing manner.
With the Timeline widget from The Plus Addons for Elementor, you can easily show events in a timeline in Elementor.
Check the Live Widget Demo
Required Setup
- Elementor FREE Plugin installed & activated.
- You need to have The Plus Addons for Elementor plugin installed and activated.
- This is a Premium widget, and you need the PRO version of The Plus Addons for Elementor.
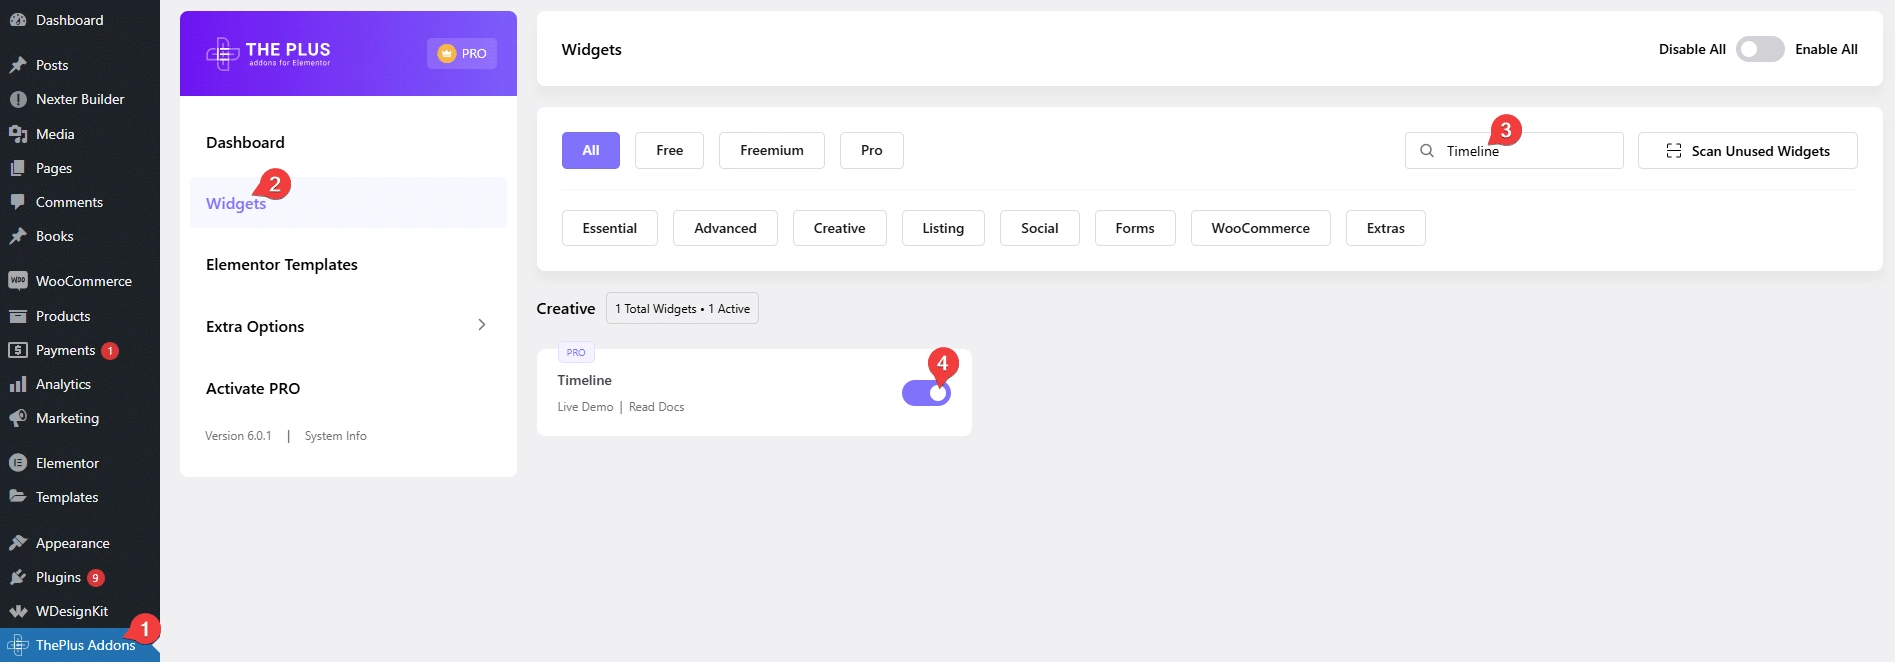
- Make sure the Timeline widget is activated, to verify this visit The Plus Addons → Widgets → and Search for Timeline and activate.
Learn via Video Tutorial:
How to Activate the Timeline Widget?
Go to
- The Plus Addons → Widgets
- Search the widget name and turn on the toggle.
Key Features
- Two Preset – You can select from two preset styles.
- Button – You can easily add a button in the timeline.
- Elementor Template – You can use an Elementor template in the timeline.
How to Use the Timeline Widget in Elementor?
Add the Timeline widget from The Plus Addons for Elementor to the page.
Note: By clicking on the Import Presets button, you can import a ready-made design and customize it as per your requirements.
Content
From the Style section, you have to select a predefined style.
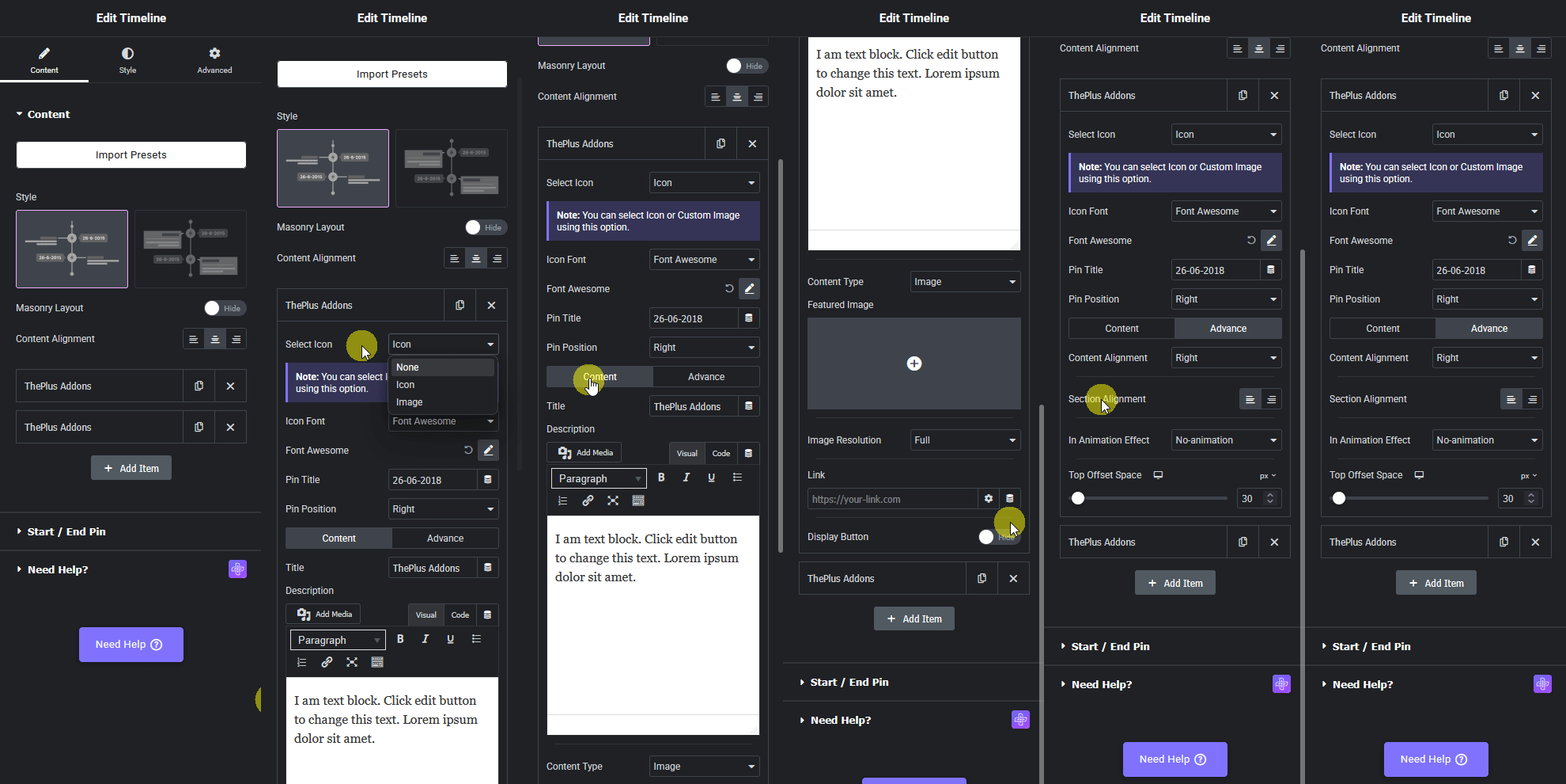
Then by enabling the Masonry Layout toggle, you can make the timeline items spacing more compact.
From the Content Alignment section, you can align the timeline items.
Then you’ll find a repeater section, here you’ll have to add the timeline content. You’ll find two items by default, open one item –
From the Select Icon dropdown, you can add an icon or image to the timeline pin. Here you’ll find three options –
- None – This won’t add any icon or image to the pin.
- Icon – With this option, you can add an icon to the pin.
- Image – With this option, you can add an image to the pin.
Select the option as per your requirements, let’s select Icon here.
Note: Based on the selected option you’ll find different options to add the icon or image.
From the Icon Font dropdown, you can select the icon library.
Then from the Icon Library section, you have to select the icon.
In the Pin Title field, you can add the pin title.
From the Pin Position dropdown, you can set the pin position.
You can add the title for the timeline item in the Title field under the Content tab.
Then in the Description section, you can add the timeline item description.
From the Content Type dropdown, you can select different content types for the timeline item. Here you’ll find three options –
- Image – To add an image after the title of the timeline item.
- Iframe/HTML – To add an iFrame or HTML content after the title of the timeline item.
- Template – To use an Elementor template in the timeline item.
Select the option as per your requirements, let’s select Image here.
In the Featured Image section, you have to add the image.
From the Image Resolution section, you can manage the image size.
You can add a link to the timeline item from the Link field.
From the Display Button toggle, you can add a button to the timeline item.
Then from the Advanced tab, you can align the timeline item content from the Content Alignment dropdown.
From the Section Alignment section, you can change the timeline item position to left or right in the timeline.
You can an entrance animation to the timeline item from the In Animation Effect dropdown.
Then from the Top Offset Space section, you can add top spacing to the timeline item for responsive devices.
Following this process you can edit the other item.
You can click the + Add Item button to add more timeline items.
Start / End Pin
From the Pin Center Style dropdown, you can select a predefined style for the pins.
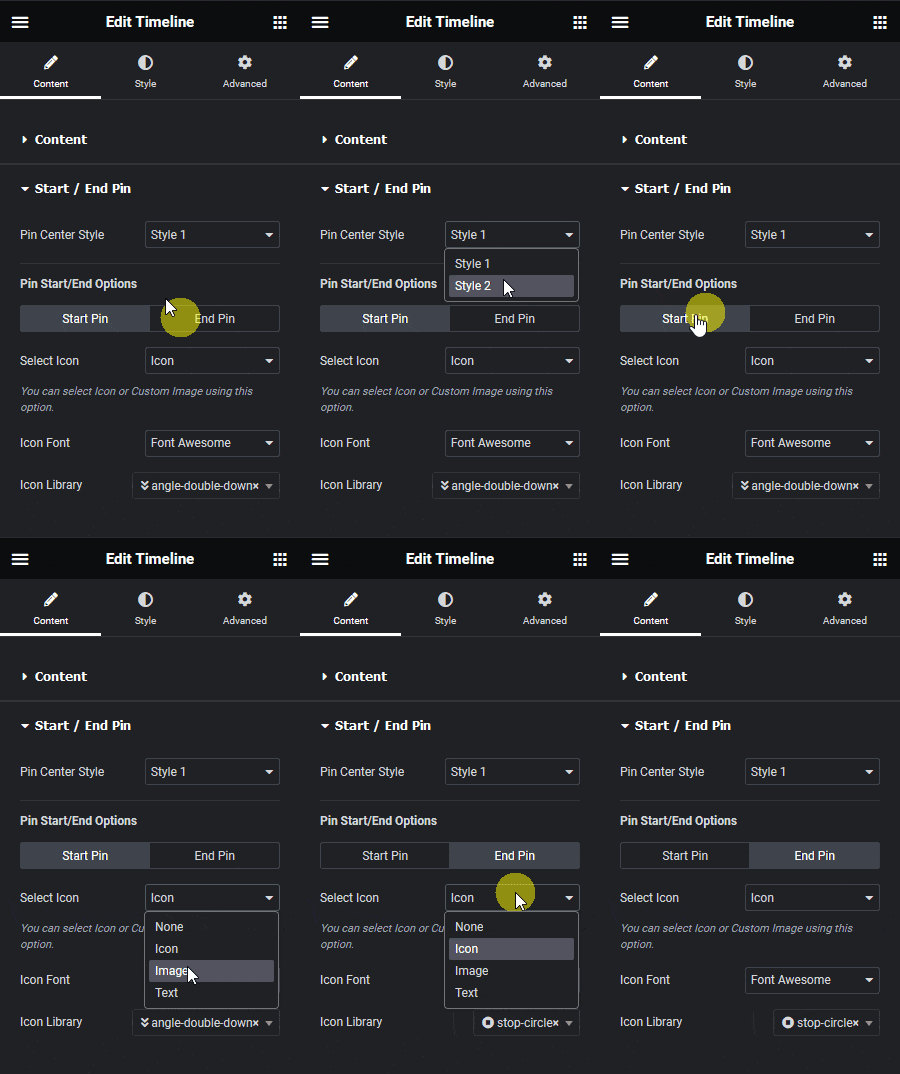
From the Select Icon dropdown, under the Start Pin tab, you can add a starting pin in the timeline. Here you’ll find four options –
- None – This won’t add any starting pin.
- Icon – With this option, you can add an icon as the starting pin.
- Image – With this option, you can add an image as the starting pin.
- Text – With this option, you can add text as the starting pin.
Select the option as per your requirements, based on your selection you’ll find different options to add the content.
Similarly from the End Pin tab, you can add an end pin in the timeline.
How to Style the Elementor Timeline Widget?
To style the Timeline widget, you’ll find all the options under the Style tab.
Loop Pin Style – From here, you can style the timeline pin title and pin icon.

Title Style – From here, you manage the timeline title typography, color and border for normal and hover states.
Description / Content Style – From here, you can manage the title content typography and color.
Button Options – From here, you can style timeline buttons.
Pin Start / End Style – From here, you can manage the timeline divider color, start and end pin icon size and color.
Extra Options – From here, you can manage the gap between the timeline items and the divider.
Advanced options remain common for all our widget, you can explore all its options from here.
