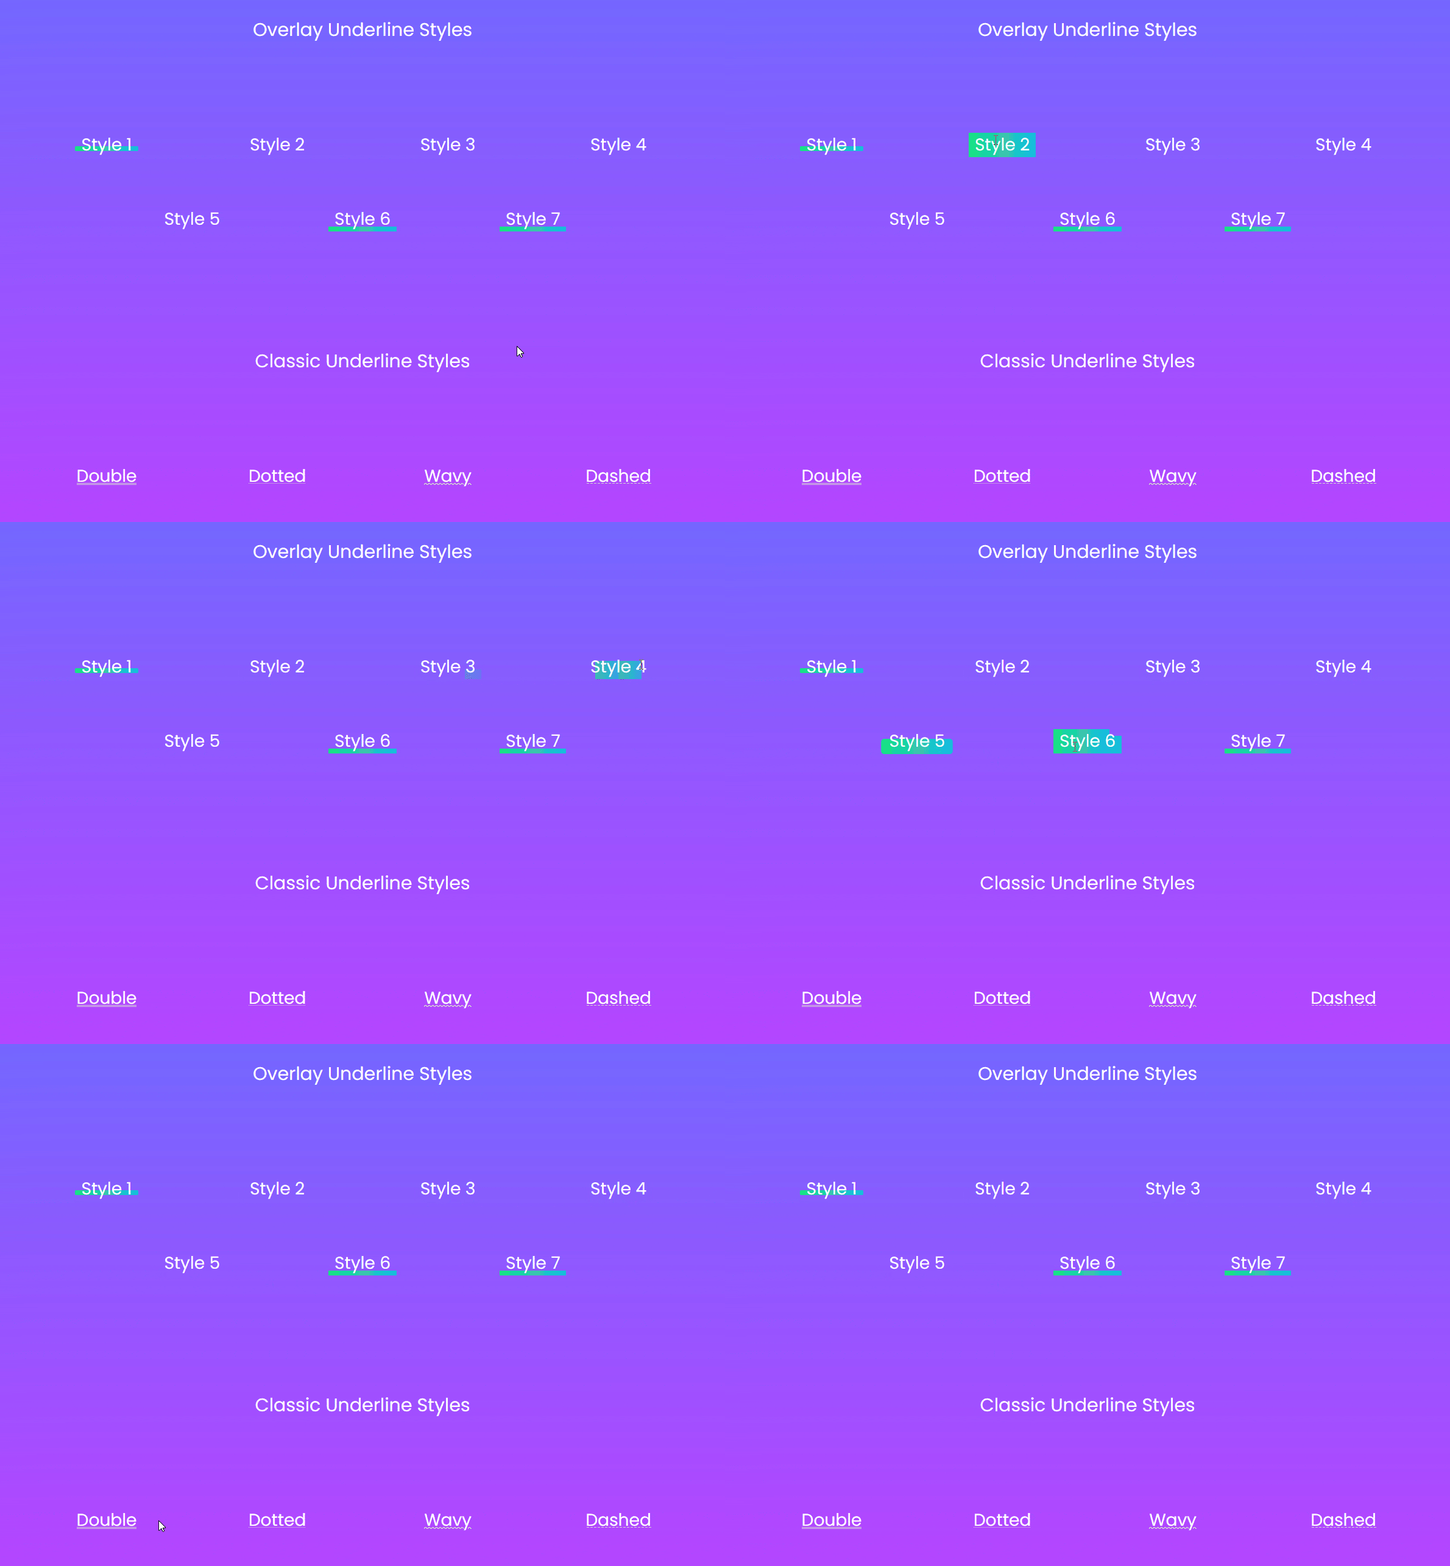
Want a highlighter-style underline that grows over your text on hover?
The Advance Underline Options of the Advanced Typography widget from The Plus Addons for Elementor add classic text underlines and seven overlay styles.
To check the complete feature overview documentation of The Plus Addons for Elementor Advanced Typography widget, click here.
Requirement – This widget is a part of The Plus Addons for Elementor, make sure it’s installed & activated to enjoy all its powers.
Before You Start
- Edition: Pro — The Advanced Typography widget needs The Plus Addons for Elementor Pro. In the free plugin it shows in the Elementor panel with a lock icon.
- Widget to enable: Advanced Typography, switched on under The Plus Addons > Widgets.
Steps
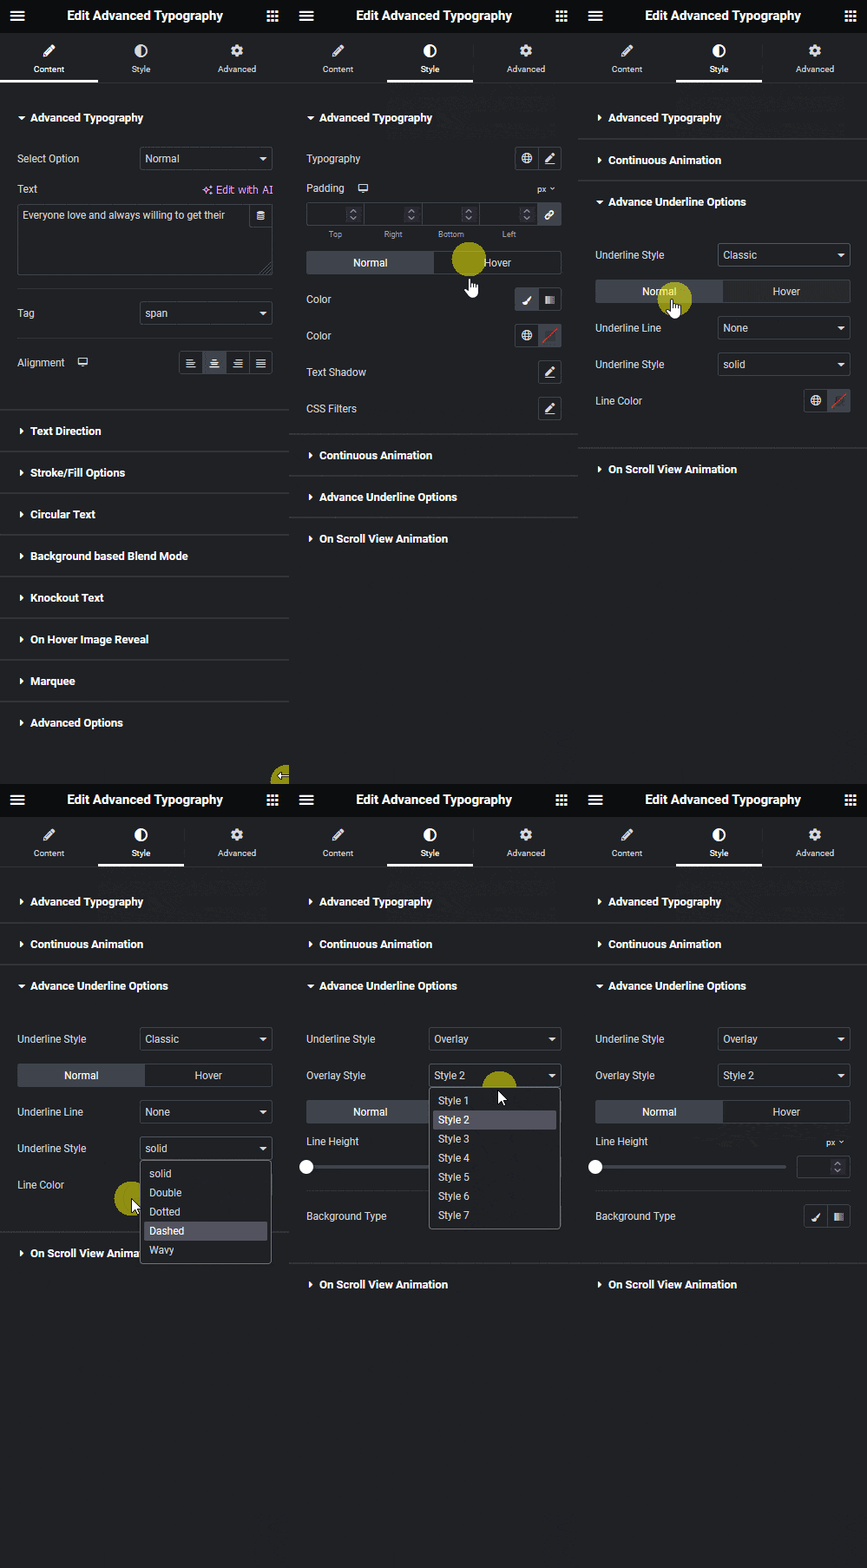
- Add the Advanced Typography widget, keep Select Option on Normal and type your text.
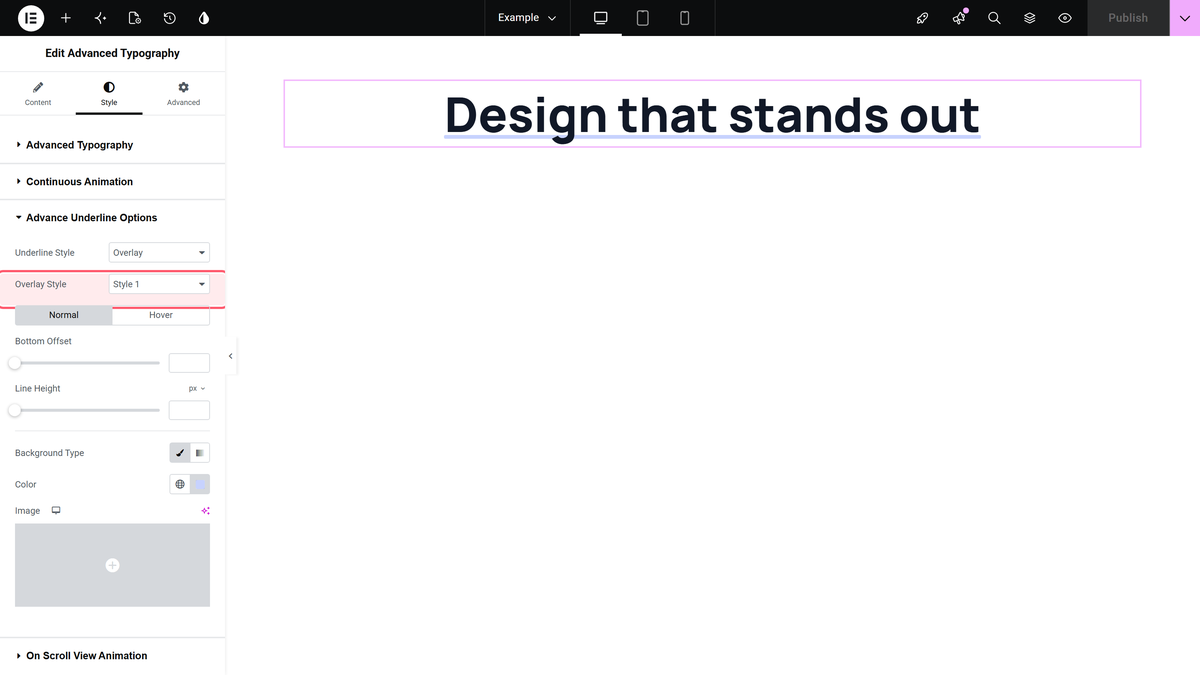
- Go to Style > Advance Underline Options.
- Set Underline Style to Overlay (or Classic for a normal underline).
- Pick an Overlay Style, from Style 1 to Style 7.
- On the Normal and Hover tabs, set the Line Height and pick a color under Background Type and Color.
Settings
| Setting | What it does |
|---|---|
| Underline Style | None (default), Classic or Overlay |
| Overlay Style | Style 1 to Style 7 (Overlay only). Style 7 has no Normal/Hover settings |
| Bottom Offset | Distance of the line from the bottom (Overlay Style 1 only) |
| Line Height / Hover Line Height | Thickness of the overlay line, normally and on hover |
| Background Type / Color | Classic or gradient color of the overlay, normally and on hover |
| Underline Line | Classic: Underline, Overline or Line Through (also on hover as Classic Hover) |
| Underline Style (Classic) | Solid, Double, Dotted, Dashed or Wavy |
| Line Color | Classic line color, normally and on hover |
Overlay Style 1 with a light color, before hover:

How It Behaves
- The underline covers the whole text. You can’t underline only part of it in Normal mode.
- Overlay Style 1 starts as a thin line (5 px, 10 px from the bottom) and grows to the full height of the text on hover. Without your own color it is red.
- Classic uses CSS text decoration, for example an Underline with the Wavy style.
- To underline only some words, use Multiple mode: each item has its own Advance Underline Options.