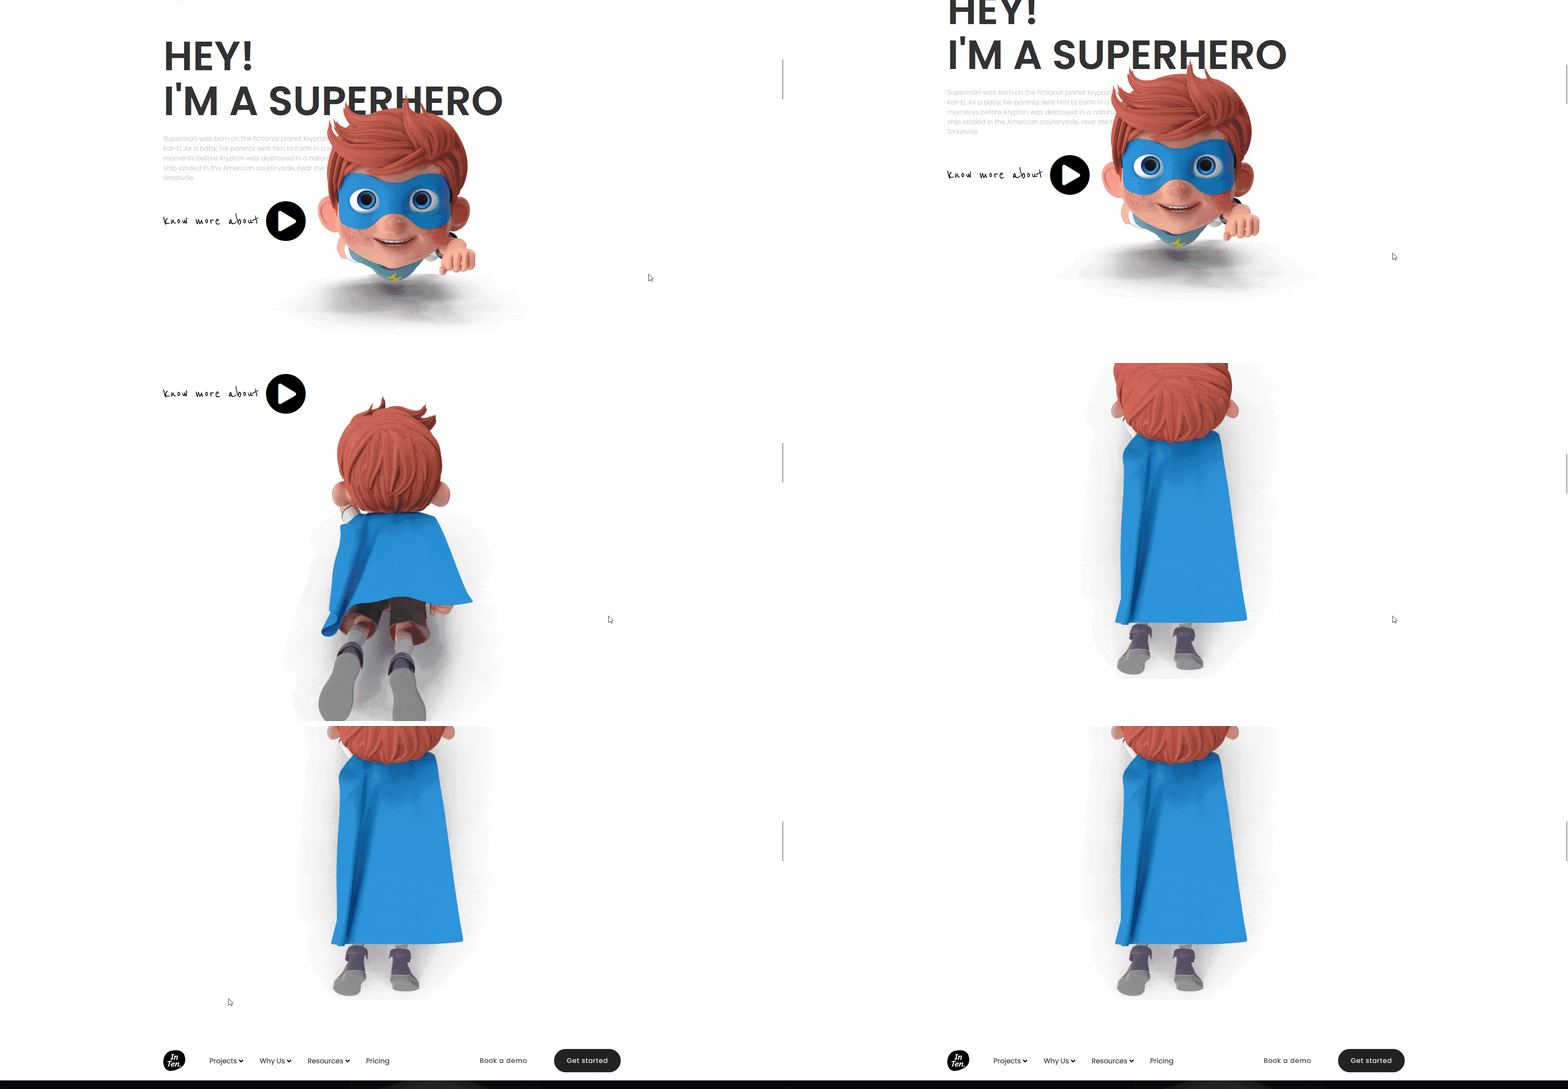
Scroll Sequence animation is a popular technique that is increasingly being adopted by designers to enhance the user experience on websites. This technique allows designers to create a story-like experience for visitors as they move down the page, with each section revealing new information or features. The goal of Scroll Sequence elementor widget is to engage the user and make the website more visually interesting and memorable.
With the Scroll Sequence widget from The Plus Addons for Elementor, you easily create amazing image scrolling animations on your Elementor website.
Required Setup
- Elementor FREE Plugin installed & activated.
- You need to have The Plus Addons for Elementor plugin installed and activated.
- This is a Premium widget, and you need the PRO version of The Plus Addons for Elementor.
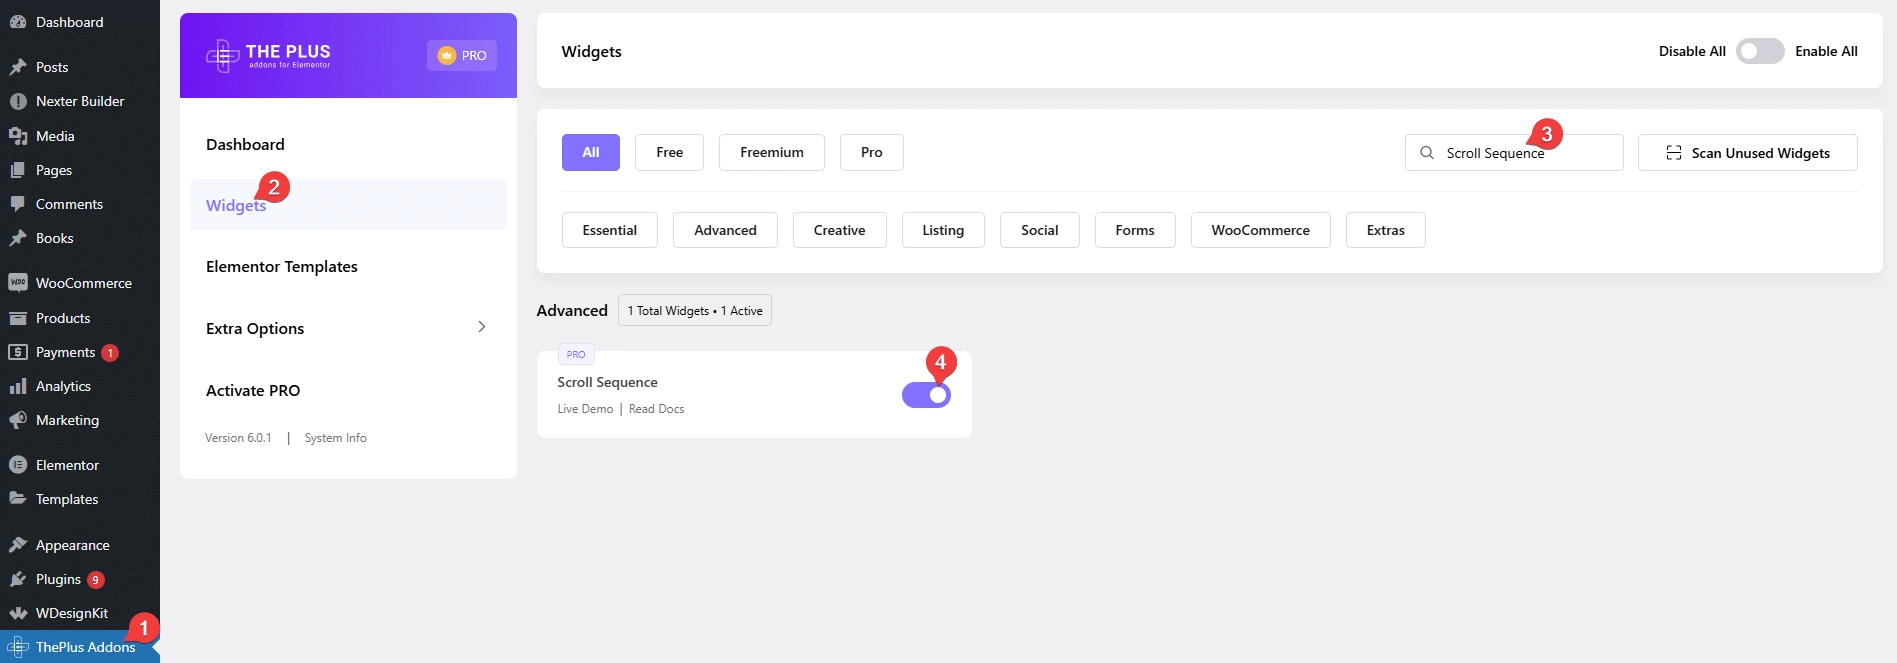
- Make sure the Scroll Sequence widget is activated, to verify this, visit The Plus Addons → Widgets → and Search for Scroll Sequence and activate.
How to Activate the Scroll Sequence Widget?
Go to
- The Plus Addons → Widgets
- Search the widget name and turn on the toggle.
Key Features
- Multiple places to add scroll sequence – You can apply scroll sequence to multiple places, Default (Container / Section), Body and Inner Column.
- Multiple image sources – You can create image sequence animation from an image gallery or an external URL.
- Sticky section – You can add sticky sections to add different types of content.
How to Create Image Sequence Animations in Elementor?
To create an image sequence animation in Elementor, add a section or container (for flexbox).
Then add the Scroll Sequence widget there, in the Apply To section under the Scroll Sequence tab, you have to choose where you want to add the scroll sequence animation. Here you’ll find three options –
Default – In this option, it will apply to a section or container (in flexbox).
Body – In this option, it will apply to the page body. Learn the process.
Inner Column – If you are using Elementor sections, then with this option, you can add scroll sequence animation in the column of a section or inner section. Learn more.
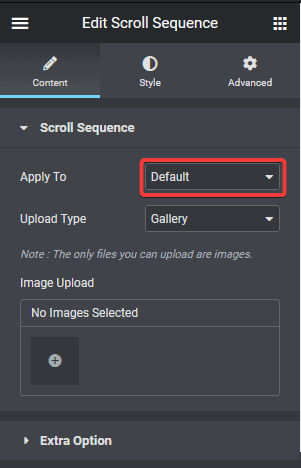
We’ll keep it to Default here.
Then, in the Upload Type, you can choose the image source for the sequence animation. Here you’ll find two options –
Gallery – In this option, you can add images from your WordPress media library.
Remote Server – With this option, you can add images from an external URL to create an image scroll sequence. Learn the process.
Here we will keep it to Gallery, and then from the Image Upload section, you can add images from the media library.
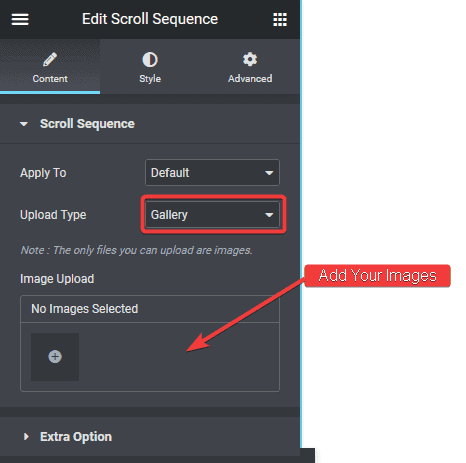
Supported image type – JPG, PNG and WebP.
Then under the Extra Option tab, you’ll find Preload Image (%), here you can choose the number of images to load at first from your image sequence, then the rest of the images will load.
You can decide the number based on your image sequence so that it doesn’t increase the load time.
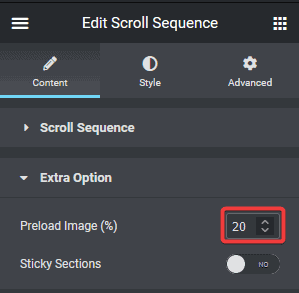
Then from the Sticky Sections, you can add content over the scrolling sequence to animate with it on the scroll. Learn the process.
If you don’t have long enough content on the Section or Container (in flexbox) then you have to set a minimum height for the Section or Container (for flexbox) containing the Scroll Sequence widget for the scroll animation to work.
For Elementor Section
Select the Section in the Layout tab, set Height to Min-Height, and from the Minimum Height section, set a minimum height.
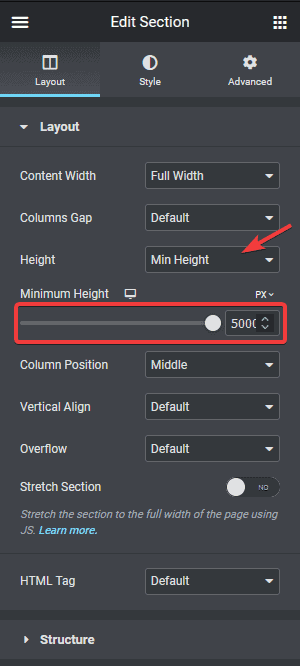
Note: The height will decide the speed of your scroll sequence animation, higher the number slower and smoother the animation.
For Flexbox Container
From Min Height under the Layout tab, you can set the minimum height.
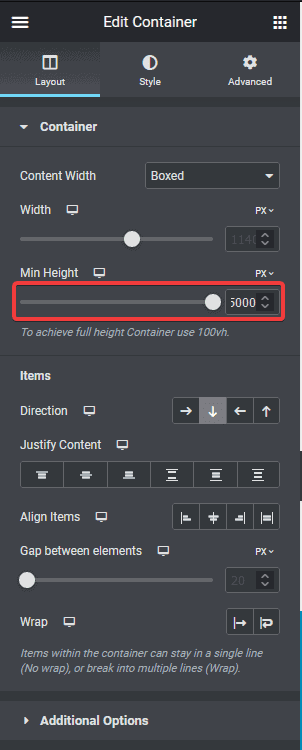
Now you should have a beautiful image scrolling sequence animation.
How to Style the Scroll Sequence Widget?
You can do some position styling of the Scroll Sequence widget from the Style tab.
Position – From here you can move the Scroll Sequence from top and left.
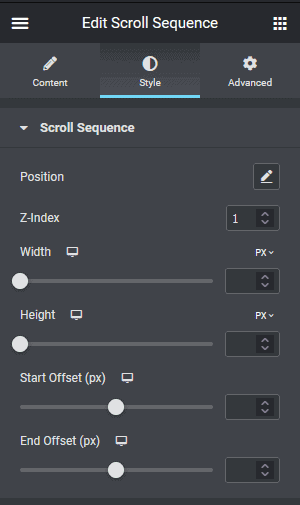
Z-index – From here, you can set a z-index value for the Scroll Sequence.
Width – From here, you can set a width for the Scroll Sequence, by default, it is 100%.
Height – From here, you can set a height for the Scroll Sequence.
Start Offset (px) – The value set here will delay the start of the sequence by equivalent pixels. For example, if the Start Offset (px) is set to 500, then the animation will start once the user scrolls down by 500px.
End Offset (px) – The value set here will end the sequence before equivalent pixels. For example, if the End Offset (px) is set to 500, then the animation will end 500px before the section ends.
Advanced options remain common for all our widget, you can explore all it options from here.
