






---
title: "How to Protect Content Based on User Role in Elementor Website?"
url: https://theplusaddons.com/docs/protect-content-based-on-user-role-in-elementor/
date: 2024-02-22
modified: 2026-09-16
lang: en
author: "Aditya Sharma"
description: "Some content should only be for people who are already logged in — a price list for customers, notes for editors, a download for subscribers. The Protected Content widget in..."
image: https://theplusaddons.com/wp-content/uploads/2024/03/How-to-Protect-Content-Based-on-User-Role-in-Elementor-Website_-1024x536.jpg
word_count: 726
---

# How to Protect Content Based on User Role in Elementor Website?

## 

- Protected Content in The Plus Addons for Elementor Pro gates a section by WordPress user role, and choosing User role removes the password form completely.
- The Plus Addons for Elementor Pro requires the Protected Content widget to be switched on under The Plus Addons > Widgets, and the widget is not in the editor when the Pro plugin is switched off.
- The check happens on the server while the page is built, so protected content is never written into the HTML for visitors without a matching role.
- Protected Content matches a visitor’s first role only, and leaving Select Roles empty locks everybody out while administrators are not automatically let through.

Some content should only be for people who are already logged in — a price list for customers, notes for editors, a download for subscribers.

The **Protected Content** widget in The Plus Addons for Elementor can gate a section on the visitor's WordPress user role, with no password involved.

*To check the complete feature overview documentation of The Plus Addons for Elementor Protected Content widget, [click here](https://theplusaddons.com/docs/protected-content-widget-settings-overview/).*

***Requirement - This widget is a part of The Plus Addons for Elementor Pro, make sure it's installed & activated to enjoy all its powers.***

[LIVE WIDGET LINK](https://theplusaddons.com/elementor-widget/protected-content/?utm_source=tpae&utm_medium=docs&utm_campaign=text)

## Before You Start

- **Edition:** **Pro** — Protected Content is only in The Plus Addons for Elementor Pro. With the Pro plugin switched off the widget is not in the editor at all, and a page that already uses it shows nothing where the widget was — not the gate and not the protected content either.- **Widget to enable:** Protected Content, switched on under **The Plus Addons > Widgets**. Search for the widget name there and turn its toggle on.- **You need the roles to exist:** the **Select Roles** list is built from the roles registered on your site, so plugins that add roles (WooCommerce adds **Customer**, for example) add them here too.- **Test while logged out:** use a private window. Logged in as an administrator you are not a good test of what a visitor sees.

## Set the Role Gate

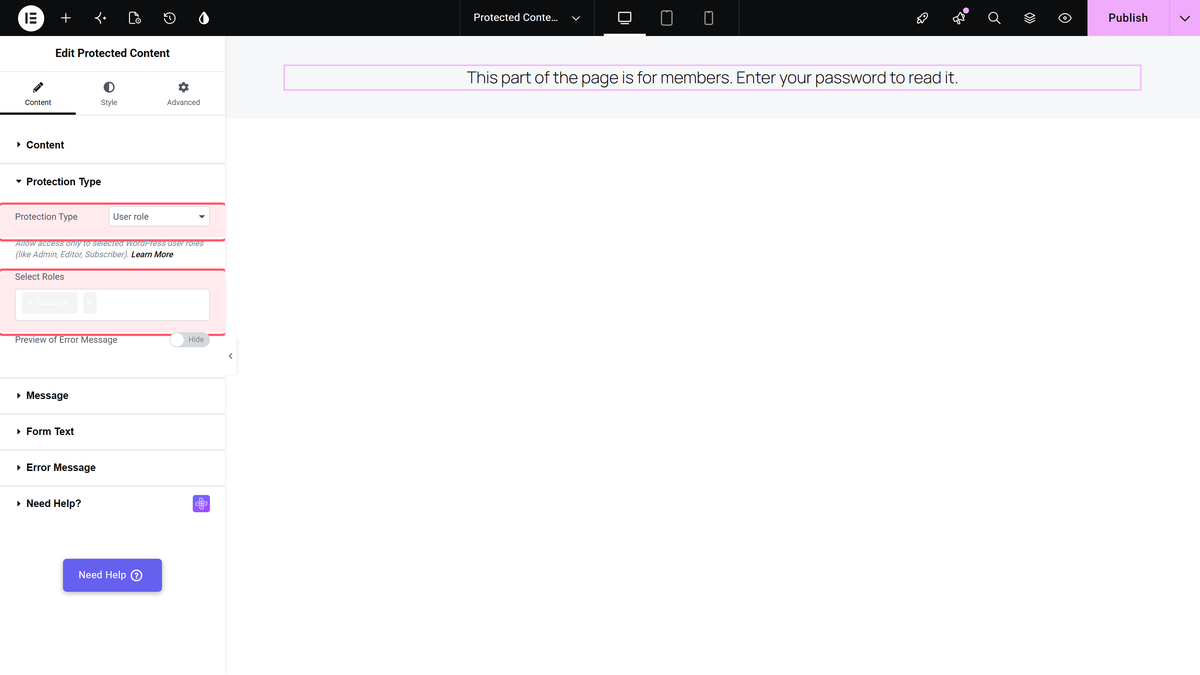
- Add the **Protected Content** widget to the page.- In the **Content** section, put the content you want to protect in **Protected Content** (or switch **Content Source** to **Page Template** and pick a template).- Open the **Protection Type** section and set **Protection Type** to **User role**.- In **Select Roles**, pick one or more roles. The field accepts several.- In the **Message** section, write what everyone else should see — say plainly who the content is for and how to get access.
![Protection Type set to User role, with Customer chosen in Select Roles](https://theplusaddons.com/wp-content/uploads/2026/09/protectedcontent-user-role.webp)

> *Choosing **User role** removes the password form completely. The **Form Text** and **Error Message** sections have no effect on this protection type.*

## What Each Visitor Sees

With **Select Roles** set to **Customer**, this is what three different visitors got on the same published page.

| Visitor | What they see | Is the content in the page source? |
| ------- | ------------- | ---------------------------------- |
| Not logged in | The message only | No |
| Logged in, role **Subscriber** | The message only | No |
| Logged in, role **Customer** | The protected content | Yes |

![A logged-out visitor sees only the message explaining who the content is for](https://theplusaddons.com/wp-content/uploads/2026/09/protectedcontent-result-role-locked.webp)

![The same section seen by a visitor logged in with the Customer role, showing the protected content](https://theplusaddons.com/wp-content/uploads/2026/09/protectedcontent-result-role-open.webp)

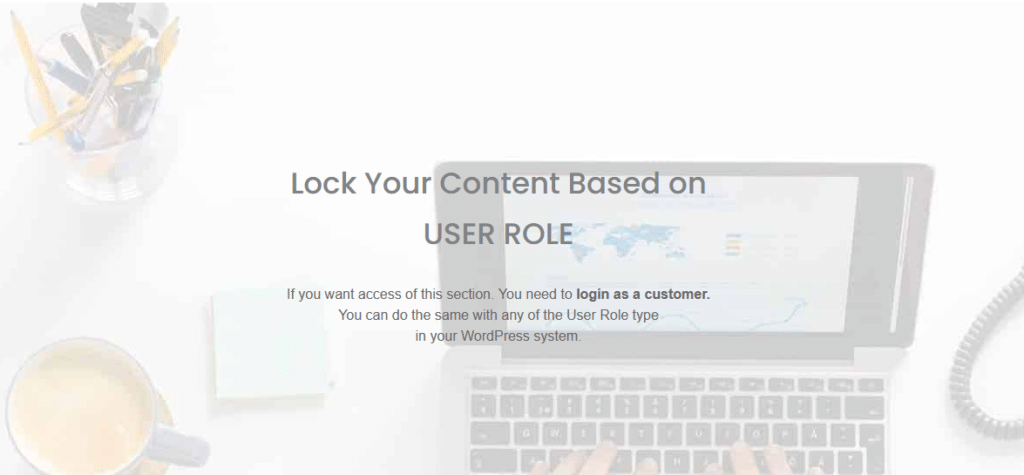
Because the message is the only thing most visitors will ever read, it is worth designing. Switch **Message Source** to **Elementor Templates** if you want a full section there instead of a line of text.
![A page section locked to the Customer user role](https://theplusaddons.com/wp-content/uploads/2024/02/protected-content-user-role-demo-1024x475.png)

## How It Behaves

- The check happens on the server while the page is built. For anyone without a matching role the protected content is never written into the HTML.- The widget looks at the visitor's **first** role. A user who holds several roles may not match, even if one of the roles they hold is in your list.- Administrators are not automatically let through. If you want to see the content yourself, add your own role to **Select Roles**.- Leaving **Select Roles** empty locks everybody out — everyone gets the message.

## Limitations

- There is no login form in the widget. A logged-out visitor sees your message and has to find their own way to a login page, so put a link in the message.- Role gating protects this widget's content, not the page. The page URL still works for everyone and the rest of the page is public.- **Preview of Error Message**, in the same section, does not only affect the editor. Switch it on and visitors who *are* allowed see the message printed under the content as well. Leave it on **Hide** for published pages.- Multi-role users are matched on their first role only, as described above.

## Troubleshooting

### A user with the right role still sees the message

Check whether that user holds more than one role. Only the first one is compared. Give the user just the role you are gating on, or add their other role to **Select Roles** as well.

### The message appears under the content for allowed users

Set **Preview of Error Message** back to **Hide** in the **Protection Type** section.

### The editor shows the content, the live page does not

You are logged in as an administrator in the editor. Open the published page in a private window to see what a visitor gets.

## Related Docs

- [Protected Content Widget: Settings Overview](https://theplusaddons.com/docs/protected-content-widget-settings-overview/)- [How to Add Multiple Password Protected Content in Elementor?](https://theplusaddons.com/docs/add-multiple-password-protected-content-in-elementor/)- [How to Add Protected Content for Elementor Template?](https://theplusaddons.com/docs/protected-content-for-elementor-template/)

## Frequently Asked Questions

**Q: How do I protect part of a WordPress page by user role in Elementor?**
A: The Protected Content widget in The Plus Addons for Elementor gates a section by WordPress user role, not by password. Put the content inside Protected Content, set Protection Type to User role, then choose one or more roles in Select Roles. That setup is useful when the page itself should stay public but one block needs to stay private, like customer pricing or subscriber downloads.

**Q: What happens if I leave Select Roles empty in Protected Content?**
A: An empty Select Roles field locks everybody out, so every visitor gets the message instead of the protected content. That is easy to miss because there is no fallback role or default access. If you are testing and nothing shows up, this is one of the first things to check in The Plus Addons for Elementor, The Plus Addons, Plus Addons for Elementor, POSIMYTH.

**Q: Why does a user with the right role still see the message?**
A: The widget compares only the visitor’s first role. If that person has multiple roles, they may still fail the gate even when one of their other roles is listed in Select Roles. The fix is to give them just the role you are gating on, or add their other role to the allowed list so the first-role match succeeds.

**Q: Why does the message show under protected content for allowed users?**
A: That usually means Preview of Error Message is still set to show instead of Hide. In this widget, that preview setting affects published pages too, not just the editor. If allowed visitors should see only the protected content, switch Preview of Error Message back to Hide in the Protection Type section.

**Q: Does Protected Content hide the whole page from visitors?**
A: No. Role gating protects only the widget’s content, not the page URL or the rest of the page. The page still loads publicly, and only the protected section is withheld from people without a matching role. That makes it better for mixed pages where most content stays public and only one block needs access control.

**Q: What should I use instead of a password form for role-based content protection?**
A: User role protection removes the password form completely, so logged-out visitors only see your message and have to find their own way to a login page. A practical setup is to make that message clear and include a login link. If you want a fuller notice area, switch Message Source to Elementor Templates.

