If you have sensitive content or any special content (offer, discount code etc.) that you don’t want everyone to see, adding password protection can be an effective solution. This feature allows you to restrict access to specific sections of your website by requiring visitors to enter a password.
With the Protected Content widget from The Plus Addons for Elementor, you can easily restrict content on your Elementor website in multiple ways.
Required Setup
- Elementor FREE Plugin installed & activated.
- You need to have The Plus Addons for Elementor plugin installed and activated.
- This is a Premium widget, and you need the PRO version of The Plus Addons for Elementor.
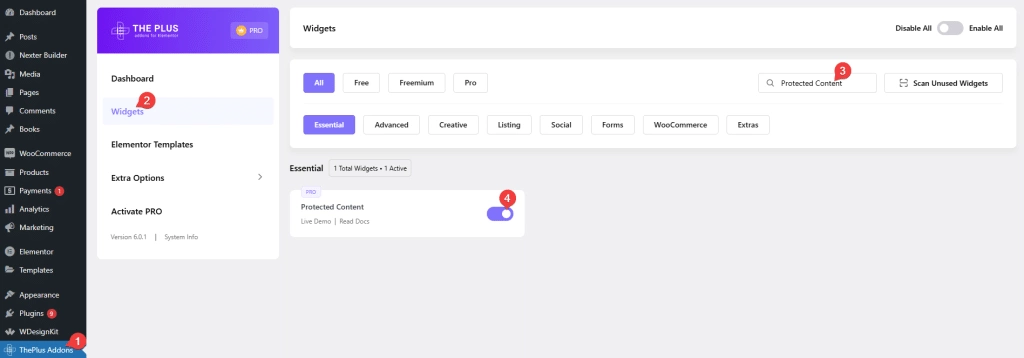
- Make sure the Protected Content widget is activated, to verify this visit The Plus Addons → Widgets → and Search for Protected Content and activate.
Learn via Video Tutorial:
How to Activate the Protected Content Widget?
Go to
- The Plus Addons → Widgets
- Search the widget name and turn on the toggle.
Key Features
- Single Password – You can add a single password to protect the content.
- Multiple Password – You can easily add multi password protected content.
- User Role – You can restrict content based on different user roles.
- Elementor Template – You can easily add protected content with an Elementor template.
How to Password Protect Content in Elementor?
To password protect content on your Elementor website add the Protected Content widget on the page.
Protected Content
From the Content Source dropdown, you have to select the source of the content that you want to protect. Here you’ll find two options –
- Content – With this option, you can directly add content in the editor.
- Page Template – With this option, you can add protected content with an Elementor template.
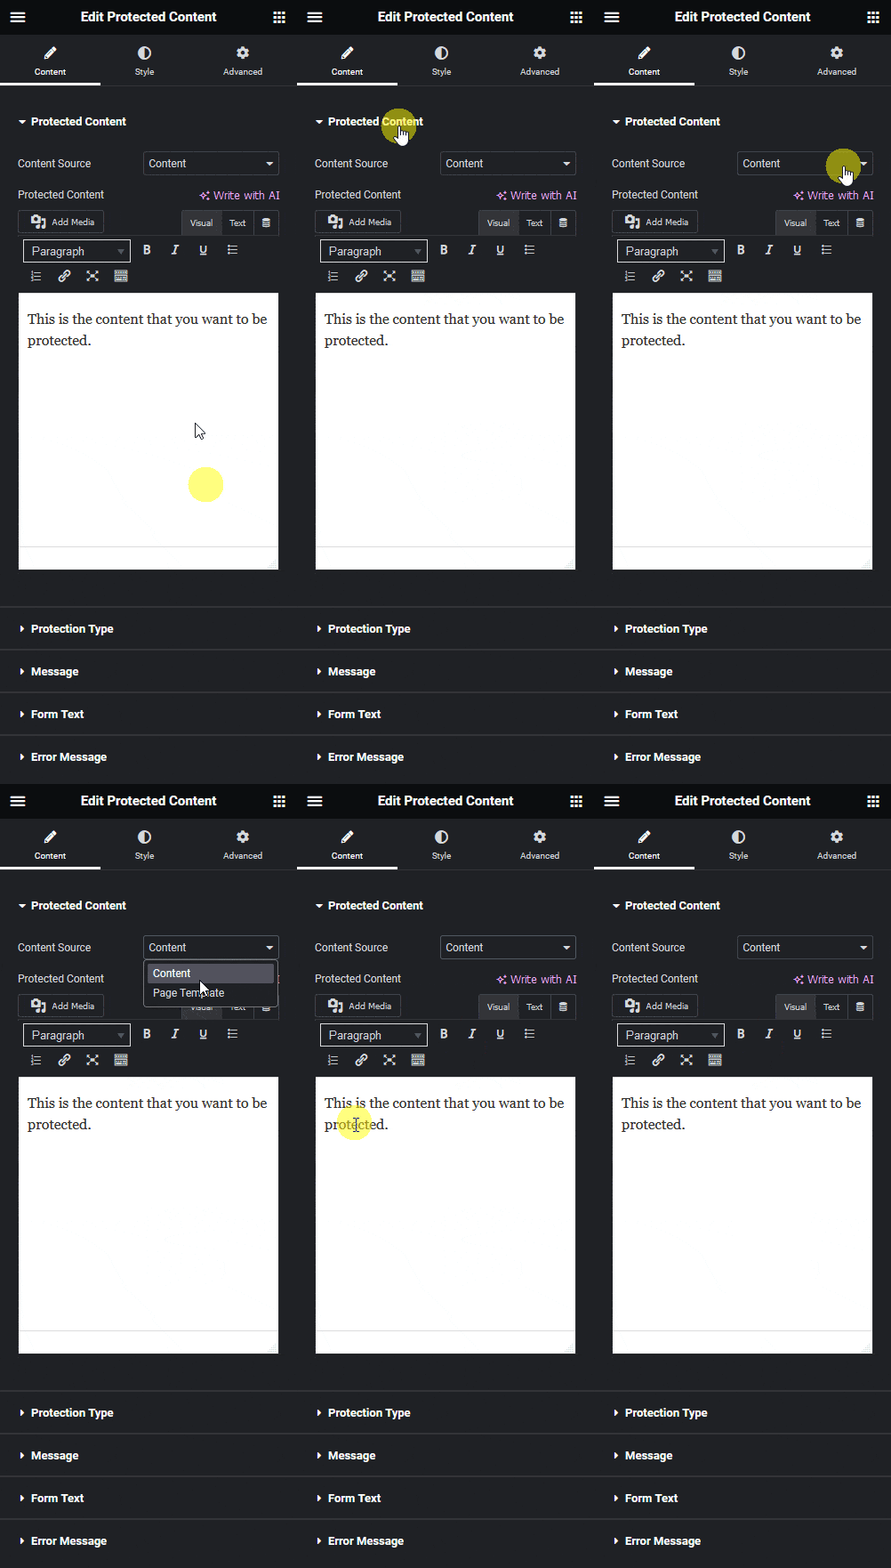
Let’s select Content here.
Then in the Protected Content section, you have to add the content directly.
Protection Type
From the Protection Type dropdown, you have to select the protection type. Here you’ll find three options –
- User Role – With this option, you can protect content by user role.
- Single Password – With this option, you can add a single password to protect content.
- Multiple Password – With this option, you can add multiple passwords to protect the content.
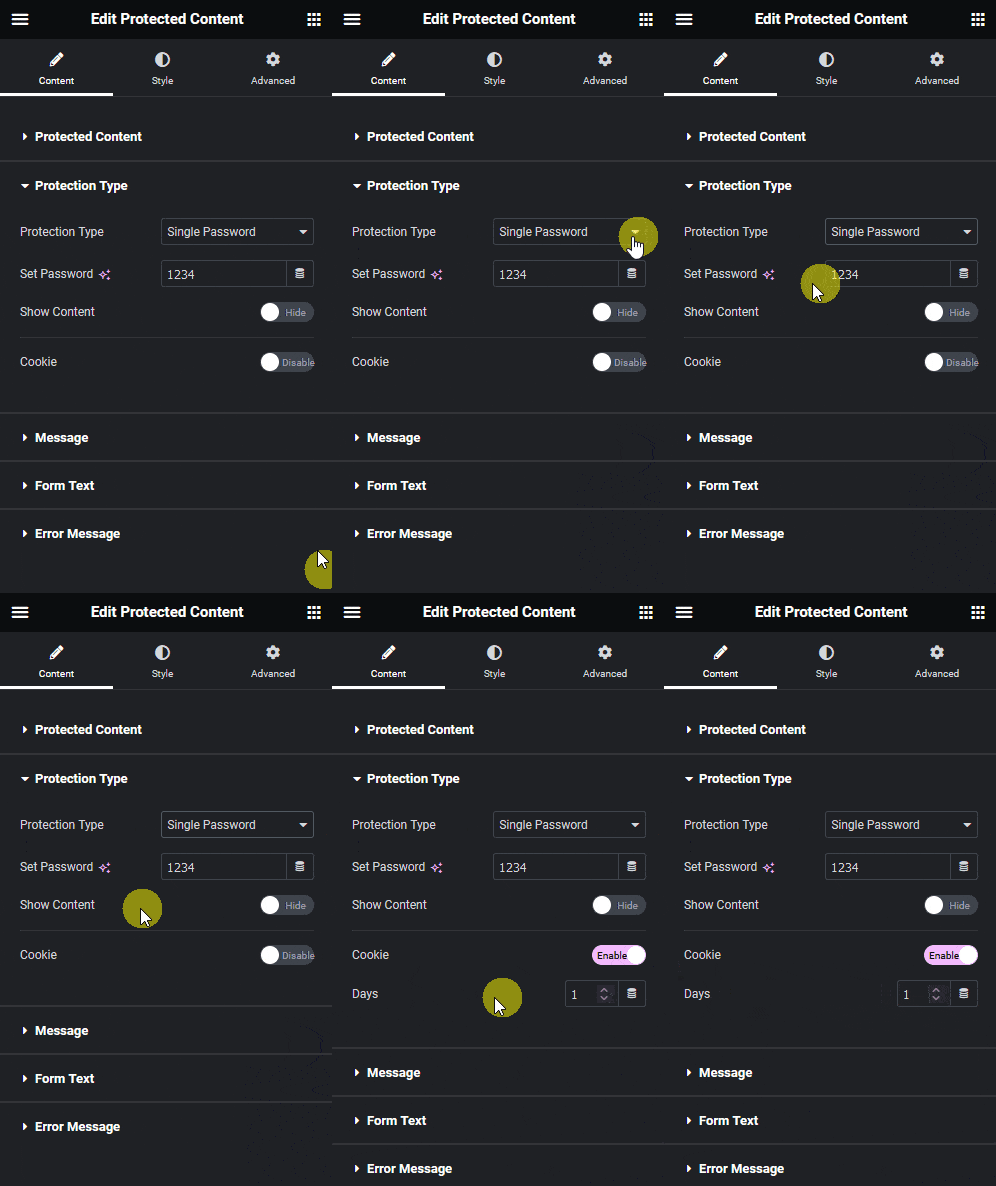
Let’s select Single Password here.
Then in the Set Password field, you have to add the password that users need to enter to see the protected content.
You can enable the Show Content toggle, to see the protected content in the backend, this can be used to style the content better.
By enabling the Cookie toggle, you can save the information in the visitor’s browser cookies so they don’t have to re-enter the password every time they visit the page to see the protected content.
Once enabled you can set how long the cookies will saved in the Days field.
Message
From the Message Source dropdown, you can select the message source which will be visible when the content is protected. Here you’ll find three options –
- None – This will not show any message
- Message – With this option, you can directly write the message in the editor.
- Elementor Template – With this option, you can show custom content using an Elementor template.
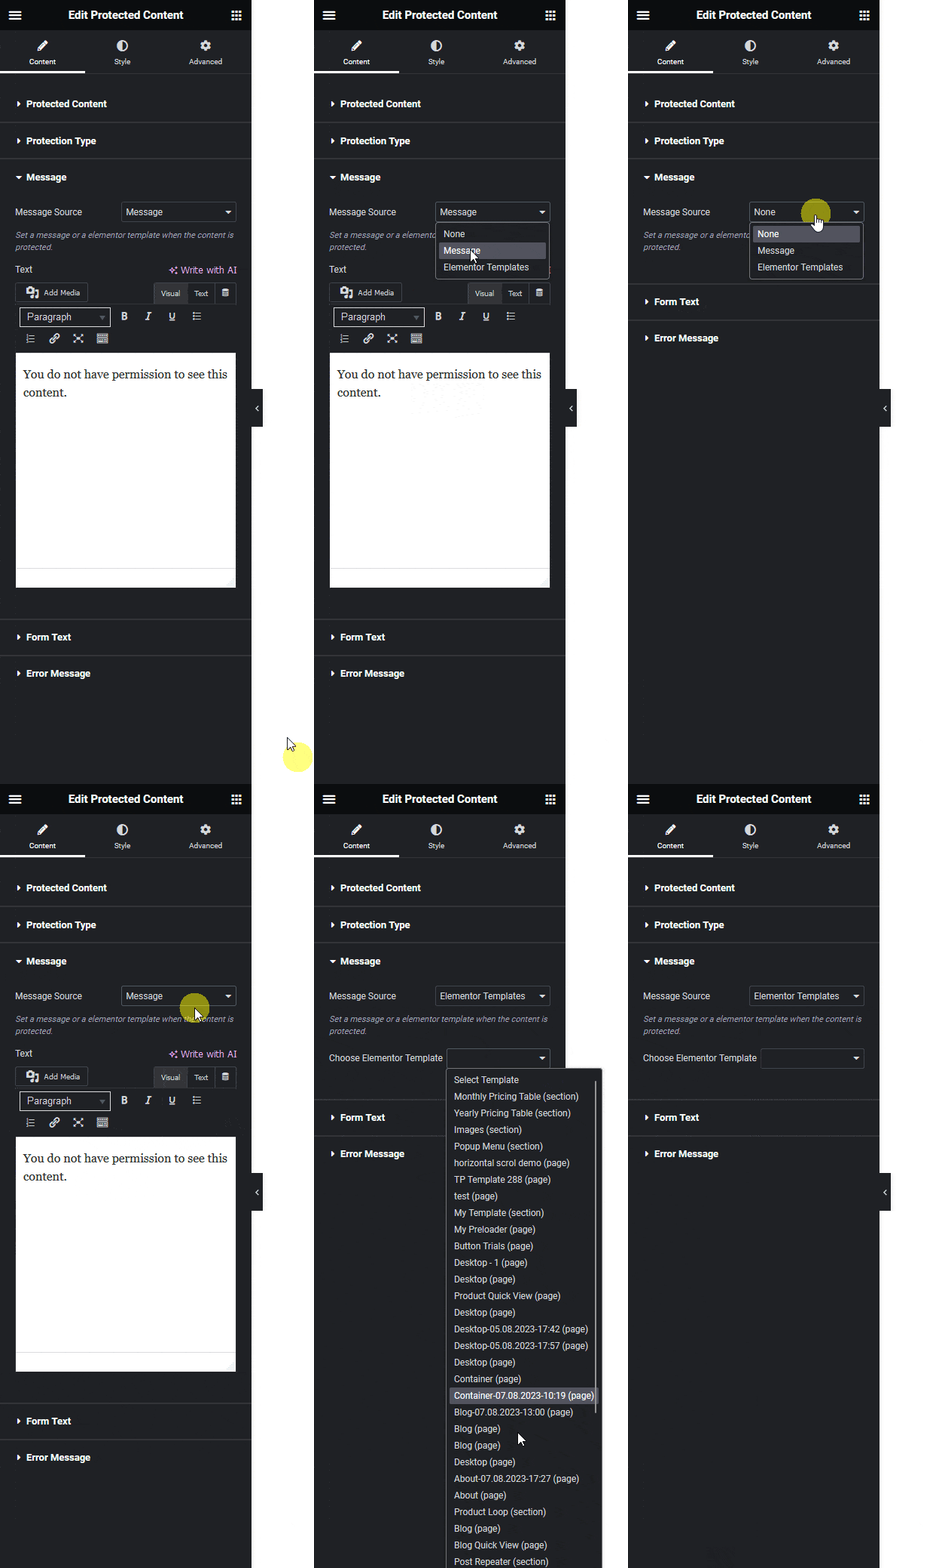
Select the option as per your requirements of your content needs.
Form Text
From the Input text field, you can edit the password field placeholder text.
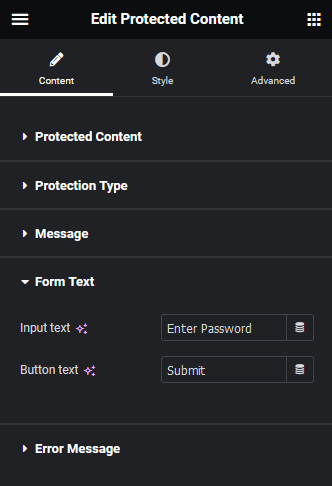
Then in the Button text field, you can edit the password form submit button text.
Note: These options are not applicable for the User Role protection type.
Error Message
In the Error Message field, you can add a message for wrong passwords.
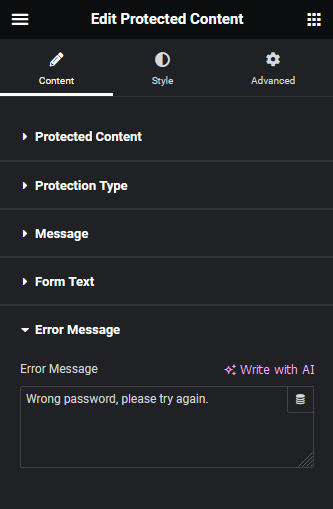
Note: This option is not applicable for the User Role protection type.
How to Style the Protected Content Widget?
To style the Protected Content widget, you’ll find all the styling options under the Style tab.
Message – From here, you can style the protected content message added in the editor.

Form Input – From here, you can manage the password input field style.
Submit Button – From here, you can manage the password form submit button style.
Error Message – From here, you can style the wrong password error message.
Front Content – From here, you can manage the protected content front wall style, i.e. the content all visitors see.
Protected Content – From here, you can style the protected content section i.e. the content you’ll see after inputting the correct password.
Advanced options remain common for all our widgets, you can explore all its options from here.


