Are you looking to add multi password protected content in Elementor? This method allows you to protect content using different passwords, and visitors can use any one password to unlock the content.
With the Protected Content widget from The Plus Addons for Elementor, you can easily add multiple passwords to protect content on your Elementor website.
To check the complete feature overview documentation of The Plus Addons for Elementor Protected Content widget, click here.
Requirement – This widget is a part of The Plus Addons for Elementor, make sure it’s installed & activated to enjoy all its powers.
To do this, add the Protected Content widget to the page and follow the steps –
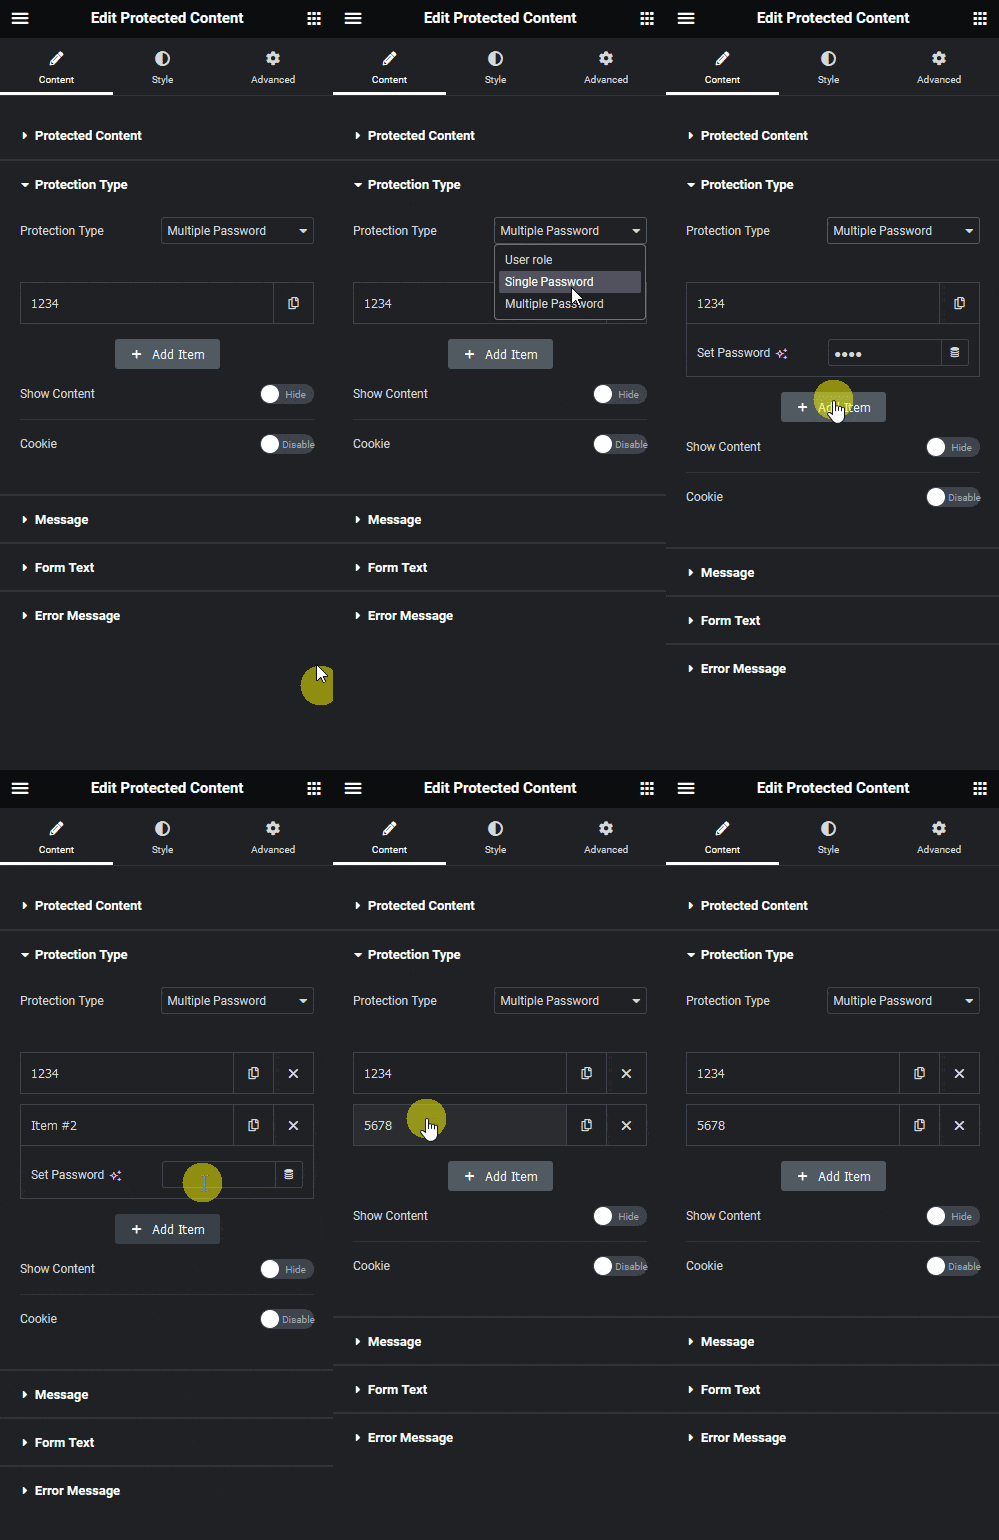
1. Set the appropriate protected content in the Protected Content tab.
2. Then go to the Protection Type tab and select Multiple Password from the Protection Type dropdown.

3. You’ll see an item with a default password, open the item to change the password in the Set Password field.
4. Then click on the + Add Item button it will add another item, here you have to add the second (alternate) password.
Similarly, you can add more passwords.
You can enable the Show Content toggle, to see the protected content in the backend, this can be used to style the content better.
By enabling the Cookie toggle, you can save the information in the visitor’s browser cookies so they don’t have to re-enter the password every time they visit the page to see the protected content.
Now visitors can enter any one of the listed passwords to unlock the content.
Suggested Read: How to Add Protected Content for Elementor Template


