Do you want to customize the post comments section in the Elementor blog post? Allowing users to comment on blog posts can increase user engagement on your website.
With the Post Comment widget from The Plus Addons for Elementor, you can easily add and customize the post comments section to the Elementor blog post page.
To check the complete feature overview documentation of The Plus Addons for Elementor Blog Builder, click here.
Required Setup
- Elementor FREE Plugin installed & activated.
- You need to have The Plus Addons for Elementor plugin installed and activated.
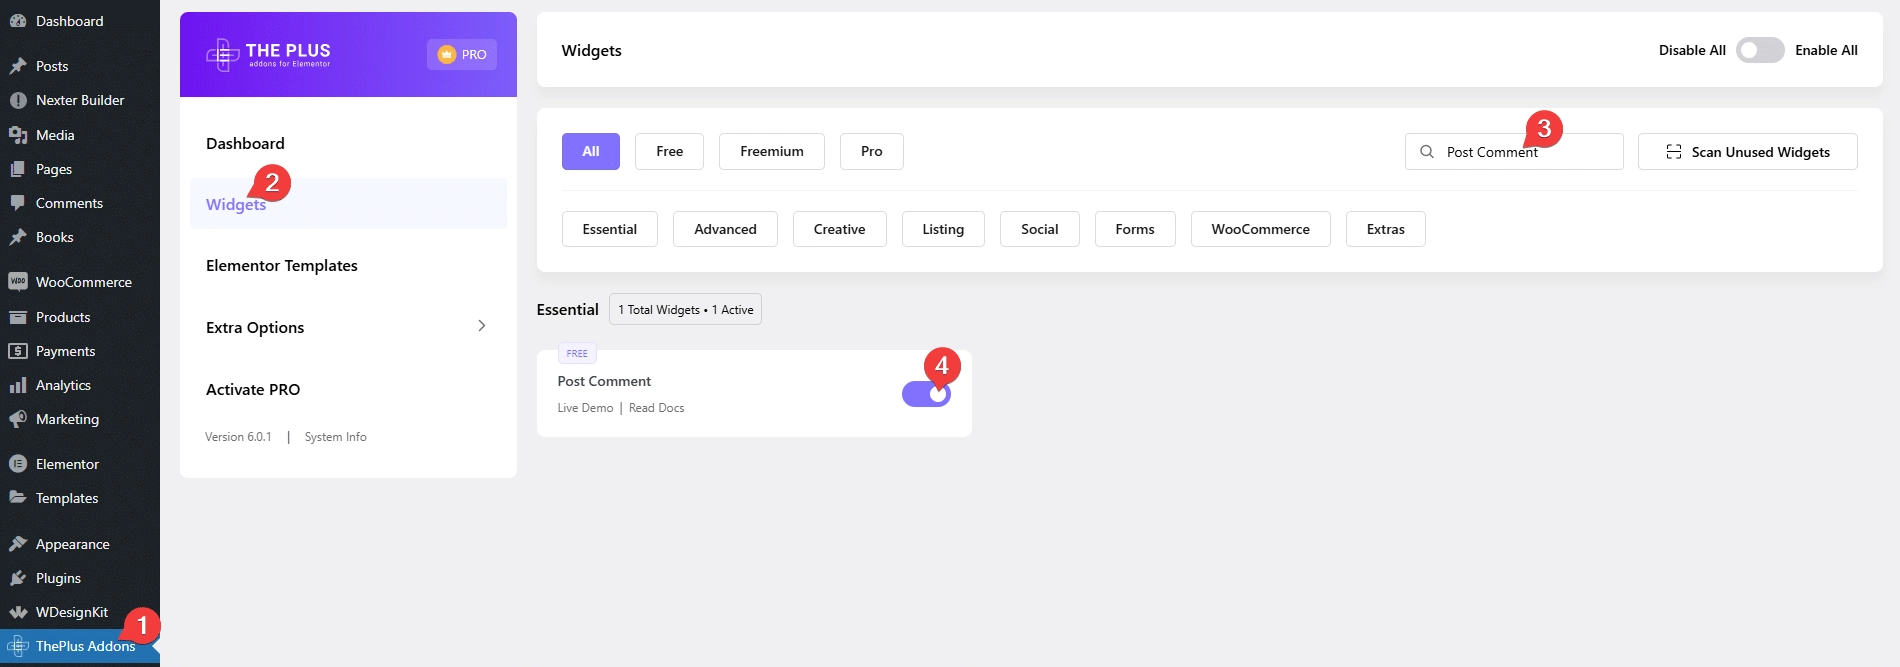
- Make sure the Post Comment widget is activated, to verify this visit The Plus Addons → Widgets → and Search for Post Comment and activate.
How to Activate the Post Comment Widget?
Go to
- The Plus Addons → Widgets
- Search the widget name and turn on the toggle.

Add Post Comment
Add the Post Comment widget to the appropriate location on the blog post template.
To create the blog post template, you can use the free Nexter Builder or you can use Elementor Pro if you are already using it.
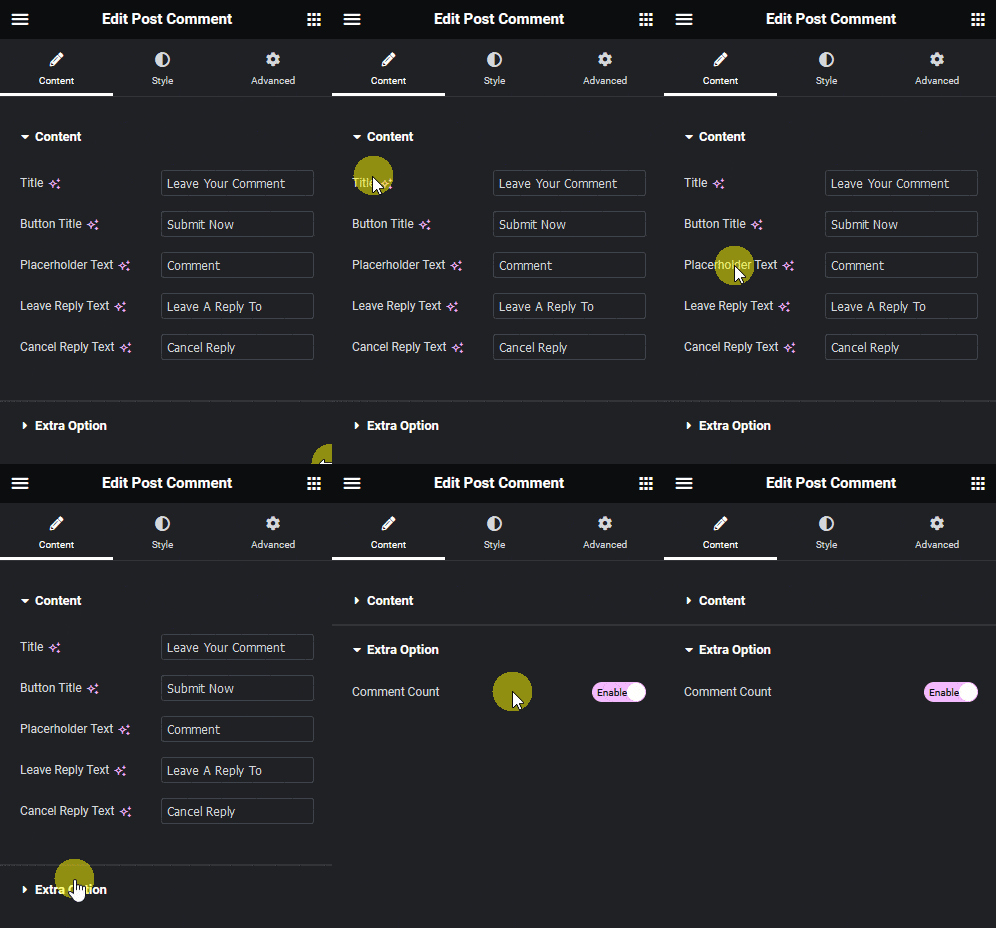
From the Content tab, you can customize the post comment form title, button text, placeholder text, leave reply text and cancel reply text.
You can enable the Comment Count toggle from the Extra Option tab, to show the number of comments in the post comment section.

Suggested reading, 10+ best blogs & YouTube Channels to learn Elementor
From the Style tab, you can customize the post comment style.
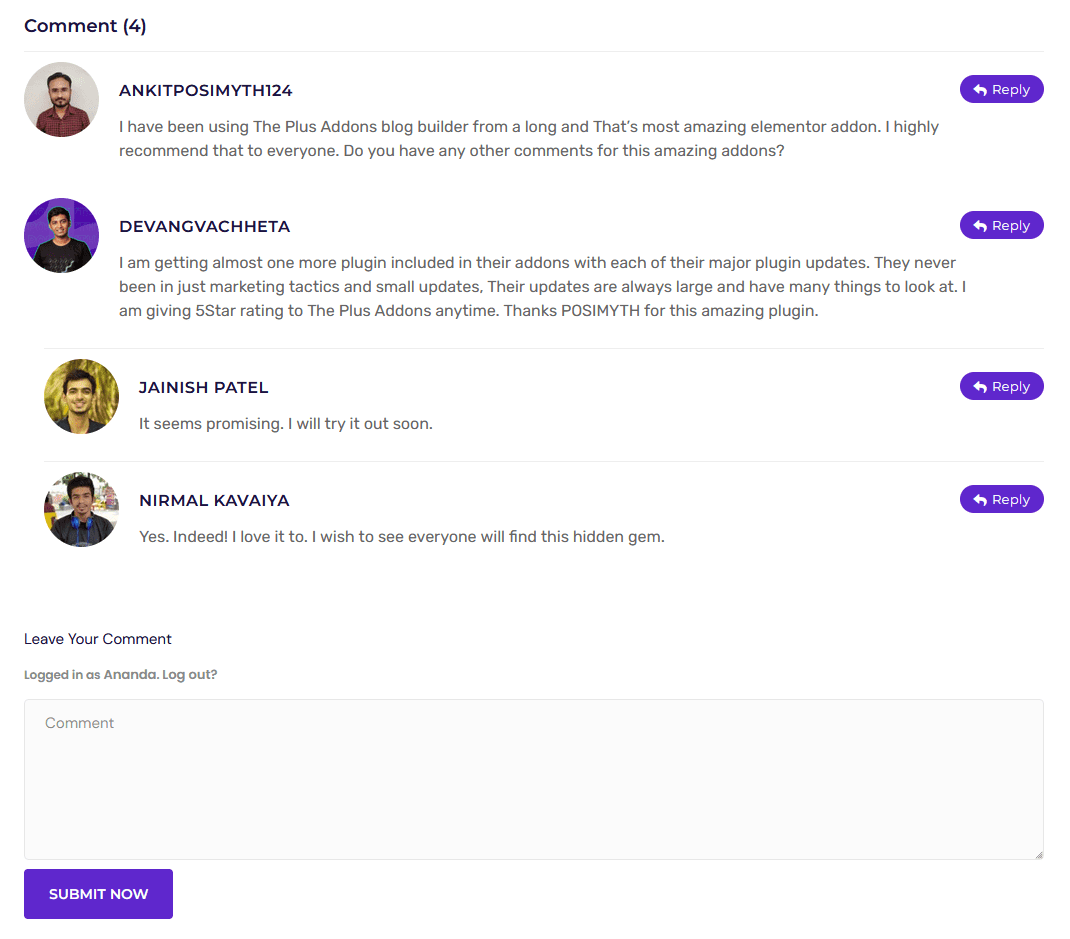
Now you should be able to see a beautiful post comment section on your blog post page.

Also, check how to customize post title in Elementor blog post.


