To use The Plus Addons for Elementor Google Map widget, you must have a Google Maps API key.
So let’s see how you can generate a Google Maps API key.
To create a Google Maps API key click here.
From there, click on the Go to the Credentials page button.
To check the complete feature overview documentation of The Plus Addons for Elementor Google Map widget, click here.
Requirement – This widget is a part of The Plus Addons for Elementor, make sure it’s installed & activated to enjoy all its powers.
Create a New Project
From the Credentials page, you have to create a new project.
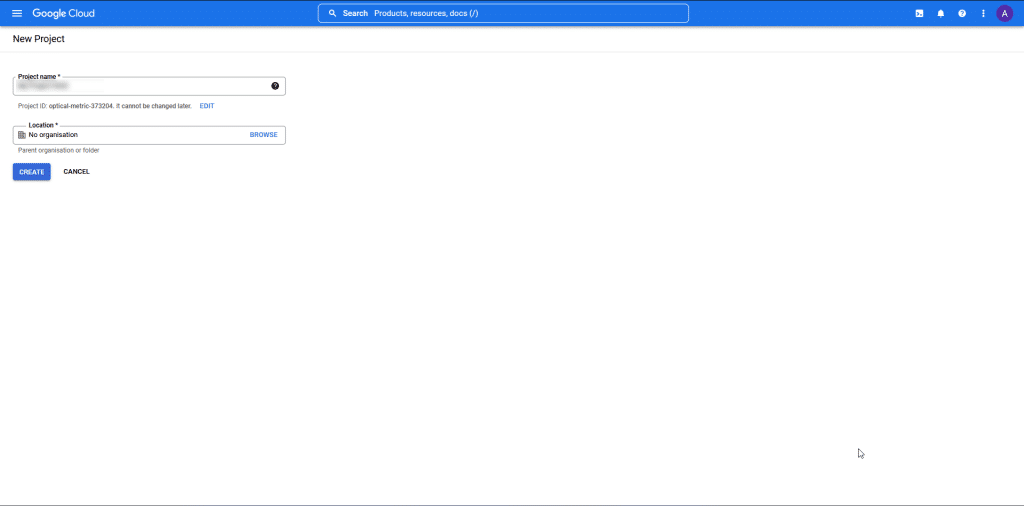
- Add a Project name.
- Enter your location and click on the Create button.
Set up Billing
Once the project is created, you have to set up billing information for your project on the next page.
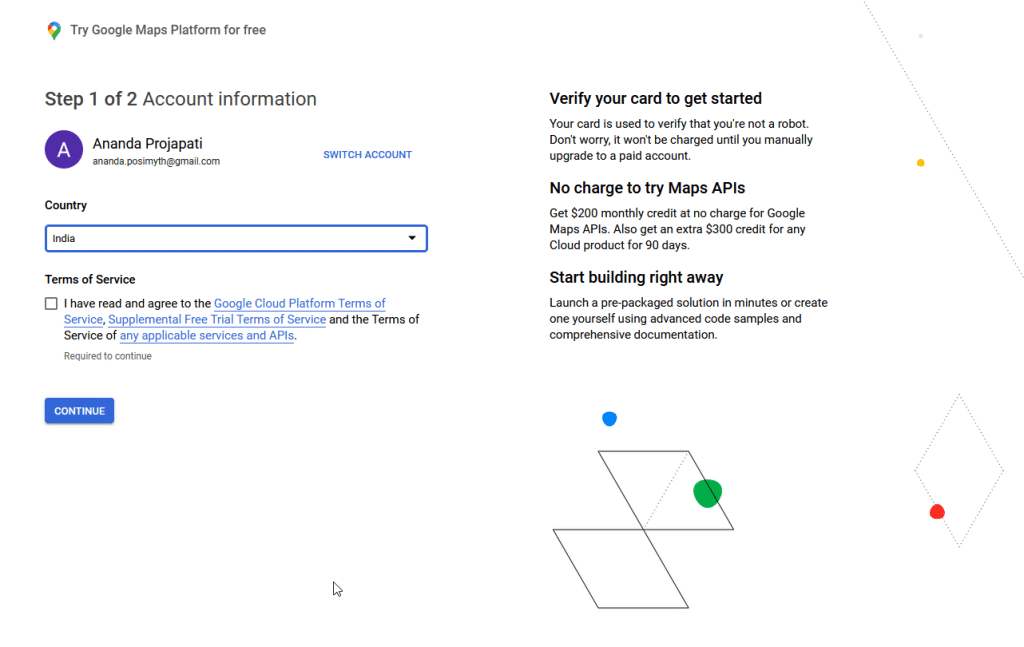
Step 1
- Choose your country.
- Agree to the Terms of Service and click on the Continue button.
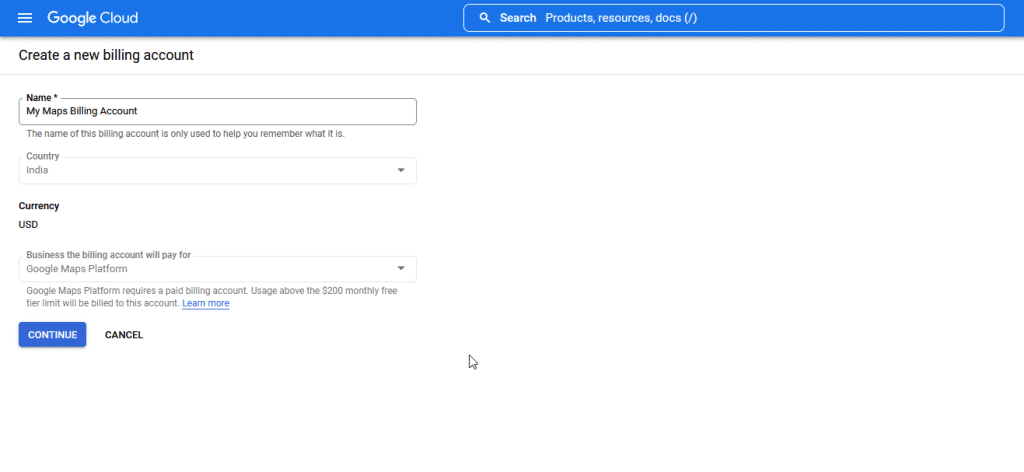
Step 2: Create a new billing account
- Choose a name for your billing account.
- Verify the details and click on the Continue button.
On the next page, add your billing information.
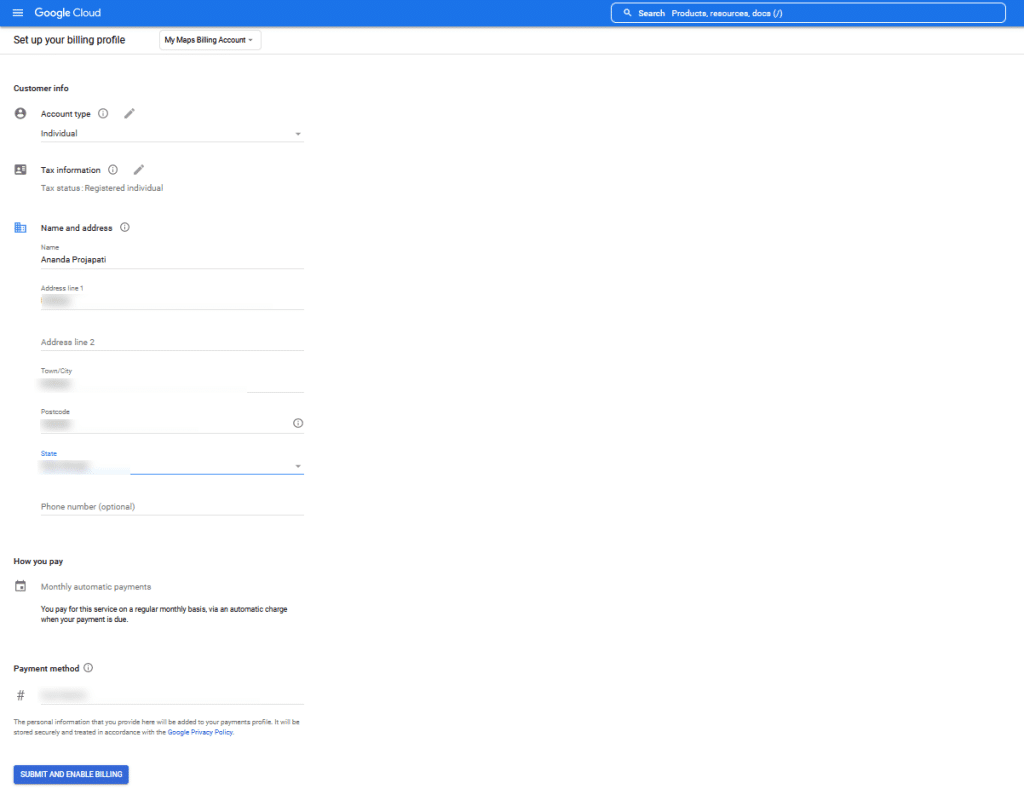
- Choose your Account Type.
- Fill in your Tax information.
- Add your personal details.
- Add a payment method (For example Credit Card). Click on the Submit and Enable Billing button.
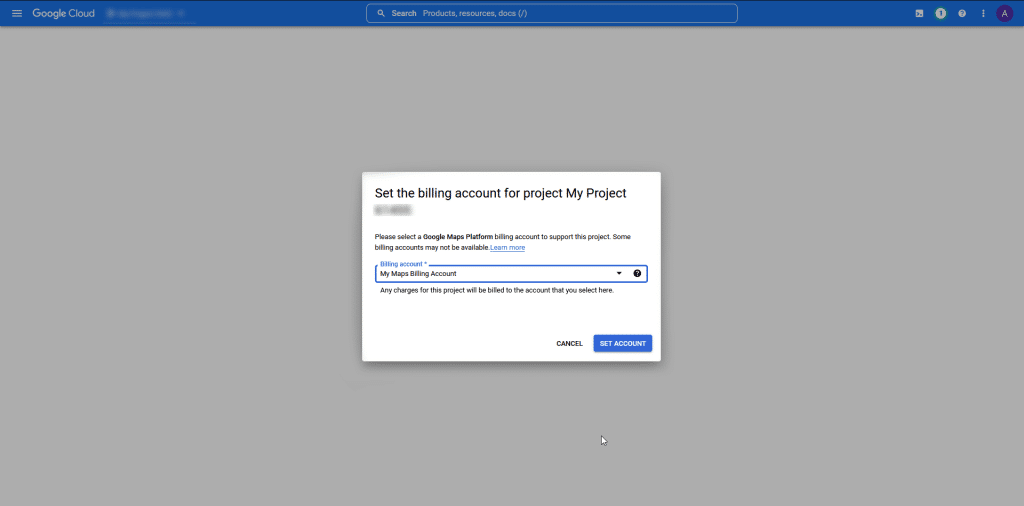
On the next page, choose your project’s billing account and click on the Set Account button.
Then Google Maps will ask a few questions related to your project, like your industry, the platform you are building the project for etc. fill in the answers accordingly and click on the Submit button.
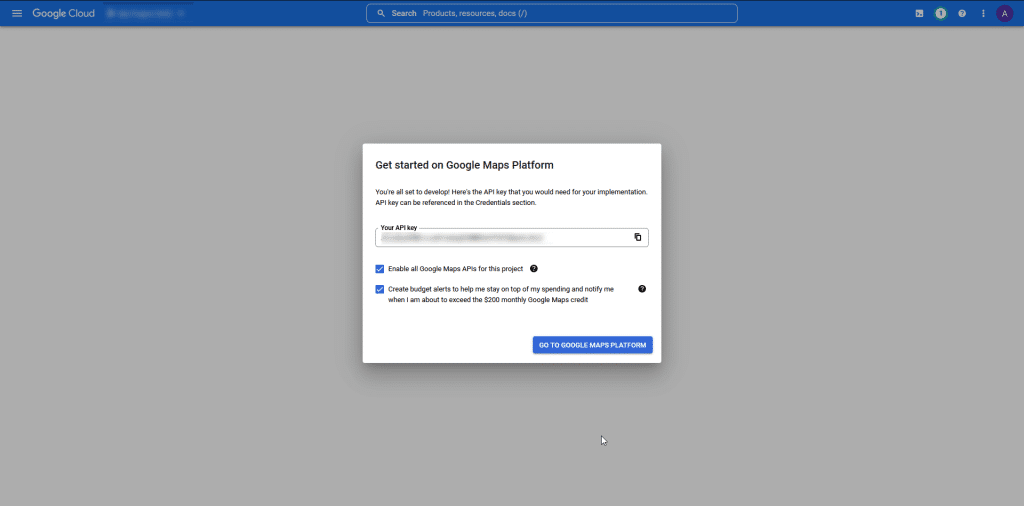
On the next page, you will get your Google Maps API Key, copy the API and click on the Go to Google Maps Platform button.
Now you have your API key but as per Google Maps recommendation you need to restrict the usage of your API key by limiting its use to the required APIs for your application.
Protect your API (adding Maps Embed API)
Now on the next page, Google Maps will automatically ask you to protect your API key.
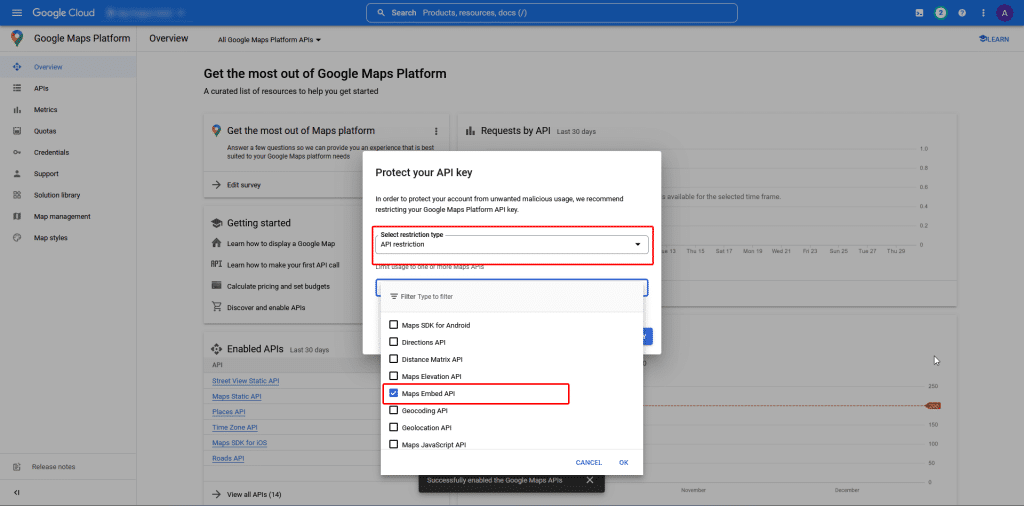
- Select restriction type as API restriction.
- And from the Limit usage dropdown, select Maps Embed API and click on the Restrict Key button.
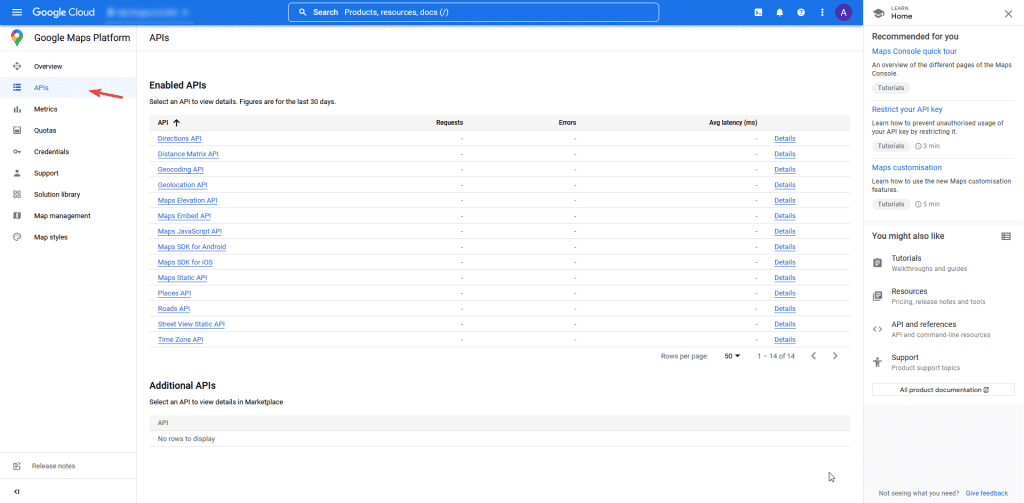
Now the usage of your API key has been restricted. To check the list of enabled APIs for your project, click on the APIs from the left panel and it will display all the enabled APIs.
Now you can use your newly created Google Maps API Key with The Plus Addons for Elementor Google Map widget.
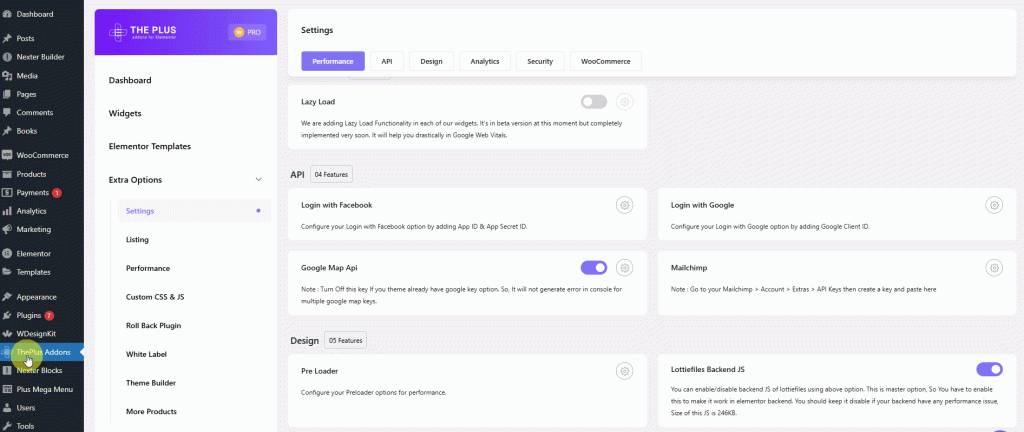
To do this, go to
- The Plus Addons → Extra Options → Settings
- Scroll down and go to the Google Map API section and enable it.
- Then, Click on the setting Icon then you’ll see the Google Map API section, put the Key in the Map API Key section, and then click on Save.
Also, check out How to Remove Elementor Google Maps API Error browser console.


