A pricing table is crucial for businesses, as it allows customers to compare different pricing options and make informed decisions easily.
With the Pricing Table widget from The Plus Addons for Elementor, you can easily add beautiful pricing tables in Elementor.
Check the Live Widget Demo
Required Setup
- Elementor FREE Plugin installed & activated.
- You need to have The Plus Addons for Elementor plugin installed and activated.
- This is a Freemium widget. To unlock the extra features, you need the PRO version of The Plus Addons for Elementor.
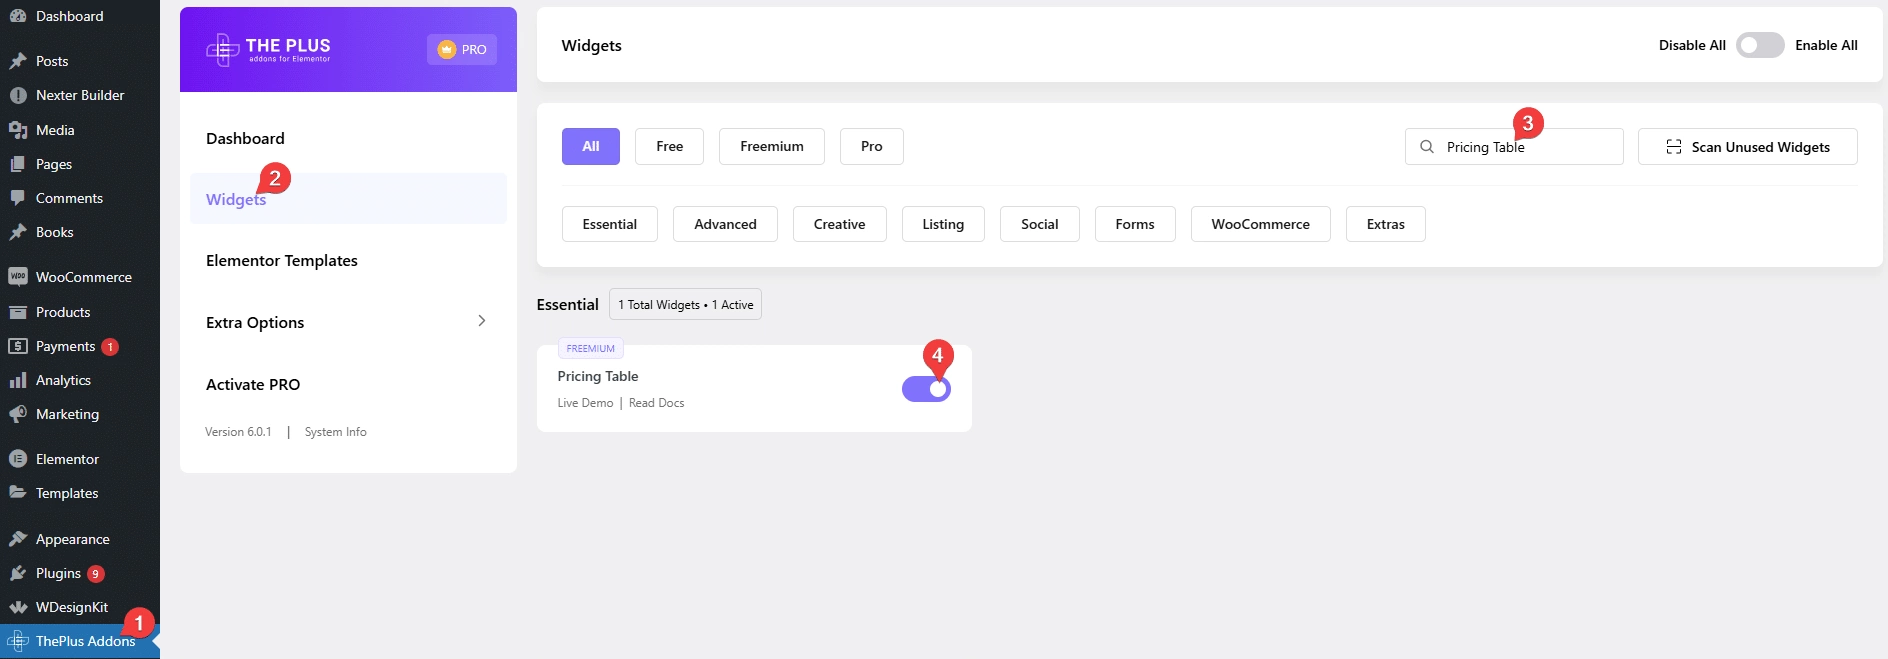
- Make sure the Pricing Table widget is activated. To verify this, visit The Plus Addons → Widgets → and search for Pricing Table and activate.
Learn via Video Tutorial:
How to Activate the Pricing Table Widget?
Go to
- The Plus Addons → Widgets
- Search the widget name and turn on the toggle.
Key Features
- Multiple Layout – You can select from multiple predesigned layouts.
- Previous Price – You can easily show a previous price in the pricing table.
- Ribbon (Pro) – You can easily add a ribbon tag to highlight a pricing table.
- Tooltip (Pro) – You can add a tooltip to a pricing table content.
- Show More Options (Pro) – You can easily limit the initial content by adding a show more option to a pricing table.
- Scale Effect – You can easily add a zoom effect to highlight a pricing table.
How to Use the Pricing Table in Elementor?
Add the Pricing Table widget to the page.
Layout
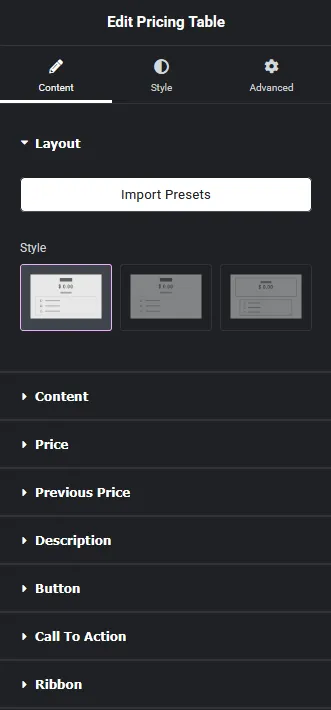
You can click on the Import Presets button to import a preset template and customise it as per your requirements.
From the Style section, you can select a pre-defined style (free and pro) for the pricing table.
Content
From the Style dropdown, you can select a style for the title.
You can edit the title from the Title field.
In the Sub Title field, you can add a subtitle.
Then, from the Select Icon dropdown, you can add an icon, image, or SVG (pro) above the title in the pricing table.
- None – To add nothing above the title.
- Icon – To add an icon from different icon libraries.
- Image – To add an image above the title.
- Svg (Pro) – To add a pre-built animated or custom SVG image above the title.
Price
From the Price Style dropdown, you can select a pre-defined style (free and pro) of the price text.
In the Prefix Text field, you can add a currency symbol or any text before the price amount.
Then, in the Value Of Price field, you have to add the actual price.
You add text after the price in the Postfix Text field. Ideal for adding the frequency of the payment, like per month, per year, etc.
Previous Price
By enabling the Display Previous Price toggle, you can add a previous price, ideal for showing the differences between the old and new prices.
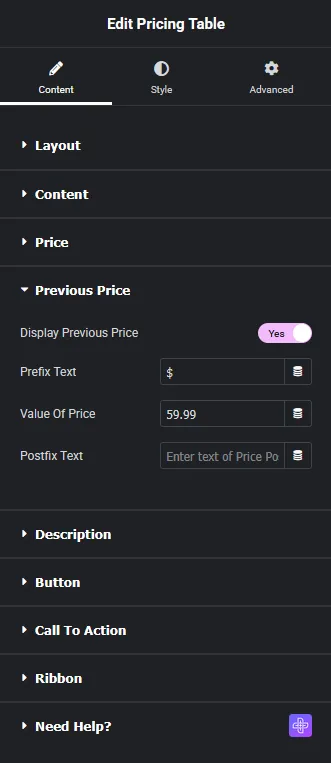
Similar to the Price tab, you can add a prefix text, price, and postfix text in the Prefix Text, Value Of Price, and Postfix Text fields.
Content Description
In this tab, you have to add the pricing table content.
From the Content Style dropdown, you have to select how you want to add the content. Here you’ll find two options –
- Stylish List – With this option, you can add content using repeater items.
- WYSIWYG – With this option, you’ll find a WYSIWYG editor to add the content.
Select the option as per your requirements. Let’s select Stylish List here.
Note: You’ll find extra options with the Stylish List option.
You can select a pre-defined style from the Content List Style dropdown.
Then you’ll find three repeater items by default, open one item.
In the List Description section, you can add the description.
From the Icon Font (pro) dropdown, you can select the icon library and add an icon to the description list item.
By enabling the Tooltip Options toggle, you can add a tooltip to the list item.
Following this process, you can edit the other repeater items.
You can click on the + Add Item button to add more items.
From the List Open Default section, you can limit the initial item visibility by adding a show more option.
Button
By enabling the Button (Pro) toggle, you can add a button to the pricing table.
From the Button Style section, you can select a pre-defined style.
In the Button Text field, you can add the button text.
You can add a link to the button in the Button Link field.
Note: The icon related options are available for Style 2 only.
From the Icon Type dropdown, you can add an icon to the button. Here you’ll find two options –
- Icon – To add an icon to the pricing table button.
- Lottie – To add a Lottiefiles to the pricing table button.
Then, from the Icon Position dropdown, you can place the icon before or after the button text.
Call to Action
From the Call To Action(CTA) Text (Pro) section, you can add a call to action content below the button.
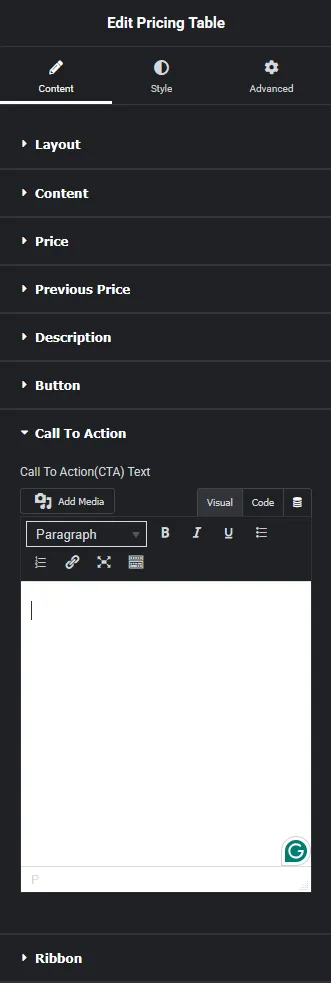
Ribbon
By enabling the Display Ribbon (Pro) toggle, you can add a ribbon to the pricing table.
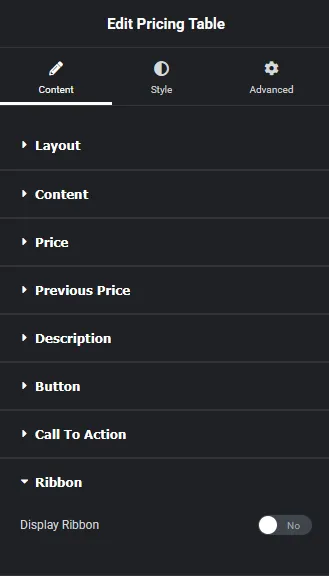
Note: This will only add one pricing table item, to create multiple pricing table items you have to use the Pricing Table widget multiple times.
How to Style the Pricing Table Widget?
To style the Pricing Table widget, you’ll find all options in the Style tab.
Lottie – You’ll see this tab only when Lottie is selected as the icon type for the button. From here, you can style the Lottiefiles.
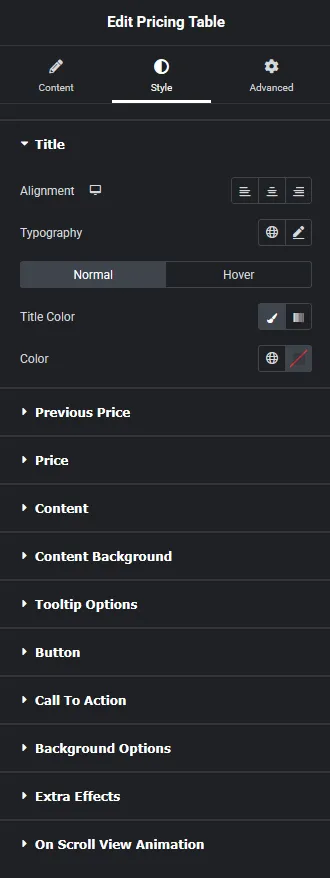
Title – From here, you can style the title.
Previous Price – From here, you can style the previous price text.
Price – From here, you can style the price text.
Content – From here, you can style the pricing table description text.
Content Background – From here, you can style the pricing table description area.
Tooltip Options (Pro) – You’ll see this tab only when the tooltip toggle is enabled in the pricing content item. From here, you can style the tooltip.
Button – You’ll see this tab only when the button toggle is enabled. From here, you can style the button.
Call To Action (CTA) (Pro) – From here, you can style the call to action text.
Ribbon/Pin – You’ll see this tab only when the ribbon toggle is enabled. From here, you can style the ribbon.
Background Options – From here, you can style the pricing table background for normal and hover states, add different hover animations, and more.
Extra Effects – From here, you can add a zoom effect to highlight a pricing plan.
On Scroll View Animation – This is our global extension available for all our widgets, which adds scrolling animation as the widget comes into the viewport. You can learn more about this from here.
Learn more about On Scroll View Animation
Advanced options remain common for all our widgets; you can explore all their options from here.
