






Sometimes the arrows belong somewhere other than under the carousel — beside a heading, in the opposite column, or above the whole section.
Carousel Remote is a separate widget that does nothing on its own. You give it the same ID as your Info Box carousel and it takes over the paging, wherever you happen to place it on the page.
To check the complete feature overview documentation of The Plus Addons for Elementor Info Box widget, click here.
Requirement – This widget is a part of The Plus Addons for Elementor, make sure it’s installed & activated to enjoy all its powers.
Before You Start
- Edition: Pro — the Carousel layout and the Carousel Remote widget needs The Plus Addons for Elementor Pro. In the free plugin the option is still in the panel but shows an upgrade notice instead of working.
- Widget to enable: Info Box, switched on under The Plus Addons > Widgets. In the Elementor panel it appears under Plus Essential.
- Switch on two widgets under The Plus Addons > Widgets: Info Box and Carousel Remote.
- Build the carousel first. You need a working Info Box carousel with more items than columns before a remote has anything to drive — see the carousel guide.
Give the Carousel an ID
- Select your Info Box widget, already set to the Carousel layout.
- Open the Style tab and expand Carousel Options.
- Type a short, unique name into Unique Carousel ID — something like
services-carousel. Use letters, numbers and hyphens.
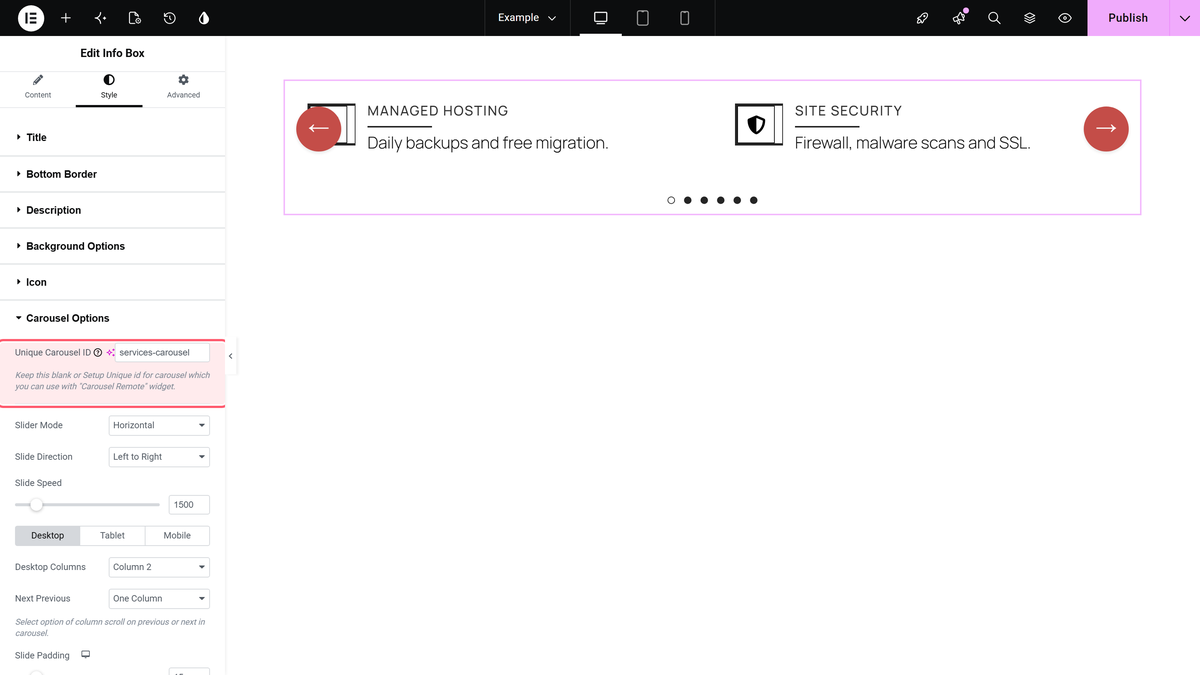
Use a different ID for every carousel on the page. Two carousels sharing one ID will both answer the same remote.
Add the Remote and Match the ID
- Drag the Carousel Remote widget onto the page, wherever you want the controls to appear.
- In its Content tab, enter the same value in Unique Connection ID.
- Leave Remote Type on Carousel, which is the default.
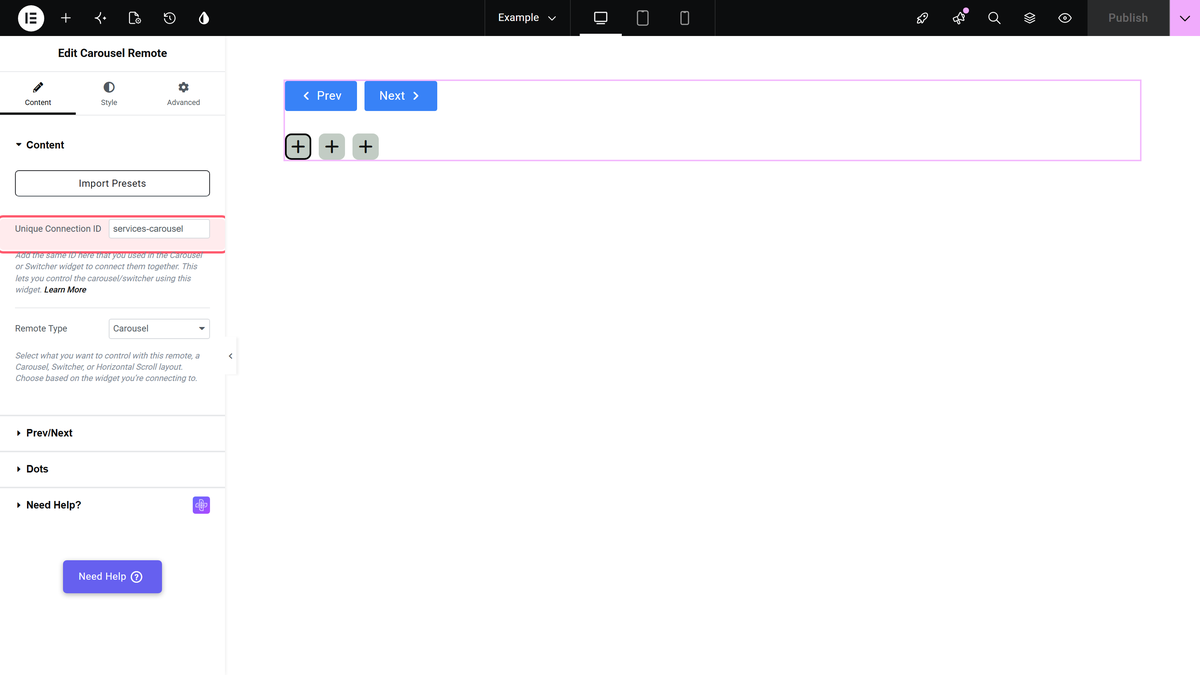
The two IDs must match exactly, including case and hyphens. This is the one step that silently fails if you mistype it.
Set Up the Arrows
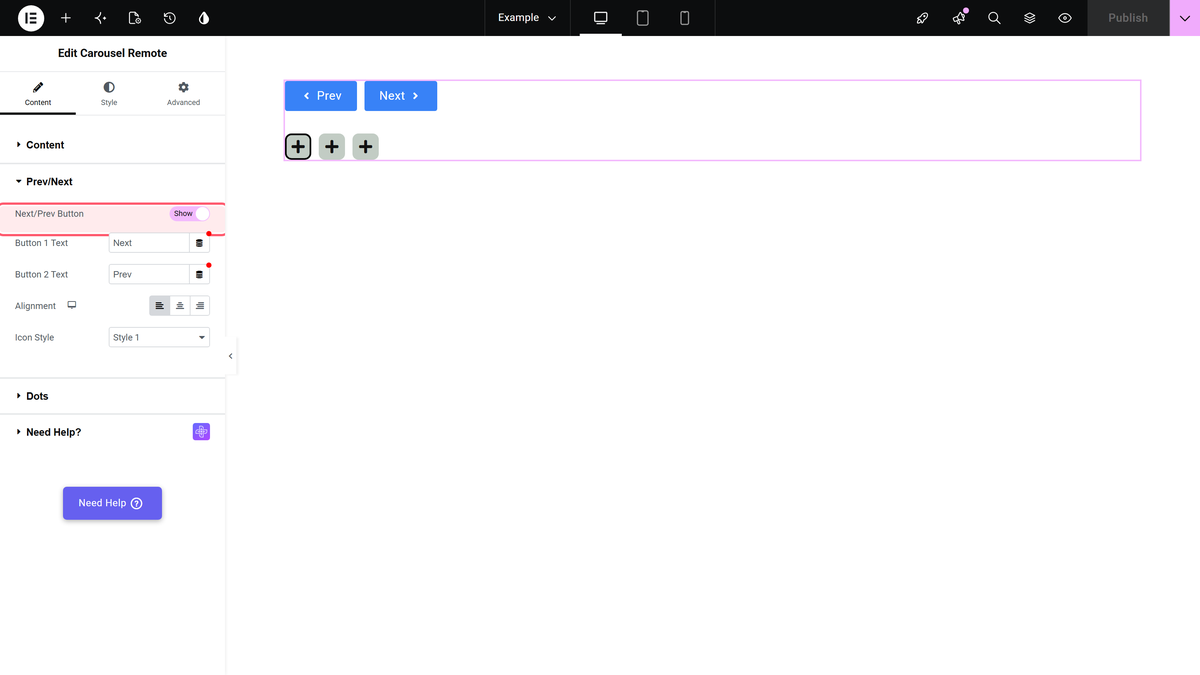
Open the Prev/Next section. Next/Prev Button is already on — you do not need to switch it on, only to style it.
- Button 1 Text and Button 2 Text set the labels, which start as Next and Prev.
- Alignment places the pair left, centre or right.
- Icon Style chooses the arrow glyph.
Add Dots
- Open the Dots section.
- Switch Dots on — unlike the arrows, this one is off by default.
- Add one row per scroll position using + Add Item, and give each a Label.
- Layout sets whether the dots run horizontally or vertically, and Active Dot Style picks how the current one is highlighted.
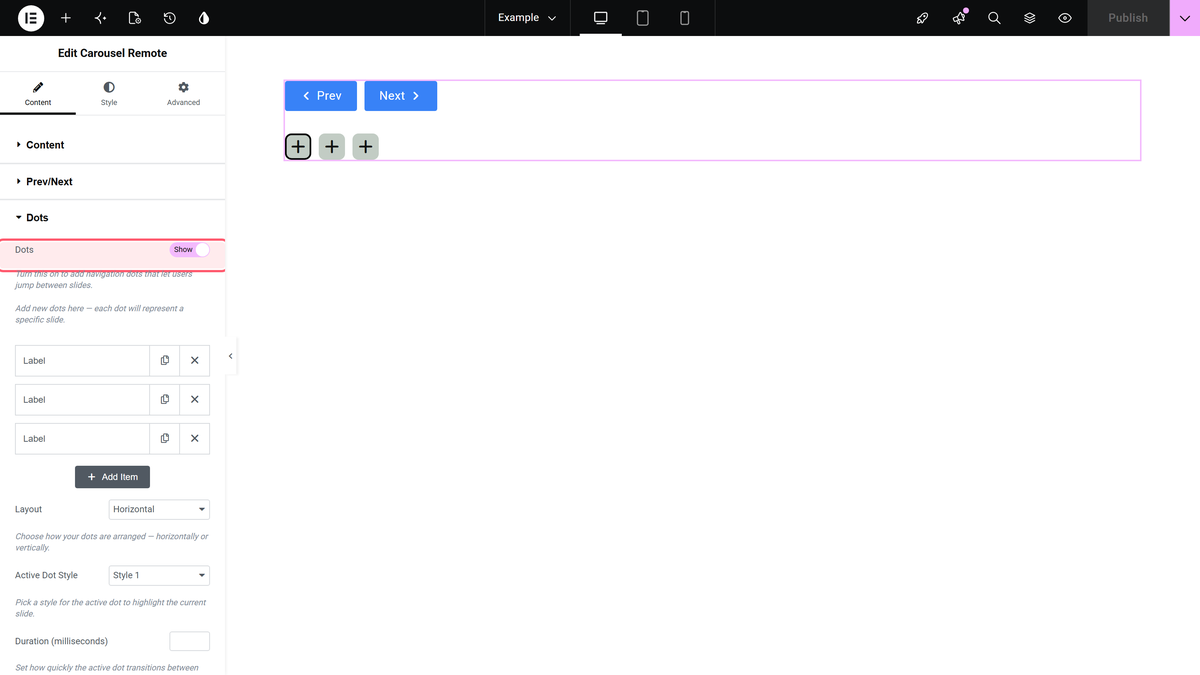
Add one row for each position the carousel can stop at, not one per box. Six items shown two at a time gives six positions, so you need six rows.
Check It on the Front End
Publish or preview the page and click the remote’s Next button. The Info Box carousel should advance, even though the remote sits somewhere else entirely.
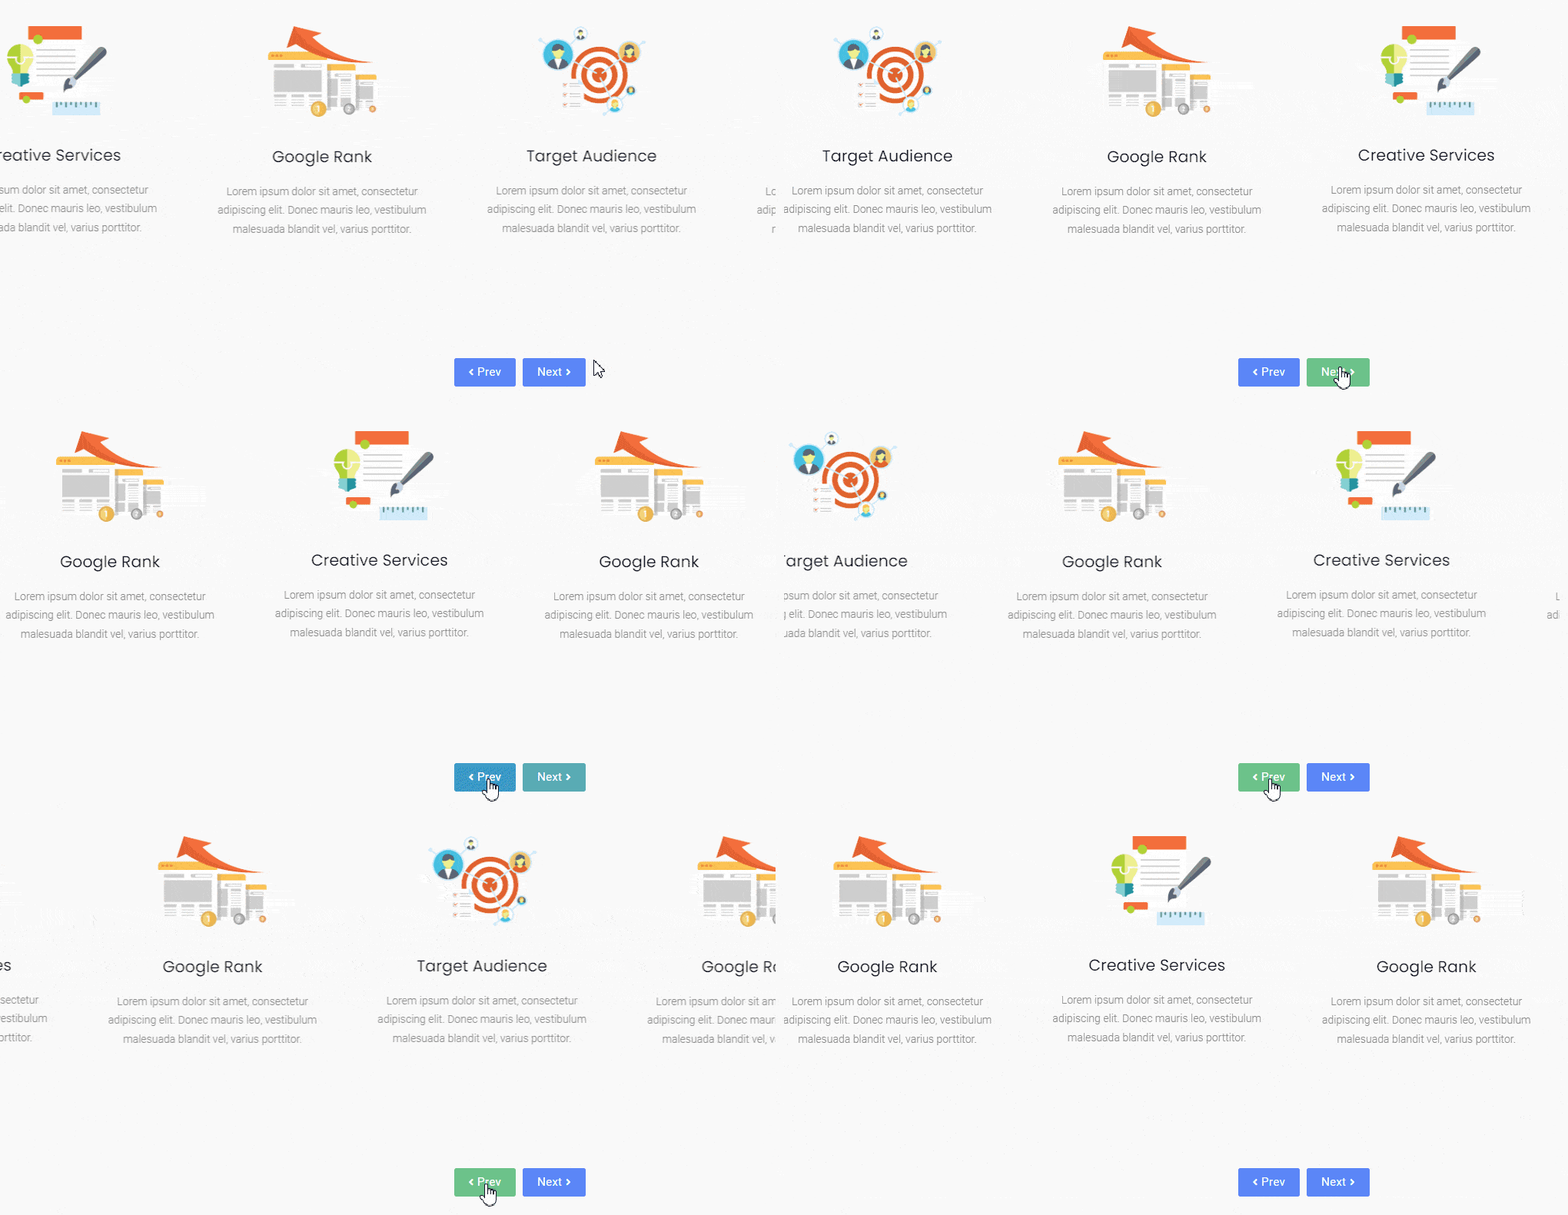
How It Behaves
- The remote drives the carousel, it does not contain it. You can put the remote above the carousel, beside it in another column, or further down the page.
- The Info Box carousel keeps its own arrows and dots if you have those switched on in Carousel Options. Turn them off there if you want the remote to be the only control.
- The active dot in the remote follows the carousel, including while Autoplay is moving it.
- None of this works in the editor canvas. Preview or publish to test it.
Limitations
- Nothing warns you about a mismatched ID. If Unique Carousel ID and Unique Connection ID differ by so much as a capital letter, the remote renders normally and simply does nothing.
- The dot rows do not size themselves. You add them by hand, so a carousel with more positions than dots leaves the last few unreachable from the remote, and extra dots do nothing.
- Both widgets need Pro. The Carousel layout and the Carousel Remote widget are Pro features; in the free plugin the carousel never initialises, so there is nothing for a remote to control.
- A remote controls one carousel ID. Driving two carousels together means giving them the same ID, which then moves both in lockstep.
Troubleshooting
The remote buttons do nothing
Compare Unique Carousel ID on the Info Box with Unique Connection ID on the remote, character for character. This is the usual cause.
The carousel itself does not move at all
Check the carousel works on its own first. With as many columns as items there is nothing to scroll, and no remote can change that. Lower Desktop Columns or add more items.
I cannot find the Next/Prev Button switch
It is in the Prev/Next section and it is on already. If you see no arrows on the page, check Alignment and the widget’s own width rather than the switch.
Some dots do nothing
You have more dot rows than the carousel has positions. Remove the extras, or add more items to the carousel.
