


A hero section with a short clip playing behind the headline tells visitors more in three seconds than a paragraph can. A coffee shop can show steam rising off a cup, a travel agency can show a beach, a SaaS product can show its dashboard in motion. Done well, a video background sets the mood before anyone reads a word. Done badly, it slows the page, drains mobile data and makes the text hard to read.
This guide shows you two ways to add a video background in Elementor. The first uses the Background settings that come with Elementor itself, which work in the free version. The second uses the Row Background widget in The Plus Addons for Elementor Pro, which adds separate videos for tablets and phones, per-device fallback images, a fixed parallax video and extra layers such as particles or a texture overlay on top of the clip. After both methods, you will find the settings that keep a video background fast, readable and accessible.
The setting names below were checked on 18 November 2026 against the code of Elementor 4.4.1 and The Plus Addons for Elementor Pro 6.6.1, and against our own documentation.
What Is a Video Background in Elementor?
A video background is a video that plays behind the content of a container (or a classic section), the same way a background image sits behind text. The video has no controls, usually starts on its own without sound and loops. Your headings, buttons and forms stay on top of it and remain editable as normal Elementor widgets.
It is different from a video you place with a Video widget. A Video widget is content: visitors press play, see controls and hear sound. A background video is decoration: it fills the container, sits behind everything else and plays silently. If you want visitors to watch a full video with sound, a video lightbox in Elementor or a regular video player is the better choice.
Good places for a video background:
- Hero sections: a short loop behind the main headline of a homepage or landing page.
- Product or service highlights: a clip of the product in use behind a short feature list.
- Event and travel pages: a few seconds of the venue or destination behind the booking button.
- Call-to-action bands: a subtle moving texture behind a sign-up form at the end of a page.
Before You Start: Pick and Prepare the Video
The video matters more than the settings. A background clip should be short, calm and readable with text on top. Fast cuts, bright flashes and busy details fight with your headline. A slow camera move, gentle motion or a soft-focus scene works best.
Prepare the file before you upload it:
- Keep it short. A clip that loops cleanly after a few seconds is enough. Visitors rarely watch a background for long.
- Remove the audio track. Background videos normally play muted, so the sound only adds file size.
- Export at the size you need. A background behind a full-width hero rarely needs more than a standard HD width, and a smaller file starts playing sooner.
- Use MP4. Elementor recommends MP4 for self-hosted background videos, and the Row Background widget asks for an MP4 address first, with an optional WebM or Ogg file.
- Prepare a still image. Both methods use a fallback image. Take a frame from the video so the switch from image to video looks natural.
You also have to decide where the video lives. A self-hosted file sits in your WordPress Media Library and plays with no third-party player. A YouTube or Vimeo video saves your server bandwidth, but it loads the provider’s player and depends on its rules for background playback.
Method 1: Add a Video Background With Elementor’s Built-in Settings
Elementor includes a Video background type for containers, and it works in the free version of Elementor. Here is how to set it up.
Step 1: Select the Container
Open your page in Elementor and click the handle of the container that should get the video. If you are building a hero, set Min Height first in the Layout tab under Container, because an empty container is only as tall as its content.
Step 2: Choose the Video Background Type
Go to the Style tab and open the Background section. On the Normal tab, the Background Type control shows four icons: Classic, Gradient, Video and Slideshow. Click Video.
Step 3: Paste the Video Link
The Video Link field takes a YouTube or Vimeo link, or a link to a video file. Elementor’s own hint under the field says that MP4 is recommended for files. To use a file from your Media Library, copy the video’s file URL from its attachment details and paste it here.
Step 4: Set the Playback Options
Below the link, Elementor gives you these settings:
| Setting | What it does |
|---|---|
| Start Time | The second the video starts from, so you can skip an intro. |
| End Time | The second the video stops, so you can loop only the best part. |
| Play Once | Plays the video one time instead of looping. Off by default, so the video loops. |
| Play On Mobile | Shows the background video on mobile screens. Off by default, so the video is hidden on phones and the Background Fallback image shows, if you set one. |
| Privacy Mode | For YouTube videos, loads them from YouTube’s privacy-enhanced domain. |
| Background Fallback | A cover image that replaces the video when it cannot be loaded. |
For a self-hosted file, Elementor writes the video tag with autoplay, muted and playsinline, and adds loop unless Play Once is on. So a self-hosted background video always plays without sound, which is also what browsers expect: Chrome, for example, always allows muted autoplay but limits autoplay with sound.
Step 5: Add an Overlay So the Text Stays Readable
Still on the Style tab, open Background Overlay and choose Classic (a colour or image) or Gradient. Elementor places the overlay above the video and below your widgets. Its Opacity slider starts at 0.5; adjust it until the video still shows through but white text is easy to read.
Step 6: Check Every Device
Switch to the tablet and mobile views in the editor, then preview the page on a real phone. Remember that Play On Mobile is off by default, so phones do not get the video. They see the Background Fallback image if you set one, so always set one.
That is all you need for a basic video hero. Where the built-in settings stop is device control: there is one video link for every screen size, and on mobile you can only choose between that same video or the fallback image.
Method 2: Add a Video Background With The Plus Addons for Elementor
The Row Background widget in The Plus Addons for Elementor Pro adds a layered background to any container. You drop the widget inside the container, and its layers fill that container behind your other widgets. The widget itself takes up no space on the page. A video is one of the options of its bottom layer, called the Deep Layer.
Step 1: Turn On the Row Background Widget
In your WordPress dashboard, open The Plus Addons, go to Widgets and switch on Row Background. It carries a PRO badge, so The Plus Addons for Elementor Pro needs to be installed and active. With only the free plugin, the widget appears as a locked tile in the Elementor panel.
Step 2: Drop the Widget Into the Container
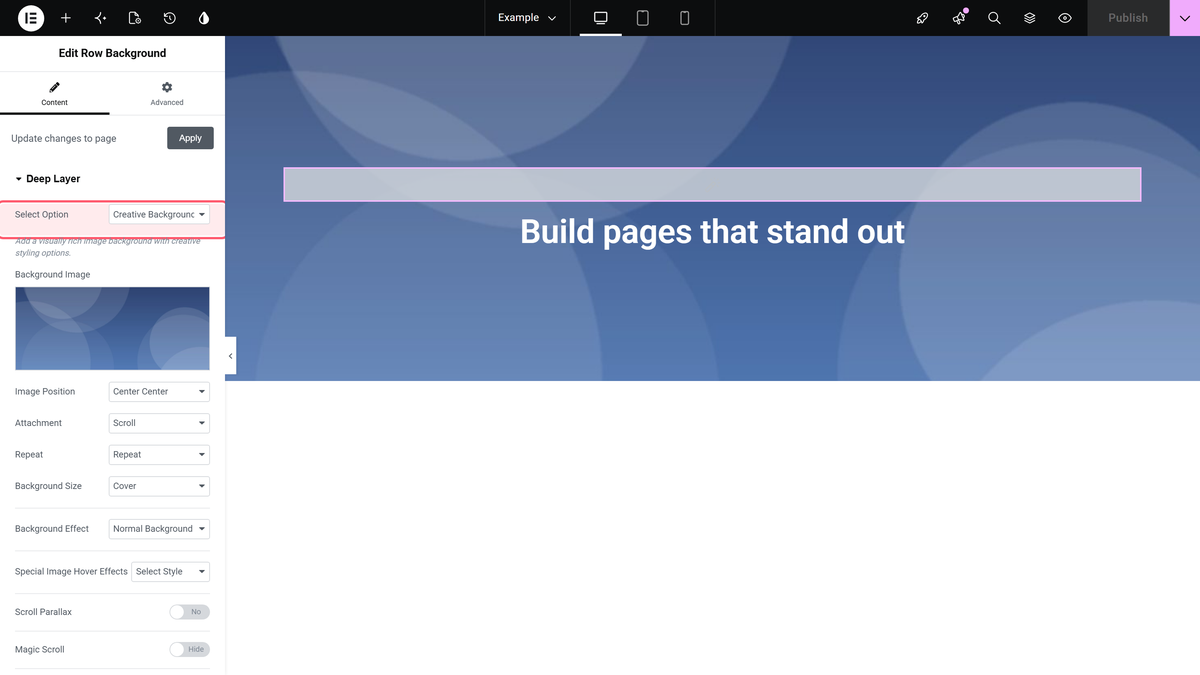
Search the Elementor panel for Row Background and drag it into the container that should get the video. You can place it anywhere inside that container. Then open Content > Deep Layer and set Select Option to Creative Background Video.
Step 3: Choose the Video Source
Video Source has three choices: Self Hosted, YouTube and Vimeo. YouTube is the default.
- Self Hosted: paste the file address into URL of Video (MP4). You can add a second file in URL of Video (WebM/Ogg).
- YouTube: enter only the ID of the video in Enter YouTube Video ID, not the full link. The ID is the part after v= in a YouTube address.
- Vimeo: enter the numeric ID in Enter Vimeo Video ID.
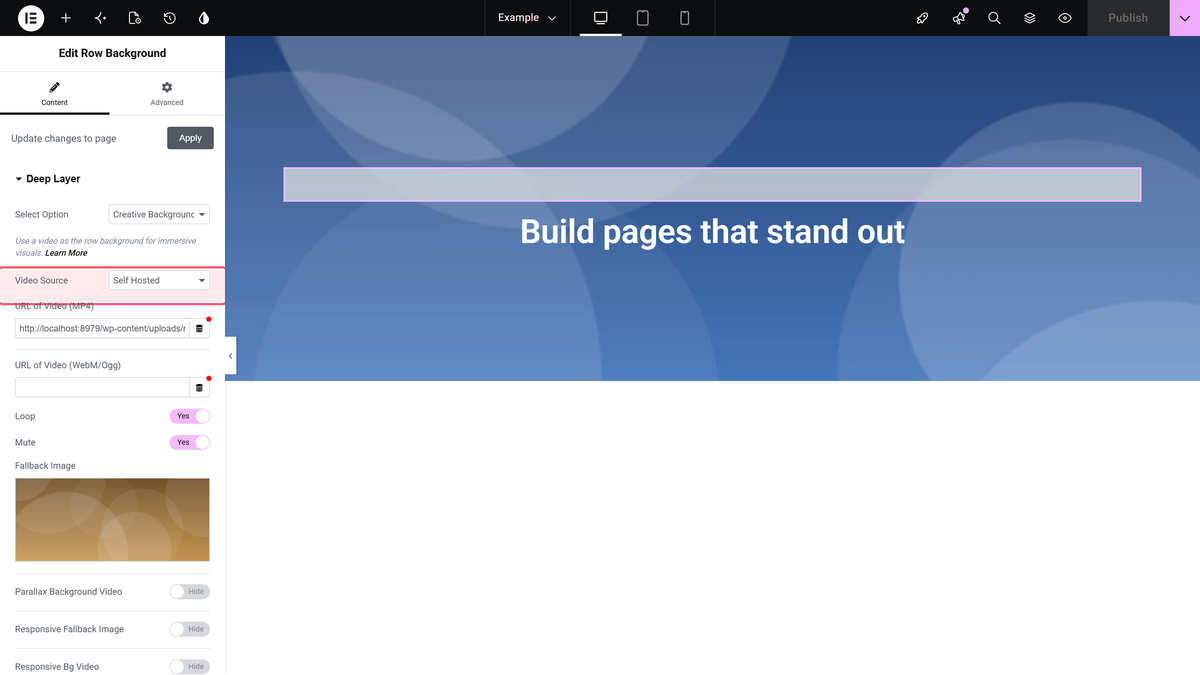
Step 4: Set Loop, Mute and the Fallback Image
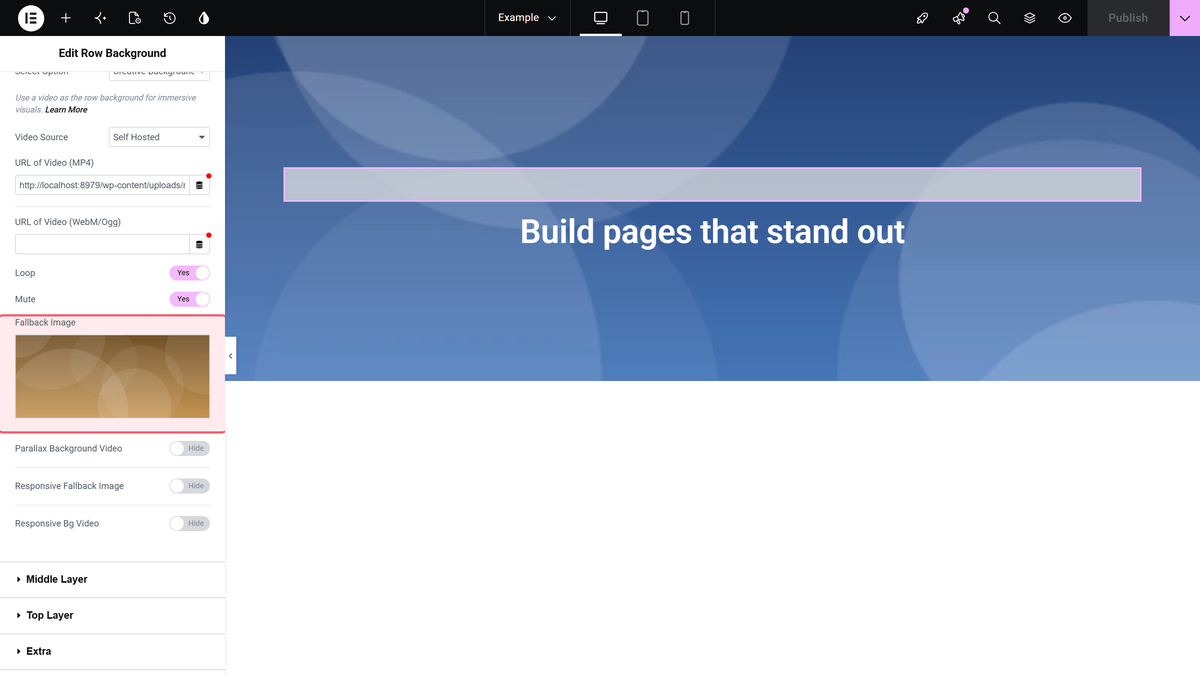
Loop and Mute are both on by default, which is what a background needs. Then pick a Fallback Image. It shows behind the video and works as the video poster while the file loads. Our documentation notes that without a Fallback Image, the widget shows a placeholder image from the plugin, so always set your own.
Step 5: Use the Extra Video Options
Three switches below the fallback image are where the widget goes beyond the built-in settings:
| Setting | What it does | Default |
|---|---|---|
| Parallax Background Video | Keeps the video fixed to the screen while the page scrolls past it. | Off |
| Responsive Fallback Image | Opens Tablet and Mobile tabs, each with its own Fallback Image. | Off |
| Responsive Bg Video | Opens Tablet and Mobile tabs, each with its own URL of Video (MP4). | Off |
Responsive Bg Video is the one to use when phones matter. You can give desktops a wide 16:9 clip and phones a lighter vertical clip that fits a tall screen, instead of cropping one video for every size. With both Responsive Bg Video and Responsive Fallback Image on, our documented test served the desktop file to a 1200 px screen, the tablet file to an 800 px screen and the mobile file to a 390 px screen, each with its own fallback image. The widget picks the tablet or mobile file by detecting the device on the server, so if you use page caching, check that your cache keeps separate versions for mobile visitors. Note that these device fields take MP4 addresses only, not YouTube or Vimeo IDs.
Step 6: Publish and Check the Result
Publish the page and open it in a new tab. A self-hosted video starts on its own, muted and looping, and scales to cover the whole container.
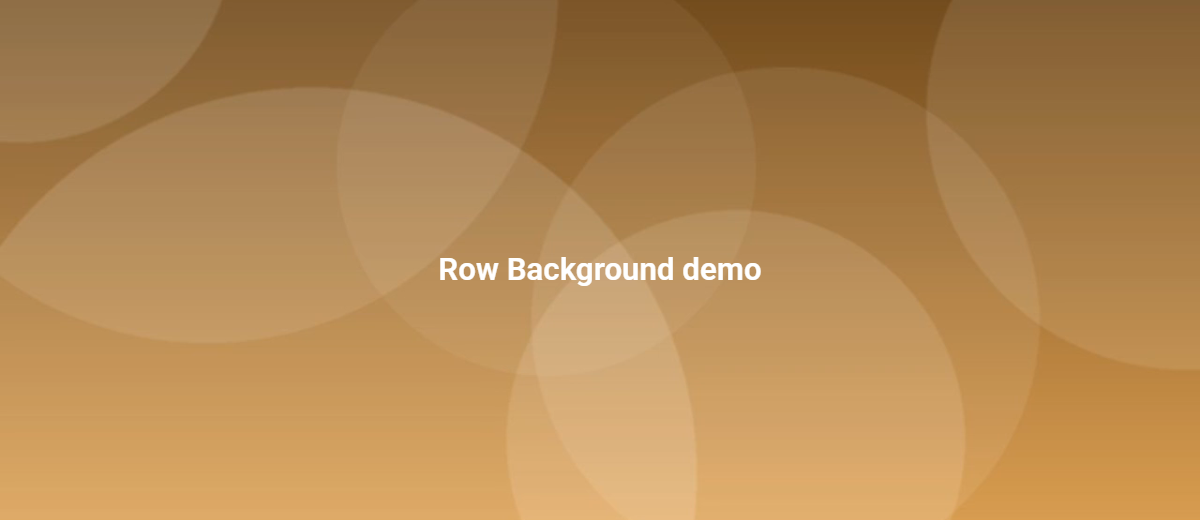
The video background documentation has a short recording of these steps and a list of every setting with its default.
Make the Video Readable With an Overlay and Extra Layers
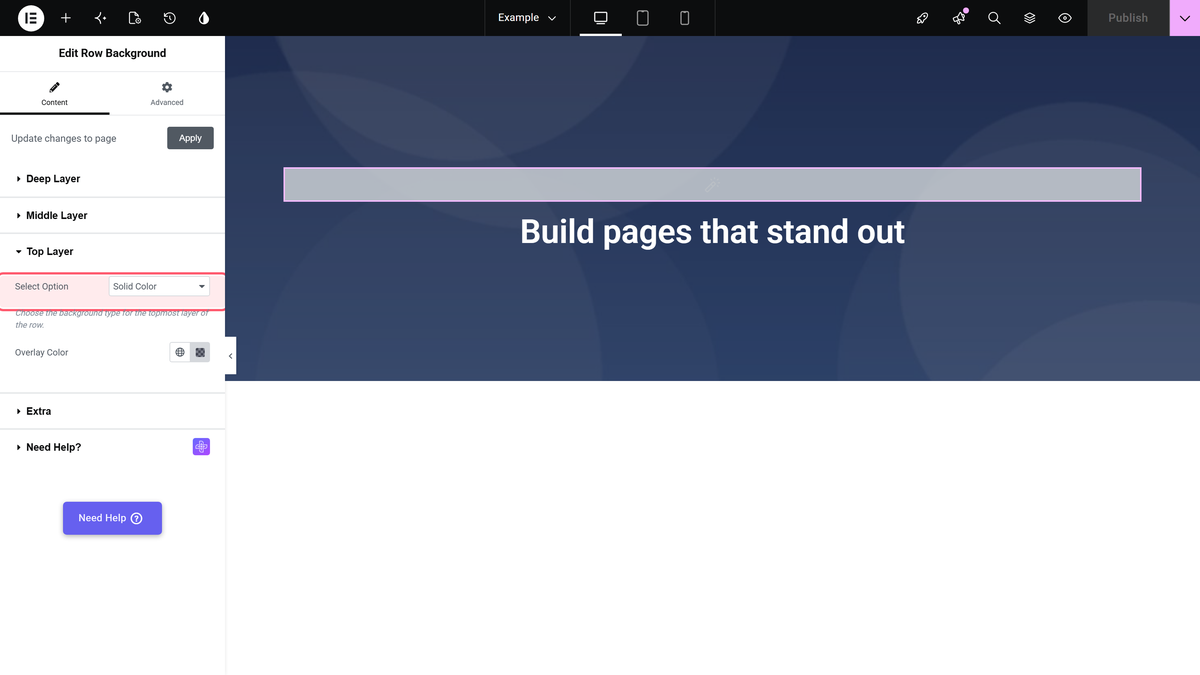
The Row Background widget has three layers, and you can use them together. The Deep Layer holds the video. The Middle Layer can add moving particles, auto-moving images or mouse-hover parallax images above it. The Top Layer covers both and works as an overlay.
For text on a video, the Top Layer is the useful one. Open Top Layer and set Select Option to Solid Color, Gradient Color or Texture Image:
- Solid Color: one Overlay Color. Pick a colour with transparency, or the video disappears behind it.
- Gradient Color: two colours with locations, a style and an angle, for example dark at the bottom where the text sits and clear at the top.
- Texture Image: a repeated image with an Opacity setting from 0 to 1, such as a dot or line pattern that softens the video.
A texture with a lowered Opacity lets the video show through while softening busy details:

The background overlay guide covers each overlay option, and the multi-layer background guide shows how the three layers stack. If you want particles moving over the video, see the particle background doc.
Built-in Settings vs Row Background: Which Should You Use?
Both methods put a video behind a container. The difference is how much control you get per device and what you can stack on top.
| Feature | Elementor built-in | Row Background (The Plus Addons for Elementor Pro) |
|---|---|---|
| Plan needed | Free Elementor | The Plus Addons for Elementor Pro |
| YouTube, Vimeo and self-hosted video | Yes | Yes |
| Separate second-format field (WebM or Ogg) | No (one Video Link) | Yes |
| Start and end time | Yes | No |
| Play once instead of looping | Yes | Loop switch can be turned off |
| YouTube privacy mode | Yes | No |
| Different MP4 per tablet and mobile | No | Yes |
| Different fallback image per device | No | Yes |
| Fixed (parallax) video while scrolling | No | Yes |
| Extra layers: particles, moving images, texture overlay | Background Overlay section (Classic or Gradient) | Middle Layer and Top Layer |
| Video on phones | Off by default, switch with Play On Mobile | YouTube and Vimeo players are not loaded on phones; use a mobile MP4 with Responsive Bg Video |
Use the built-in settings when you need one simple looping clip, want to trim it with start and end times, or need YouTube privacy mode. Use the Row Background widget when the mobile experience matters, when you want a vertical clip for phones, or when the design needs a fixed video, particles or a textured overlay. You can use both on the same site, container by container.
Keep Your Video Background Fast
A video background is often the heaviest file on the page. A few habits keep it from hurting load times and your Elementor Core Web Vitals:
- Compress before you upload. Export a short, silent clip at the size the section needs. A smaller file starts sooner.
- Always set a fallback image. Visitors see it while the video loads, and it replaces the video where it cannot play.
- Serve a lighter file on phones. With Responsive Bg Video, phones can get a smaller MP4 than desktops. With the built-in method, leaving Play On Mobile off shows the image instead.
- Use one video per page. Two or three autoplaying backgrounds multiply the weight and compete for attention.
- Prefer self-hosted for the hero. A self-hosted MP4 needs no third-party player. If your host is slow, a CDN helps; our guide on using a CDN for WordPress explains the setup.
For the rest of the page, the Elementor performance guide covers caching, images and widget loading.
Make It Accessible
Motion that starts on its own can bother some visitors, and it can make text harder to read. Keep these points in mind:
- Contrast first. Check that your text is readable over the brightest frame of the video, not only the frame you see in the editor. An overlay is the easiest fix.
- Offer a way to stop long motion. The W3C guidance on Pause, Stop, Hide asks for a way to pause moving content that starts automatically, lasts more than five seconds and is shown next to other content. A clip that plays once and stops within five seconds falls outside the rule. A looping clip needs a way for visitors to pause or hide it, which neither method adds by default, so keep looping videos subtle or ask a developer to add a pause button.
- Respect reduced motion. Some visitors set their device to reduce motion. The CSS media query prefers-reduced-motion lets a developer hide the video for them and show the fallback image instead.
- Keep meaning out of the video. Never put important information only in the background clip. Anything visitors must read belongs in a heading or text widget.
Troubleshooting Common Video Background Problems
- The video does not show on phones (built-in method). Play On Mobile is off by default. Turn it on, or keep it off on purpose and set a good Background Fallback.
- The YouTube video does not show on phones (Row Background). That is expected on phone-sized screens, where only the Fallback Image shows. Use a self-hosted MP4 with Responsive Bg Video for phones.
- A placeholder image shows instead of my video (Row Background). The placeholder appears when no Fallback Image is set. Add one, then check the MP4 address or the video ID.
- The Vimeo background stays in its loading state. The widget’s default Vimeo ID shows no video. Enter your own Vimeo ID. On phones, Vimeo and YouTube backgrounds are not shown, so set a Fallback Image.
- The YouTube background is blank (Row Background). Enter only the video ID, not the full link.
- The Row Background widget is missing or locked. Switch it on in The Plus Addons > Widgets and make sure The Plus Addons for Elementor Pro is active.
- The text is hard to read. Add an overlay: Background Overlay in Elementor, or the Top Layer in the Row Background widget.
- The video looks cropped. A self-hosted background video is scaled to cover the container, so the edges are cut when the container shape differs from the video. Change the container height, or use a separate mobile clip with Responsive Bg Video.
Free vs Pro: What You Can Do Without Paying
You can build a video background with free Elementor and the free version of The Plus Addons for Elementor: the background itself comes from Elementor, and our free plugin adds widgets for the content you place on top. The Row Background widget, with per-device videos, parallax video and layered overlays, is part of The Plus Addons for Elementor Pro. The free vs Pro comparison lists what each plan includes, and the pricing page has the current plans. If you like background effects in general, our parallax background doc and the guide to scroll animations in Elementor are good next steps.
Frequently Asked Questions
Can I Add a Video Background in Elementor for Free?
Yes. Free Elementor has a Video background type for containers: Style tab > Background > Background Type > Video. Paste a YouTube or Vimeo link or an MP4 file link into Video Link.
Why Is My Elementor Video Background Not Playing on Mobile?
In Elementor’s built-in settings, Play On Mobile is off by default, so phones show the Background Fallback image if you set one. Turn the switch on to play the video on phones. In the Row Background widget, YouTube and Vimeo backgrounds are not shown on phones; turn on Responsive Bg Video and add a mobile MP4.
Can I Use a YouTube Video as a Background in Elementor?
Yes. In the built-in settings, paste the full YouTube link into Video Link. In the Row Background widget, set Video Source to YouTube and enter only the video ID.
Does a Video Background Play With Sound?
Usually not. Elementor always mutes self-hosted background videos. In the Row Background widget, Mute is on by default but can be switched off. Browsers generally allow muted autoplay but restrict autoplay with sound.
How Do I Show a Different Video on Mobile in Elementor?
Elementor’s built-in settings use one video for every screen. The Row Background widget in The Plus Addons for Elementor Pro has a Responsive Bg Video switch with separate MP4 fields for tablet and mobile.
How Do I Darken a Video Background So Text Is Readable?
Add an overlay. In Elementor, use Style > Background Overlay with a semi-transparent colour. In the Row Background widget, set the Top Layer to Solid Color, Gradient Color or Texture Image.
Suggested Reading
- How to Create a Video Lightbox in Elementor
- How to Add Scroll Animations in Elementor
- How to Add Scroll Parallax and Mask Effects to Images in Elementor
- How to Make a Transparent Header on Scroll in Elementor
- Best WordPress Video Player Plugins for Elementor
- Elementor Core Web Vitals
- How to Create an Image Gallery in Elementor


