
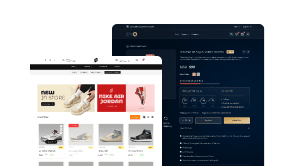


Do you want to add info banners to your Elementor website? These banners can be used to display important information and promotional offers on your website. Adding an info banner is a simple and effective way to grab the attention of your audience and improve the overall user experience.
With the Animated Service Boxes widget from The Plus Addons for Elementor, you can create beautiful info banners in Elementor.
To check the complete feature overview documentation of The Plus Addons for Elementor Animated Service Boxes widget, click here.
Requirement – This widget is a part of The Plus Addons for Elementor, make sure its installed & activated to enjoy all its powers.
To do this, add the Animated Service Boxes widget to a page and follow the steps –
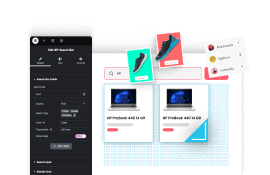
1. Select Info Banner from the Main Style dropdown.
From the Style dropdown, you can select a predefined style.
2. Then from the Hover Orientation dropdown, you can select the slide direction on hover. You can set the direction to top, bottom, left or right.
You can select the image size from the Image Resolution dropdown.
By enabling the Button toggle you can add a button to the info banners.
When enabled you can select a button style from the Button Style dropdown.
Then by enabling the Image/Icon toggle, you can add different image types to the info banner.
3. In the Animated Service Boxes section, you have to add the content for the info banners. By default, you’ll find three items, open one item.
4. You can add a title in the Title field.
Then from the Select Icon dropdown, you can select the image type for the info banner. Here you’ll find four options –
- None – This will not add any image to the info banner.
- Icon – With this option, you can add an icon to the info banner.
- Image – With this option, you can add an image to the info banner.
- Lottie – With this option, you can add a Lottie file to the info banner.
Based on your selection you’ll get different options to add the image type.
Note: Make sure the Image/Icon toggle is enabled to show the icon, image or Lottie file.
You can add a subtitle in the Sub Title field as required.
5. In the Description field you can add a description that will show on the back slide.
6. Then in the Featured Image section, you have to add an image for the info banner.
You can edit the button text and URL from the Button Text and Button Link fields respectively.
Note: Make sure the Button toggle is enabled to make the Button Text and Button Link fields work.
Following this process you can edit the other items.
You can click on the +Add Item button to add more info banners.
Then from the Layout tab, you can manage the text alignment of the info banner content and you can also manage the info banner height as well.
Then from the Columns Manage tab, you can manage the number of items in a row for desktop, tablet and mobile separately. You can also manage the gap between the items as well.

