Are you looking to add a before and after opacity slider in Elementor? Adding a before and after opacity comparison slider can add a visual touch to your website as the images slowly blend over each other as you move your cursor.
With the Before After widget from The Plus Addons for Elementor, you can easily create a before and after opacity slider in Elementor.
To check the complete feature overview documentation of The Plus Addons for Elementor Before After widget, click here.
Requirement – This widget is a part of The Plus Addons for Elementor, make sure its installed & activated to enjoy all its powers.
To do this, add the Before After block on the page and follow the steps –
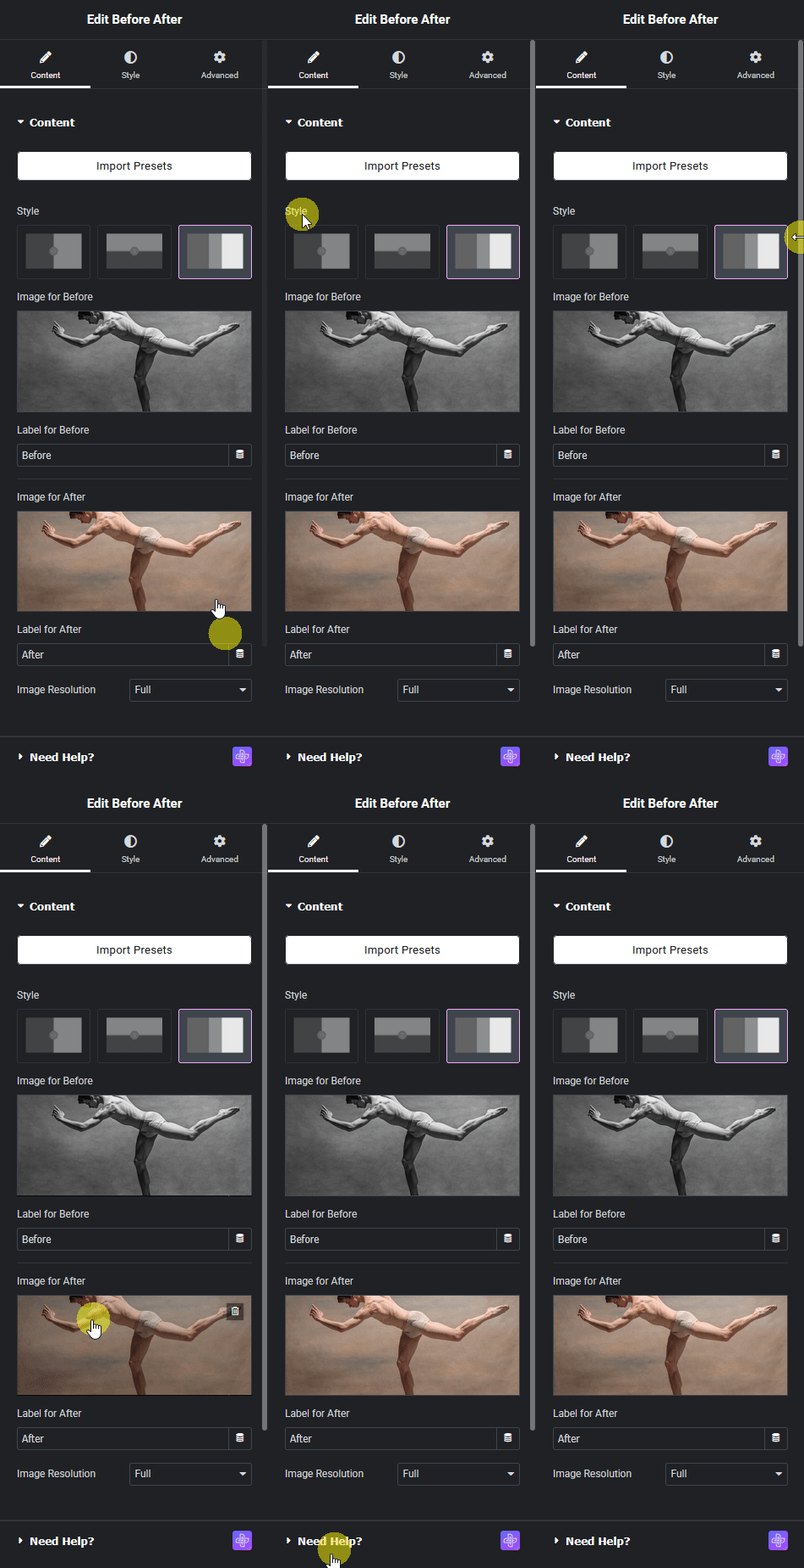
1. Select the Opacity from the Style section.

2. Then in the Image for Before section, you have to add the before image.
In the Label for Before field, you can add a label for the before image.
3. After that in the Image for After section, you have to add the after image.
In the Label for After field, you can add a label for the after image.
Now you will see an opacity before and after comparison slider.
Suggested Read: How to Add a Vertical Before and After Comparison Slider in Elementor.


