In December 2024, Meta permanently shut down the Instagram Basic Display API, the method every guide published before that date told you to use. If your Instagram feed stopped working, or if you’re setting one up now, you need a new process.
The replacement is the Instagram API with Instagram Login. It works differently from the old approach: it only supports Creator and Business accounts, and it no longer requires adding a test user before generating a token. The steps are actually fewer than before.
This guide walks you through the current process to generate an Instagram access token and connect it to your WordPress site using The Plus Addons for Elementor by POSIMYTH.
What Is an Instagram Access Token?
An Instagram access token is a unique alphanumeric code that gives a third-party application, like a WordPress feed widget, permission to read your Instagram account’s content.
It acts as a secure key so your site can pull and display your posts without storing your Instagram password.
When you add an Instagram feed to a WordPress page, the plugin uses this token to request your posts from Meta’s API on your behalf. Without it, the feed has no way to authenticate your account.
What Changed with Instagram Access Tokens in 2024?
Meta officially shut down the Instagram Basic Display API on December 4, 2024, according to Meta’s developer changelog. Tokens generated under the old API stopped working on that date.
Here is what changed:
| Old Process (Before December 2024) | Current Process (2026) | |
|---|---|---|
| API name | Instagram Basic Display API | Instagram API with Instagram Login |
| Account type required | Personal, Creator, or Business | Creator or Business only |
| Test user setup | Required before generating token | Not required |
| Token duration | 60 days | 60 days |
| App type in Meta | Consumer | Business |
The most important change for WordPress users: personal Instagram accounts are no longer supported by any public Meta API. You must have a Creator or Business account to generate an access token today.
What You Need Before Getting Started
Before opening Meta for Developers, confirm you have the following in place:
- An Instagram account converted to Creator or Business type
- Your Instagram account set to Public (private accounts cannot connect)
- A Meta for Developers account, free to create at developers.facebook.com
To convert a personal account: open Instagram on your phone, go to Settings > Account > Switch to Professional Account, then choose Creator or Business. The conversion is free and takes under two minutes.
How to Get an Instagram Access Token for WordPress
Follow these five steps in order. If your account is already a Creator or Business type and set to public, you can skip Step 1 and start from Step 2.
Step 1: Go to Meta for Developers
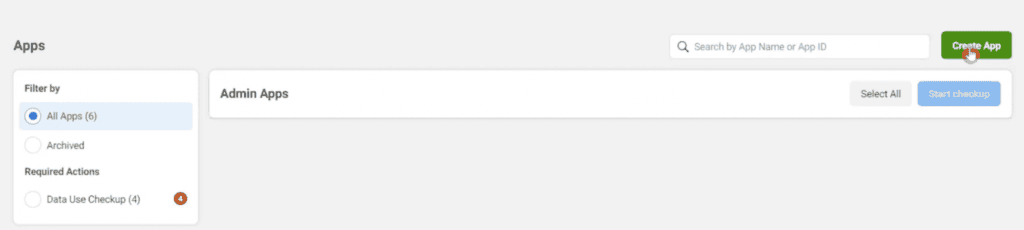
Go to developers.facebook.com and sign in with your Facebook account. From the top navigation, click My Apps, then click Create App.
Step 2: Create a New App
On the use case screen, select Other. On the next screen, select Business as the app type. Enter an app display name (anything works, for example, “My WordPress Site”) and your contact email. Click Create App to continue.
Note: This screenshots shows an earlier UI version, the current Meta dashboard may look slightly different, but the options remain the same.
Step 3: Add Instagram and Select API Setup with Instagram Login
Once inside your app dashboard, scroll down to find the Instagram product and click Set up. In the left sidebar, click on Instagram to expand it, then select API Setup with Instagram Login.
This is the current replacement for Basic Display API. Do not select “API Setup with Facebook Login”, that is a different integration for Facebook Pages, not Instagram accounts.
Step 4: Add Your Instagram Account
In the Generate access tokens section, click Add an Instagram Account. A login popup will appear. Log in with your Instagram Creator or Business account credentials and click Allow when prompted to grant access.
Your Instagram account will appear in the list once connected.
Step 5: Generate and Copy Your Token
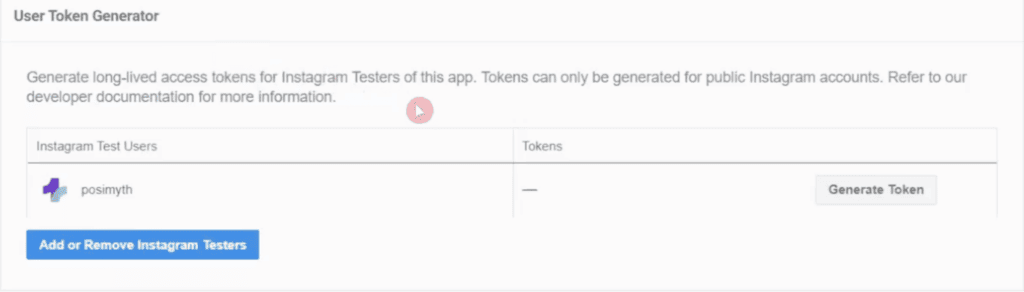
Click Generate Token next to your connected Instagram account. You may be prompted to log in to Instagram once more to confirm authorization.
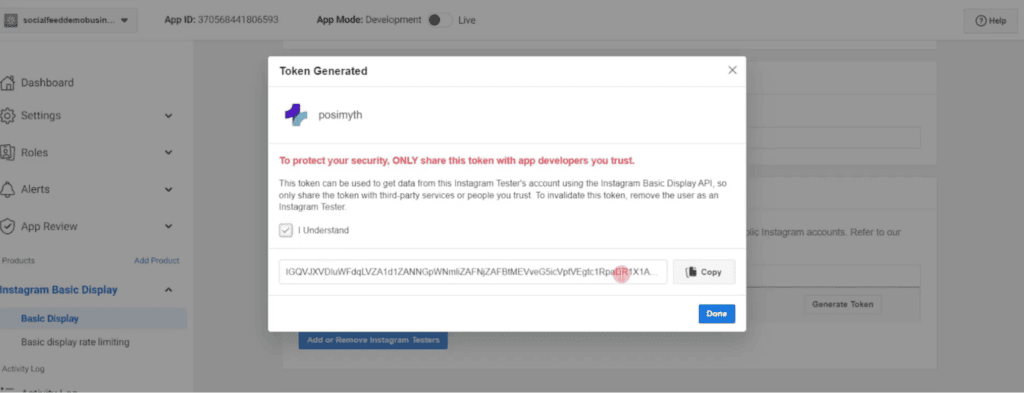
Once generated, copy the token immediately and save it somewhere secure, you will not be able to view it again from the Meta dashboard. Click Done, then Save Changes.
Already have your token? Learn how to display it on your site: How To Add Instagram Feed To Your Elementor WordPress Website
How to Connect Your Instagram Access Token in The Plus Addons for Elementor
The Instagram Feed widget (Pro) in The Plus Addons for Elementor, which has 100,000+ active installs as of June 2026 per WordPress.org, lets you paste your token directly into the widget settings and start displaying your feed in Elementor with full layout control.
Here is how to connect it:
- Add the Instagram Feed widget to any page in Elementor
- In the widget’s Content tab, find the Instagram Configuration section
- Paste your access token into the designated field
- Set your display preferences, post count, layout style, columns, and image size
- Click Update to publish
The widget also lists Auto API Generation as a supported connection method. Check the Instagram Feed setup documentation for the exact steps, as this may allow you to connect your account without going through Meta for Developers manually.
Don’t need a full feed? If you only want to embed a single Instagram post or Reel on your page, the Instagram Embed widget (Free) handles this without any token. No developer account required.
How Long Does an Instagram Access Token Last?
Tokens generated through the Instagram API with Instagram Login are long-lived tokens valid for 60 days, according to Meta’s developer documentation. After 60 days, the token expires and your feed will stop pulling new posts.
To renew: go back to your app in Meta for Developers, navigate to Instagram > API Setup with Instagram Login, and click Generate Token again for your connected account. The new token becomes active immediately.
A long-lived token can also be refreshed programmatically once it is at least 24 hours old and before it expires, which extends it for another 60 days.
If your WordPress plugin supports automatic token refresh, it will handle this in the background. For token renewal options specific to The Plus Addons for Elementor, check the plugin documentation or ask in the 24/7 support chat.
Want to connect a Facebook feed too? Read How To Add Facebook Feed To Your Elementor WordPress Website
Is Setting Up an Instagram Access Token Worth It?
Yes, if you have a Creator or Business Instagram account and want a live, styled, filterable feed on your WordPress site. A connected feed updates automatically as you post to Instagram and can be customized to match your site’s design through Elementor’s visual editor.
Skip it if you only need to embed a single post or Reel. The free Instagram Embed widget handles that without any API setup.
Not yet on a Creator or Business account? The conversion is free and takes under two minutes in Instagram’s app settings. Once converted, you can generate a token and have your feed live the same day.
The Plus Addons for Elementor’s Instagram Feed widget is available on the Pro plan, which starts at $39/year and includes access to 120+ widgets, 8+ builders, and the full Extras library, alongside the Instagram Feed integration.