The Elementor page builder offers you limitless design possibilities. One of them is the ability to create custom Elementor blog post templates.
Your blog is an important part of your website as it is one of the most effective ways to leverage content marketing and create brand awareness. However, apart from good content, visual appeal is what will truly help you attract and engage your target audience.
A well-designed blog post page will help improve your website views, appeal to your audience, and help you reduce the bounce rate.
When you pick a theme for your website, it includes a single post template that you can use for your blog posts. It is made up of different elements- Post Title, Post Content, Metadata, Featured Image, and more.
But what if you want a customized blog post design that fits your website aesthetic?
Fortunately, Elementor lets you design your own blog post templates from scratch without coding. You can easily customize the layout, structure, appearance, and content style.
In this guide, we’ll walk you through the different methods of creating a custom Elementor blog post template from scratch.
Let’s begin!
What is an Elementor Blog Post Template?
Elementor blog post template is a pre-made structure or design that you can easily customize and apply to some or all of your content. With a ready-made blog post template, you can save time otherwise spent in creating designs when publishing new blog posts.
Instead of designing blog post pages, sections, or layouts every time from scratch, you can use a single post template to implement your designs and publish the blog posts quickly. This also helps you ensure a consistent design across various blog posts and other parts of your website.
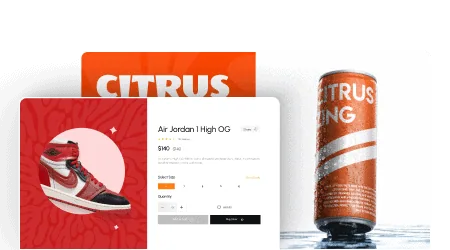
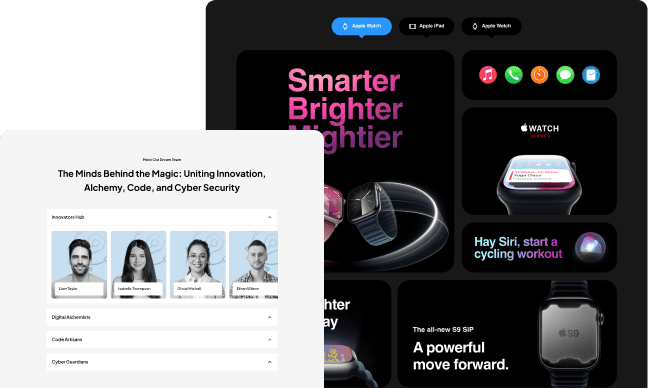
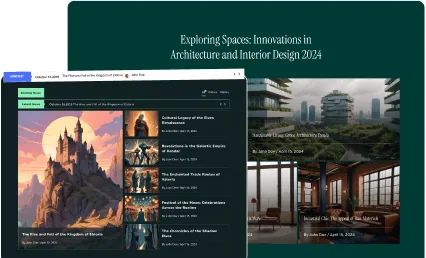
Above is a snap of Blog Templates created using The Plus Addons’ free Blog Builder
By default, your post template is part of your WordPress theme. But if you’re creating your website using the Elementor page builder, you can create a custom post template for WordPress to give your blogs a fresh look.
What’s more, you can even create multiple templates with Elementor for blog posts in different categories.
Plugins Required for Creating Custom Elementor Blog Templates
Elementor is a versatile page builder that gives you access to tons of features, customizations, and design options to create your blog post Elementor template. But to do so without writing code, you’ll need to install the following plugins on your WordPress-
- Elementor (Free)
- Elementor Pro
Once you have these plugins installed and activated, you can start creating an Elementor single blog post template using the intuitive drag-and-drop builder.
How to Create Custom Elementor Blog Post Template [2 Easy Methods]
You can create a custom Elementor Blog Post Template in 2 simple ways-
- Create an Elementor blog page template from scratch
- Create a single post page using pre-made Elementor blog templates
Both these methods are easy to implement, and you can try out any method based on your website needs and technical knowledge.
Do you want to add unique designs and advanced functionality to your Elementor website? Use custom CSS. Learn 4 Easy Methods to Add Custom CSS in Elementor for Free.
Method 1- Creating Elementor Custom Blog Page Template from Scratch
Elementor Pro offers you a range of feature-rich and functional widgets to build attractive blog page templates from scratch. Here’s how-
Step 1: Create a new blog post template
The first step is to create a new template on WordPress. For this, go to the dashboard and navigate to Templates > Add New.
![Create a new blog post template | The Plus Addons for Elementor Create a new blog post template how to create custom elementor blog post template [beginners guide] from the plus addons for elementor](https://theplusaddons.com/wp-content/uploads/2023/09/Create-a-new-blog-post-template-1024x477.webp)
On the new window, select the type of template as Single Post, name the template, and click on Create Template.
![Create Template 1 | The Plus Addons for Elementor Create template 1 how to create custom elementor blog post template [beginners guide] from the plus addons for elementor](https://theplusaddons.com/wp-content/uploads/2023/09/Create-Template-1-1024x514.webp)
For this method, you can ignore the pre-made templates library since you’re going to create a blog template from scratch.
Step 2: Select the layout for the template
Next, it’s time to create the basic structure for your blog template. This should fit the look and design of your overall website and be easy to follow for the website visitors.
To design the structure of your blog page template, click on the + icon on the page builder and add sections and columns as you like.
![Select the layout for the template | The Plus Addons for Elementor Select the layout for the template how to create custom elementor blog post template [beginners guide] from the plus addons for elementor](https://theplusaddons.com/wp-content/uploads/2023/09/Select-the-layout-for-the-template-1024x504.webp)
Step 3: Add and customize the featured image
Once you have the structure of your blog post all ready, you can start working with the widgets you like within the set columns.
Starting with the blog post image, you can add the Featured Image widget by dragging and dropping the widget where you want it from the left-hand side menu.
![Featured Image widget | The Plus Addons for Elementor Featured image widget how to create custom elementor blog post template [beginners guide] from the plus addons for elementor](https://theplusaddons.com/wp-content/uploads/2023/09/Featured-Image-widget-1024x500.webp)
Now, customize the image size, alignment, link, and caption from the Content tab.
![Edit featured image | The Plus Addons for Elementor Edit featured image how to create custom elementor blog post template [beginners guide] from the plus addons for elementor](https://theplusaddons.com/wp-content/uploads/2023/09/Edit-featured-image-1024x508.webp)
In addition, you navigate to the Style tab to change the image height, width, border, radius, opacity, and more to make the image more appealing and in line with the overall structure.
![Edit featured image style | The Plus Addons for Elementor Edit featured image style how to create custom elementor blog post template [beginners guide] from the plus addons for elementor](https://theplusaddons.com/wp-content/uploads/2023/09/Edit-featured-image-style-1024x504.webp)
Step 4: Add and customize post info widget
To display the post metadata, you’ll need to add the Post Info widget to your Elementor template. Add a new column below the featured image, find the widget from the Elementor menu, and drop it in the column.
![Post info 1 | The Plus Addons for Elementor Post info 1 how to create custom elementor blog post template [beginners guide] from the plus addons for elementor](https://theplusaddons.com/wp-content/uploads/2023/09/Post-info-1.webp)
Go to the Content tab to add the Meta Data to the post, including author, time, data, and comments.
![Meta data | The Plus Addons for Elementor Meta data how to create custom elementor blog post template [beginners guide] from the plus addons for elementor](https://theplusaddons.com/wp-content/uploads/2023/09/Meta-data-1024x474.webp)
In the Style tab, you can set the alignment of the post meta content, along with the icon color, icon size, and text style.
![List style | The Plus Addons for Elementor List style how to create custom elementor blog post template [beginners guide] from the plus addons for elementor](https://theplusaddons.com/wp-content/uploads/2023/09/List-style-1024x475.webp)
Step 5: Add the post title widget
Next comes the Post Title widget, with which you can display a custom blog title.
![Post title 1 | The Plus Addons for Elementor Post title 1 how to create custom elementor blog post template [beginners guide] from the plus addons for elementor](https://theplusaddons.com/wp-content/uploads/2023/09/Post-title-1.webp)
![Edit post title 1 | The Plus Addons for Elementor Edit post title 1 how to create custom elementor blog post template [beginners guide] from the plus addons for elementor](https://theplusaddons.com/wp-content/uploads/2023/09/Edit-post-title-1-1024x475.webp)
Add the widget from the Elementor menu and go to the Style tab to experiment with the content design and style. Here, you can customize the post title’s typography, text color, text shadow, stroke, and Blend mode.
![Blend mode | The Plus Addons for Elementor Blend mode how to create custom elementor blog post template [beginners guide] from the plus addons for elementor](https://theplusaddons.com/wp-content/uploads/2023/09/Blend-mode-1024x501.webp)
Step 6: Include the post content widget
After post info, search for the Post Content widget from the left-side menu and drag and drop it below the post info section.
![Post Content | The Plus Addons for Elementor Post content how to create custom elementor blog post template [beginners guide] from the plus addons for elementor](https://theplusaddons.com/wp-content/uploads/2023/09/Post-Content.webp)
Add your content and customize the content alignment, typography, and text color from the Style tab.
![Edit post content | The Plus Addons for Elementor Edit post content how to create custom elementor blog post template [beginners guide] from the plus addons for elementor](https://theplusaddons.com/wp-content/uploads/2023/09/Edit-post-content-1024x505.webp)
Want to take your website experience to a whole new level? Learn How to Add Elementor Preloader and Page Transitions to include page-loading animations for a better user experience.
Step 7: Use the social share widget to add a share option
Adding social icons to your blog posts is a great way to improve your reach and visitor engagement and get more attention.
With the Social icon widget added to your template, your website audience will have the option to share your blog posts on different social media platforms.
![social share widget | The Plus Addons for Elementor Social share widget how to create custom elementor blog post template [beginners guide] from the plus addons for elementor](https://theplusaddons.com/wp-content/uploads/2023/09/social-share-widget.webp)
Drag the social icon widget and customize the icons however you like – change the icon shape, size, color, alignment, spacing, and more.
![Edit social icons | The Plus Addons for Elementor Edit social icons how to create custom elementor blog post template [beginners guide] from the plus addons for elementor](https://theplusaddons.com/wp-content/uploads/2023/09/Edit-social-icons-1024x477.webp)
You can add or delete social media sharing icons for multiple social platforms, including Facebook, Twitter, and YouTube.
![Social icons | The Plus Addons for Elementor Social icons how to create custom elementor blog post template [beginners guide] from the plus addons for elementor](https://theplusaddons.com/wp-content/uploads/2023/09/Social-icons-1024x472.webp)
Step 8: Add the author info widget
You can also add an author box within your blog post template. Drag and drop the Author Box from the widgets below the social icons section.
![Author box 1 | The Plus Addons for Elementor Author box 1 how to create custom elementor blog post template [beginners guide] from the plus addons for elementor](https://theplusaddons.com/wp-content/uploads/2023/09/Author-box-1.webp)
Here, you can choose to display a custom author from the Source dropdown under the Content tab. In addition, you can choose to show or hide the author’s profile picture, display name, and biography.
![Content | The Plus Addons for Elementor Content how to create custom elementor blog post template [beginners guide] from the plus addons for elementor](https://theplusaddons.com/wp-content/uploads/2023/09/Content-1024x501.webp)
Further, Elementor also gives you the option to change the link, layout, alignment, and HTML tag of the author box.
As for the styling options, you can also customize the author box like every other element of your blog post template. You can change the text typography, background, image size, border, and spacing, among other things.
![Author box | The Plus Addons for Elementor Author box how to create custom elementor blog post template [beginners guide] from the plus addons for elementor](https://theplusaddons.com/wp-content/uploads/2023/09/Author-box-1024x504.webp)
Step 9: Use the post navigation widget for pagination
The post navigation feature allows your website visitors to navigate between various published blogs on your website.
Once you add the Post Navigation widget to your blog post page, you can choose to show or hide the pagination label or arrows.
![Post Nevigation | The Plus Addons for Elementor Post nevigation how to create custom elementor blog post template [beginners guide] from the plus addons for elementor](https://theplusaddons.com/wp-content/uploads/2023/09/Post-Nevigation.webp)
Plus, you can choose from multiple design options for the arrow signs and even customize the “previous” and “next” options text.
![previous | The Plus Addons for Elementor Previous how to create custom elementor blog post template [beginners guide] from the plus addons for elementor](https://theplusaddons.com/wp-content/uploads/2023/09/previous-1024x474.webp)
You can further change the color, title, typography, and borders for the pagination label in both normal and hover views.
![Edir post nevigation | The Plus Addons for Elementor Edir post nevigation how to create custom elementor blog post template [beginners guide] from the plus addons for elementor](https://theplusaddons.com/wp-content/uploads/2023/09/Edir-post-nevigation-1024x444.webp)
Step 10: Display related posts
![Display related posts | The Plus Addons for Elementor Display related posts how to create custom elementor blog post template [beginners guide] from the plus addons for elementor](https://theplusaddons.com/wp-content/uploads/2023/09/Display-related-posts.webp)
Displaying related posts is an interesting way to get your visitors to explore your content. You can use the Elementor post widget to showcase related posts on your blog page.
![Classic | The Plus Addons for Elementor Classic how to create custom elementor blog post template [beginners guide] from the plus addons for elementor](https://theplusaddons.com/wp-content/uploads/2023/09/Classic-1024x502.webp)
With this widget, you get the option to customize the skin color, layout, number of columns, posts per page, image position, image size, and more, along with the basic styling options.
![Edit Posts | The Plus Addons for Elementor Edit posts how to create custom elementor blog post template [beginners guide] from the plus addons for elementor](https://theplusaddons.com/wp-content/uploads/2023/09/Edit-Posts-1024x500.webp)
Step 11: Add post comments
Lastly, if you want to give your website visitors the option to leave comments under the blogs, you can add the Post Comments widget to the page. Search for the widget from the Elementor menu and drag and drop it into a new section under related posts.
![Post Comment | The Plus Addons for Elementor Post comment how to create custom elementor blog post template [beginners guide] from the plus addons for elementor](https://theplusaddons.com/wp-content/uploads/2023/09/Post-Comment.webp)
Here, you can set the skin of the comment box and the source of the comment under the Content tab on the left panel.
![Content tab | The Plus Addons for Elementor Content tab how to create custom elementor blog post template [beginners guide] from the plus addons for elementor](https://theplusaddons.com/wp-content/uploads/2023/09/Content-tab-1024x456.webp)
Step 12: Update and Review the Elementor Single Blog Post Template
Once your design is complete, review the template, and if everything is to your liking, click on Update, and on the publishing window, click Save and Close.
![Update and Review | The Plus Addons for Elementor Update and review how to create custom elementor blog post template [beginners guide] from the plus addons for elementor](https://theplusaddons.com/wp-content/uploads/2023/09/Update-and-Review.webp)
Widgets let you add unique functionalities to your website, but not all might be useful for you. Learn How to Disable and Hide Elementor Widgets to ensure a high-performing website.
Method 2 – Creating a Single Post Page Using Pre-made Elementor Blog Templates
This is another quick and simple method to create a custom Elementor blog template for your website. Here, you can use a pre-built Elementor template available with the Elementor theme builder in just three simple steps.
Step 1: Create a new single blog post template
Similar to the first method discussed, you need to create a new single blog post template. For this, navigate to Templates > Add New on the WordPress dashboard.
In the pop-up window, select the template type as Single Post and name the template. Click on Create Template.
![Create Template | The Plus Addons for Elementor Create template how to create custom elementor blog post template [beginners guide] from the plus addons for elementor](https://theplusaddons.com/wp-content/uploads/2023/09/Create-Template-1024x514.webp)
Step 2: Choose a pre-designed single post template
Now, a new window will pop up where you will see the Elementor template library. This is an extensive collection of single post and website page templates.
![Choose a pre designed single post template | The Plus Addons for Elementor Choose a pre designed single post template how to create custom elementor blog post template [beginners guide] from the plus addons for elementor](https://theplusaddons.com/wp-content/uploads/2023/09/Choose-a-pre-designed-single-post-template-1024x563.webp)
Here, you can choose any blog post template you like and click on Insert to add it to your website design.
![Blocks library | The Plus Addons for Elementor Blocks library how to create custom elementor blog post template [beginners guide] from the plus addons for elementor](https://theplusaddons.com/wp-content/uploads/2023/09/Blocks-library-1024x606.webp)
Step 3: Save and publish the template
Once the template loads on the page builder, click on Publish and then Save and Close to save all new blog post templates.
This template will have all the necessary elements and sections you need to display for an attractive and engaging blog post page on your website.
![Elements | The Plus Addons for Elementor Elements how to create custom elementor blog post template [beginners guide] from the plus addons for elementor](https://theplusaddons.com/wp-content/uploads/2023/09/Elements-1024x501.webp)
That said, you can still customize the basic design and styling of a ready-made template to make it more in line with your website aesthetic.
Looking to enhance the customization and functionality of your Elementor blog website? Check out these 10 Best Free Elementor Blog Widgets with Templates.
Enhance Your Blog Customization with The Plus Addons’ Blog Builder
If you want to create custom blog post templates for your Elementor website, we have another amazing tool for you. The Plus Addons for Elementor offer a feature-rich blog builder with the biggest library of widgets to customize any blog page easily.
![Blog Customization with The Plus Addons | The Plus Addons for Elementor Blog customization with the plus addons how to create custom elementor blog post template [beginners guide] from the plus addons for elementor](https://theplusaddons.com/wp-content/uploads/2023/09/Blog-Customization-with-The-Plus-Addons-1024x525.webp)
With The Plus Addons’ Blog Builder, you can customize your single blog pages, add listing options, design a custom loop skin, and fetch any custom post-type data to your blog page.
What’s more, all the widgets are fully customizable and SEO friendly, so you can engage your visitors with stunning website designs and improve your search engine rankings.
Here are the various features you can enjoy with The Plus Addons’ Blog Builder-
- Widget Set: The Plus Addons’ Blog Builder has all the necessary widgets you need to customize a blog page in Elementor. It offers you the Post Title, Post Author, Featured Image, Post Content, Post Comment, Post Meta widgets, and more that are fully customizable to match your website design.
![Widget Set | The Plus Addons for Elementor Widget set how to create custom elementor blog post template [beginners guide] from the plus addons for elementor](https://theplusaddons.com/wp-content/uploads/2023/09/Widget-Set-1024x553.webp)
- Various Layouts: The builder comes with tons of layout options for your single blog post pages, author pages, search pages, and category pages.
![Various Layouts | The Plus Addons for Elementor Various layouts how to create custom elementor blog post template [beginners guide] from the plus addons for elementor](https://theplusaddons.com/wp-content/uploads/2023/09/Various-Layouts-1024x860.webp)
- Listing Option Widgets: You also have the listing options widget with which you can create blog lists in different styles and layouts. You can also customize the blog listing structure, add a load more button, pagination, and more.
![Listing Option Widgets | The Plus Addons for Elementor Listing option widgets how to create custom elementor blog post template [beginners guide] from the plus addons for elementor](https://theplusaddons.com/wp-content/uploads/2023/09/Listing-Option-Widgets-1024x566.webp)
- Customization Options: The Blog Builder offers you plenty of amazing customization options to create an Elementor single blog post template that stands out. You can add advanced search filters, set up a carousel layout, create custom loop skins, and dynamic listing.
![Customization Options | The Plus Addons for Elementor Customization options how to create custom elementor blog post template [beginners guide] from the plus addons for elementor](https://theplusaddons.com/wp-content/uploads/2023/09/Customization-Options-1024x518.webp)
- Create Different Listing Pages: The Plus Addons’ Blog Builder is an all-in-one tool to create any blog page for your website. With it, you can build and customize single post pages, archive pages, category pages, search pages, custom post pages, and many more.
![Create Different Listing Pages | The Plus Addons for Elementor Create different listing pages how to create custom elementor blog post template [beginners guide] from the plus addons for elementor](https://theplusaddons.com/wp-content/uploads/2023/09/Create-Different-Listing-Pages-1024x642.webp)
The Plus Addons for Elementor’s Blog Builder is a feature-rich tool to help you create stunning single post pages for Elementor that attract and engage your readers.
The best part? A complete collection of 120+ Elementor widgets along with the Blog Builder is available with The Plus Addons for Elementor plugin at $39/year. You can also check out the lifetime plan if you wish to pay only once.
Additional Read: Elementor is a hands-on page builder. But is it worth the hype? Check out this honest Elementor Review to learn if it is the best WordPress page builder.
FAQs on Creating Custom Elementor Blog Post Template
What are the benefits of creating a custom Elementor blog post template?
While popular WordPress themes provide default single post designs, they might not meet your requirements. Crafting a custom Elementor blog post template offers flexibility, enabling the addition of unique design elements. Once created, this template can be applied across all your blog posts.
Can I use Elementor to create a blog post template for my WordPress site?
Yes, Elementor gives you access to all the necessary widgets you need to create a custom single blog post template for your WordPress website. Its easy drag-and-drop builder makes it super convenient to build a template from scratch.
How do I add custom fields to my Elementor blog post template?
To add custom fields to an Elementor blog post template, you can use the Elementor Pro plugin or a third-party plugin like Advanced Custom Fields. Once installed, you can create custom fields and add them to your blog post template using Elementor’s dynamic content feature.
What is the difference between a custom post type and a blog post?
Custom post types, similar to regular content types on WordPress, such as pages or blog posts, enable the creation of unique content with different formats. While a blog post delves into a specific topic, custom post types allow you to structure content uniquely beyond the standard post format.
Are there any pre-made Elementor blog post templates available to use?
Yes, Elementor offers an extensive template library from where you can choose a suitable template for your blog posts that fits your website design. You can even customize the design according to your needs. All you need to do is create a single post template from the WordPress dashboard and pick a template from the Elementor library.
What are some best practices for creating a custom Elementor blog post template?
Creating a custom Elementor blog post template is easy and straightforward. Elementor offers a convenient drag-and-drop builder and a great selection of widgets for your blog post template. To create a template, make sure to install Elementor and Elementor Pro to get the features you need. Plus, you can also use The Plus Addons’ Blog Builder to customize your template.
Do you need Elementor Pro for a blog?
Yes, you will need to install the Elementor Pro plugin to create a custom single blog post template for your WordPress website.
Can I stylize/customize the post-comment section with Elementor?
With Elementor, you can easily stylize the post comment section on your blog post page. You can add the Post Comments widget from Elementor’s widget library to allow your visitors to leave comments. Here, you can customize the skin of the comment box and set the source of the comment.
What is the main difference between a blog post and a blog page?
Blog pages are used for static content types like your blog archive pages, category pages, search pages, and more. On the other hand, blog posts are used to publish and update content regularly.
