Users expect smooth website navigation, and failing to provide that can significantly impact their experience.
A cluttered or confusing menu can leave your audience feeling frustrated and lost, leading to high bounce rates and missed opportunities.
The good news is that you can easily upgrade your website’s navigation by creating a dropdown menu in WordPress!
A well-structured dropdown menu simplifies the user journey, allowing visitors to access your content effortlessly.
In this blog post, we’ll guide you step-by-step on how to create dropdown menu in WordPress, ensuring your site is both visually appealing and user-friendly.
Let’s get started!
What are Dropdown Menus in WordPress?
Dropdown menus are a useful feature for organizing your website’s navigation. They allow you to display multiple options under a single menu item.
This helps visitors find what they need quickly.
Here, you can build your main menu and add sub-items that will appear in a dropdown.
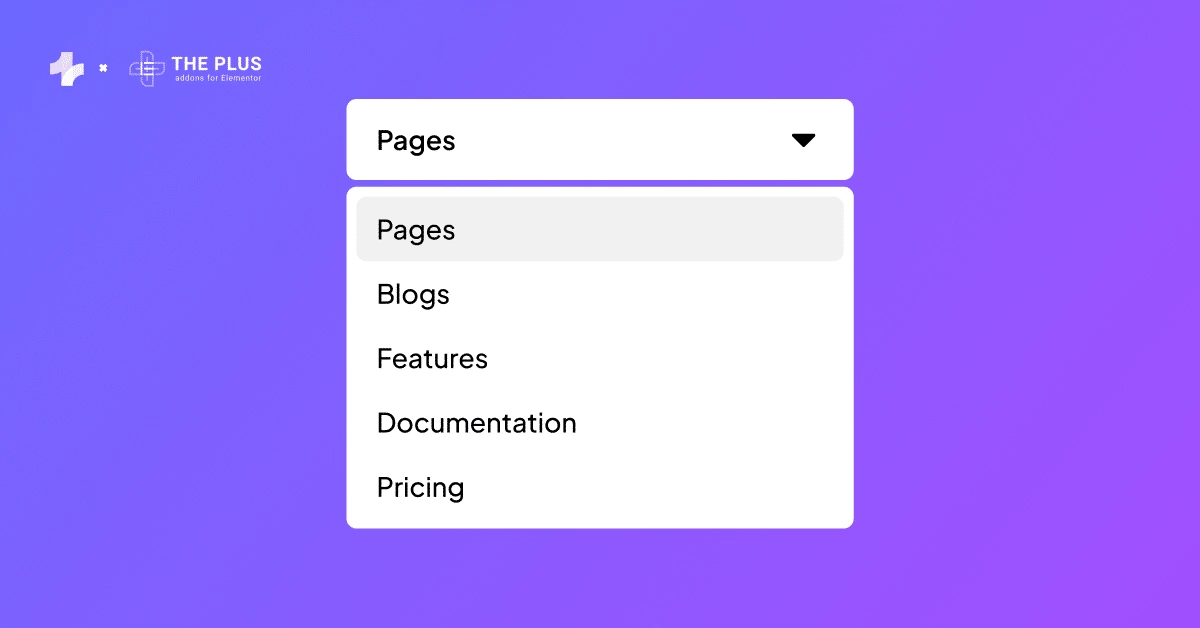
Adding a dropdown menu provides many benefits as:
- Organized Navigation: It helps group similar items together for easier access.
- User-Friendly: Helps visitors navigate without cluttering the main menu.
- Aesthetic Appeal: Improves the look of your site by providing a clean layout.
How to Create Dropdown Menu in WordPress [Easy Methods]
There are several methods for creating a dropdown menu in WordPress. We’ll discuss the easiest three methods to help you create a smooth dropdown menu for your website.
Method 1: Using WordPress Built-in Menu Option
Step 1: Create a New Menu
To create a new menu, start by going to your WordPress dashboard. Navigate to Appearance and then select Menus.
Here, you can create a new menu by clicking on the “create a new menu” option.

Enter a name for your menu, such as “Main Navigation,” and click Create Menu.
Once created, you can set this menu to the desired location by checking the box next to the theme location options provided.
Step 2: Add Menu Items
After creating your menu, you can add items to it. On the left side of the menu screen, you’ll see options like Pages, Posts, and Custom Links.
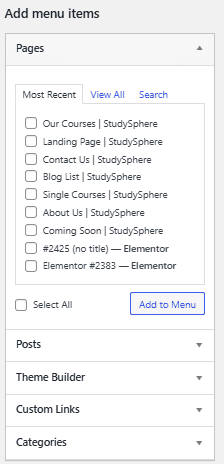
Check the boxes next to the items you want to add, then click Add to Menu.
This action moves these items to the right side, where your menu structure displays.
You can also add categories or custom links by following similar steps.
Step 3: Organize Menu Structure and Order
Once you have added your menu items, you can easily change their order. Drag and drop the items to position them as you like.
Now, move a sub-item slightly to the right under the main item. This action will nest items (sub-menu).
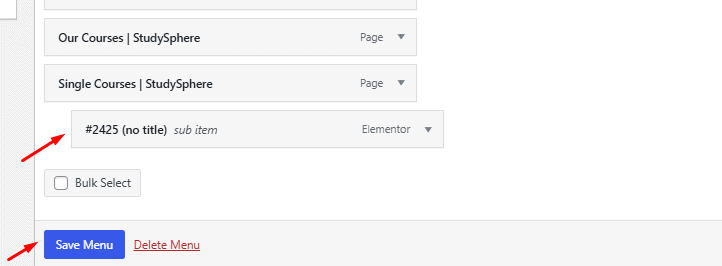
Make sure to save your changes by clicking the Save Menu button. A clear structure helps users find what they’re looking for quickly.
Keep the most important links at the top for better access.
People Also Read: How to Add a Menu in WordPress?
Method 2: Using Plugins
Using plugins can make it easier to create a dropdown menu in WordPress. With the right plugin, you can customize your menus without needing to code.
Here are the key steps to choose, install, and effectively set up a dropdown menu plugin.
Step 1: Selecting the Right Plugin
Start by choosing a suitable plugin for your needs. Some popular options include:
- Max Mega Menu: Great for creating complex dropdown menus with ease.
- WP Mega Menu: Easy to use and offers a lot of customization.
- Responsive Menu: Perfect for creating mobile-friendly menus.
Check user reviews and the number of active installations.
For your menu to function well, pick a plugin that’s regularly updated and supported.
Compatibility with your WordPress version is also essential to avoid issues.
Step 2: Plugin Installation and Activation
Once you have chosen a plugin, you need to install it.
Go to your WordPress dashboard and click on ‘Plugins‘ > ‘Add New Plugin.’

Search for the plugin name.

After your desired plugin appears, click ‘Install Now‘ and then ‘Activate‘ once it’s installed.
After activation, you may see a new menu option added to your dashboard.
Follow the prompts to start creating and customizing your dropdown menus.
Most plugins offer preview options, so you can see changes in real-time.
Don’t forget to save your settings after making adjustments. This will allow your dropdown menu to function properly on your site.
Recommended Read: How to Create Mega Menu in Elementor
Method 3: Using the Navigation Block
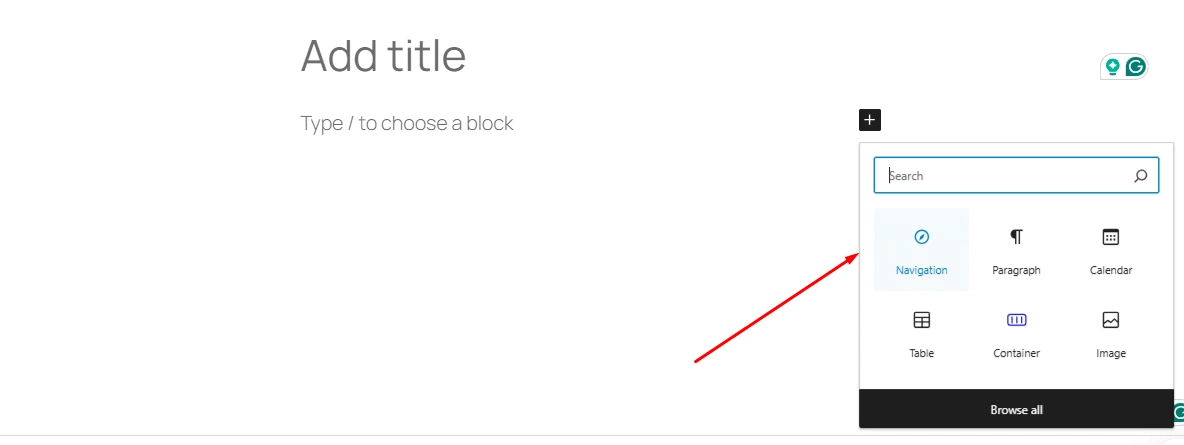
To create a dropdown menu using the Navigation Block in WordPress, open the page or post where you want to add the dropdown menu.
Click on the “+” icon to add a new block. This is usually found in the upper left corner of the editor.
Search for Navigation in the block options and select it. This will create a new navigation menu.
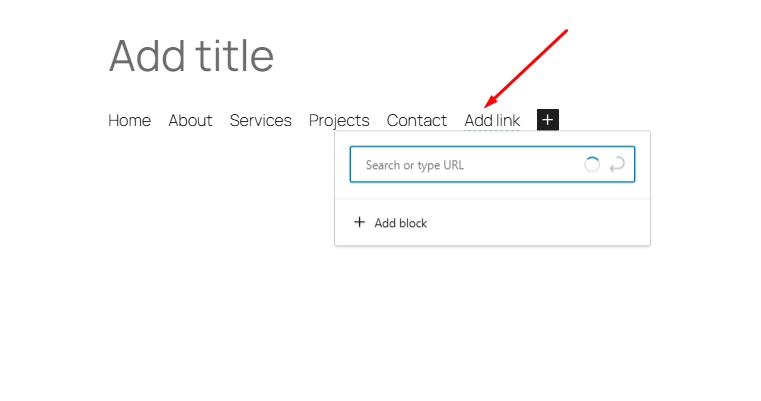
Click on “Add Link” to start adding more items to your menu. You can link to pages, posts, or custom URLs.
To turn a menu item into a dropdown, select the navigation menu block and then select the menu item for which you want to add a dropdown, and add a submenu block.
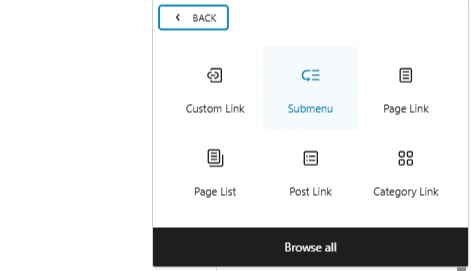
This will nest this menu item in a dropdown of the parent item. Then click on the Add link to add the link.
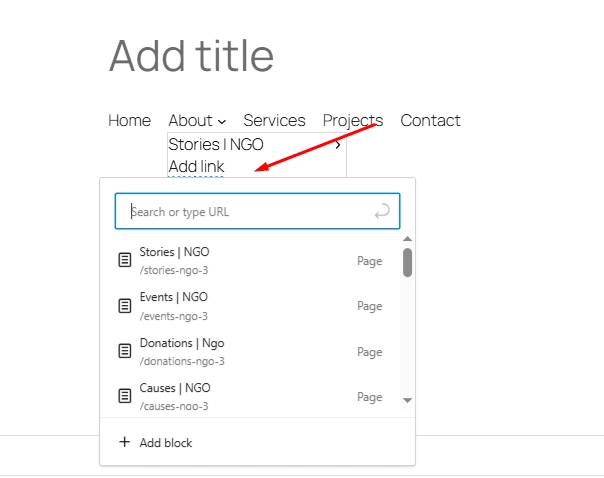
You can customize your dropdown menu by clicking on any menu item to change its name or link. You can also rearrange items by clicking and dragging them.
Once you are happy with your menu, click “Update” or “Publish” to save your changes.
Your navigation menu should now contain a dropdown that visitors can use to navigate your site easily.
Further Read: How to Create a Circle Menu in WordPress
Wrapping Up
Creating a dropdown menu in WordPress is a simple yet powerful way to improve your site’s navigation and user experience.
Whether you use the built-in WordPress Customizer, a plugin, or the Navigation Block, each method offers flexibility to organize your menu effortlessly.
A well-structured menu not only helps visitors find what they need quickly but also enhances the overall look and functionality of your website.
By taking the time to set up a clear, user-friendly menu, you can keep visitors engaged and guide them toward important pages easily.
If you’re an Elementor user, there are multiple widgets that The Plus Addons for Elementor plugin provides, such as
- Circle Menu Widget for Elementor and many more.
FAQs on How to Create Dropdown Menus in WordPress
Do dropdown menus affect SEO?
Yes, dropdown menus can impact SEO depending on how they are implemented. Search engines need to crawl and index the links within them properly.
Are dropdown menus bad for page load speed?
If the dropdown menu relies on heavy JavaScript or bloated code, it can slow down page loading, which indirectly affects SEO.
How do I modify an existing dropdown menu in WordPress?
To modify an existing dropdown menu, go to your WordPress dashboard. Click on “Appearance” and then “Menus.” Select your menu, then drag and drop items to rearrange them. You can also add or remove items as needed and save the changes when finished.
Can I create a dropdown menu in WordPress without linking to pages?
Yes, you can create a dropdown menu without linking to pages. Simply create a custom link and enter “#” as the URL. This approach allows you to create dropdown items that do not lead anywhere while still providing an organized menu structure.
What is the process for building a collapsible menu on a WordPress website?
To build a collapsible menu, use a theme or plugin that supports this feature. Typically, it involves adding a “menu” widget to your site’s sidebar or header. In the settings, enable the collapsible option, allowing users to expand or hide menu items as needed.


